When it comes to landscaping, one of the most important decisions you will make is what trees to plant. There are a number of different options available, but two of the most popular choices are chokecherry and buckthorn.
Both of these trees have their pros and cons, so how do you decide which one is right for you? In this blog post, we will compare chokecherry and buckthorn in detail and help you decide which one is the best fit for your needs!
Chokecherry Vs Buckthorn
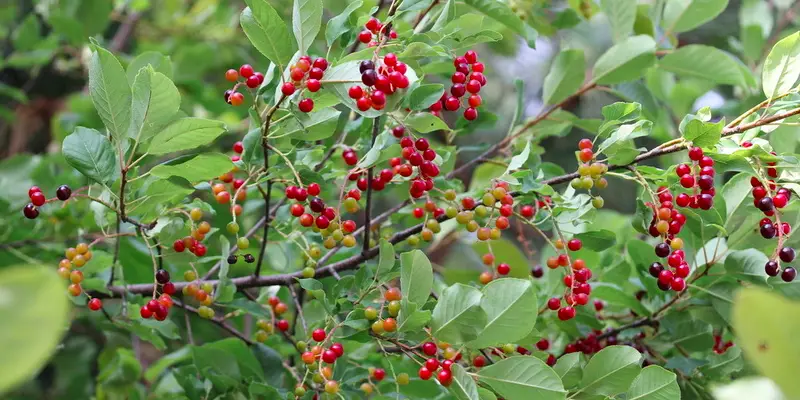
Chokecherry trees grow larger and faster than buckthorn trees, but the easiest way to identify and differentiate the trees is to look at the fruits produced by each. While buckthorn fruits have multiple seeds, chokecherry fruits have a single seed in the center.
I will now go further into detail about the differences between these two trees. By the end of this post, you should have a good idea of which one is right for you!
1. General Appearance
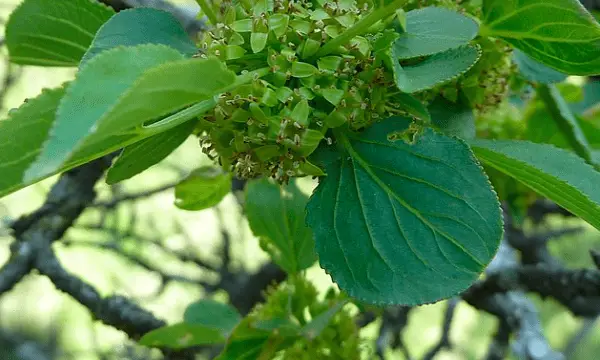
Buckthorn trees are small, spindly, and have a lot of small branches coming off the main trunk. The branches are a grey-brown color and the leaves are dark green. Chokecherry trees can grow much larger, with thicker trunks and large branches. The leaves are bright green and the branches tend to be a reddish-brown color.
2. Fruits
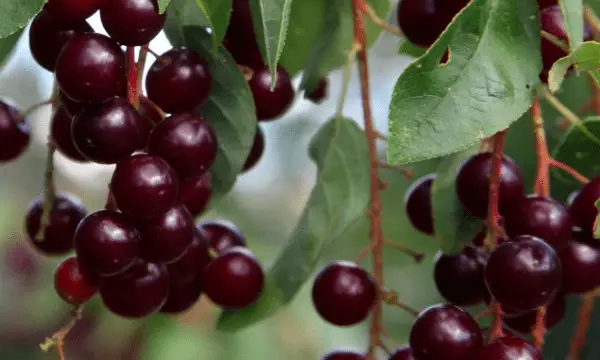
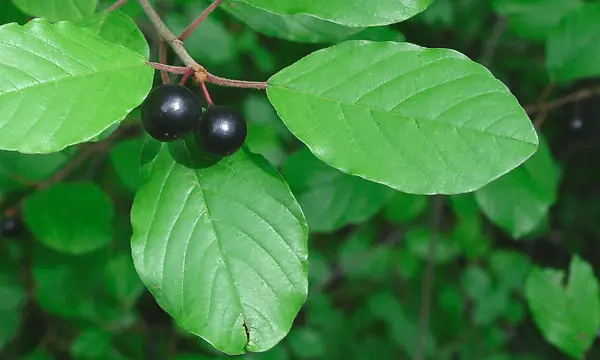
As I mentioned before, one of the easiest ways to tell these trees apart is by looking at the fruits they produce. Buckthorn fruits are small and black, with multiple seeds in the center. Chokecherry fruits are much larger and can be either red or black. They have just one seed in each fruit.
Buckthorn fruits may look tasty, but they aren’t edible for humans. Chokecherry fruits are edible and can be used in pies, jams, and other recipes. I wouldn’t recommend consuming raw chokecherry fruits as they tend to be bitter.
Buckthorn fruitChokecherry fruit
3. Leaves
Buckthorn leaves are small, dark green, and have a glossy appearance. They are also sharply serrated along the edges. Chokecherry leaves are much larger, brighter green, and have a more matte finish.
One other difference to note is that buckthorn leaves tend to be more round, while chokecherry leaves tend to be slightly more oval-shaped. The veins on chokecherry leaves also run straight, while the veins on chokecherry leaves have a more curved appearance that runs to the tip of the leaf.
Chokecherry leavesBuckthorn leaves
4. Flowers
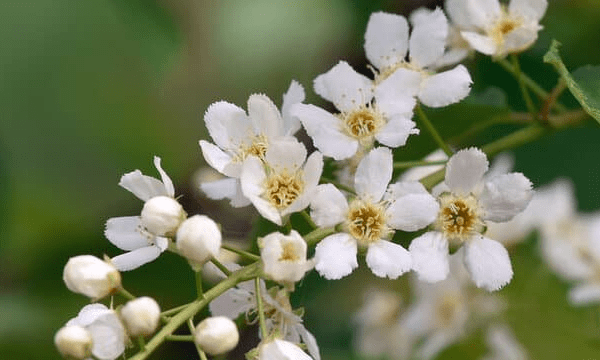
Buckthorn flowers are small and green, and they grow in clusters of three. Chokecherry flowers are also small, but they are white and grow in clusters of five.
Flowers typically appear on the trees in early spring before the leaves have fully sprouted. This is one of the best ways to tell these trees apart if you aren’t able to see the fruits.
Buckthorn buds are appressed and subopposite, so they are up against the stem. In contrast, chokecherry buds are pointed and alternate, so they are not up against the stem.
Plus, buckthorn blooms tend to be less noticeable, while chokecherry flowers are beautiful and fragrant. This is another reason why chokecherry is the better choice for landscaping!
Chokecherry flowersBuckthorn flowers
5. Bark
Buckthorns tend to have thorns near the terminal buds. Plus, there are dotted marks all along the branches and trunk. While the bark starts off as brown, it will turn grey as it matures. The bark may also start to peel over time.
The color of chokecherry tree bark can be brown or grey (with a reddish tinge). The bark is smoother than the bark of a buckthorn tree. Plus, the bark tends to darken as the tree matures, even turning black in some cases.
Conclusion
If you are looking for a tree to plant in your landscaping, you should definitely consider chokecherry and buckthorn. Both of these trees have their own unique benefits that can make them a great addition to any yard!
While buckthorn is a great choice for its low maintenance and fast growth, chokecherry is the better choice if you are looking for a tree that produces edible fruits. Chokecherry is also a beautiful tree with fragrant flowers, making it a great addition to any landscape.
I hope this post helped you learn more about these two trees and which one might be right for you. Do you have any experience with either of these trees? Let us know in the comments below! And be sure to check out our other blog posts for more gardening tips and tricks!
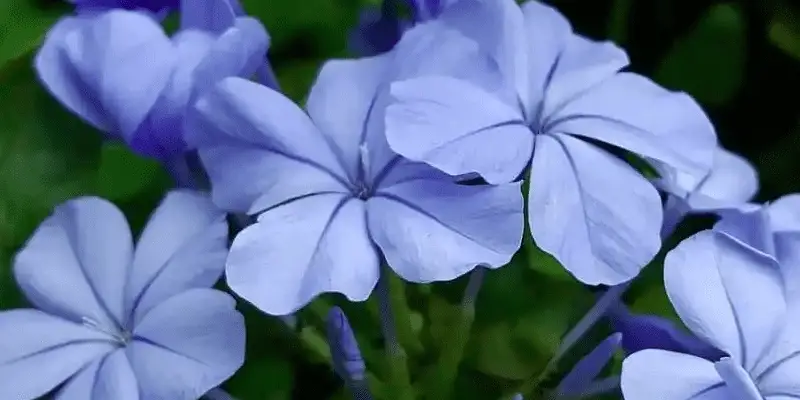
If you are like me, you were probably looking forward to seeing some beautiful plumbago flowers blooming in your garden this year. Unfortunately, it seems that they are not going to happen. But why is this? In this blog post, we will take a look at the reasons why plumbago plants may not bloom, as well as some tips on what you can do to encourage them to bloom next year.
Why Is My Plumbago Not Blooming?
The most common reasons for plumbago not blooming include bad weather, overwatering, pests infestations, and a lack of nutrients. All of these issues can put the plumbago under stress, which can prevent it from blooming.
I will now go into each of these reasons in more detail so that you can troubleshoot the problem and try to get your plumbago blooming again next year.
1. Lack Of Nutrients
If your plumbago is not getting enough of the right nutrients, it will not bloom. This is often the case if you have recently moved the plant to a new location or changed the type of soil it is growing in.
To amend the soil, you can add compost or manure to it. You can also use a fertilizer that is high in phosphorus, as this will encourage blooming. Be sure to follow the instructions on the fertilizer package so that you do not overdo it and end up burning the roots of your plumbago.
I recommend using fertilizer every 2-4 weeks during the growing season. A balanced fertilizer can be used at the start of the season, while a 10-30-10 fertilizer can be used to encourage blooming.
If you suspect that your plumbago is not getting enough nutrients, you can also have a soil test done to confirm this. This will tell you what nutrients are lacking and how much needs to be added.
2. Bad Weather
Bad weather can also cause plumbago not to bloom. If it is too cold or if there has been a lot of rain, this can stress the plant and prevent it from blooming. frost is especially damaging to plumbago, so be sure to protect it if there is a chance of frost in your area.
If the weather has been bad for an extended period of time, you may need to wait until next year for your plumbago to bloom again. However, if the weather is just starting to improve, you may still be able to encourage your plumbago to bloom by giving it some extra TLC.
Extra TLC can include things like adding a layer of mulch to the soil to help retain moisture, moving the plant to a more sheltered location, or giving it extra water during dry periods.
3. Overwatering
While plumbagos do need to be watered regularly, overwatering can also cause them not to bloom. This is because the roots of the plant can become waterlogged, which prevents them from getting the oxygen they need to function properly.
If you think your plumbago may be overwatered, try letting the soil dry out for a week or two before watering again. You can also try moving the plant to a location with better drainage.
Moving forward, only add more water when the top inch or two of soil is dry. Be sure to check the soil before watering, as there is no need to water it if it is still moist. A moisture meter can be used to help you determine when the soil is dry.
4. PestInfestation
Plumbago pests can also prevent plumbagos from blooming. Aphids, whiteflies, and spider mites are all common pests that can infest plumbago plants. These pests suck the sap out of the plant, which can cause it to become stressed and prevented it from blooming.
If you think your plumbago has pests, you can treat it with an insecticide. Be sure to follow the instructions on the package and apply it when the pests are active. You may need to reapply the insecticide several times to get rid of all of the pests.
My favorite insecticide is neem oil, as it’s an organic option that is safe to use in the garden.
However, there are many other effective insecticides on the market, so be sure to choose one that is right for your needs.
You can also try using a natural pest control method, such as adding ladybugs to your garden. Ladybugs are predators of many common garden pests and can help to keep them under control.
Conclusion
In conclusion, there are many reasons why plumbagos may not bloom. These include lack of nutrition, bad weather, overwatering, and pest infestation. Look closely for signs of each of these problems so that you can take steps to fix them. With a little bit of care, your plumbago should start blooming again in no time!
Do you have any tips for getting plumbagos to bloom? If so, please share them in the comments below!
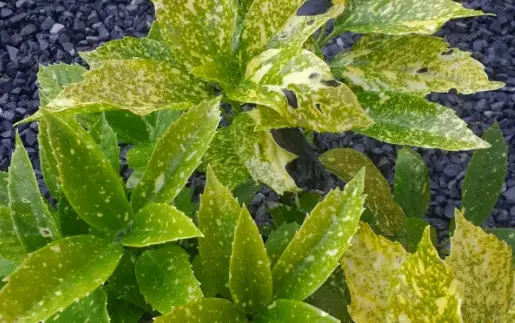
Aucuba japonica, also known as Japanese laurel, is a popular evergreen shrub that is often used in landscaping. While it is relatively easy to care for, there are a few diseases that can affect this plant.
In this blog post, we will discuss three of the most common Aucuba Japonica Diseases: leaf spot, powdery mildew, and rust. We will also provide tips on how to prevent these diseases from affecting your plants!
Common Aucuba Japonica Diseases
The most common Aucuba Japonica diseases include Phyllosticta leaf spot, Phomopsis stem dieback, nonpathogenic root rot, and Fungal anthracnose. Each of these diseases usually only affects a portion of the plant but can cause serious damage if left untreated.
I will now go into more detail about each disease so that you can be on the lookout for them!
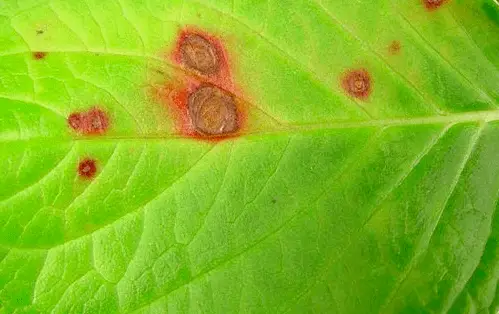
1. Phyllosticta Leaf Spot
This disease is caused by the Phyllosticta minima fungus and usually appears as small, dark spots on the leaves of the plant. These spots are also usually surrounded by a red border. These spots can eventually lead to leaf death if left untreated.
The best way to prevent Phyllosticta Leaf Spot is to practice good garden hygiene by removing any dead leaves or debris from around the plant. Also, make sure to water the plant at the base of the stem and not on the leaves to reduce the chances of this disease developing.
There is no fungicide that specifically targets Phyllosticta disease, but tebuconazole-based fungicides are great against pathogenic fungi.
Phyllosticta Leaf Spot
2. Phomopsis Stem Dieback
This disease is caused by the Phomopsis fungi and usually appears as brown or black lesions on the stems of the plant. These lesions start at the base of the plant and can eventually kill the entire stem if left untreated.
To prevent Phomopsis stem dieback, make sure to prune any dead or diseased stems from the plant. Also, avoid watering the plant from above as this can spread the fungus to other parts of the plant.
I recommend pruning any dead or diseased stems from the plant as soon as you see them. This will help to prevent the disease from spreading through the entire plant and killing it.
3. Fungal Anthracnose
This disease is caused by the Colletotrichum fungi and appears as small, dark spots on the leaves of the plant. Anthracnose is one of the most popular diseases for all plants, not just Aucuba japonica.
It thrives in moist conditions, which is why it frequently affects plants in the springtime when the weather is wet and still relatively cool. Dry, hot weather doesn’t allow the fungi spores to spread and infect new leaves.
To stop your Aucuba Japonica from developing this disease, you should avoid wetting the leaves when watering and make sure the plant has good air circulation. You can also use a fungicide that contains chlorothalonil to help prevent the disease from developing. Copper fungicide is another good option as it will kill the fungi spores before they have a chance to infect the plant.
A Suspected Case of Fungal Anthracnose Disease
4. Root Rot
Root rot is another common disease that can affect Aucuba japonica. This disease usually starts with the roots of the plant but can eventually spread to the leaves and stems if left untreated.
The best way to prevent root rot is to make sure the plant is not sitting in water. If you notice the leaves of the plant starting to turn yellow or brown, this is a sign that the roots are beginning to rot.
Inspect the roots of your plant regularly and if you notice any that are brown or black, cut them off immediately. The goal is to stop the rot from spreading to the rest of the plant. In some cases, it will be too late and the plant will die.
Can My Aucuba Japonica Recover from Root Rot?
Yes, it is possible for your Aucuba Japonica to recover from root rot if you catch it early enough. However, you must act quickly as this disease can spread quickly and kill the plant if left untreated.
If you suspect that your plant has root rot, the first thing you should do is remove it from the ground/pot and inspect the roots. If they are black or mushy, cut them off immediately.
Next, replant the Aucuba Japonica in fresh soil and make sure the pot has drainage holes to allow for proper drainage. Water the plant regularly, but make sure not to overwater as this can cause the root rot to come back.
It will take some time for your plant to recover, but if you follow these steps, it should be able to bounce back relatively quickly.
Should I Prune Diseased Foliage from My Aucuba Japonica?
Yes, it can be a good idea to prune diseased foliage from your Aucuba Japonica. This will help to prevent the disease from spreading and infecting other parts of the plant. The quicker you catch the disease, the easier it will be to treat.
If you notice any leaves that are brown or black, cut them off immediately and dispose of them. It’s also a good idea to sterilize your pruning shears after each use to prevent the disease from spreading.
Conclusion
In conclusion, there are several diseases that can affect Aucuba Japonica. Some of the most common include Phyllosticta leaf spot, Phomopsis stem dieback, fungal Anthracnose, and root rot.
To prevent these diseases from occurring, make sure to keep your garden clean and free of debris. Also, be careful with watering as too much or too little water can lead to plant stress which makes them more susceptible to diseases.
If you do notice any of these diseases developing, act quickly as they can spread quickly and kill the plant if left untreated. Prune off any affected leaves and/or stems and dispose of them immediately.
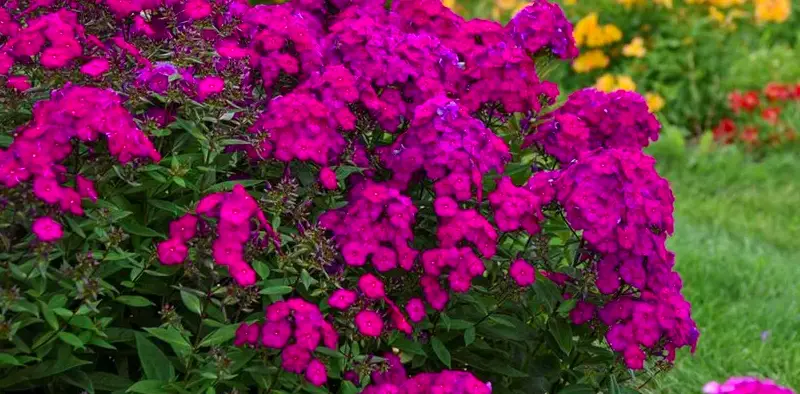
Deer can be a huge problem for gardeners. They love to eat plants, and they can quickly decimate a garden. If you are looking for plants that are deer resistant, phlox is a great option. Phlox is a genus of flowering plants that includes around 200 different species. Most varieties of phlox are native to North America, and they grow well in both sun and shade.
Do Deer Eat Phlox?
Phlox is deer resistant, but that doesn’t mean they are deer-proof. Deer will eat just about anything if they are hungry enough. However, phlox is not a preferred food for deer. They much prefer tastier plants like roses or tulips. This means that if you have a garden full of phlox, the deer will probably leave it alone in favor of something else.
Phlox are fragrant flowers that bloom in the spring and summer. They come in a variety of colors, including white, pink, purple, and red. This is mainly the reason why deer don’t like them because the strong fragrance can be overwhelming for them. Deer have a very keen sense of smell, and they are put off by the scent of phlox.
If you have a phlox plant and are concerned about deer, there are a few things you can do to deter them. I will discuss those in the next section.
How to Protect Phlox from Deer?
To really deter deer from your garden, you need to take some proactive steps:
1. Fencing
The first step is to put up a fence. Deer can jump, so the fence needs to be at least eight feet high. Simply put, if the deer can’t get to the plants, they won’t be able to eat them. Fencing can be a bit of an investment, but it is definitely worth it if you are serious about keeping deer out of your garden.
If you don’t want to put up a fence, there are other options. You can try using netting or chicken wire around your phlox plants. This will keep the deer away but still allow you to see the beautiful flowers.
I like this netting from Amazon as it’s an affordable and effective option. Unlike fencing that’s built into the ground, this netting is also easy to take down and move if you need to.
2. Hanging Baskets
Another option is to grow your phlox in hanging baskets. This will make it more difficult for deer to reach the plants, and they are less likely to bother them. For ultimate effectiveness, hang the baskets high enough that the deer can’t reach them.
This guarantees that even if the deer do want to eat your phlox, they won’t be able to get to it. The downside is that the plant will be limited in size, and you won’t be able to enjoy the full beauty of the phlox.
Hanging baskets are also a great way to add some color and interest to your porch or patio, where you may otherwise not be able to grow plants. Simply choose a beautiful pot and fill it with your favorite phlox variety.
3. Deer Repellents
There are many different deer repellents on the market. Some work better than others, and you may need to experiment to find one that works for you. There are both natural and chemical options available.
Some people swear by herbs like garlic or mint. You can plant these around your phlox, and the deer will stay away. Simply crush up some garlic cloves and sprinkle them around the base of the plant. You can also try using mint leaves or oil.
4. Sprinklers
Another option is to use a sprinkler system. Deer hate getting wet, so if you can train the sprinklers to go off when they are around, they will quickly learn to stay away. This won’t work all the time, but it can be effective in deterring deer from your garden.
The automatic variety is particularly effective as it will go off even when you are not home. Plus, the deer will never be able to predict when the sprinklers will go off, so they will always be on their guard.
Can Phlox Be Used as Deer-Resistant Fencing?
Yes, phlox plants are fragrant and can be used as a deer-resistant fence. You will need to plant them close together so that the deer cannot get through. I like to plant mine in a zigzag pattern so that the deer cannot figure out how to get through.
Phlox plants grow tall and can be dense, making them ideal for deer-resistant fencing. If you plant phlox along the perimeter of your garden, it will create a natural barrier that deer will not want to cross.
While deer will generally avoid eating phlox, they may still try to rub their antlers on the plants. This can damage the phlox, so you will need to take steps to protect them. Simply follow the tips in the section above and you should have no problem keeping your phlox safe from deer.
Conclusion
In conclusion, phlox are deer-resistant plants that deer are unlikely to eat. However, they may still try to rub their antlers on the plants which can damage them. To protect your phlox from deer, you can take steps such as fencing them in, growing them in hanging baskets, using deer repellents, or setting up a sprinkler system.
With a little effort, you can enjoy the beauty of phlox without worrying about deer damage. Do you have any tips for keeping deer away from phlox? Share them in the comments below!