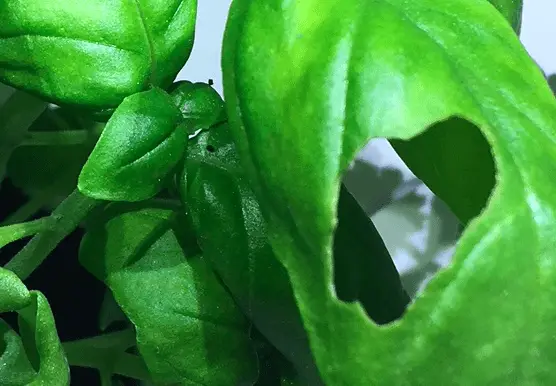
Do you have a basil plant at home and have been noticing holes in the leaves? This is a common problem that gardeners face, but there are a few different reasons why it may be happening. In this blog post, we’ll go over some of the most common causes of holes in basil leaves and what you can do to fix the problem.
Why Are There Holes in Basil Leaves?
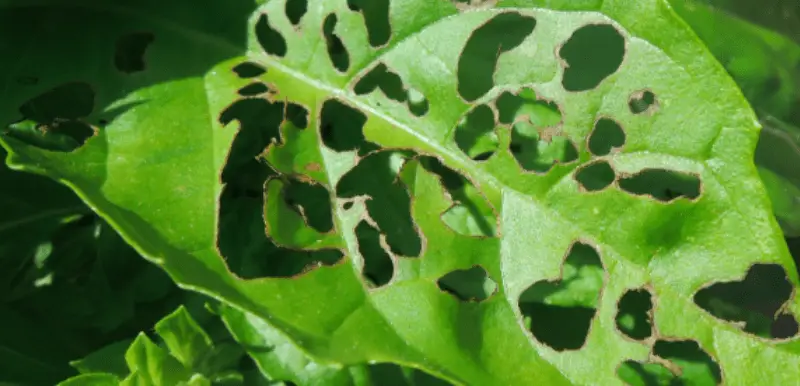
The most common reason for holes in basil leaves is the presence of pests. The most common pests that attack basil plants are Japanese beetles, slugs, and aphids. These pests are attracted to the plant because of its sweet smell and taste.
You may not even know pests are present until you see the damage they’ve done. If you suspect pests are the cause of holes in your basil leaves, inspect the plant carefully. Look for small insects crawling on the leaves or chewed edges on the leaves. You may also see slime trails, which is a telltale sign of slugs.
How to Remove Pests from Basil Leaves?
If you do find pests on your plant, there are a few different ways you can get rid of them. You can handpick the pests off of the plant and drop them into a bucket of soapy water. This is a great way to get rid of small numbers of pests, but it won’t do much if you have a large infestation.
Another option is to use an insecticide. You can find these at your local garden center or online. Be sure to choose an insecticide that is safe to use on edible plants. Once you’ve treated the plant, be sure to continue monitoring it for pests.
My favorite pesticide for basil plants is Neem oil, which is a natural and safe way to get rid of pests. You can find this at your local garden center or online. The neem oil is safe to use on edible plants and will not harm your basil plant.
Simply mix the neem oil with water according to the directions on the bottle and spray it on your plant. Be sure to cover the entire plant, including the undersides of the leaves. You’ll need to reapply every few days until the pests are gone.
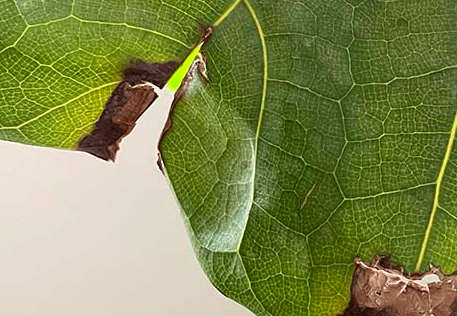
Pest damage to basil leaves
How to Keep Pests Away From Basil Leaves?
Prevention is the best method for keeping pests away from your basil plant.
The first step is to clean up any debris around the plant. This includes fallen leaves, branches, and dead insects. These can attract pests to your plant. Simply use a rake or your hands to remove the debris and dispose of it in the trash.
Another way to keep pests away is to use a physical barrier. You can do this by covering the plant with a floating row cover or insect netting. This will prevent pests from getting to the plant, but it will also allow sunlight and water to reach the leaves.
Applying a preventative pesticide to your plant can also help. This way, if any pests do manage to get to your plant, they’ll be killed before they have a chance to do any serious damage.
If you live in an area where pests are a problem, you may also want to consider planting your basil in pots. This will allow you to move the pots around if necessary and make it easier to inspect the plants for pests.
What Else Causes Holes in Basil Leaves?
It’s not just pests that can cause damage to basil leaves:
Physical Damage
One possibility is that the holes were caused by physical damage, such as from wind or hail. If you live in an area where there is a lot of severe weather, this could be the cause of the holes in your basil leaves. There is not much you can do to prevent this type of damage, but you can try to protect your plant by covering it with a tarp or placing it in a sheltered area.
Fungal Infections
Holes in basil leaves can also be caused by disease. The most common diseases that affect basil plants are downy mildew and powdery mildew. These fungal diseases thrive in warm, humid conditions and can quickly spread to other plants in your garden.
You’ll know if your plant has a fungal infection if you see white or gray powder on the leaves. The leaves may also have yellow spots or patches. If the disease is severe, the leaves will turn brown and die.
To prevent fungal diseases, water your plant at the base instead of overhead. This will help keep the leaves dry and make it more difficult for the fungus to spread. You should also avoid planting basil in areas that are too shady or humid.
If you do notice a fungal infection, you can treat it with a fungicide. Be sure to choose a fungicide that is safe to use on edible plants. Neem oil is not just a pesticide, but it’s also an effective fungicide.
Mix the neem oil with water according to the directions on the bottle and spray it on your plant. Be sure to cover the entire plant, including the undersides of the leaves. You’ll need to reapply every few days until the disease is gone.
Animals
Another possibility is that your plant is being eaten by animals. The most common culprits are rabbits, deer, and groundhogs. These animals are attracted to the taste of basil leaves and will eat them if they have the chance.
You’ll know if an animal is eating your plant if you see chewed leaves or stems. You may also see footprints or other signs of animals around the plant.
The best way to keep animals away from your basil plant is to build a fence around it. The fence should be at least four feet tall and made of chicken wire or hardware cloth. You can also try using natural repellants like mothballs or cayenne pepper.
Should I Prune Basil Leaves with Holes?
The only time you should prune basil leaves is if they are diseased or damaged. If the leaves have holes but are otherwise healthy, there is no need to prune them. In fact, pruning healthy leaves can actually harm the plant.
If you do need to prune your basil plant, be sure to sterilize your shears before you use them. This will help prevent the spread of disease. Dispose of the diseased leaves in the trash so they can’t infect other plants.
Can I Eat Basil Leaves with Holes?
It depends on the severity of the damage. If the holes are small and the leaves are otherwise healthy, you can probably still eat them. However, if the holes are large or the leaves are diseased, it’s best to throw them away.
When in doubt, err on the side of caution and discard any leaves that look damaged or unhealthy. Do you really want to eat a leaf that has been nibbled on by a rabbit?
Holes in basil leaves are not necessarily a cause for alarm. In most cases, they can be caused by pests or physical damage. However, if the holes are large or the leaves are diseased, it’s best to throw them away.
Conclusion
I hope this article has helped you to identify the cause of the holes in your basil leaves. If you have any further questions, please feel free to leave a comment below. Thanks for reading!
To sum up, holes in basil leaves can be caused by pests, physical damage, or disease. The biggest threat is a pest infestation, which can quickly spread to other plants in your garden. If you suspect a pest infestation, the best course of action is to use neem oil or another natural pesticide.
Do you have any tips for preventing or dealing with holes in basil leaves? Please share them in the comments!
If you’re like most gardeners, you have probably dealt with black spots on roses at some point. This frustrating disease can cause leaves to turn yellow and drop off, resulting in a loss of blooms. But don’t worry – there is a solution! In this blog post, we will discuss how to fix black spot on roses using vinegar.
What is Black Spot Disease?
Black spot is a fungal disease that affects roses and other plants in the Rosaceae family. The fungus, Diplocarpon rosae, produces black spots on the leaves of affected plants. These spots eventually turn yellow and cause the leaves to drop off. Black spot thrives in warm, humid conditions and is most active during the summer months.
Symptoms of Black Spot Disease on Roses
The most obvious symptom of black spot disease is the presence of black spots on the leaves. These spots are usually round or oval in shape and measure about ½ inch in diameter. They may be surrounded by a yellow halo. As the disease progresses, the spots will enlarge and the leaves may turn yellow and drop off.
The stems of affected plants may also show scabby, black lesions. All of these symptoms spread quickly, so it’s important to take action as soon as you notice any of them.
Treating Black Spot on Roses with Vinegar
There are a few different ways to treat black spot disease on roses. One of the most effective methods is to use vinegar. Vinegar is a natural fungicide and will help to kill the fungus that is causing the black spots.
How to Make the Vinegar Solution
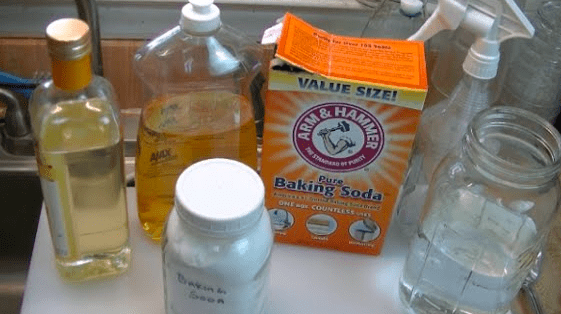
First, put one tablespoon of both baking soda and vinegar into a bucket
Pour one gallon of cold water into the bucket
Stir the mix well, and then pour it into your spray bottle. Be careful with shaking the mix as it can cause quite a mess
Allow the mix to rest for about 15 minutes
How the Vinegar Solution Works
Vinegar is an acid, and when diluted, it can be an effective way to control fungal growth. You see, vinegar is a natural fungicide, and it will help to kill the fungus that is causing the black spots. The baking soda acts as a surfactant, which helps the vinegar solution stick to the leaves better.
Studies have shown that vinegar can be effective against various types of fungi, including powdery mildew, black spot, and rust. This means you don’t have to spend a lot of money on expensive chemicals, and you can rest assured knowing that the vinegar solution is safe for both you and your plants.
Making the vinegar solution
Applying the Vinegar Solution
Once you have mixed up the solution, it’s time to apply it to your roses. For best results, treat your plants every seven to ten days throughout the growing season. Be sure to spray the solution on both the tops and bottoms of the leaves. You can also apply it to the stems, but be careful not to get any on the flowers.
If you are dealing with a severe case of black spot, you may need to increase the frequency of treatments. You can do this by applying the solution every three to five days. Add additional treatments as needed until the disease is under control.
Other Ways to Get Rid of Black Spots on Roses
There are a few other ways to get rid of black spots on roses. Let’s look at my favorites:
1. Neem Oil
Neem oil is a natural fungicide that can be effective against black spot. You can find it at your local garden center or online. This is an organic product that is made from the seeds of the neem tree.
Neem oil has been used for centuries in India for its medicinal properties. It’s also a great pesticide, so it can be used to control pests on your plants.
To use neem oil, mix it with water according to the manufacturer’s instructions. Then, apply it to your roses using a spray bottle. Spray generously on all areas of the plant so that all fungal spores are killed.
2. Milk and Water
You can also make a homemade fungicide using milk and water. For this solution, you will need to mix one part milk with two parts water. Then, apply it to your roses using a spray bottle.
Milk contains lactoferrin, which is an antimicrobial protein that has antifungal properties. You can read about antifungal functions of lactoferrin here. This means it can help to kill the fungus that is causing black spots on your roses. Plus, you can simply raid your fridge and make this solution with ingredients that you probably already have on hand.
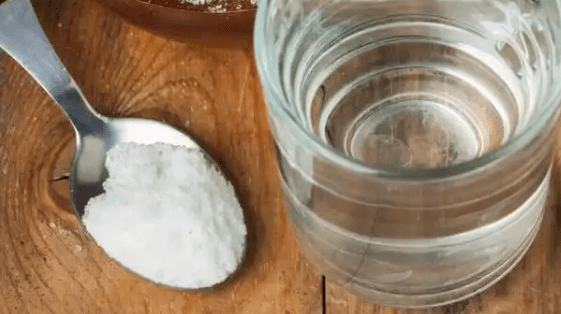
3. Baking Soda and Water
Baking soda is another ingredient that can be used to make a homemade treatment. You see, baking soda is fungistatic, which means it prevents the growth of fungi. This can help to prevent black spot from spreading and developing in the first place.
To use baking soda, mix one tablespoon with one gallon of water. Then, apply it to your roses using a spray bottle. Be sure to coat all areas of the plant, including the undersides of the leaves.
Baking soda
How to Prevent Black Spots on Roses?
Prevention is better than the cure, so it’s important to take steps to prevent black spot from developing in the first place. Here are a few tips:
1. Control Watering
Fungus thrives in moist conditions, so it’s important to control how much you water your roses and the manner in which you water them.
Water early in the day so that the leaves have time to dry before nightfall. This will help to prevent the fungus from taking hold. Avoid wetting the foliage when you water as this can spread the spores and cause the disease to spread. Instead, add water to the base of the plant.
Overwatering can lead to other problems, such as root rot. You can tell if your plants need water by checking the soil or using a moisture meter. If it’s dry, then it’s time to give them a drink.
2. Use a Preventive Treatment
You can also use a preventive treatment, such as neem oil, baking soda, or milk and water. While these are good solutions for treating black spot, they can be used as preventive treatments as well.
As soon as any fungal spores land on your roses, they will start to grow. But, if you treat your plants regularly, you can prevent the spores from taking hold and causing black spot.
Be sure to apply them early in the season before the disease has a chance to take hold. Apply them every seven to ten days throughout the growing season.
You can also use a fungicide that is specifically designed to prevent black spot. These products usually contain sulfur or copper, which are effective against fungi. Be sure to follow the manufacturer’s instructions when using these products.
3. Monitor HumidityLevels
Fungus loves moist conditions, so it’s important to monitor humidity levels around your roses. If the air is too humid, black spot and other diseases can take hold.
You can monitor humidity levels using a hygrometer. This will tell you how much moisture is in the air. If it’s too high, then take steps to lower it.
You can do this by ventilating your greenhouse or using a dehumidifier. Just be sure not to let the air get too dry as this can also lead to problems. Roses like humidity levels of around 40-60%.
Hygrometer
4. Space PlantsProperly
When planting roses, be sure to space them properly. If they are too close together, then air cannot circulate between them and this can lead to fungal problems. It also means diseases can spread easily from one plant to another.
So, be sure to space your roses properly when planting them. They should be spaced at least 18-24 inches apart. You should also prune your plants regularly to promote good air circulation.
5. Keep the Garden Clean
A clean garden is a healthy garden. So, it’s important to remove any dead leaves or debris from around your plants. This will help to prevent problems such as black spot from developing.
You should also remove any infected leaves as soon as you see them. Be sure to dispose of them carefully so that you don’t spread the disease.
It’s also a good idea to disinfect your gardening tools regularly. This will help to prevent the spread of diseases from one plant to another. You can do this by soaking them in a solution of bleach and water for ten minutes.
By following these tips, you can help to prevent black spot from developing in your garden. But, if you do find that your plants are affected, then there are a few things you can do to treat the problem.
Conclusion
In conclusion, black spot is a common problem for gardeners. It spreads quickly and can be difficult to control. But, vinegar can be used as an effective treatment to kill the fungus and stop it from spreading.
You should prevent it from happening in the first place by monitoring humidity levels, spacing plants properly, and keeping the garden clean. If you do find that your plants are affected, then remove any infected leaves and treat them with vinegar.
So, don’t let black spot ruin your rose garden. With a little bit of care and attention, you can keep your roses healthy and disease-free. Thanks for reading! I hope this has been helpful.
It’s the middle of summer and you walk out to your front yard to find that your ficus tree is on its last legs. The leaves are wilted and brown, the branches are drooping, and there doesn’t seem to be any life left in it. Don’t worry, we’re here to help! In this blog post, we will discuss how to save a dying ficus tree.
How to Save a Dying Ficus Tree?
Fiscus trees usually die due to incorrect watering, lack of sunlight, nutrient deficiencies, diseases, and pests. If you think your ficus tree is dying, the first step is to try to save it!
If you’re not sure what’s wrong with your ficus tree, the best course of action is to take a sample of the leaves to your local nursery or gardening store. They will be able to help you diagnose the problem and recommend a course of action.
Once you know what’s wrong with your ficus tree, you can take steps to correct the problem. If your tree is not getting enough water, make sure to water it deeply and regularly. If it’s not getting enough sunlight, try moving it to a sunny spot. And if there are pests or diseases attacking your tree, you can treat them with the appropriate pesticides or fungicides.
I will now go through each of these problems in more detail so that you can save your dying ficus tree!
1. Incorrect Watering
If you are watering your ficus tree too much or too little, it will start to die. Ficus trees need to be watered deeply and regularly, about once a week. But if you were like me, you tend to think that if a little water is good, more water is better. This couldn’t be further from the truth!
Too much water will actually suffocate the roots of your ficus tree and cause the leaves to turn yellow and drop off. Plus, root rot can set in, which will eventually kill your tree if you don’t take corrective action.
On the other hand, not enough water can cause drooping leaves, wilting, and eventually death. So make sure you’re watering your ficus tree deeply and regularly, about once a week.
The best way to test if your fiscus tree needs water is to stick your finger in the soil. If the top inch or so is dry, it’s time to water your tree. A moisture meter is also a good investment if you want to take the guesswork out of watering your ficus tree.
Brown leaves from a lack of water
2. Lack of Sunlight
Just like all plants, ficus trees need sunlight to grow and thrive. If your tree is not getting enough sunlight, it will start to die. The leaves will turn yellow and drop off, and the branches will become spindly and weak.
If you think your ficus tree isn’t getting enough sunlight, try moving it to a sunnier spot. Make sure the spot you choose gets at least six hours of sunlight a day. You can also try using grow lights to supplement the sunlight if moving your ficus tree is not an option.
Be careful though – too much sunlight can also be harmful to your ficus tree. If the leaves start to turn brown and curl up, it’s getting too much sun. Try moving it to a spot that gets less sunlight or providing some shade with a sheer curtain or cloth.
3. Nutrient Deficiencies
Ficus trees need nutrients to grow and thrive. If your tree is not getting enough nutrients, it may wilt, the leaves may turn yellow and drop off, and eventually, the tree will die.
There are a few ways to make sure your ficus tree is getting enough nutrients. The first way is to fertilize it regularly with a balanced fertilizer. You can also try top dressing your tree with compost or manure. It’s generally regarded that theideal NPK ratio for a ficus is 3-1-2. This is because ficus is a nitrogen-loving plant.
Other nutrient deficiencies that can kill your ficus tree include phosphorus, potassium, and magnesium. These can all cause similar symptoms like yellowing leaves, stunted growth, and leaf drop.
If you suspect your tree has a deficiency of one of these nutrients, you can get a soil test done to confirm it. You can then take corrective action by adding the appropriate fertilizer or amendments to your soil.
4. Pests
The ficus tree is vulnerable to many pests that can cause it to die. These include aphids, whiteflies, spider mites, and mealybugs. All of these pests can suck the sap out of your tree, causing the leaves to turn yellow and drop off.
To get rid of pests on your ficus tree, you can use a variety of methods. You can start by spraying the tree with water to knock the pests off. You can also use insecticidal soap or neem oil. If these methods don’t work, you can try more aggressive pesticides like pyrethrin or malathion.
Be sure to follow the instructions on the pesticide label carefully. You don’t want to harm your ficus tree or the environment more than you have to.
Whitefly on my fiscus
5. Disease
Ficus trees are also susceptible to several diseases that can kill them. These include fungal diseases like anthracnose and root rot, as well as viral diseases like the ficus mosaic virus.
The best way to prevent disease is to practice good sanitation and avoid wounding your ficus tree. If you do get disease, you can try to treat it with fungicides or antivirals. However, these treatments are not always effective and may not save your tree.
Neem oil is a great fungicide that can help prevent and treat disease in ficus trees. It’s also safe for humans and the environment, which is always a bonus.
Conclusion
If your ficus tree is dying, don’t despair – there are several things you can do to save it! Start by making sure it’s getting enough water, sunlight, and nutrients. You can also check for pests and diseases and take steps to control them. With a little care, you should be able to revive your ficus tree in no time!
Do you have a dying ficus tree? What are you doing to try and save it? Let us know in the comments below!
Marigolds are beautiful, cheerful flowers that are easy to grow. They come in a variety of colors, including yellow, orange, and red. But what does it mean when marigold leaves turn purple?
This is a question that many gardeners have, and the answer can be a bit complicated. In this blog post, we will discuss the possible reasons why your marigold leaves are turning purple, and what you can do to remedy the problem. We will also provide some tips on how to prevent this from happening in the future!
Why Is My Marigold Turning Purple?
Nutrient deficiency is the most likely reason for marigold leaves turning purple. This can be caused by a lack of nitrogen, phosphorus, or potassium in the soil. If your marigold is not getting enough of these essential nutrients, it will start to show signs of stress, and the leaves will begin to turn purple.
Typically, it’s a lack of phosphorus that is the problem. This nutrient is essential for plant growth, and it is often the first to be depleted in the soil. If your marigold leaves are turning purple, you should fertilize with phosphorus-rich fertilizer to correct the deficiency.
What is Phosphorus?
Phosphorus is an essential mineral nutrient for plants, helping them to grow and stay healthy. It is involved in many important plant processes, including photosynthesis, respiration, cell division, and cell differentiation.
Phosphorus is found in the soil and taken up by plants through their roots. It is a component of many plant tissues, including the chloroplasts, which are responsible for photosynthesis. Phosphorus deficiency can cause problems with plant growth and development.
Luckily, there are many ways to correct a phosphorus deficiency. Fertilizing with a phosphorus-rich fertilizer is the most common and effective method. You can also add phosphate rock or bone meal to your garden soil to help increase the levels of this essential nutrient.
How to Treat Purple Marigold Leaves?
If your marigold leaves are turning purple, the first step is to test the soil. You can do this with a simple at-home soil test kit. This will tell you what nutrients are present in the soil and in what quantities.
Soil acidity can also inhibit phosphorous intake, so it’s important to make sure your soil is not too acidic. The ideal pH range for marigolds is between six and seven. You can test the pH of your soil with an at-home soil test kit as well.
If the soil test reveals a lack of phosphorus, you should fertilize with a phosphorus-rich fertilizer. You can also add phosphate rock or bone meal to the soil to help increase the levels of this essential nutrient.
I recommend using fertilizer for blooming plants to give your marigolds the nutrients they need to produce beautiful flowers. This is a good one (Amazon link) that I’ve had success with over the years.
Simply sprinkle the fertilizer around the base of the plant, being careful not to get any on the leaves. Water deeply to help the nutrients reach the roots. This should be done every two weeks until the leaves return to their normal color.
If you are unsure of what type of fertilizer to use, ask for help at your local garden center. The staff should be able to recommend a product that will correct the nutrient deficiency and help your marigold leaves return to their normal color.
Once you have corrected the nutrient deficiency, you should see a marked improvement in your marigold’s health and growth. However, it is important to keep an eye on the plant and make sure that the deficiency does not recur. Regular soil testing and fertilization will help to ensure that your marigold stays healthy and vibrant.
In addition to fertilizing, you can also try adding organic matter to the soil. This will help to improve drainage and aeration, both of which are important for plant health. Compost, manure, and peat moss are all good options for adding organic matter to your garden soil.
Purple marigold leaves
Preventing Purple Marigold Leaves
The best way to prevent purple marigold leaves is to make sure that the plant is getting all of the nutrients it needs. This can be accomplished by regularly fertilizing with a balanced fertilizer and by conducting soil tests to ensure that the soil is not deficient in any essential nutrients.
In addition, it is important to water your marigold regularly and deeply. This will help to ensure that the roots are getting enough moisture and the roots are able to take up all of the nutrients from the soil.
Pests are known to cause problems with marigolds, so it is important to keep an eye out for them. If you see any pests on the plant, be sure to remove them immediately. You can also try using a natural insecticide to help deter pests and keep your marigold healthy and strong.
Cold weather can also trigger purple leaves in marigolds. If the temperature drops suddenly, it can reduce the uptake of phosphorus in the plant. To prevent this, make sure to protect your marigolds from frost by covering them with a cloth or blanket if frost is expected.
Finally, make sure that your marigold is planted in an area that receives plenty of sunlight. Marigolds need at least six hours of sunlight each day to thrive. If they are not getting enough light, they may start to show signs of stress, including purple leaves.
Should I Prune Purple Marigold Leaves?
It is not a requirement to prune your marigold leaves if they turn purple. Generally, I only prune leaves when a disease is present or they are starting to die off. If your marigold leaves are turning purple due to a nutrient deficiency, you can simply fertilize the plant and provide it with the nutrients it needs.
If you do decide to prune your marigold leaves, be sure to use sharp, clean shears. This will help to prevent the spread of disease. Start by cutting off any leaves that are heavily discolored or damaged. Then, cut back the remaining leaves by about one-third.
After you have pruned your marigold leaves, be sure to fertilize the plant and water it deeply. This will help it to recover from the pruning and encourage new, healthy growth.
Conclusion
Purple leaves on your marigold plant can be a cause for concern. However, in most cases, they are nothing to worry about. By testing the soil and fertilizing accordingly, you can usually fix the problem and get your marigold back to its normal, healthy self.
If you are still having trouble with your marigold, or if the leaves are severely damaged, you may need to prune them back. This will encourage the plant to focus its energy on new growth. Just be sure to use sharp, clean shears and fertilize and water deeply after pruning.
I hope this article helped troubleshoot your purple marigold leaves. As always, if you have any further questions, please feel free to reach out to me in the comments below. Happy gardening!
Grapes are a type of fruit that is grown on vines. Grapes come in all sorts of colors, including green, red, and purple. While grapes can be eaten fresh, they are also used to make wine.
But have you ever looked at your grape vines and wondered why the grapes are so small? Well, you’re not alone. Many gardeners have this same question. In this blog post, we will discuss the climate conditions that are necessary for grape vines to produce large, juicy grapes. We will also provide tips on how to create the perfect environment for your grape vines!
Why Are My Grapes So Small?
Underwatering, over-fertilization, poor pruning, and lack of weeding can all contribute to small grapes. Just one of these factors can limit the size of your grapes, so it’s important to address all of them if you want to see an improvement.
I will now go into more detail about each of these factors so that you can make the necessary changes in your own grape-growing operation.
1. Lack of Water
Just like all plants, grape vines need water to survive. However, grape vines are especially susceptible to drought stress. When the soil around your grapevine is too dry, the plant will start to shut down and will not produce grapes.
Make sure that you are watering your grape vines regularly and deeply. Deep watering means that you should water the roots of the plant, not just the leaves. The best way to water grape vines is with a soaker hose or drip irrigation system. These methods will ensure that your plants are getting the water they need without wetting the leaves, which can lead to fungal diseases.
Young grapes need around 1 inch of water per week. If you live in an area with hot summers, you may need to water your grape vines twice a day to prevent them from drying out. Make sure to check the soil around your plants regularly so that you can tell when they need water.
Make sure drainage is good in the area where you are growing your grape vines. If the soil does not drain well, the roots of your plants will start to rot. This can lead to a number of problems, including the death of your grape vines.
2. Over-fertilization
While grape vines do need nutrients to grow, too much fertilizer can actually be harmful. When you over-fertilize your grape vines, the plants will produce more leaves and stems than grapes. This can lead to a smaller crop overall.
To reduce the risk of over-fertilization, only fertilize your grape vines when they are actively growing. This typically happens in the spring and early summer. Avoid fertilizing your plants in late summer or fall, as this can encourage new growth that is susceptible to frost damage.
When you do fertilize your grape vines, use a balanced fertilizer that is specifically formulated for grapes. Do not use a fertilizer with too much nitrogen, as this can burn the roots of your plants.
It is also important to test the soil before you fertilize. This will help you determine which nutrients your grape vines are lacking so that you can add the right fertilizer. A soil test kit can be purchased at your local garden center.
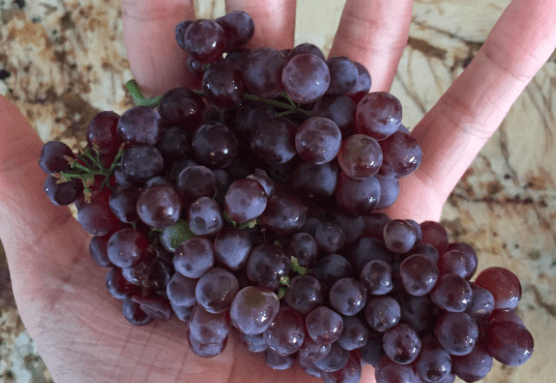
A handful of small grapes
3. Poor Pruning
Annual pruning is required to reduce the amount of fruiting canes on the plant. you see, the yield will suffer if too many canes are left on the grapevine, so get rid of about 90% of the last season’s growth. This may seem like a lot, but trust me, it’s necessary for optimal grape production.
In addition to reducing the number of fruiting canes, pruning also helps to improve air circulation and sunlight exposure. These factors are important for preventing fungal diseases and ensuring the grapes get the sunlight they need to ripen properly.
If you are new to grape growing, I recommend having a professional come and prune your vines for the first year or two. This will help you get a feel for how much to prune and when to do it. After that, you can start doing it yourself.
Pruning grape vines may seem like a lot of work, but it is essential for getting a good crop. Make sure to prune your plants regularly to ensure the best possible results. Cane pruning and spur pruning are the two main types of pruning for grape vines.
4. Lack of Weeding
Weeds compete with grape vines for water, nutrients, and sunlight. This can lead to smaller grapes and a reduced overall crop. Just think about it: if the weeds are taking up space and resources that could be used by the grape vines, the grapes will suffer.
Having plants growing under your vines also makes the soil cooler, which can lead to problems with grape growth in terms of size and quantity.
To prevent this from happening, make sure to remove any weeds that you see around your grape vines. You can do this by hand or with a hoe. Be careful not to damage the roots of the grape vines when you are weeding, as this can harm the plants.
Weeding may seem like a tedious task, but it is essential for getting a good grape crop. Make sure to remove any weeds that you see around your vines so that they can grow and produce fruit properly.
Can My Grapes Grow after the Initial Growth Period?
No, once the initial growth period is over, your grapes will not grow any larger. This is because the grape vines have reached their full size and are no longer actively growing.
This highlights the importance of proper grape vine care from the start. If you want to grow large, healthy grapes, you need to provide the plants with everything they need to thrive. This includes proper fertilizer, pruning, and weed control.
How Do I Know If My Grapes Are Ripe?
It can be tricky to determine when grapes are ripe, as they can vary in sweetness and color depending on the variety. A good way to test for ripeness is to gently press the grape with your thumb – if it yields to pressure, it’s likely ripe. Additionally, look for grapes that are mostly a uniform color (with just a touch of green remaining), and that have a sweet aroma.
If you’re not sure whether or not your grapes are ripe, it’s best to taste them – but be careful, as some grapes can be quite sour even when ripe.
Conclusion
In conclusion, the four main reasons why your grapes might be small are lack of water, over-fertilization, poor pruning, and lack of weeding. Make sure to address these issues if you want to grow healthy grape vines that produce a good crop.
Simply put, the better you care for your grape vines, the more grapes you will get. So, make sure to give your plants the attention they need and you will be rewarded with a bountiful harvest.
Do you have any tips for growing grapes? I would love to hear them in the comments section below. Thanks for reading!