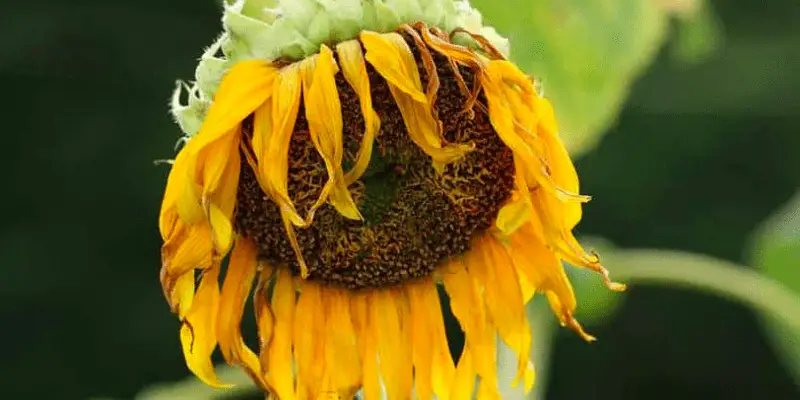
It’s a beautiful day, and you’re admiring your sunflowers when you notice something strange – some of the petals are falling off! This is a common problem with sunflowers, and there are a few things you can do about it. In this blog post, we will discuss the causes of sunflower petal fall and how to prevent it from happening.
Why Are Sunflower Petals Falling Off?
Sunflower petals fall off when the plant reaches the end of its maturity period. The petals are actually designed to fall off, as this is how the plant spreads its seeds. If you want to gather the seeds yourself, continue caring for the plant and wait for seeds to form in the proceeding days and weeks.
Sunflowers are annuals, meaning they complete their entire life cycle – from germination to producing seed – in a single year. They grow best in full sun and well-drained soils.
Sunflowers are typically planted in the spring, when the soil warms up to at least 60 degrees F. The plants will grow about 2 feet tall and produce large, showy flowers. After the flowers fade, the plants will produce seeds that can be harvested and stored for later use.
However, there are also other reasons why sunflower petals may fall off prematurely. If the plant is stressed, for example, by too much or too little water, it may cause the petals to fall off. Pests and diseases can also cause premature petal falls.
I will now go further into the different causes of why sunflower petals fall off. While it’s usually due to reaching maturity, there are other causes to be aware of:
1. The Natural Lifecycle
The first cause is simply due to the plant’s natural life cycle. All plants have a specific life cycle that they go through, and at the end of the cycle, the plant will start to die off. This is normal and nothing to be alarmed about.
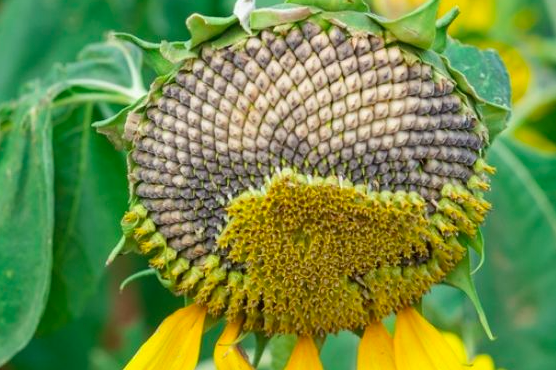
In fact, this is how the sunflower spreads the seeds that it produces. The petals fall off and the seeds are left open to be taken by the wind or animals, and then they are transported to a new location where they can grow into new sunflowers.
So, if you’re noticing that the petals on your sunflower are starting to fall off, it’s likely because the plant is reaching the end of its natural life cycle. There’s nothing you can do to prevent this, but you can enjoy the plant while it’s still alive and take some seeds to plant next year.
To take the seeds, simply wait for the petals to fall off completely and for the flower to dry out. Once it’s dry, you can cut off the head of the sunflower and remove the seeds. Store them in a cool, dry place until you’re ready to plant them next year.
The natural lifecycle of a sunflower
2. Underwatering
There is such a thing as too little water, and if your sunflower isn’t getting enough, it will start to show signs of stress. One of these signs is petal fall. Other signs of underwatering include wilting leaves, dry soil, crispy leaves, and slow growth.
Sunflowers love the sun, but they also need plenty of water to grow. If you live in an area with little rainfall, make sure to water your sunflowers regularly. The sun can quickly evaporate any water that’s in the soil, so it’s important to give them a deep watering every few days.
If you think your sunflower is not getting enough water, start by checking the soil. It should be moist but not soggy. If it feels dry, give the plant a good watering. You can also try adding a layer of mulch around the plant to help keep the moisture in.
If you’re still having trouble, consider getting a soil moisture meter to help you keep track of how much water your sunflower is getting. This will help you make sure that you’re watering it enough and not underwatering it.
In periods of high heat, you may need to water your sunflower more often. Check the soil every few days and water it when it feels dry.
3. Sunflower Pests
Unfortunately, pests can also cause sunflower petals to fall off. The most common culprit is the Japanese beetle, which feeds on the leaves and flowers of sunflowers. These pests hide in the ground and emerge when the sunflowers start to bloom.
If you notice Japanese beetles on your sunflowers, there are a few things you can do to get rid of them. You can handpick them off of the plant and drop them into a bucket of soapy water, or you can use an insecticide specifically designed to kill Japanese beetles.
Neem oil is a great natural option that will also help to prevent fungal diseases. Simply mix together a solution of neem oil and water, and then spray it on your sunflowers. Be sure to follow the instructions on the bottle, as you don’t want to use too much and harm the plant.
You can also use neem oil as a preventative measure. If you live in an area where Japanese beetles are common, start spraying your sunflowers with the neem oil solution a few weeks before they bloom. This will help to keep the pests away before they have a chance to do any damage.
To prevent pests from being attracted to your sunflowers in the first place, make sure to keep the area around the plants clean. Pests are attracted to overgrown gardens, so tidy up any areas that might be inviting them in.
In addition, isolate any new plants before adding them to your garden. You see, some plants may have pests on them without you even realizing it. By keeping new plants separate from your main garden, you can prevent any pests from hitchhiking in and wreaking havoc.
Conclusion
In conclusion, there are a few different reasons why sunflower petals may fall off. The most common reason is simply due to the plant reaching the end of its natural life cycle. However, underwatering and pests can also cause petal falls.
If you’re concerned about your sunflowers, be sure to check for signs of stress such as drooping leaves or wilting flowers. If you notice any pests, there are a few different ways to get rid of them. Neem oil is a great natural option that prevents pests and fungal diseases.
I hope this article was helpful in understanding why sunflower petals may fall off. Thanks for reading!
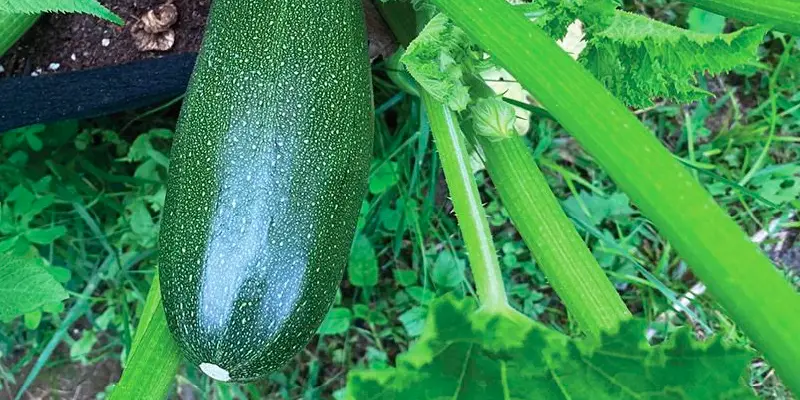
Have you ever grown zucchini, or any other type of squash for that matter? If so, you may have noticed that they come in all shapes and sizes. Some are long and thin, while others are short and fat. What makes them grow this way? In this blog post, we will take a look at the factors that influence zucchini growth, and offer some tips on how to get the most out of your plants!
Why Are My Zucchini Short And Fat?
The main reasons for zucchini being short and fat include cross-pollination, pest infestations, diseases, low-quality soil, and a lack of sunlight or water. I’ve found that any one of these reasons can stunt how long a zucchini grows.
To grow a healthy zucchini, it is important to start with a high-quality seed. I like to buy my seed from a local nursery or garden center. Once you have your seed, you will need to plant it in well-drained soil that is rich in organic matter. Zucchini plants need a lot of sunlight, so make sure to plant them in an area that gets at least six hours of sun per day.
I will now go over each of these reasons in more detail so that you can identify the exact issue affecting your zucchini plant.
Seed Cross-Pollination
One of the main reasons for zucchini being short and fat is seed cross-pollination. This occurs when two different types of plants are grown close to each other and the bees transfer pollen from one plant to the other. The resulting zucchini will have characteristics of both plants, which can include being short and fat.
To avoid this issue, make sure to plant your zucchini in an area where there are no other squash plants nearby. Plus, make sure the seeds you purchase are from a reputable source and are labeled as pure zucchini seeds.
Pest Infestations
Common pests that attack zucchini plants include cucumber beetles, squash bugs, and aphids. These pests can cause a variety of problems for your plant, such as stunted growth, yellowing leaves, and misshapen fruits.
To control pests, you will need to use a combination of IPM (Integrated Pest Management) practices and pest-specific controls. Some IPM practices that can be used for controlling cucumber beetles include crop rotation, using row covers, and planting trap crops.
Neem oil is a great pest-specific control for aphids and other bugs that attack zucchini plants. To use neem oil, mix it with water and spray it on your plant leaves. Make sure to do this in the early morning or evening to avoid harming the leaves with the sun’s heat.
Diseases
Another common reason for zucchini being short and fat is due to diseases. The most common diseases that affect zucchini plants are powdery mildew and downy mildew. These diseases can cause stunted growth, yellowing leaves, and misshapen fruits.
To control diseases, you will need to use a combination of cultural practices and fungicides. Some cultural practices that can be used for powdery mildew and downy mildew include crop rotation, using resistant varieties, and increasing air circulation. And some fungicides that can be used include chlorothalonil, mancozeb, and copper hydroxide.
Low-Quality Soil
Zucchini plants need well-drained soil that is rich in organic matter. If your soil is too sandy or too clayey, it will not hold enough water or nutrients for your plant, and this can lead to stunted growth.
To improve the quality of your soil, you will need to add organic matter such as compost or manure. You can also use a soil test kit to test the pH of your soil and adjust it accordingly. The ideal pH for zucchini plants is between six and seven.
Lack of Sunlight
Zucchini plants need a lot of sunlight, so if they are not getting enough, it can lead to stunted growth. It’s the same with any other type of plant – they need sunlight to produce food for themselves through photosynthesis. If your zucchini plants are not getting at least six hours of sun per day, they will not grow as well as they should.
To solve this problem, you will need to move your plants to an area that gets more sun. I tend to move my plants around a lot to make sure they are getting the right amount of sun. You may need to remove any plants or objects that are shading your zucchini plants.
Lack of Water
Another common reason for zucchini being short and fat is a lack of water. Zucchini plants need about one inch of water per week, so if they are not getting enough, it can lead to stunted growth.
To solve this problem, you will need to water your plants more often. I like to water my plants twice a week to make sure they are getting enough water. You can also add mulch around your plants to help retain moisture in the soil.
Conclusion
In conclusion, zucchini plants can be a weird shape for many reasons. The most common reasons are pest infestations, diseases, low-quality soil, lack of sunlight, and lack of water. If you can identify the exact issue affecting your plant, you will be able to solve the problem and grow healthy zucchini plants. Thanks for reading! I hope this was helpful. 🙂
Personally, I think the most common reason is that the seeds were cross-pollination with another plant, like a cucumber or squash. This is because zucchini, cucumbers, and squash are all in the same family (Cucurbitaceae), so they can cross-pollinate with each other easily.
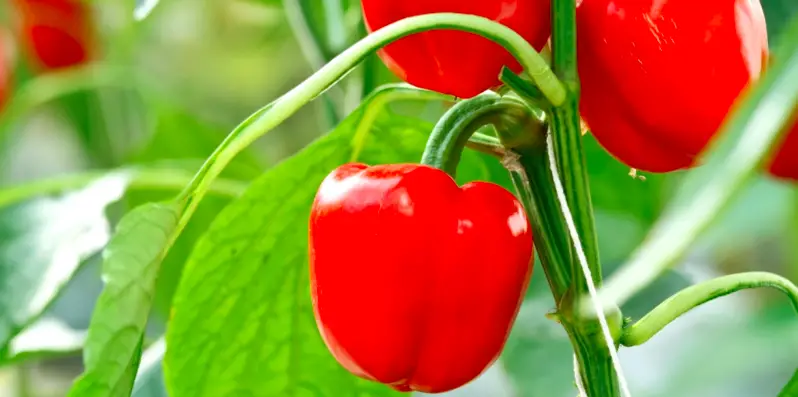
If you’re like most pepper growers, the answer to this question is a mystery. You plant your peppers in the spring, and by summer they should be a deep red. But instead, they are green!
What gives? Don’t worry – you’re not alone. Many gardeners have this same problem. In this blog post, we will discuss some of the reasons why your peppers may not be turning red, and we will give you some tips on how to fix the problem.
Why Won’t My Peppers Turn Red?
The top reasons for peers not turning red include owning a green variety, the peppers not fully maturing, lack of sun, or pests. Each reason can cause a delay in the red coloring, so it is important to identify the problem early on.
I will now go into more detail about each of these reasons so that you can determine which one is affecting your peppers.
1. Owning a Green Variety
The first reason your peppers may not be turning red is that you simply own a green variety. There are many green varieties of peppers, and they are bred to remain green even when they are fully ripe. If you have a green pepper plant, then it is likely that your peppers will never turn red.
Many people make this mistake as they are not aware that there are different types of peppers that have different colors. Make sure to do your research so that you can avoid this issue in the future.
If you want to grow red peppers, make sure to buy a red variety from the nursery or seed catalog. Some popular varieties include Lipstick, Gypsy, or the Lady Bell. Simply purchase the seeds or seedlings of these varieties, and you will be on your way to harvesting beautiful red peppers in no time.
If you’re sure that you have a red variety of pepper, but your peppers are still green, then read on to find out the other possible reasons why this may be happening.
2. The Peppers Have Not Fully Matured
Another reason your peppers may not be turning red is that they have not fully matured. Peppers take a long time to mature, and the process can be delayed by factors such as cool weather or disease. If your peppers are still green, give them some more time. They may turn red yet!
Here’s where the confusion starts – most seed packets comment that the peppers will be fully-ripe in 6 weeks. However, this is just when they’re ripe enough to eat – not when they will turn red. In reality, it can take up to 9 weeks for pepper to go from green to red. So if your peppers are still green after six weeks, don’t worry – they may just need some more time.
If you don’t like waiting that long, try growing a smaller variety of pepper. That way, you can harvest them earlier and enjoy the fruits (or vegetables) of your labor sooner.
With those two issues out of the way, are you sure that your peppers should be turning red by now? If so, then read on to find out about the next possible reason for your green peppers.
3. Lack of Sun
Another common reason for green peppers is a lack of sun. Peppers need a lot of sunlight to turn red, so if your plants are not getting enough sun, they may stay green indefinitely.
To fix this problem, make sure to plant your peppers in a sunny spot in the garden. If possible, choose an area that gets at least six hours of direct sunlight each day. You can also try using a grow light to supplement the natural sunlight.
Similarly, the temperature can also affect the color of your peppers. Peppers need warm weather to turn red, so if it is too cold outside, they may stay green. In general, peppers need temperatures of at least 70 degrees Fahrenheit to turn red.
If planting your peppers outside, this means you will need to wait until the weather warms up in late spring or early summer. There need to be at least 16 weeks of warm weather before the first frost date in order for the peppers to turn red.
Peppers growing on a windowsill
4. Pests
The final reason your peppers may not be turning red is pests. Peppers are susceptible to a variety of pests, including aphids, whiteflies, and spider mites. These pests can suck the nutrients out of the plant, causing it to become stunted or even die.
If your peppers are infested with pests, you will need to take action immediately. The best way to get rid of pests is to use an insecticide or pesticide. You can also try using a natural remedy such as neem oil.
Neem oil is a natural substance that is extracted from the neem tree. It is effective against a variety of pests, and it will not harm your plants. It works by disrupting the life cycle of the pests, preventing them from reproducing.
Simply mix a teaspoon of neem oil with a cup of water and spray it on your plants. Be sure to apply the mixture every few days until the pests are gone. This method is safe for both you and your plants, and it will not affect the flavor of your peppers.
Can I Eat Peppers That Haven’t Turned Red?
Yes, as long as the peppers are ripe, you can eat peppers that haven’t turned red. In fact, green peppers are just as nutritious as red peppers. They contain the same vitamins and minerals, so you can enjoy all the health benefits regardless of color.
However, I recommend waiting until the peppers are fully mature to experience the best flavor. Peppers that are still green tend to be more bitter than those that are ripe. So if you want the sweetest, most delicious peppers, it is best to wait until they turn red.
How to Make Peppers Turn Red Quicker?
The best and most efficient way to make peppers turn red is by giving consistent care. Make sure the plant gets enough water, sunlight, and nutrients so it can grow properly. By taking good care of your pepper plants, you will be rewarded with sweet, juicy peppers in no time.
You see, every day of cold temperature delays the process by one day. So, if it’s 40 degrees for one full day, that’s one day of growth lost. Two days at 50 degrees is two days lost, and so on.
The good news is that you can make up for the lost time by giving the pepper plants some extra TLC. For example, you can move them to a warmer location or use a grow light to supplement the sunlight.
Sunlight is especially important for peppers, so make sure they are getting at least six hours of direct sunlight each day. If possible, choose an area that gets full sun all day long.
You can also try using a balanced fertilizer to give the plants a boost. Apply the fertilizer according to the package directions, and be sure to water it well.
Conclusion
In conclusion, there are several reasons why your peppers may not be turning red. The most common reason is that they simply need more time to mature. However, a lack of sun, owning the wrong variety, or pests can also cause peppers to stay green.
If you want the best-tasting peppers, it is best to wait until they turn red. However, you can still eat peppers that are green, as they are just as nutritious. Simply enjoy them in a different way, such as adding them to salads or stir-fries. With a little patience, you will be able to enjoy the sweet taste of red peppers in no time!
Remember, if pests are the problem, be sure to take action immediately. The best way to get rid of pests on your peppers is with neem oil. This natural substance will not harm your plants and it will effectively disrupt the life cycle of the pests.
I hope you enjoyed this blog post. If you have any questions, please leave a comment below and I will be happy to answer them!
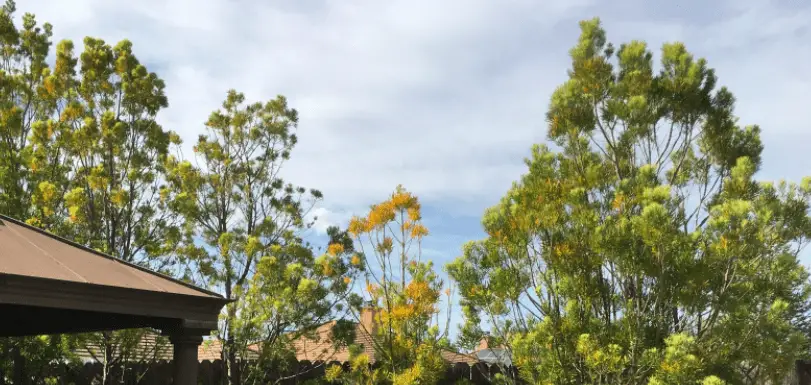
Podocarpus is a genus of coniferous trees that are popular in landscaping. These trees are known for their evergreen leaves and beautiful branches. However, one common problem with podocarpus is that they can turn yellow easily. In this blog post, we will explore the reasons why podocarpus turns yellow and offer solutions to help you keep your tree looking green and healthy!
Why Is My Podocarpus Turning Yellow?
Yellow leaves on a podocarpus can be caused by overwatering, fungal diseases, nutrient deficiencies, insufficient sunshine, and environmental stress. The exact type of yellowing will depend on the underlying cause.
I will now go through each of these reasons in more detail so that you can determine what is causing the yellowing of your podocarpus leaves.
1. Overwatering
If your leaves are yellow and droopy, it is likely that you are overwatering your tree. Podocarpus prefer well-drained soil and do not like to stay wet for long periods of time. Overwatering can lead to root rot, which will eventually kill the tree.
The best way to check if you are overwatering your podocarpus is to stick your finger into the soil. If it feels damp, then you do not need to water it. If the soil is dry, then give your tree a deep watering. Make sure that the water can drain freely from the pot and that the roots are not sitting in any water.
If you live in an area with high humidity, then it is especially important to make sure that you are not overwatering your podocarpus. High humidity can lead to fungal diseases, which we will discuss next.
2. Fungal Infections
Fungal infections are another common reason for yellow leaves on podocarpus. These infections are usually caused by overwatering, high humidity, or contamination from other infected plants.
The most common type of fungal infection is called Phytophthora root rot. This infection causes the roots of the tree to rot, which eventually leads to the death of the tree. Phytophthora root rot is especially common in areas with high humidity or poor drainage.
My favorite anti-fungal treatment is neem oil (Amazon link), which is a natural fungicide that is safe to use around humans and pets.
To prevent fungal infections, make sure that you are not overwatering your podocarpus and that the roots are not sitting in water. In addition, make sure you’re not spreading any infection from other plants by sterilizing your tools before using them on your podocarpus.
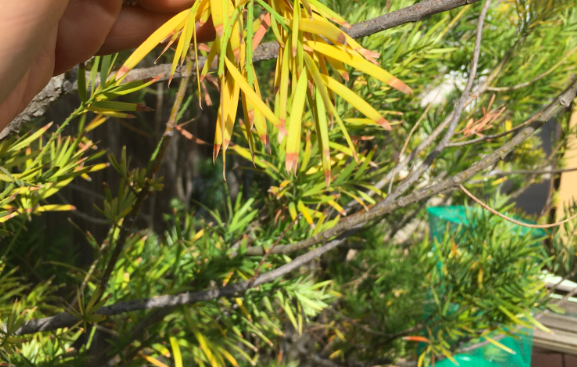
Yellow leaves on podocarpus
3. Nutrient Deficiencies
Nutrient deficiencies are another common problem that can cause yellow leaves on podocarpus. The most common nutrient deficiency in these trees is iron, but other nutrients such as nitrogen and magnesium can also be lacking.
Deficiencies are usually caused by poor soil quality or incorrect fertilizer. If you suspect that your tree is deficient in a certain nutrient, you can have your soil tested or give your tree a fertilizer specifically designed for podocarpus.
A 6-6-6 fertilizer is best for podocarpus. This fertilizer has a balanced ratio of nitrogen, phosphorus, and potassium, which is perfect for these trees. Use it 2-3 times each growing season.
Simply apply the fertilizer to the soil around the tree, being careful not to get any on the leaves. Water it in well so that the roots can absorb the nutrients.
4. Lack of Sunlight
Podocarpus trees need at least six hours of sunlight each day to stay healthy. If your tree is not getting enough sun, the leaves will turn yellow and begin to drop off. This happens because the tree is not able to produce enough chlorophyll, which is necessary for photosynthesis.
To fix this problem, simply move your tree to a location that gets more sun. You may need to experiment with different locations until you find one that suits your tree.
You can also need to prune any branches that are blocking sunlight from reaching the leaves. This will ensure that your tree gets the light it needs to stay healthy.
5. Environmental Stressors
There are many different environmental stressors that can cause yellow leaves on podocarpus. These include extreme temperatures, drought, wind damage, and too much sun.
If your tree is experiencing any of these stressors, the leaves will turn yellow as a way to conserve energy. The tree is essentially shutting down non-essential functions in order to survive. The podocarpus leaves may even turn brown if they’re burning from heat stress.
To fix this problem, you need to remove the stressor. If the stressor is extreme temperatures, then move your tree to a cooler location. If the stressor is drought, then water your tree more frequently. And if the stressor is too much sun, then move your tree to a shadier location.
You can also try to shelter your tree from wind damage by erecting a barrier around it. This will protect the tree from the elements and help it to recover.
Should I Cut Yellow Leaves off My Podocarpus?
There is no need to cut yellow leaves off your podocarpus. The tree will eventually shed these leaves on its own. If you decide to prune the leaves, then you should only remove the ones that are significantly yellow or dead.
Pruning will not fix the underlying problem, but it can help to improve the appearance of your tree. In addition, pruning will also help to increase air circulation and allow more sunlight to reach the leaves.
Simply use a sharp pair of shears to cut the yellow leaves off the tree. Be mindful that sterilizing your tools before each use will help to prevent the spread of disease.
Will Yellow Podocarpus Leaves Turn Green Again?
No, it is unlikely for yellow podocarpus leaves to turn green again. Once the leaves have turned yellow, they are typically dead or dying. The tree will eventually shed these leaves and replace them with new growth.
The good news is that fixing the underlying problem will prevent future yellowing. So, if you can identify and correct the issue, then your tree should be back to its normal self in no time.
Conclusion
Podocarpus trees are tough, but they can still experience problems from time to time. If you notice that your tree’s leaves are turning yellow, then don’t panic! There are many possible reasons for this, and most of them can be fixed relatively easily.
I hope this article has helped you to identify the problem with your tree and find a solution. If not, then feel free to leave a comment below and I’ll do my best to help you out.