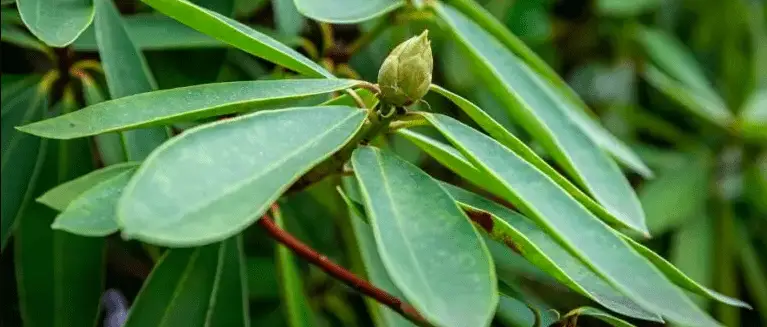
Do you have a rhododendron plant in your garden? If so, you may have noticed that the leaves have been curling lately. This can be a sign of trouble, so it’s important to know what to do if this happens. In this blog post, we will discuss the causes of leaf curling in rhododendrons and what you can do to fix the problem.
Why Are My Rhododendron Leaves Curling?
The leaves of rhododendron can curl up as a result of water scarcity, overwatering, rapid temperature changes (such as from dry air), or improper pH levels in the soil. The exact curling will depend on the cause – for example, leaves may curl inward if they’re too dry, or curl outward if they’re getting too much water.
If you have any of these problems, we’ll walk you through how to fix them. They’re simple to address, so your rhododendron will be back to normal in no time! I will now write each of these points out in more detail:
1) Too Much Water
This is one of the most common causes of leaf curling. If you notice that the leaves are curling outward, it’s a sign that your plant is getting too much water. The best way to fix this problem is to reduce the amount of water you’re giving your rhododendron.
Let the soil dry out completely before watering again, and make sure that the plant is in a well-soil. If you’re not sure how often to water, check the soil before watering – if it’s dry to the touch, it’s time to water.
While this can be a minor problem, it’s important to address it quickly. Overwatering can lead to root rot, which is a serious issue that can kill your plant.
If you think your plant may be suffering from root rot, check for the following signs:
Leaves that are yellow or brown
Soft or mushy leaves
Wilting leaves
A foul odor coming from the roots
If you see any of these signs, it’s important to take action immediately. The best way to treat root rot is to replant your rhododendron in fresh, well-draining soil. You may also need to trim away any affected roots.
2) Not Enough Water
If the leaves are curling inward, it’s a sign that your plant isn’t getting enough water. They do this to conserve water, but it’s not a good long-term solution for the plant. Make sure you’re watering your rhododendron regularly, and that the soil is moist but not soggy.
Just like with overwatering, if you think your plant isn’t getting enough water, check the soil before watering. If it’s dry to the touch, water your rhododendron.
There are a few things you can do to help your plant get the water it needs. First, make sure you’re watering regularly. Second, you can try using mulch around the base of the plant to help retain moisture.
Third, make sure the pot has drainage holes so that excess water can drain out. You can also consider moving your plant to a location where it will get more water, such as near a hose or sprinkler.
3) Sudden Temperature Changes
Rhododendrons are sensitive to sudden changes in temperature, so if the leaves are curling it could be a sign that the plant is stressed. This is most common in winter, when the leaves may curl up as a result of exposure to cold winds or frost.
If you think your rhododendron is experiencing stress from temperature changes, there are a few things you can do to help. First, make sure the plant is in a location where it will be protected from sudden temperature changes. For example, if you live in an area with cold winters, you may want to move your plant indoors or into a greenhouse during this time.
High heat can also cause leaf curling, so make sure the plant is not in direct sunlight. You can also try misting the leaves with water to help cool them down.
4) Soil with a High pH Level
Rhododendrons prefer acidic soils with a pH level of around five. If the soil is too alkaline, it can cause the leaves to curl. This is because the plant isn’t able to absorb nutrients from the soil properly.
If you think your rhododendron’s leaves are curling because of alkaline soil, you can try a few things to fix the problem. First, you can try acidifying the soil with an acidic fertilizer or by adding organic matter such as peat moss.
Will Underwatering Cause Rhododendron Leaves to Curl Inwards?
Yes, underwatering can cause rhododendron leaves to curl inwards. This is because the plant isn’t getting enough water and it’s trying to conserve moisture. It’s important to water your rhododendron regularly and to make sure the soil is moist but not soggy. You can also try using mulch around the base of the plant to help retain moisture.
Should I Prune Curling Rhododendron Leaves?
No, there is no need to prune curling rhododendron leaves. Simply find the reason why the leaves are curling (such as overwatering, underwatering, or exposure to cold temperatures) and take steps to fix the problem. Once the problem is fixed, the leaves should return to normal.
Conclusion
In conclusion, if your rhododendron leaves are curling, it’s a sign that something is wrong. The most common causes are overwatering, underwatering, exposure to cold temperatures or alkaline soil. However, there are a few things you can do to fix the problem.
Find the cause of the leaves curling and then address it. The leaves should return to normal once the problem is addressed. Thanks for reading!
Basil leaves are a popular herb that is used in many dishes. It has a unique flavor and smell that can really enhance the taste of food. However, sometimes you may notice that your basil leaves start to curl up. This can be alarming, but don’t worry – we’ll tell you why it’s happening and how to fix it!
Why Are My Basil Leaves Curling?
Basil leaves can curl up from a lack of water, sudden temperature changes (such as from dry air), or having soil that’s the wrong pH level. Each of these problems is easy to fix, so your basil should be back to normal in no time!
I will now go further into depth about each of these reasons so that you can identify which one is causing your basil leaves to curl, and how to solve the problem.
1. Overwatering
Giving your basil too much water can cause the leaves to curl up. This is because the roots are getting too much water and they start to suffocate. If you think you’re overwatering your basil, try letting the soil dry out a bit before watering it again.
Only water when the topsoil is dry to the touch – you don’t want to water your basil every day. Be sure to check the soil before watering, as overwatering is one of the most common reasons for basil leaves to curl.
If you’re still having trouble, consider getting a soil moisture meter. This will help you to know exactly when your basil needs water, so you don’t have to worry about overwatering it.
The leaves of an overwatered basil plant will be limp and may turn yellow or brown. Curling leaves are a sign that the plant is starting to suffocate, so it’s important to take action if you see this happening.
You can also try using a pot with drainage holes to help excess water drain out. This will ensure that your plant doesn’t sit in water for too long, which can cause the roots to rot.
2. Underwatering
If your basil leaves are curling up and inward, it could be a sign that you’re not watering it enough. The leaves will start to curl in order to preserve moisture, so be sure to water your plant regularly.
Basil likes to grow in moist soil, so be sure to check the soil before watering. If the topsoil is dry, it’s time to give your plant a drink. A good rule of thumb is to water your basil plant with 1 inch of water every week. This will ensure that your plant has enough moisture to grow and thrive.
It’s important to not let your basil plant go too long without water, as this can stress the plant and cause the leaves to curl. If you’re unsure how often to water your basil, err on the side of caution and water it more rather than less.
3. Sudden Temperature Changes
Basil needs warmth to grow, so sudden temperature changes can cause the leaves to curl. If you live in a place with cold winters, it’s important to bring your basil plant indoors before the temperature drops too low.
You should also avoid placing your basil plant near drafts or vents, as this can cause the leaves to curl. Try to keep your plant in a consistent, warm environment to prevent the leaves from curling.
If you notice that your basil leaves are starting to curl, take a look at the temperature in the room. If it’s too cold, try moving your plant to a warmer location. You can also try using a grow light to give your plant the extra warmth it needs.
4. Soil with a High pH Level
Basil needs a neutral pH level to grow, so a soil with a high pH level can cause the leaves to curl. This is because the roots are not able to absorb nutrients from the soil properly.
If you think your basil’s leaves are curling because of the pH level of the soil, you can try testing it with a pH test kit. This will tell you the exact pH level of your soil, so you can adjust it accordingly.
Adding some organic matter to your soil can also help to lower the pH level. This includes things like compost, manure, or peat moss. Be sure to mix it well so that your basil plant can benefit from it.
You should also avoid using chemicals or fertilizers with a high pH level, as this can make the problem worse. Stick to organic methods of adjusting the pH level of your soil to prevent further damage to your plant.
Will Underwatering Cause Basil Leaves to Curl Up?
Yes, underwatering your basil plant can cause the leaves to curl up. This is because the plant is trying to preserve moisture, so it will start to curl in order to prevent water loss. By curling, the leaves are able to slow down evaporation and prevent the plant from drying out.
Its easy to forget to water your plants, especially if you’re busy. A good way to ensure that your basil plant is getting enough water is to get a soil moisture meter. This will help you to know exactly when your basil needs water, so you don’t have to worry about overwatering or underwatering it.
Should I Prune Curling Basil Leaves?
There is no need to prune curling basil leaves, as this is not a sign of disease or pests. Curling leaves are simply a sign that your plant is stressed, so you should try to figure out the cause and address it accordingly.
Pruning your basil plant can actually do more harm than good, as it will make the plant even more stressed. If you need to remove damaged or dead leaves, do so carefully and avoid pruning too much of the plant at once.
Conclusion
Basil leaves curl for a variety of reasons, but most of them can be easily fixed. By understanding the causes of leaf curling, you can take steps to prevent it from happening in the first place. If your basil plant is already showing signs of curling leaves, try adjusting the pH level of the soil, changing your watering schedule, or using a grow light.
Underwatering and sudden temperature changes are also common causes of leaf curling, so be sure to water your plant regularly and keep it in a warm environment. By taking these steps, you can keep your basil plant healthy and prevent the leaves from curling.
I hope this article was helpful in understanding why basil leaves curl and how to prevent it. If you have any questions or comments, please leave them below. Thanks for reading!
Do you have a carnation plant that is full of buds, but they’re all turning brown? This can be frustrating, especially when you were looking forward to seeing those pretty flowers. In this blog post, we will discuss the reasons why your carnation buds might be turning brown, as well as solutions to fix the problem.
Why Are Carnation Buds Turning Brown?
Carnation buds turn brown due to fungal diseases, pests, or environmental conditions. All of these reasons can cause the buds to discolor and fall off the plant. The exact browning will depend on the problem, but you will typically see brown spots on the buds.
I will now go into more detail about each of these reasons so that you can try to identify the problem with your carnation plant.
Fungal Diseases
Perhaps the most common reason for carnation bud browning is fungal diseases. These diseases are often caused by too much moisture on the buds or leaves. The most common types of fungi that infect carnations are botrytis blight (storage rot) and powdery mildew.
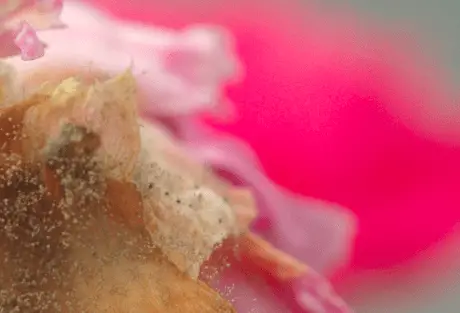
Botrytis blight is a gray mold that affects the carnation plant during storage. The spores of these fungi survive in the soil and on dead leaves. They will then infect the plant when the conditions are right, which is humid weather. The symptoms of botrytis blight include brown or gray spots on the buds and leaves, as well as fuzzy growth
To prevent these diseases, make sure that you are not overwatering your carnation plant and allow the soil to dry out in between waterings. This will help to reduce the amount of moisture on the plant, making it less susceptible to fungal diseases. You should also remove any dead leaves or debris from around the plant so that the spores cannot infect it.
If you do see any signs of fungi, such as gray or white mold, treat the plant with a fungicide as soon as possible. Neem oil is my go-to fungicide for carnation plants because it’s an organic, affordable, safe, and effective option. You can find it at most garden stores or online.
Simply mix the neem oil with water according to the instructions on the bottle and spray it onto the plant, being sure to cover all of the affected areas. You will need to do this every few days until the problem is gone.
Fungus growth on carnation
Pests
Pests can also be responsible for carnation bud browning. The most common pests that attack carnations are aphids, thrips, and mites. These pests feed on the sap of the plant, which can cause the buds to turn brown and fall off.
Aphids are particularly damaging when they feed on the buds of the plant because this can cause them to deform. They are small insects that are usually green, but they can also be black, brown, or yellow. You will typically find them in large groups on the undersides of leaves or on new growth.
You can prevent pests from attacking your carnation plant by keeping the area around the plant clean. Remove any dead leaves or debris that could attract pests. You should also regularly inspect the plant for signs of pests, such as small holes in the leaves or white powder on the buds.
If you do see any pests, treat the plant with an insecticide as soon as possible. Neem oil is not just a fungicide, but also an effective insecticide against many common garden pests, including aphids. You can find it at most garden stores or online.
Environmental Conditions
Finally, environmental conditions can also cause carnation buds to turn brown. If the plant is not getting enough light, the buds will often turn brown and fall off. Carnations also need a certain amount of humidity to thrive, so too much or too little humidity can also cause bud browning.
To prevent this, make sure that your carnation plant is getting enough light. If you are growing the plant indoors, place it near a sunny window. You should also try to maintain a relative humidity of 40-50% around the plant. This can be done by using a humidifier or placing the pot on a tray of pebbles and water.
Should I Prune Brown Carnation Buds?
Yes, there are a few reasons why you should prune brown carnation buds. First, it will help to prevent the spread of any diseases or pests that might be causing the problem. Second, it will encourage the plant to produce more flowers. Finally, it will improve the overall appearance of the plant.
To prune brown carnation buds, simply cut them off at the base of the bud. You can also remove any leaves that are affected by diseases or pests. Make sure to sterilize your pruning shears before and after use to prevent the spread of any problems.
Conclusion
In conclusion, there are a few reasons why your carnation buds might be turning brown. These include fungal diseases, pests, and environmental conditions. You can prevent these problems by taking some simple precautions, such as not overwatering the plant and keeping the area around it clean.
If you do see any brown buds, make sure to prune them off so that the plant can continue to produce healthy flowers. Thanks for reading! I hope this blog post has helped you to understand why your carnation buds might be turning brown and how to fix the problem.
By understanding the reasons why carnation buds turn brown, you can take steps to prevent it from happening. If you are having trouble with your carnation plant, try one of the solutions listed above. With a little care, you should be able to enjoy those pretty flowers in no time!
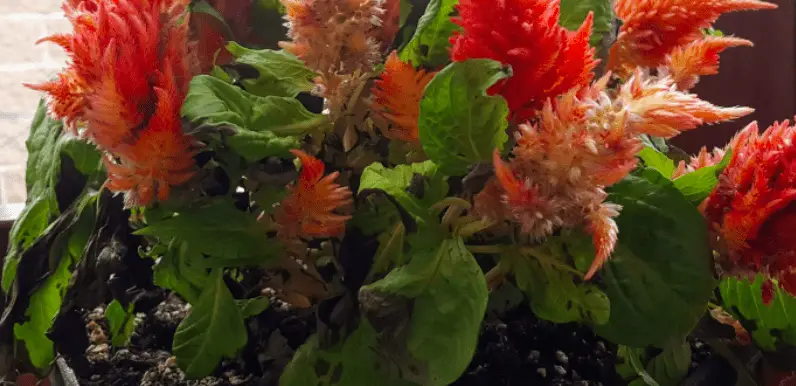
If you’ve been growing celosia plants in your garden, you may have noticed that some of the leaves have holes in them. This can be quite frustrating, as it can cause the plant to look unhealthy and unattractive. In this blog post, we will discuss the reasons why this happens and provide solutions to help correct the problem.
Why Are There Holes in My Celosia Leaves?
Celosia leaves are usually caused by pests attacking the plant. The most common pests that attack celosia plants are caterpillars, aphids, and whiteflies. These pests will feed on the leaves of the plant, causing them to become damaged and eventually die.
If you notice holes in your celosia leaves, it is important to inspect the plant carefully for signs of these pests. They are likely hiding on the underside of the leaves or in the soil around the plant.
How to Treat Celosia Leaves with Holes?
It’s important to get rid of the pests ASAP. Big pests can be removed by hand, but for smaller pests like aphids and whiteflies, you’ll need to use an insecticide. Be sure to follow the directions on the label carefully.
Neem oil is my favorite organic insecticide. You can find it at most garden stores or online. It is made from the neem tree, won’t affect your plants, will kill pests, and is safe for humans and pets.
Simply mix the neem oil with water in a spray bottle and apply it to your celosia plants. Be sure to coat the underside of the leaves, as that is where most pests hide. Apply the mixture every few days until you no longer see any pests on your plant.
Once the pests are gone, you can focus on repairing the damage they’ve done to the leaves. For small holes, simply trim off the damaged part of the leaf. Pruning is not always necessary, but if more than half of the leaf is damaged, it’s best just to remove it.
How to Keep Pests Away From Celosia Leaves?
The key is to prevent any pests from getting to your celosia plants in the first place.
You can do this by keeping your garden clean and free of debris. This will remove any hiding places for pests. Simply rake up any leaves or dead plants that have fallen on the ground and dispose of them.
It’s also important to inspect your celosia plants regularly for signs of pests. If you catch them early, you can remove them before they cause too much damage.
You can also use row covers to protect your plants from pests. Row covers are made of a lightweight material that pests cannot penetrate. They will allow sunlight and water to reach your plants while keeping pests out.
What Else Causes Holes in Celosia Leaves?
There are a few other reasons why your celosia leaves may have holes:
Animals
Animals, like deer and rabbits, can also cause holes in celosia leaves. If you live in an area with these animals, it’s important to take precautions to protect your plants.
You can do this by fencing in your garden or using repellents. Be sure to read the label carefully before applying any repellent, as some of them can be harmful to plants. An automatic sprinkler is a great way to keep deer away as well.
Disease
Holes in celosia leaves can also be caused by disease. The most common diseases that affect celosia plants are powdery mildew and root rot.
Powdery mildew is a white powdery fungus that appears on the leaves of the plant. It can be controlled with fungicides, but it’s best to prevent it in the first place by keeping your plants healthy.
Using Neem oil is a great way to prevent powdery mildew. Simply mix it with water and spray it on your plants every few weeks. This will kill any fungal spores that are on the leaves and prevent them from spreading.
Weather
Holes in celosia leaves can also be caused by weather conditions, like high winds or heavy rains. These conditions can cause the leaves to tear or become damaged.
If you live in an area with these conditions, it’s important to take precautions to protect your plants. You can do this by staking them or using row covers.
Row covers are a great way to protect your plants from the weather. They are made of a lightweight material that will allow sunlight and water to reach your plants while protecting them from the wind and rain.
Should I Prune Celosia Leaves with Holes?
Pruning is not always necessary, but if more than half of the leaf is damaged, it’s best just to remove it. This will prevent any disease from spreading and allow your plant to focus its energy on new growth.
To prune celosia leaves, simply cut off the damaged part of the leaf with a sharp knife or scissors. Be sure to disinfect your tools before and after use to prevent the spread of disease.
Conclusion
If you have celosia leaves with holes, don’t worry! There are a few reasons why this may happen and there are several solutions to help correct the problem. Be sure to check your plants regularly for pests, disease, and damage from the weather.
Also, dismiss Neem oil at your own risk. This natural fungicide has been used for centuries to prevent and treat powdery mildew. Simply mix it with water and spray it on your plants every few weeks. This will kill any fungal spores that are on the leaves and prevent them from spreading.
If you prune your celosia plants, be sure to do so carefully to avoid damaging the plant. With a little care and attention, your celosia plants will be healthy and thriving in no time! Thanks for reading!
Do you have a garden and are looking for plants that slugs won’t eat? Lamb’s ears might be the plant for you! This post will explore whether or not lamb’s ears are slug resistant, as well as some of the other benefits of this plant.
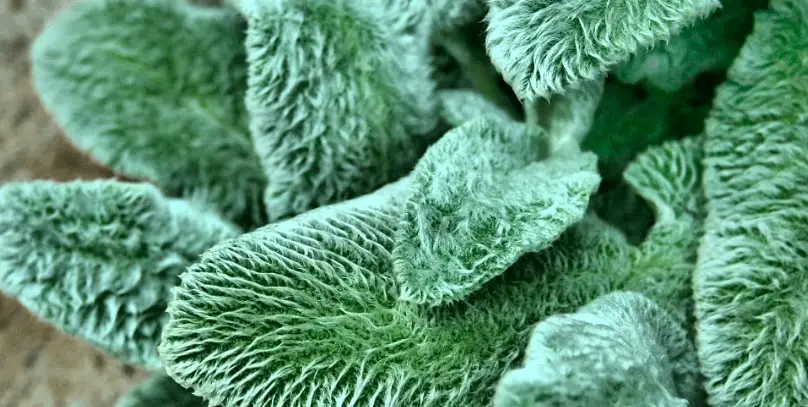
Are Lamb’s Ears Slug Resistant?
Yes, lamb’s ears are slug resistant! This is because the leaves of the plant are covered in tiny hairs, which makes them unappealing to slugs. So if you’re looking for a plant that won’t be eaten by slugs, lamb’s ears are a good choice.
You can safely plant lamb’s ears in your garden without worrying that they will be eaten by slugs. In fact, you can use them to block out other plants that slugs might be interested in eating. The slugs won’t want to cross the lamb’s ears to get to the other plants, so they’ll leave them alone.
So if you’re looking for a slug-resistant plant that is also low-maintenance, lamb’s ears might be the right choice for you! Give them a try in your garden and see how they do. You might be surprised at how well they perform.
Can I Make a Slug-Resistant Bed with Lamb’s Ears?
Yes, you can make a slug-resistant bed with lamb’s ears! A good idea is to plant them around the perimeter of your garden. This will create a barrier that slugs will not want to cross, even if there are other plants on the other side that they would be interested in eating.
Lamb’s ears are a great choice for a slug-resistant plant because they are low-maintenance and require little care. They are also drought tolerant, so you don’t have to worry about them during periods of dry weather.
Another good idea is to plant lamb’s ears in containers. This way, you can move them around as needed and keep the slugs away from your other plants. If you have a problem with slugs in your garden, planting lamb’s ears can help solve it!
Other Ways to Keep Slugs Out of the Garden
In addition to planting lamb’s ears, there are other ways to keep slugs out of the garden. Let’s take a look:
1. Slug Barrier
One way to keep slugs out of the garden is to create a barrier around it so that they can’t get in. This can be done with a fence, a row of rocks, or anything else that will block their access.
Slugs are creatures of habit and will often return to the same spot day after day. So if you have a problem with them in one area, creating a barrier can help keep them out. There are many different types of slug barriers that you can use, so find one that works best for your garden and situation.
2. Slug Pellets
Barriers can be an effective way to keep slugs out of the garden, but they won’t work if there are already slugs inside the garden. If you have a problem with slugs, you might need to use a product like slug pellets.
Slug pellets are poisonous to slugs and will kill them if they eat them. They are available at most garden stores and can be used to help control the slug population in your garden.
The Slug & Snail Bait has earned a lot of positive feedback from me and the hundreds of other gardeners I’ve spoken with over the years.
Simply apply the pellets around the base of plants or in areas where slugs are commonly found. Be sure to follow the instructions on the package, as too much bait can be harmful to plants and the environment.
3. Handpicking
If you have a small garden, handpicking slugs can be an effective way to control them. This involves going out into the garden at night with a flashlight and picking the slugs off of plants.
Handpicking is most effective when done on a regular basis. So if you see a few slugs, be sure to go out and pick them off right away. This will help keep their population under control.
These are just a few of the many ways to keep slugs out of the garden. Find the method that works best for you and your garden, and stick with it. With a little effort, you can keep these critters under control!
Conclusion
Slugs can be a major nuisance in the garden, eating away at your plants and leaving behind unsightly trails. But with a few simple tricks, you can keep them at bay and enjoy a slug-free garden.
So if you’re looking for an easy way to protect your plants, try planting lamb’s ears around the perimeter of your garden. And don’t forget to check out our other tips for keeping slugs out of the garden!
Do you have any other tips for keeping slugs out of the garden? Share them with us in the comments below.