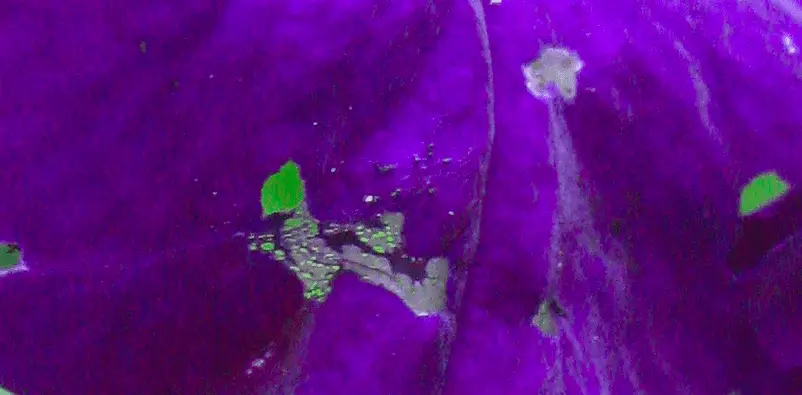
If you’ve ever grown petunias, you may have noticed that sometimes the flowers develop holes. This can be quite frustrating for gardeners, as it can make the flowers look unsightly. In this blog post, we will explore some of the reasons why petunia flowers develop holes and suggest some solutions to fix the problem!
Why Are There Holes in My Petunia Flowers?
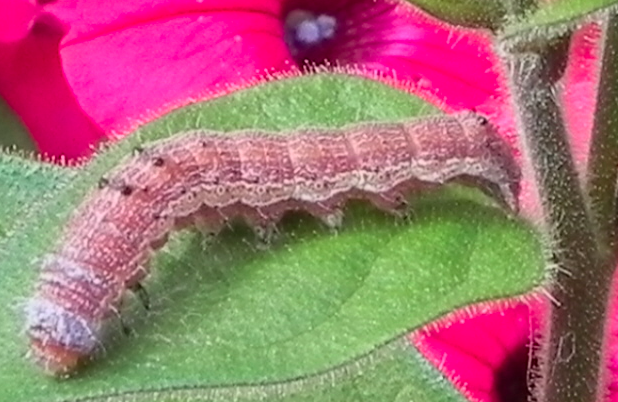
Holes in petunia flowers are usually caused by Tobacco budworms, also known as Petunia budworms. These small, green caterpillars are attracted to petunia flowers and feed on the buds, resulting in the formation of holes. Budworms can be controlled by spraying the plants with an insecticide or by picking them off by hand.
Budworms are just one of the many pests that can cause problems for petunias. Other common pests include aphids, whiteflies, and thrips. Take a closer look at your petunia flowers to see if you can spot any of these pests.
They may be hard to find, so look for signs of damage such as chewed leaves or stunted growth. Budworms appear in late summer and early fall, so be on the lookout for them during these months.
How to Treat Petunia Flowers with Holes?
If you find any pests on your petunias, you can control them by spraying the plants with an insecticide or by picking them off by hand. You can also try using traps or barriers to keep pests away from your plants.
My favorite way to get rid of budworms is through the use of neem oil (Amazon link), which is a natural insecticide made from the seeds of the neem tree. Neem oil works by disrupting the life cycle of insects, preventing them from reproducing. It is also effective against other common petunia pests such as aphids and whiteflies.
To use neem oil, mix it with water according to the instructions on the bottle and spray it on your plants. Be sure to spray in the evening, as neem oil can damage leaves if exposed to direct sunlight. Keep applying the spray every few days until the pests are gone.
If you don’t want to use neem oil, you can also try using horticultural oil or insecticidal soap. These products work in a similar way to neem oil, but they may be less effective against certain types of pests.
How to Keep Pests Away From Petunia Flowers?
Preven​tion is always the best cure when it comes to pests. There are a few things you can do to keep pests away from your petunia flowers.
Keep the area clean: Pests are attracted to places that are dirty and cluttered. Keep your garden clean and free of debris to make it less inviting to pests.
Remove affected plants: If you find a petunia plant that is infested with pests, remove it from the garden immediately. This will help prevent the spread of pests to other plants.
Use traps: You can buy special traps that are designed to catch specific pests. For example, yellow sticky traps can be used to catch whiteflies. This will help reduce the population of pests in your garden.
Plant petunias early: Planting petunias early in the season will give them a head start on growth and make them less susceptible to damage from pests.
Use barriers: You can also use physical barriers to keep pests away from your petunias. For example, you can place a piece of cheesecloth over the plant to prevent budworms from getting to the flowers.
Petunias are a beautiful addition to any garden, but they can be susceptible to pests. By following these tips, you can keep your petunias looking their best all season long!
The Tobacco Budworm
What Else Causes Holes in Petunia Flowers?
There are a few other reasons why your lantana leaves might have holes.
Animals
If you notice that the holes in your petunia flowers are chewed, then it is likely that an animal is responsible. Animals such as rabbits, deer, and groundhogs love to eat petunias. To prevent animals from eating your plants, you can try using a fence or deterrent spray.
Animals may even accidentally trample your petunias, which can cause the stems to break and the flowers to fall off. If you notice that your petunias have been trampled, gently remove the damaged flowers and leaves. The plant will eventually recover and produce new growth.
Disease
Another possibility is that your petunia flowers have been affected by a disease. Some common diseases that affect petunias include powdery mildew and botrytis. These diseases can cause the leaves and flowers of the plant to turn brown and die.
Weather
High winds cand hail can cause damage to petunia flowers. If you live in an area that is prone to severe weather, you can try planting your petunias in a protected area. Using fencing or other physical barriers can also help to protect your plants.
As you can see, there are a few different reasons why your petunia flowers might have holes. By troubleshooting the problem, you can find the cause and take steps to fix it!
Should I Prune Petunia Flowers with Holes?
There is usually no need to prune petunia flowers with holes, as the plant will eventually recover on its own. If the damage is severe, you can remove any dead or dying leaves and flowers. This will help the plant to focus its energy on new growth.
if you do decide to prune your petunias, be sure to use sharp, clean shears. This will help to prevent the spread of disease. Sterilizing your shears with rubbing alcohol is also a good idea.
Conclusion
Holes in petunia flowers can be caused by a variety of factors, including pests, disease, and weather. In most cases, the plant the Tobacco budworm is the culprit. If you find that your petunias have been damaged by pests, you can take steps to prevent the problem from happening again in the future.
Should you decide to prune your petunias, be sure to use sharp, clean shears. By following these tips, you can keep your petunias looking their best all season long!
Do you have any tips for preventing or fixing holes in petunia flowers? Share your thoughts in the comments below!
Do you have a garden? If so, chances are you’ve planted petunias at some point. Petunias are one of the most popular flowers because they are easy to grow and come in a variety of colors. But did you know that petunias can be slug resistant? In this blog post, we will discuss how to make your petunia plants slug resistant and keep those slugs away!
Are Petunias Slug Resistant?
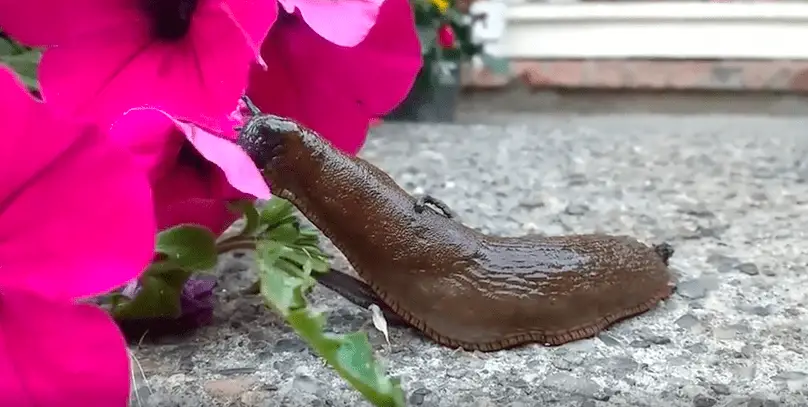
No, petunias are not slug resistant. This means they will happily munch on your petunia plants if given the chance. They love eating the leaves and flowers, which can cause the plant to become stunted or even die.
But don’t worry, there are a few things you can do to make your petunias less appealing to slugs. I will share with you some tips on how to do this.
Can I Make a Slug-Resistant Bed with Petunias?
No, you cannot make a slug-resistant bed with petunias. This is a recipe for disaster as the slugs will simply eat all of the petunias in the bed.
What you can do, however, is make a slug-resistant border around your petunia bed. This will keep the slugs out of the bed and away from your plants. I recommend planting slug-resistant lamb’s ear plants to create a border. These plants have dense, furry leaves that slugs don’t like to eat.
How to Protect Petunias from Slugs?
There are a few things you can do to protect your petunias from slugs. I will share with you some of the best methods for protecting your plants.
1. Slug Barrier
One of the best ways to protect your petunias from slugs is to create a barrier around the plants. You can do this by placing objects such as rocks, boards, or eggshells around the base of the plant. The barrier will prevent the slugs from getting to the plant and eating it.
Make sure to check the barrier regularly and remove any slugs that may have made it through. Some slugs are very good at climbing, so don’t underestimate them!
2. Slug Pellets
Another way to protect your petunias from slugs is to use slug pellets. Slug pellets are poisonous to slugs and will kill them if they eat them.
To use slug pellets, simply sprinkle them around the base of the plant. Make sure to follow the instructions on the package carefully, as too much can be harmful to your plants.
This Slug & Snail Bait is another one of those solutions that have received rave reviews from me and the hundreds of other gardeners I’ve spoken to over the years. It’s cost-effective and works well.
3. Handpicking
One of the simplest but most effective ways to protect your petunias from slugs is to handpick them off of the plant. This may seem like a lot of work, but it’s actually very easy to do.
All you need to do is check your plants regularly and remove any slugs you see. I recommend doing this in the evening or after rainfall, as this is when slugs are most active.
Be sure to dispose of the slugs properly, so they don’t end up back on your plants. I recommend placing them in a bucket of soapy water to get rid of them for good.
Conclusion
As you can see, petunias are not slug resistant. But there are a few things you can do to protect your plants from these pesky creatures. I recommend using a slug barrier, slug pellets, or handpicking as the most effective methods of protection.
It’s also not a good idea to try and make a slug-resistant bed with petunias. This will only end in disaster! Do you have any tips on how to protect petunias from slugs? Share them with us in the comments below.
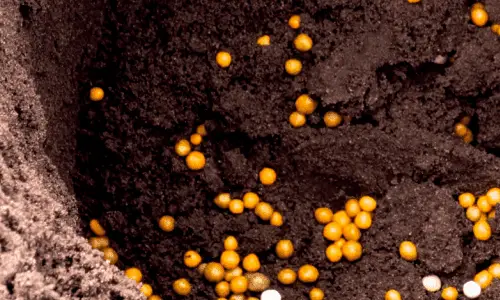
Sometimes we can see strange objects in our soil. From insects to mold, there are many things that can end up in our plant pots. However, one of the most curious things that can be found in soil is an orange ball.
What are they and how did they get there? In this post, we will investigate the strange case of orange balls in soil. Let’s find out…
What Are The Orange Balls in Soil?
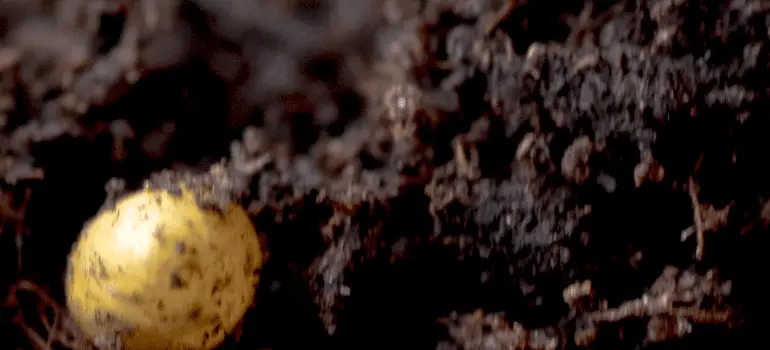
It’s likely that the orange balls in your soils are Osmocote fertilizer balls. Osmocote is a type of slow-release fertilizer that is often used in gardens and potted plants. The balls are made of clay and contain nutrients that are released over time, providing a steady supply of nutrition for your plants.
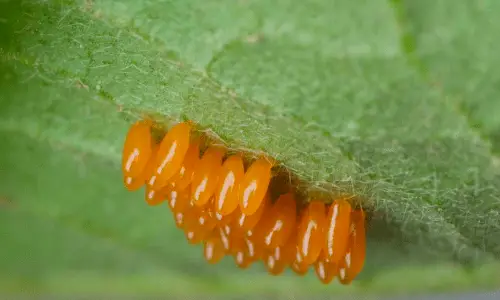
However, if the orange balls appeared overnight, it’s unlikely that they are Osmocote fertilizer balls. In this case, the balls may be eggs laid by pests. One type of pest that is known to lay eggs in plant soil is the beetle. If you suspect that the orange balls are beetle eggs, it’s best to remove them from your soil immediately.
So, how do you know which one it is? Well, eggs will be grouped together in clusters, whereas Osmocote fertilizer balls will be spread evenly throughout the soil. If you’re still not sure, try gently squeezing one of the balls. If it’s an egg, it will break open and release a larva. If it’s an Osmocote fertilizer ball, it will be firm to the touch.
How Did They Get There?
If the orange balls are Osmocote fertilizer balls, they likely got there through your potting mix. Osmocote is often added to potting mixes to provide nutrients for plants. If you didn’t add the fertilizer balls yourself, it’s possible that they were already in the potting mix when you purchased them.
On the other hand, if the orange balls are beetle eggs, they may have been laid by adult beetles that flew or crawled into your garden. Once the eggs hatch, the larvae will begin to feed on your plants. To prevent this from happening, it’s important to remove the eggs from your soil as soon as you see them.
Osmocote Balls
What is Osmocote?
You may be wondering what this fertilizer is and whether you should remove it from your soil. Osmocote is a type of slow-release fertilizer that is made of clay and contains nutrients that are released over time. It’s often used in gardens and potted plants to provide a steady supply of nutrition for plants.
If you have Osmocote fertilizer in your soil, there’s no need to remove it. The balls will slowly release nutrients into the soil, providing your plants with a steady supply of nutrition.
If your plant came from a nursery or garden center, it’s likely that they added Osmocote fertilizer to the potting mix. They do this to provide nutrients for plants and to help them grow while they sit on the shelf of the store. It makes their job a lot easier and it’s one less thing you have to worry about when you’re planting your new plants.
However, if you don’t want to use Osmocote fertilizer, you can remove the balls from your soil. To do this, simply dig up the balls and throw them away. You can also add a new potting mix to your garden or pot to replace the Osmocote fertilizer.
I’m a big fan of fish emulsion fertilizer, so I’ve previously removed the Osmocote balls from my soil and replaced them with this fertilizer. It’s an organic fertilizer made from fish waste, so it’s safe for plants and people. Plus, it provides nutrients for plants and helps them to grow quickly.
How to Remove Orange Eggs from Soil?
If you think the orange balls in your soil are beetle eggs, it’s important to remove them as soon as possible. This can be done by hand or with a small shovel. Once the eggs have been removed, it’s important to dispose of them in a sealed bag so that the larvae cannot escape and infest your garden.
Beetle Eggs
Be sure to check that every egg has been removed, as even a single egg can hatch and cause problems. You may also need to check the leaves of your plants for eggs, as beetles often lay their eggs on leaves as well as in the soil.
Neem oil is a natural insecticide that can be used to prevent and control infestations. This oil is made from the seeds of the neem tree and is safe to use around children and pets. To use neem oil, mix it with water and spray it on your plants. Be sure to follow the instructions on the label carefully.
If you see any larvae or adult beetles, be sure to remove them immediately. You can also take steps to prevent pests from entering your garden in the first place. This includes keeping your garden clean and free of debris, as well as using insecticidal soap or other products to keep pests at bay.
Conclusion
So, there you have it! The mystery of the orange balls in the soil has been solved. Now that you know what they are and how they got there, you can rest assured that they pose no threat to your plants.
To sum up, the orange balls in your soil could be Osmocote fertilizer balls or beetle eggs. Depending on which one it is, you may or may not want to remove them from your soil. If you do remove the orange balls, be sure to dispose of them properly so that the larvae cannot escape and infest your garden.
We hope this post has helped you learn more about the strange case of orange balls in soil. Be sure to check back for more updates on this curious phenomenon!
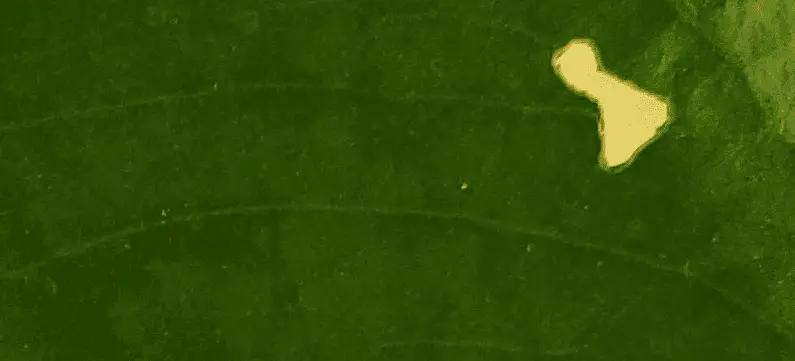
Do you have a monstera plant with tiny holes in the leaves? If so, don’t worry, you’re not alone. This is a common problem that many people experience with this type of plant. In this blog post, we will discuss the reasons why your monstera may be developing these tiny holes and how to solve the problem.
Why Are There Tiny Holes in My Monstera Leaves?
It’s highly likely that the tiny holes in your monstera leaves are due to pests feeding on the plant.The most common pests that cause this problem are aphids, mealybugs, and spider mites. These pests suck the sap out of the leaves, which eventually leads to small holes forming in the leaves.
If you suspect that your plant has a pest problem, it’s important to take action as soon as possible. The longer you wait, the more damage the pests will cause.
Take a closer look at your plant and see if you can spot any of these pests. They are likely hiding in the crevices of the leaves or in the soil where you are less likely to notice them.
Spider mites are particularly difficult to spot because they are so small. If you see any webbing on your plant, it’s a good indication that spider mites are present. Aphids are yellow-white or green-colored insects that are usually found in groups on the undersides of leaves. Mealybugs are small, white insects that tend to congregate around stems and leaves.
How to Treat Monstera Leaves with Tiny Holes?
Before your monstera can get back to its healthy self, you need to get rid of the pests that are causing the problem.
There are a few different ways you can do this. You can use chemical pesticides, but these can be harmful to both your plant and the environment. If possible, it’s always best to go with a more natural solution.
I’ve successfully used neem oil (Amazon link) on my plants to get rid of pests. Neem oil is a natural substance that comes from the neem tree. It’s safe for both humans and animals, and it’s very effective at killing pests.
To use neem oil, mix it with water according to the instructions on the bottle. Then, use a spray bottle to apply it to the affected areas of your plant. Be sure to get the underside of the leaves where the pests are likely hiding. You’ll need to reapply neem oil every few days until the pests are gone.
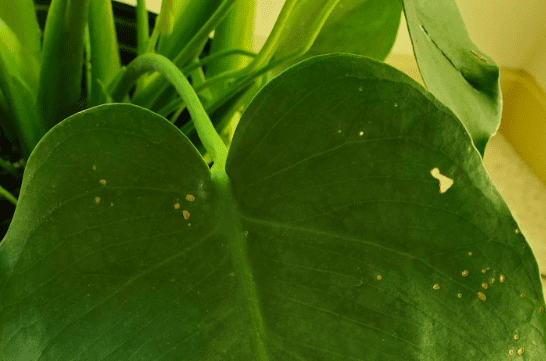
Monstera With Tiny Holes
How to Keep Pests Away From Monstera Leaves?
To prevent pests from attacking your monstera in the future, there are a few things you can do.
First, make sure your plant is healthy. A strong plant is less likely to be attacked by pests than a weak one. This means giving your plant the right amount of water, light, and nutrients. Keep an eye on your plant and address any problems that arise as soon as possible.
Second, keep your plant clean. Pests are attracted to dirty plants. Be sure to wipe down the leaves of your plant regularly and remove any dead leaves or debris from the pot to stop pests from taking up residence.
Third, consider using a natural pesticide like neem oil on a regular basis. This will help keep pests away and give your plant an extra layer of protection if a stray pest does happen to find its way inside.
By following these tips, you can keep your monstera plant healthy and free of pests. Tiny holes in the leaves will be a thing of the past!
What Else Causes Holes in Monstera Leaves?
We’ve discussed the most probable cause of holes in monstera leaves, but it’s not the only possibility:
Disease
Like nearly all plants, monstera plants are susceptible to disease. This includes fungal diseases like powdery mildew and leaf spot, as well as bacterial diseases like bacterial blight.
If you think your plant might be suffering from a disease, it’s important to take action right away. Many diseases can be treated if they’re caught early enough. However, if left untreated, they can quickly kill your plant.
To treat a disease, you’ll need to use a fungicide or bactericide. These can be found at your local garden center or online. Be sure to follow the instructions on the label carefully to ensure that you’re using the product correctly. Again, neem oil is great for this at it’s a fungicide as well as a pesticide.
Animals
If you have pets or other animals in your home, they could be the culprits behind the holes in your monstera leaves.
Cats, dogs, and rodents are all known to nibble on plants from time to time. If you think your pet might be responsible for the holes in your plant, there are a few things you can do.
First, try to keep your plant out of reach of your pet. If that’s not possible, you can try spraying the leaves with a mixture of water and vinegar. The vinegar will deter your pet from nibbling on the leaves, but it won’t harm them if they happen to take a taste.
It’s not necessary to prune monstera leaves with holes, but you can if you want to. If the holes are small and don’t affect the overall appearance of the plant, you can simply leave them be.
However, if the holes are large or numerous, you may want to consider pruning the affected leaves. This will help your plant look its best and prevent the holes from getting any worse.
It’s also a good idea to prune if the holes are from disease as this will help prevent the disease from spreading to other parts of the plant or to other plants.
To prune your plant, simply cut off the affected leaves at the base of the stem. Be sure to use sharp, clean shears to avoid damaging the plant. After you’ve pruned the leaves, it’s important to dispose of them properly. Don’t leave them in the pot or on the ground around your plant, as this could attract pests.
Conclusion
By far the most common cause of holes in monstera leaves is pests. However, there are a few other possible causes, including disease and animals.
The best way to prevent holes from appearing in the first place is to keep your plant healthy and free of pests. If you do find holes in your plant’s leaves, you can try treating the problem yourself or you can take your plant to a professional for help.
In most cases, you won’t need to prune monstera leaves with holes. However, if the holes are large or numerous, you may want to consider doing so. Pruning will help your plant look its best and prevent the problem from getting worse.
When it comes to plants, there’s always something to learn. We hope this article has taught you something new about monstera plants and the holes that can appear in their leaves. Thanks for reading!
Black houseplants are the perfect way to add a little bit of drama and contrast to your home. If you’re trying for an edgy look, black is one option that will not steer you wrong.
In this post, we’re going to take a look at 15 varieties of black houseplants that are sure to set the mood…
15 Black Houseplants
In this collection, you’ll discover some beautiful black beauties that will complement your decor. The exciting news is that you don’t need to be a gardener to take care of these plants – all you need is a desire to learn.
1. Alocasia Reginula / Black Velvet
Also known as the Little Queen, this plant is exotic and elegant. With silver veins that shine against a dark background, it’s a good way to add mystery to any room.
The plant is native to Southeast Asia and is a member of the Araceae family. It is quite rare to find in the wild, but popular in homes across the globe.
It is called black velvet because of the velvety appearance of its large, heart-shaped leaves. These leaves are thick and tend to grow to 4-6 inches in length.
The plant is tolerant of low light conditions, loves humidity, and should be kept in course soil. Alocasias are prone to root rot, so being careful with watering is important.
2.Canna Lily / Tropicanna Black
It’s a bold choice, but one that will draw eyes to it. The Canna Lily is a tropical plant that gives orange blooms against a dark backdrop of black foliage.
It’s best to grow this plant outdoors in fertile soil that receives direct sunlight. It is also possible to grow it indoors, but you will need a lot of time and dedication.
The flowers are large and beautiful – with the plant able to grow 1m in width and 1.5m in height! This plant is considered a perennial, so once you plant it – you don’t have to worry about replanting.
3. Colocasia Esculenta / Black Magic
Known as black magic and elephant ear, the colocasia is a tropical plant really commands attention. If you’re looking for an attention-grabbing, dramatic flair in your garden, this is definitely the plant of choice.
Colocasia is typically found growing in bogs, swamps, or even the margins of your water garden. It will also do well as long as it has average soil to grow with!
As tropical plants, they love the summer and don’t thrive in areas below zone nine. This means that those who live in colder climates may have issues with growing this plant.
4.Zamioculcas Zamiifolia / ZZ Raven
The ZZ raven is a plant that offers a lot of variety to the home. It’s got unique, waxy foliage and can be found in four different colors – green, bronze, silver, or black!
It is considered an indoor houseplant because it does not need direct sunlight. In fact, it prefers low light conditions which make them perfect for spaces with no natural light, like offices.
Offering a beautiful, deep green color to any room, they are also easy enough for beginners to take care of. Their thick trunks offer structure and style that will last throughout the years.
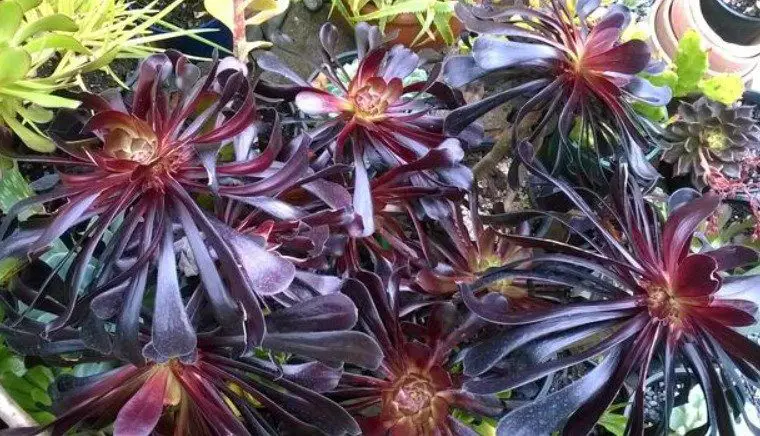
5.Aeonium Arboreum / Zwartkop
The zwartkop is a succulent shrub that has a lot of depth to it. It’s got dark, thick leaves, but with a green center.
It will do best when planted outdoors with plenty of light exposure – making them perfect for the sunroom or garden. If you’re looking to add an accent plant indoors, they’ll need bright lighting but indirect.
The plant is native to many areas in the Canary Islands, so it’s important that they are kept warm – between 60-80 degrees Fahrenheit.
6.Strobilanthes Dyeriana / Persian Shield
The Persian shield is a stunning plant with an interesting pattern. The leaves are dark purple, but have green-colored veins running through them.
Its foliage offers both structure and color to any room it’s placed in! This makes persian shields great for entryways or places where you want guests to stop and stay awhile.
They grow best when kept outdoors, in full sunlight. They also need water regularly, so it’s important to keep their soil moist at all times!
7. Calathea Rosepicta “Dottie” / Rose Painted Calathea
The rose-painted calathea is a beautiful, eye-catching plant that will add color to any room! It’s got large leaves with pink veins running through them.
Their bold colors make it a perfect accent piece for your kitchen or sunroom – where you can enjoy the vibrancy of their foliage on a daily basis.
The native habitat for Calathea roseopicta is the rainforests of South America. As such, give them warm temperatures and indirect light (like what they would receive on the forest floor).
It would look great in any room you want to add some color – like the bathroom or kitchen where the purple will pop but not be overbearing. It’s also got a unique look that looks great as an accent piece.
They are commonly grown outside, but can also do well indoors. Just be sure to keep them in indirect sunlight and allow the soil to dry in between waterings.
9.Sinocrassula Yunnanensis / Chinese Jade
The Chinese jade is a succulent plant that has dark, almost black leaves with green accents. It’s got an interesting pattern and looks great as a centerpiece on your table!
The Chinese jade does best when kept outdoors where it can enjoy full sunlight exposure – making them perfect for patios, decks, or even the garden.
They are drought-resistant, meaning you can enjoy them in your home without worrying about having to water them every day.
10.Echeveria “Black Prince” / Black Hens And Chicks
The black hen and chicks plant is a succulent that’s got dark leaves with green accents. The dense, thick foliage gives it an interesting look!
It grows best when kept outdoors – in full sunlight exposure where the temperature hovers between 60-80 degrees Fahrenheit. It can also grow indoors, just be sure it’s placed in bright, indirect light.
11.Haworthiopsis Nigra / Haworthia Nigra
The haworthia nigra is a succulent that’s got thin, dark leaves with green accents. They look great as a centerpiece on your table or in the window where they can soak up all that natural light!
They are native to South Africa, so they enjoy high temperatures – between 60-85 degrees Fahrenheit. They can also thrive indoors, just be sure to keep them in bright light that’s indirect.
12. Peperomia Metallica / Red Tree
The red tree rubber plant is a unique, ornamental houseplant that offers thick leaves with red veins. They’re perfect for adding pops of color to rooms or areas that don’t get much light.
They like high temperatures between 65-75 degrees Fahrenheit and indirect sunlight – making them great as an indoor plant! Just be sure they’re in a bright, sunny room where they can soak up all that natural light.
13.Viola Tricolor (Var. Hortensis) / Black Pansies
The black pansies are a unique flower that’s almost entirely black in color. They look great in gardens or as an accent piece indoors.
Pansies are incredibly hardy plants, perfect for beginner gardeners! They grow in most conditions and enjoy indirect sunlight. In fact, they even continue blooming through the winter frost!
14.Peperomia Caperata / Burgundy Ripple
The burgundy ripple is a succulent that has thick, dark leaves with green and red veins. They look great as an accent piece on your desk or coffee table!
They like warm temperatures between 65-75 degrees Fahrenheit and bright light – making them perfect for indoor growing. Just be sure to keep the soil moist but never over water.
15. Lithops / Living Stone
The living stone is a unique little succulent that’s almost entirely gray-brown with just one green spot on the top! They look great as an accent piece or in garden pots.
Lithops are small, succulent plants with only two leaves. They rarely get higher than an inch (2.5 cm.) off of the ground and can often be found growing in cracks or crevices.
How Do Black Plants Get Their Color?
Black plants have a special pigment that causes their dark shades. This chemical is called anthrocyanin, and it gives black flowers their famously intense coloration of blue or purple-hued leaves and petals.
This pigment is extremely helpful for plants that grow in hot climates. By absorbing higher levels of light, the pigment shields the plant from damage and overheating.
Black plants still contain chlorophyl, but it is masked by anthrocyanin. Although the two pigments are color-coded to absorb different wavelengths of light, they both do their part for photosynthesis.
Are Black Houseplants Actually Black?
No, not all plants with dark foliage are actually black. There is a big difference between “black” and “purple,” “blue,” or even “red-tinged.
However, genetic engineering is being used to create black foliage in more plant varieties. This technology is still a work in progress, but some of the newest cultivars are already available for purchase.
Normally, leaves that naturally grow as dark colors have adapted to absorb intense sunlight and heat from their regions. In order to thrive under those conditions – they must be able to protect themselves from overheating.
Are Black Houseplants Expensive?
It depends on the type of plant you are purchasing. Some of the most expensive black houseplants are those that have been genetically engineered to obtain their dark colors.
These new cultivars may also be protected by patent, so they cannot legally be reproduced without permission – which means it’s hard for them to trickle down into availability at your local nursery or garden center.
However, black plants like black velvet are available to buy from many places. These are naturally occurring, but they tend to have limited availability – usually only sold at certain times of the year.
Should I Buy a Black Houseplant?
Black plants are known for their striking, dramatic appearance. If you’re looking for a bold statement piece in your home – then this type of plant is an obvious choice!
However, keep in mind that the black foliage normally requires full sunlight to thrive and maintain its coloration. You’ll want to ensure it gets at least six hours per day for optimal growth.
So, you might want to avoid placing it in a room where there is only limited sunlight – unless you’re prepared for the plant to lose its deep coloration over time!
Conclusion
In conclusion, black houseplants are known for their intense coloration. However, not every black plant is actually “true” black – and the ones that tend to be unique varieties of existing plants.
These dark-colored specimens also need strong sunlight in order to maintain their coloring over time – so you’ll want to make sure your home provides them with enough of a “sunbath.”
Do you have any favorite black plants? Please feel free to share your thoughts with me. Personally, my favorite is the black velvet because it has a unique look that can be placed in any room in my house.