A lot of people garden for the love of it, and because they want to be able to enjoy the fruits (or vegetables) of their labor. There are a lot of plants that can be grown in a garden, but one of the most popular is the rose.
Roses come in many different colors and sizes, and there is a type of rose for everyone. One question that often comes up when gardening is what kind of fertilizer should be used on roses. In this blog post, we will explore whether or not tomato feed can be used on roses.
Can You Use Tomato Feed On Roses?
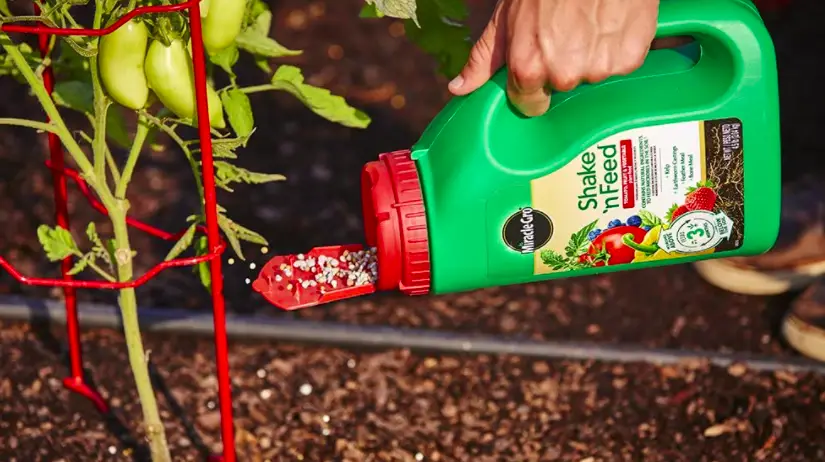
Yes, you can use tomato feed on roses. Tomato feed is high in potassium, which is essential for roses. Roses need potassium for a variety of reasons, including to develop strong roots, produce more blooms, and prevent disease.
Tomato feed can be used on all types of roses, including hybrid tea roses, floribunda roses, and climbing roses. If you are using tomato feed on roses, be sure to follow the instructions on the package.
Tomato feed is not the only fertilizer that can be used on roses. There are a variety of other fertilizers that can be used, including manure, compost, and bone meal. However, tomato feed is a good option if you are looking for a natural fertilizer that will give your roses the nutrients they need.
How Much Tomato Feed to Give Roses?
Take the recommended dosage of tomato feed and reduce it by 30% to 40%. For example, if the recommended dosage is ten tablespoons per ten gallons of water, you would use roughly six or seven tablespoons of feed.
This is because tomato feed is high in potassium and other nutrients, and you don’t want to over-fertilize your roses. In fact, it’s easy to accidentally over-fertilize roses because most people think more is better. But too much fertilizer can actually damage roses, so it’s important to be careful.
When Should You Use Tomato Feed on Roses?
If you have run out of rose fertilizer, or if you are looking for a natural option, tomato feed can be used as a one-off solution. This will provide your roses with enough nutrients to last them until their next feeding of rose fertilizer.
You can also use tomato feed as part of your regular fertilizer regime. For example, you could use it every two weeks or once a month. Just be sure to reduce the dosage, as we mentioned earlier.
The best type of fertilizer for planting roses is manure or compost. This will provide the plant with the nutrients it needs to get started. Once the plant is established, you can then start using tomato feed or other fertilizers.
How to Give Tomato Feed to Roses?
It’s not quite as simple as just chucking some tomato feed into your watering can and giving it to your roses. Let’s take a look at how to properly give tomato feed to roses:
Clear the surrounding area of any debris or companion plants
Read the label for dosage instructions and reduce. by 30%
Pour the mix equally around the base of the rose
Keep an eye on the plant to make sure it’s still healthy. The leaves start to yellow, you’ve applied too much tomato feed
Repeat the process every two weeks or as needed
Other Natural Rose Fertilizers
There are a variety of other fertilizers that you will likely find in your kitchen that can be used to fertilize roses. Here are a few other natural rose fertilizer options:
1) Coffee grounds
Coffee grounds are rich in nitrogen, which is essential for roses. Roses need nitrogen for growth, so coffee grounds are a great way to give them a boost. Just be sure not to use more than a handful per plant.
2) Eggshells
Eggshells are a good source of calcium, which is important for roses. Roses need calcium for strong roots and to prevent disease. Just crush up the eggshells and sprinkle them around the base of the plant.
3) Banana peels
Banana peels are rich in potassium, which is essential for roses. Roses need potassium for a variety of reasons, including to develop strong roots, produce more blooms, and prevent disease. Just bury the banana peels around the base of the plant.
As you can see, there are a variety of natural rose fertilizers that you can use. Tomato feed is just one option. Be sure to experiment and find the fertilizer that works best for your roses.
Conclusion
In conclusion, tomato feed can be used on roses. Be sure to reduce the dosage, as tomato feed is high in potassium and other nutrients. You can use tomato feed as a one-off solution or as part of your regular fertilizer regime. Just be sure to keep an eye on the plant to make sure it’s still healthy.
I hope you found this article helpful. If you have any questions, please feel free to leave a comment below. I will be happy to help. Happy gardening!
Rose care is a topic of much debate. Some people swear by a particular method, while others think that method is hogwash. What works for one type of rose may not work for another.
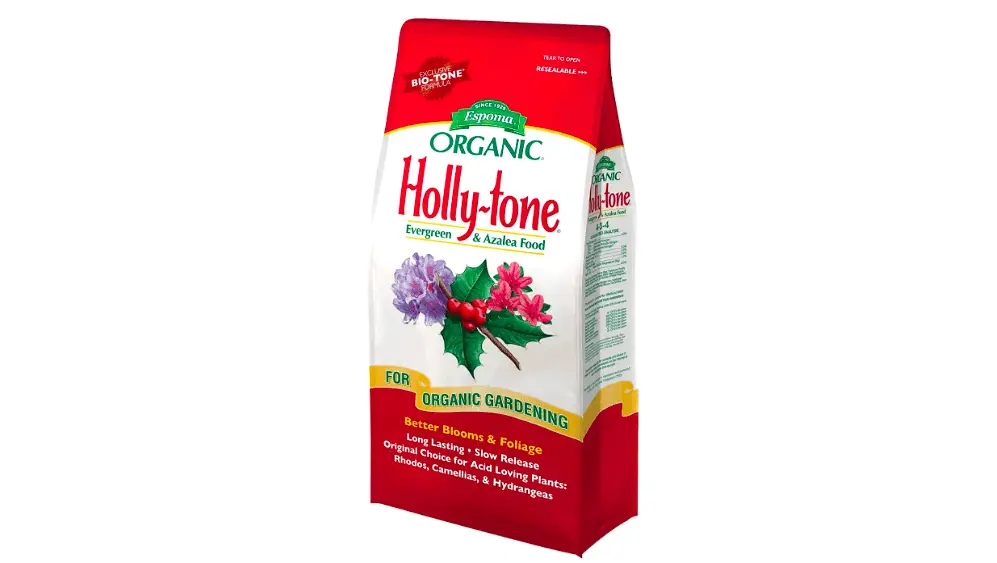
One common question that arises during rose care is whether or not to use holly-tone on roses. Holly tone is a natural fertilizer that is designed that acid-loving plants. But does it work for roses? Let’s take a closer look at this question and find an answer!
Can You Use Holly-Tone on Roses?
No, holly-tone is not recommended for use on roses. Roses are not acid-loving plants, and using holly-tone on them can actually do more harm than good. If you want to use natural fertilizer on your roses, look for one that is designed specifically for roses.
The only time where holly-tone would be beneficial is if your rose soil is too alkaline. In this case, holly-tone can help to lower the pH levels and make the soil more acidic.
Roses are vulnerable to fertilzer burn, so it is important to be careful when using any type of fertilizer on them. If you do choose to use holly-tone on your roses, be sure to follow the directions carefully and don’t overdo it. A little bit of holly-tone goes a long way!
In general, it is best to err on the side of caution when it comes to using fertilizer on roses. If you are unsure about whether or not a particular fertilizer is safe to use, consult with a rose care expert before applying it to your plants.
Holy-Tone vs Rose-Tone
There is little difference between holly-tone and rose-tone fertilizers. Both have the same core ingredients and provide the same benefits. The only real difference is that rose-tone is slightly more expensive.
If you are looking to save a few dollars, this holly-tone can be used on roses without any problems. Just be sure to use it sparingly and follow the directions carefully.
Conclusion
In conclusion, holly-tone is not recommended for use on roses unless the soil is too alkaline. If you do choose to use it, be sure to use it sparingly and follow the directions carefully. For the most part, rose-tone is the same as holly-tone but slightly more expensive.
I hope this article has helped to clear up any confusion about using holly-tone on roses. As always, if you have any further questions, consult with a rose care expert.
Do you have any experience using holly-tone on roses? We would love to hear from you in the comments below!
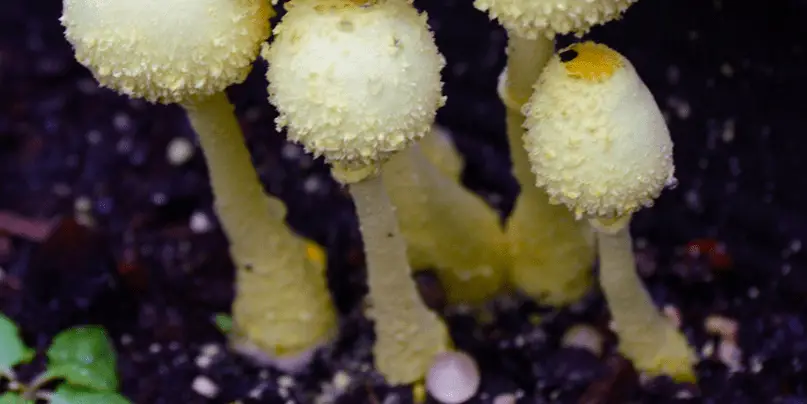
Mushrooms growing in the soil of pothos plants are a common occurrence. Many gardeners are curious about why this happens and what, if anything, they should do about it. In this blog post, we will explore the reasons why mushrooms grow in pothos soil and offer some tips on how to deal with them.
Why Are There Mushrooms in Pothos Soil?
There are mushrooms in pothos soil because the soil is fertile and contains organic matter that mushrooms need for food. In addition, pothos plants are often grown in pots or other containers that provide the right environment for mushrooms to thrive.
Mushrooms need darkness and moisture to grow, and the soil in pothos pots is often dark and moist. The lack of sunlight also helps mushrooms to grow. Plus, potting soil contains nutrients that mushrooms need, such as nitrogen, phosphorus, and potassium.
All it takes is some fungi spores to land in the right spot and you’ll soon have mushrooms growing in your pothos soil. The spores can come from the air, animals, or other plants. Once they land in a favorable environment, they will start to grow.
How to Remove Mushrooms in Pothos Soil?
So, now that we know why there are mushrooms in pothos soil, what should you do about it? If you don’t like the look of mushrooms in your pothos pot, you can remove them.
Just pull them out of the soil and dispose of them. Make sure you dispose of them far away from any other potted plants, as you don’t want to spread the spores and have to deal with more mushrooms.
Using a fungicide is a good idea to kill any spores that are in the soil. This will help to prevent mushrooms from growing back. You can find fungicides at your local garden center or online. I use this neem oil fungicide and it works great.
Neem oil is a natural fungicide that is made from the seeds of the neem tree. It’s safe to use, doesn’t harm the environment, and is effective at killing fungi spores.
To use neem oil, mix it with water according to the directions on the bottle. Then, pour it into a spray bottle and spritz the soil of your pothos plant. Make sure to get the underside of the leaves as well. Repeat this every few weeks or as needed.
Preventing Mushrooms in Pothos Soil
If you’d like to prevent mushrooms from growing in your pothos pot, there are a few things you can do.
1) Sunlight
The number one thing you can do is to make sure your pothos plant gets enough sunlight. Mushrooms need darkness to grow, so the more sunlight your plant gets, the less likely it is that mushrooms will take over.
If you’re growing pothos indoors, put it in a bright spot near a window. If you’re growing pothos outdoors, make sure it’s in a spot that gets a few hours of in-direct sunlight each day.
2) Less moisture
Another way to prevent mushrooms is to make sure the soil isn’t too moist. Mushrooms need moisture to grow, so letting the soil dry out between waterings will help to discourage them.
Only water when the top inch of soil is dry to the touch. Plus, monitor the humidity around your plant. If it’s too high, mushrooms will be more likely to grow.
Pothos plants like humidity, so you don’t want to make the air too dry. But, if you find that mushrooms are a problem, you may need to sacrifice some humidity in order to prevent them from growing.
3) Drainage
Another way to prevent mushrooms is to make sure your pothos plant has good drainage. Mushrooms need moist soil to grow, so if the water drains out quickly, they will have a harder time growing.
To improve drainage, add some perlite to your potting mix. Perlite is a type of volcanic glass that helps to aerate the soil and improve drainage. Also, make sure the pot has drainage holes in the bottom so that water can seep out.
4) Potting soil
Fourth, use sterile potting soil when repotting your pothos plant. This will help to prevent mushrooms from spores that might be in the soil. You can even use neem oil to treat the soil before potting your plant.
By following these tips, you can help to prevent mushrooms from growing in your pothos soil. If you do find mushrooms growing in your pot, you can remove them and treat the soil to help prevent them from coming back.
Conclusion
In conclusion, there are mushrooms in pothos soil because the soil is fertile and fungi spores can land in the right environment and start to grow.
By following some simple tips, you can help to prevent mushrooms from growing in your pothos soil. If you do find mushrooms growing in your pot, you can remove them and treat the soil to help prevent them from coming back. Thanks for reading!
Do you have any tips for preventing mushrooms in pothos soil? Share them in the comments below!
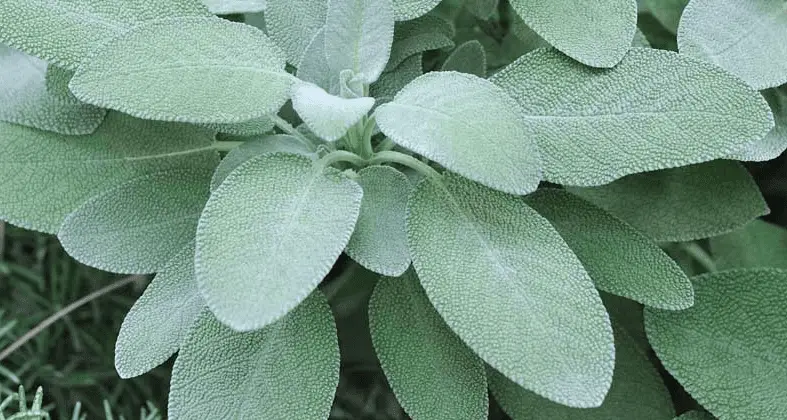
Sage is a popular herb that can be used in both savory and sweet dishes. It’s a great addition to any garden, but it can be easy to overwater sage. If you’re not careful, you can kill this hardy plant with too much water. In this article, we will discuss how to save overwatered sage plants and help them get back on track!
How to Save Overwatered Sage?
1. Stop watering the sage plant
The first step is to immediately stop watering the sage plant. The goal here is to allow the plant to dry out completely. This may take a few days or a week, so be patient. Once the plant is dry, it will be able to start recovering from the overwatering.
If you’re not sure if your sage plant is dry enough, you can check the soil with your fingers. The soil should be crumbly and dry to the touch. If it’s still wet, wait a few more days before checking again.
Once the sage plant is dry, you can start watering it again. Be sure to water only when the soil is dry to the touch. This will help prevent overwatering in the future.
2. Re-pot the sage plant
If the sage has been severely overwatered, it’s a good idea to re-pot the plant. The goal here is to provide the plant with fresh soil that drains well. This will help the plant to recover more quickly.
Perlite is a great addition that can help with drainage. You can find perlite at most garden stores or online. Just be sure to add it to the new potting mix before planting the sage.
When re-potting, be careful not to damage the roots of the plant. Gently loosen the roots and then place them in the new potting mix. The pot should have drainage holes so that the water can easily escape.
3. Prune any rotting roots
Check the roots of the sage plant for any signs of rot. If you see any, you will need to prune them away. This may seem drastic, but it’s necessary in order to save the plant.
Start by removing any dead or dying leaves from the plant. Then, cut away any rotten roots with a sharp knife. Be sure to disinfect the knife after each cut to prevent the spread of disease.
4. Monitor soil moisture
It’s important to monitor the soil moisture levels when you’re growing sage. This will help you to avoid overwatering in the future. The best way to do this is to use a soil moisture meter.
You can find these at most garden stores or online. Stick the probe of the meter into the soil and wait a few seconds for a reading. The reading will tell you how much moisture is in the soil.
Remember that sage requires sandy or well-drained soil. This means that the soil should be dry to the touch before you water it again.
By following these steps, you can save your sage plant from overwatering. Just be sure to monitor the soil moisture and avoid watering too often in the future. Your sage plant will thank you for it!
How Much Water Do Sage Plants Need?
Sage grows best in full sun with well-drained soil. It’s a drought-tolerant plant, so it doesn’t need much water. In fact, too much water can kill sage. Water sage plants only when the soil is dry to the touch.
You can test the soil moisture by sticking your finger into the soil. If it feels moist, then the plant doesn’t need water. If the soil is dry, then it’s time to water the sage plant.
Water sage plants deeply so that the water reaches the roots. Water in the morning, so that the leaves have time to dry before nightfall. This will help prevent fungal diseases.
What Does Overwatered Sage Look Like?
Your sage will go droopy and its leaves will start to turn yellow if it’s overwatered. The plant may also develop root rot, which is when the roots start to break down and die.
You may see white powder on the leaves of your sage, which is a sign of mildew. This can happen if the air around your plant is too humid or if the leaves are exposed to too much moisture.
Overwatered sage with the wrong potting soil
Conclusion
In conclusion, overwatering sage is a common problem. But by following the steps above, you can save your plant within a few weeks. The most important tips are to let the plant dry out completely, re-pot in fresh soil with good drainage, and monitor the soil moisture levels. By following these steps, you can have a healthy and happy sage plant!
Do you have any tips for saving an overwatered sage plant? Share them in the comments below!
If you’re new to the bonsai hobby, you may be wondering what type of soil to use for your trees. There are many different types of soils on the market, but can succulent soil be used for bonsai? In this blog post, we will explore the answer to that question and provide some tips on how to use succulent soil for bonsai.
Can You Use Succulent Soil for Bonsai?
Yes, succulent soil can be used for bonsai trees. This type of soil is well-drained and contains a variety of minerals that are beneficial to plants. Succulent soil is also relatively lightweight, which makes it easy to work with when potting or repotting bonsai trees.
Succulent soil is a type of potting mix that is designed to drain quickly and retain moisture. It’s made up of ingredients like perlite, pumice, or bark, and often has added fertilizers to help nourish your plants.
In fact, succulent soil and bonsai soil are nearly identical. The only difference is that bonsai soil usually contains a higher percentage of organic matter, like compost or peat moss. This helps to hold moisture in the soil and keep roots healthy.
While succulent soil isn’t traditionally used for bonsai, it can be a good option if you’re starting out and don’t want to invest in a lot of different soils and components. You can also mix succulent soil with other types of soil to create a potting mix that is tailored to your bonsai tree’s needs.
Which Succulent Soil for Bonsai Tree?
It’s also important to remember that not all succulent soil is created equal. Some soils may be too nutrient-rich or compacted, so it’s important to choose a quality soil mix that will meet your bonsai tree’s needs.
I’ve found that Kellogg Palm & Cactus (Amazon link) is the most similar to bonsai mix. It contains loads of pumice, lava, aggregate, and organic material. I’ve found that other succulent mixes, like Miracle-Gro Cactus Palm Citrus, are more like regular potting mixes.
What About Large Bonsai Trees?
While succulent soil is a good option for small bonsai trees, it may not be the best choice for large bonsai trees. This is because succulent soil is lightweight and may not provide enough support for a large tree.
If you’re potting a large bonsai tree, it’s best to mix succulent soil with other types of soil to create a potting mix that will support your tree.
The Benefits of Using Succulent Soil for Bonsai Trees
There are several benefits to using succulent soil for bonsai trees, including:
1. Drainage
Succulent soil is a porous mix that drains quickly. This is beneficial for bonsai trees because it prevents the roots from sitting in water, which stops root rot and other problems.
2. Aeration
The ingredients in succulent soil, like perlite and pumice, help to aerate the soil and promote healthy root growth.
Aeration is important for bonsai trees because it allows oxygen to reach the roots, which is essential for plant health. The last thing you want is compacted, waterlogged soil that doesn’t allow oxygen to reach the roots.
3. Nutrients
Succulent soil includes a range of minerals and nutrients that are beneficial for bonsai trees These nutrients help to promote healthy growth and can even help to correct nutrient deficiencies in your bonsai tree.
However, succulent soil tends to be slightly more nutrient-rich than is needed, so be careful not to over-fertilize your bonsai tree.
What Does Bonsai Soil Need?
Bonsai soil needs to provide several key functions for your trees. It needs to drain well, retain moisture, and aerate the roots. It should also be able to hold nutrients and not compact over time.
Many bonsai enthusiasts use a mix of components to achieve these goals, but succulent soil can be a great option if you’re looking for something simpler.
How to Use Succulent Soil for Bonsai?
If you decide to use succulent soil for your bonsai trees, there are a few things to keep in mind.
First, you’ll need to water your trees more often since the soil will drain quickly. Keep an eye on how moist the soil is and water when it starts to dry out.
Second, you may need to add extra fertilizer to your trees since the nutrients in succulent soil can be depleted quickly. A slow-release fertilizer that can be applied every month or two is a good option.
Only use succulent soil that is fresh and free of pests and diseases. Avoid using soil from your garden or yard, as it may contain harmful chemicals or pests that could harm your trees.
Finally, you’ll want to repot your trees every year or two to refresh the soil and add new nutrients. This will also unpack the roots and encourage new growth.
Conclusion
In conclusion, succulent soil can be used for bonsai, but there are a few things to keep in mind. Water your trees more often and fertilize them regularly to ensure they are getting the nutrients they need. Repotting every year or two will also help to keep your trees healthy and encourage new growth.
Do you have any questions or tips on using succulent soil for bonsai? Let us know in the comments below!