by Gardener Tim | May 23, 2022 | Facts
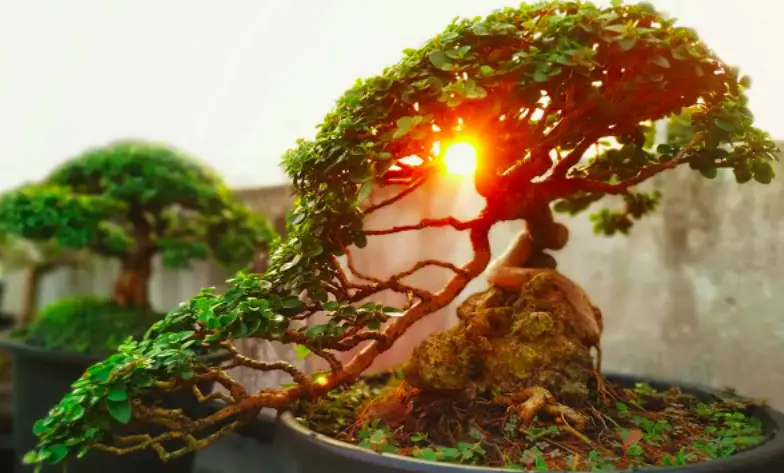
Bonsai is a Japanese art form that involves growing miniature trees in containers. The word “bonsai” actually refers to the tree itself, not the container. In this blog post, we’ll explore whether any plant can be turned into a bonsai. Let’s learn more about this fascinating art form!
Can Any Plant Become a Bonsai?
As bonsai is not a type of plant, but rather a way of growing plants, the answer is yes – any type of plant can be used for bonsai. However, some plants are better suited to this purpose than others. Shrubs or trees with wooden stems are most suitable to be turned into a bonsai.
Certain plant species have small leaves or needles, which makes them look more like miniature versions of full-sized trees. Other plants have thick, gnarled roots that can be trained and shaped into interesting designs. And some plants simply have a naturally compact growth habit, which makes them ideal for bonsai.
So, if you’re interested in growing bonsai, do your research to find out which plant species are best suited to this purpose. You’ll be well on your way to creating beautiful, miniature works of art!
What Does Bonsai Mean?
Bonsai is a Japanese art form that involves growing miniature trees that are shaped to mimic full-sized trees. Bonsai is not a type of plant, but rather a way of growing plants.
The word “bonsai” translates to “plant in a container” – referring to the shallow containers that bonsai plants are grown in.
Bonsai trees are trained and shaped over many years to create the desired aesthetic. The miniature size of bonsai trees is achieved through a combination of root pruning and potting in small containers.
Bonsai is a relaxing and rewarding hobby that can be enjoyed by people of all ages. And if you don’t have the time or space for a full-sized tree, growing bonsai might be the perfect solution!
Trees that Make Great Bonsai Trees
While any type of plant can technically be turned into a bonsai, some trees are better suited to this purpose than others. Here are a few tree species that make great bonsai:
- Ficus
- Pine
- Juniper
- Cedar
- Dwarf Jade
- Maple
- Cherry
Each of these tree species has certain characteristics that make them ideal for bonsai. For example, Ficus trees have a compact growth habit and small leaves, while Pine trees have thick, gnarled roots that can be trained into interesting shapes.
So, if you’re interested in growing bonsai, be sure to research which tree species are best suited to this purpose. With a little bit of effort, you’ll be able to create beautiful, miniature works of art!
Conclusion
In conclusion, any type of plant can be turned into a bonsai. It can be surprising to hear that bonsai is not a type of plant, but rather a way of growing plants. This Japanese art form involves growing miniature trees that mimic the shape and form of full-sized trees.
While any type of plant can technically be turned into a bonsai, some plants are better suited to this purpose than others. Trees with wooden stems, small leaves or needles, and thick roots are good candidates for bonsai. So, if you’re interested in growing bonsai, be sure to do your research to find out which plants are best suited to this purpose
Have you ever tried growing bonsai? What type of plant did you use? Let us know in the comments below!
by Gardener Tim | May 23, 2022 | Facts, Outdoor And Patio Plants, Plant Care
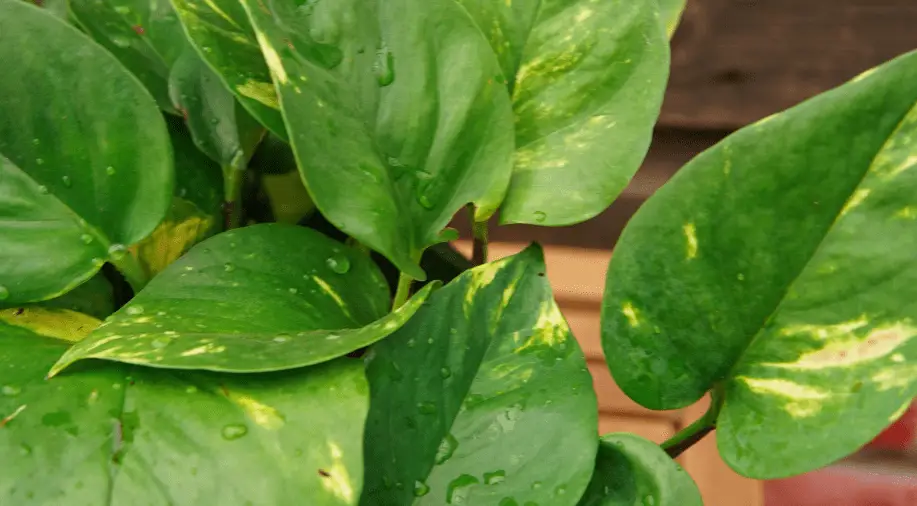
Rabbits are herbivores and can eat a variety of plants, but is it okay for them to chew on the leaves of a pothos plant? In this article, we’ll take a look at whether or not pothos plants are safe for rabbits to eat.
Can Rabbits Eat Pothos Plants?
No, rabbits should not eat pothos plants because the plant contains calcium oxalates. These crystals can cause irritation and burn in the mouth, throat, and stomach.
If your rabbit ingests a large number of calcium oxalates, it could lead to kidney damage or even death. So, it’s best to keep pothos plants out of reach of your furry friend.
There are plenty of other safe plants that rabbits can nibble on, so there’s no need to worry about your bunny going hungry. A few good options include hay, grass, dandelions, and carrots. As always, make sure to wash any fruits or vegetables before giving them to your rabbit.
What to Do If My Rabbit Ate Pothos Plant?
If you think your rabbit has eaten a pothos plant, it’s important to seek veterinary care immediately. Symptoms of calcium oxalate poisoning in rabbits include drooling, vomiting, difficulty swallowing, and excessive thirst.
With prompt treatment, most rabbits make a full recovery. However, if left untreated, calcium oxalate poisoning can be fatal. It also depends on just how much of the plant your rabbit ate.
So, if you have a pothos plant in your home, make sure to keep it out of reach of your rabbit. And, if you think your rabbit has eaten a pothos plant, don’t hesitate to contact your veterinarian for advice.
How to Prevent Your Rabbit From Eating Pothos?
There are a few things you can do to keep your rabbit from consuming monstera leaves.
1. Hide the pothos
The easiest way to prevent your rabbit from eating pothos is to simply keep the plant out of reach. This may mean placing it on a high shelf or in a room that your rabbit doesn’t have access to.
You can also use a physical barrier like a baby gate to block off the area where the plant is located. But only if your rabbit isn’t a great jumper!
If you have an outdoor pothos, make sure to keep it fenced off so your rabbit can’t get to it. Rabbits will go for any low-hanging leaves, so it’s best to be proactive and keep the pothos out of reach.
2. Cover the pothos
Another way to prevent your rabbit from eating pothos is to cover the plant so that the leaves are not accessible. This can be done with a cloche, cage, or even a plastic bag.
Just make sure that the cover is secure and that your rabbit can’t get to the plant. Otherwise, you’ll just end up with a frustrated bunny and chewed-up pothos!
3. Repellent spray
There are a few commercial repellent sprays on the market that can be used to keep rabbits away from plants. These usually contain ingredients like chili pepper or garlic, which rabbits don’t like.
You can also make your own rabbit-repelling spray at home using a mixture of water and vinegar. Just be sure to spray it on the plant every few days to keep the scent strong.
However, the best solution is just to keep the pothos out of reach so that your rabbit can’t get to them. With a little effort, you can make sure that your bunny stays safe and healthy!
Conclusion
In conclusion, pothos plants are not safe for rabbits to eat because they contain calcium oxalates that can be harmful to your furry friend. If you think your rabbit has eaten a pothos plant, contact your veterinarian immediately.
I hope you found this article helpful. If you have any questions or concerns, feel free to leave a comment below! Thanks for reading.
by Gardener Tim | May 23, 2022 | Facts
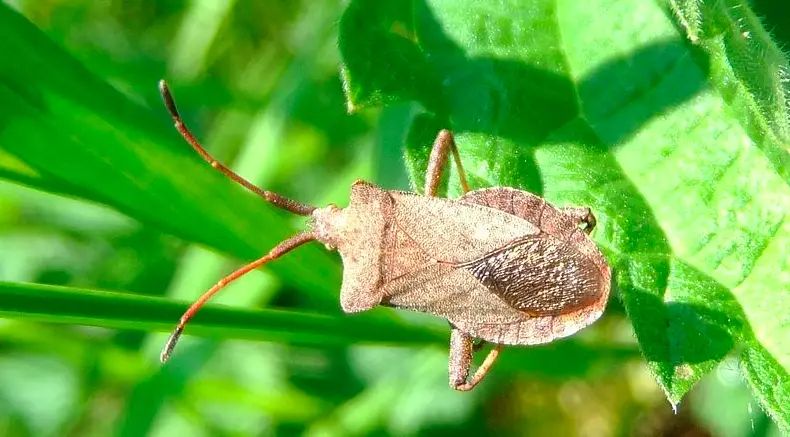
There is a nasty little bug that is wreaking havoc on plants all across the country this year, and many gardeners are looking for ways to get rid of them. This bug is called the squash bug, and it can be quite difficult to get rid of.
In this blog post, we explore whether or not vinegar can kill squash bugs and help you get rid of them for good.
Will Vinegar Kill Squash Bugs?
Yes, vinegar can kill squash bugs. Vinegar is a natural insecticide that can be used to kill a variety of different pests, including squash bugs.
To use vinegar to kill squash bugs, simply mix equal parts water and vinegar in a spray bottle and spray it directly on the bugs. The acid in the vinegar is great at killing pests, but it can also damage your plants if you’re not careful.
In fact, vinegar is used as a herbicide by some farmers. This means you’re essentially using the same stuff to kill weeds that you’re using to kill squash bugs.
So, while vinegar can be effective at killing squash bugs, you need to be careful not to damage your plants in the process. If you’re not careful, you could end up doing more harm than good.
I recommend using neem oil if you want to get rid of squash bugs without damaging your plants. Neem oil is a natural insecticide that is safe to use around humans and animals.
If you’re going to use vinegar to kill squash bugs, you need to be careful not to damage your plants. Here are a few tips on how to use vinegar safely:
- Only use diluted vinegar. Never use full-strength vinegar on your plants
- Avoid spraying in direct sunlight. The heat from the sun can cause the vinegar to damage your plants
- Test a small area of your plant before spraying the entire plant. This will help you make sure the vinegar doesn’t damage your plants
- Be sure to rinse off the vinegar after spraying. The acid in vinegar can be harmful to your plants if it’s left on for too long
How to Use Vinegar on Squash Bugs?
There’s nothing too complicated about using vinegar to kill squash bugs. Simply mix equal parts of water and vinegar in a spray bottle and apply it directly to the bugs.
Dish soap can be added to the mix to help the vinegar stick to the bugs better. It’ll also help with getting rid of any eggs that might be on the leaves. Sugar can be used in place of dish soap if you’re worried about harming your plants.
You can also use diluted vinegar as a preventative measure. Simply mix one part vinegar with ten parts water and spray it on your plants every few days. This will help keep squash bugs from infesting your plants in the first place.
What Else Can I Do To Get Prevent Squash Bugs?
It’s also important to remember that squash bugs are attracted to weak and sickly plants. So, if you have squash bugs in your garden, it’s likely because you have some unhealthy plants.
Make sure you’re doing everything you can to keep your plants healthy. This includes providing them with the proper nutrients, watering them regularly, and making sure they’re getting enough sunlight.
Remove any dead or dying plants from your garden. This will help reduce the population of squash bugs and make it easier to control them.
You should also consider using a physical barrier to keep squash bugs out of your plants. This can be something as simple as placing a piece of cardboard or cloth around the base of your plants.
The key is removing squash bugs for the long term is to stop the larvae from hatching in the first place. This can be done by removing any potential breeding grounds, such as dead leaves and plants. Don’t let them hatch and you won’t have to worry about them for long.
Conclusion
In conclusion, vinegar can kill squash bugs. However, you need to be careful when using it so that you don’t damage your plants. Neem oil is a great alternative to vinegar if you’re looking for a safe and effective way to get rid of squash bugs.
If you have any questions about getting rid of squash bugs, feel free to leave a comment below. I’m always happy to help!
by Gardener Tim | May 19, 2022 | House Plants, Plant Care
If you’re looking for a new houseplant to liven up your home, look no further than the monstera. This tropical plant is easy to care for and adds a touch of greenery to any room. But how many monstera plants should you put in a pot? Keep reading to find out!
How Many Monstera Plants in a Pot?
You can never have too many monstera plants! Okay, that might be a bit of an exaggeration, but these tropical plants are sure to add some life to your home. But how many should you put in a pot? That all depends on the size of the pot and the size of the plant.
It’s possible to hold multiple monstera plants in one pot, but they will need to be smaller in size. Most people start with one plant and then add more as they become available.
If you’re potting a small monstera, you can probably get away with two or three monstera plants in a single pot. In fact, three monstera plants tend to be the best number for most situations.
If you’re looking to put multiple monsteras in a pot, make sure the pot is at least 18 inches wide. This will give the plants enough space to grow and thrive.
So there you have it! You can never have too many monstera plants, but a good rule of thumb is to start with one plant and then add more as needed. These tropical plants are sure to liven up any room in your home!
Why Put Multiple Monstera Plants in the Same Pot?
There are a few reasons why you might want to put multiple monstera plants in the same pot.
1. Fuller look
If you want your monstera to have a fuller, more lush look, potting multiple plants together is the way to go. It means there will be no spaces in between the leaves, and the overall look will be more polished.
It’s the best way to create a jungle-like feel in your home without having to buy a bunch of different plants and wonder where to put them all.
2. Easier to care for
Another advantage of potting multiple monstera plants together is that it’s easier to care for them. You won’t have to water each plant individually, and you can fertilize them all at the same time.
3. Less likely to tip over
If you have a large, heavy pot, it’s less likely to tip over if it’s full of plants. This is especially true if you have multiple monstera plants in the pot. The more plants there are, the heavier the pot will be.
4. More oxygen
Last but not least, potting multiple monstera plants together will increase the amount of oxygen in the area. These plants produce a lot of oxygen, so having multiple plants in one pot is a great way to improve the air quality in your home.
Can I Plant a Cutting with a Mature Monstera?
Yes, you can plant a cutting with a mature monstera. In fact, this is a great way to propagate your plant and get more Monsteras for your home.
To do this, simply take a cutting from an existing monstera plant and pot it up with the mature plant. The two plants will share the same pot and root system, so they will need to be cared for in the same way.
Make sure the pot you use is large enough to accommodate both plants. A good rule of thumb is to use a pot that is at least 18 inches wide. This will give the plants enough space to grow and thrive.
Should I Separate Multiple Monstera in the Same Pot?
If you have multiple monstera plants in the same pot, you might be wondering if you should separate them. The answer is it depends.
If the plants are small and there’s plenty of space in the pot, there’s no need to separate them. In fact, it’s often best to leave them together so they can share resources and support each other.
In addition, repotting means disrupting the roots, which can stress the plants out. If the plants are happy and healthy where they are, there’s no need to repot them.
However, if the plants are large and there’s not much space in the pot, you might want to consider separating them. This will give each plant enough room to grow and thrive.
How to Grow More than One Monstera in a Pot?
There are a number of steps you need to take in order to grow more than one monstera in a pot.
1. Use a large pot
The first step is to use a large pot. The pot should be at least 18 inches wide in order to give the plants enough space to grow. You don’t want to have to keep repotting your plants, so make sure the pot is big enough from the start.
2. Use good soil
The next step is to use good-quality soil. Monsteras need well-draining soil in order to thrive. If the soil is too heavy, it will hold too much water and the roots will rot. Use a light potting mix or make your own by mixing equal parts sand, peat moss, and perlite.
You may also want to add a small amount of fertilizer to the soil to help the plants grow. You can even use eggshells as monstera fertilizer. Just crush some eggshells into the soil for a boost in potassium.
3. Use a grow pole
Another important step is to use a grow pole. Monsteras are vines, so they need something to climb on. A grow pole will give the plants something to cling to as they grow. It also means they can grow together as one unit, rather than each plant trying to find its own way.
4. Water regularly
Last but not least, water your plants regularly. Monsteras need to be watered about once a week, or when the top inch of soil is dry. Be sure to check the soil before watering to make sure it isn’t already wet. Overwatering can lead to root rot, so it’s important to only water when the plants need it.
Conclusion
In conclusion, there is no right or wrong answer when it comes to how many monstera plants are in a pot. It all depends on the size of the pot and the size of the plant. Most people start with one plant and then add more as they become available.
So, what are you waiting for? Get out there and get yourself some monstera plants! Your home will thank you for it. I hope this article was helpful. If you have any questions, please feel free to leave a comment below. I’ll be happy to help!
by Gardener Tim | May 19, 2022 | Plant Care
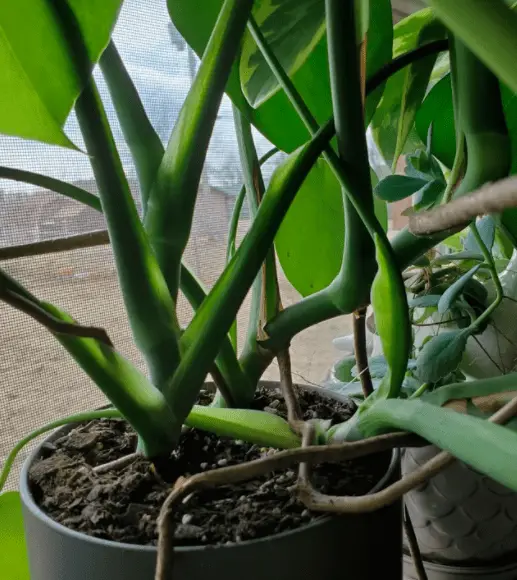
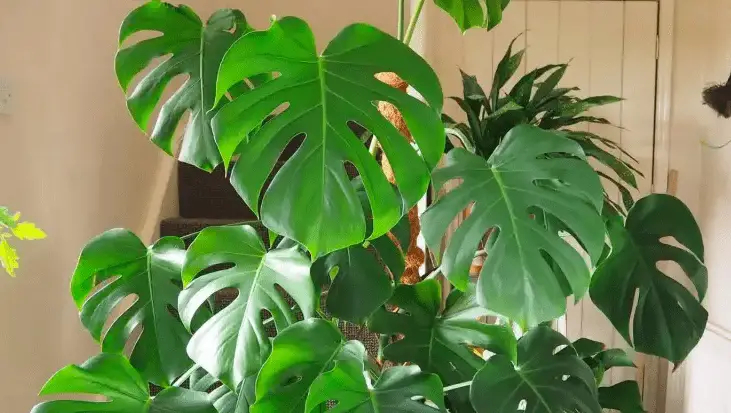
Do you have a monstera plant in your home or office? If so, you may have noticed that the stems on some of the leaves are brown. This can be quite puzzling, as most people expect monstera plants to have green stems.
So what’s going on? In this blog post, we will explore the reasons behind this phenomenon and offer some tips for keeping your Monstera looking its best.
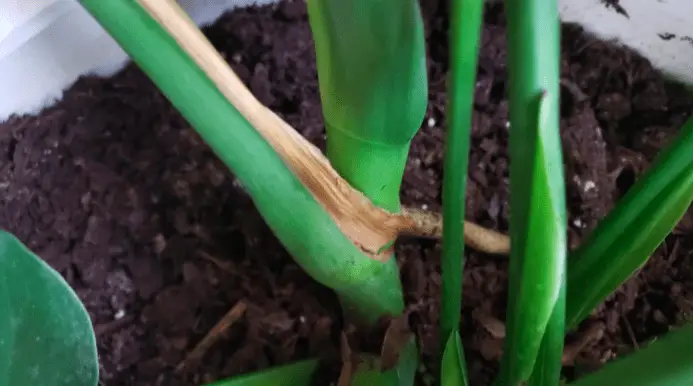
What Are the Brown Stems on Monstera?
The brown monstera stem is just an old sheath that is dying and being replaced by a new lead sheath. It is a natural process that happens as the plant grows. The brown stem will eventually fall off, revealing a new, green stem underneath. So don’t worry – your plant is perfectly normal!
If you want to tidy up your monstera and remove the brown stems, you can do so with a sharp knife or scissors. Just be careful not to damage the new, green stems underneath. With a little care, your monstera will be looking as good as new in no time!
However, if the brown stem issue is spreading quickly and affecting many leaves, it could be a sign of a more serious problem. Brown stems can sometimes be caused by too much sun, lack of water, or nutrient deficiencies. Let’s take a closer look at each of these issues.
1. Too much water
If the stem is brown and mushy, it is likely that your plant is getting too much water and is suffering from root rot. This is a serious problem that can kill your plant if not treated quickly. If you think your plant may have root rot, it’s important to take action immediately.
First, check the soil to see if it is wet or dry. If it is wet, you will need to reduce watering and allow the soil to dry out completely between watering. If the soil is dry, you will need to increase watering.
It’s also a good idea to check the drainage of your pot. Make sure that there is a hole in the bottom so that water can drain out freely. If not, the roots may become waterlogged and start to rot.
2. Too much direct sunlight
If the brown stem is dry and crispy, it may be a sign that your plant is getting too much direct sunlight. Monstera plants prefer bright, indirect light. So if your plant is in a spot that gets direct sunlight for more than a few hours per day, it’s time to move it.
Move your plant to a darker spot and observe it over the next few days. If the brown stem issue improves, then you know that was the problem. If not, it’s time to look at other possible causes.
3. Not enough water or humidity
Monstera plants live in humid tropical rainforests, so they need quite a lot of water to thrive. If the stems are brown and dry, it’s likely that your plant is not getting enough water.
You can test the soil to see if it is dry by sticking your finger in it. If the soil is dry, you will need to increase watering. If the soil is wet, you will need to reduce watering.
It’s also a good idea to check the humidity around your plant. Monstera plants prefer high humidity, so if the air in your home or office is dry, your plant may be suffering.
There are a few easy ways to increase the humidity around your plant. You can use a humidifier, put your plant on a pebble tray, or mist it with water every day.
You can also try grouping your monstera plant with other plants. This will create a mini rainforest environment that will be perfect for your plant!
4. Disease or pests
If the brown stem issue is accompanied by other problems, such as yellow leaves or mushy stems, it’s likely that your plant is sick. The most common diseases that affect monstera plants are fungal diseases.
If you think your plant may be sick, it’s important to take action immediately. The first step is to isolate the plant from any healthy plants. This will prevent the disease from spreading.
Next, you will need to treat the plant with a fungicide. You can find these at your local garden center or online. Be sure to follow the instructions on the label carefully. I like using neem oil as I’ve found it to be the most effective method and it’s safe to use indoors.
Once you have treated the plant, you should see a noticeable improvement within a few days. If the problem persists, it’s a good idea to consult with a professional.
Pests can also cause brown stems on monstera plants. The most common pests that affect these plants are aphids, mealybugs, and scale insects.
If you think your plant has pests, neem oil is a great natural solution. Neem oil is safe for humans and animals, but it is deadly to pests. Simply mix a few drops of neem oil with water and spray it on your plant.
5. Fertilizer problems
If you have recently fertilized your plant, it’s possible that the brown stem issue is a result of fertilizer burn. This happens when the roots of the plant are exposed to too much fertilizer, which can cause them to dry out and die.
If you think your plant has fertilizer burn, the first step is to stop fertilizing. Once you have done this, you will need to flush the soil with water to remove any excess fertilizer.
After you have flushed the soil, you should see a noticeable improvement within a few days. If the problem persists, it’s a good idea to consult with a professional.
As you can see, there are many possible causes of brown stems on monstera plants. By taking the time to troubleshoot the problem, you can figure out what is causing the issue and take steps to fix it. Your plant will thank you for it!
Conclusion
In conclusion, brown stems on monstera plants can be caused by a variety of factors. However, the most common cause is that the sheath is simply dying and being replaced by a new one.
Brown monstera stems are only something to be concerned about if accompanied by other problems, such as yellow leaves or mushy stems. If this is the case, it’s likely that your plant is suffering from a disease or pests.
The best way to prevent brown stems on monstera plants is to provide them with the proper care. This includes watering, humidity, and fertilization. By following these tips, you can keep your plant healthy and happy for years to come! Thanks for reading!