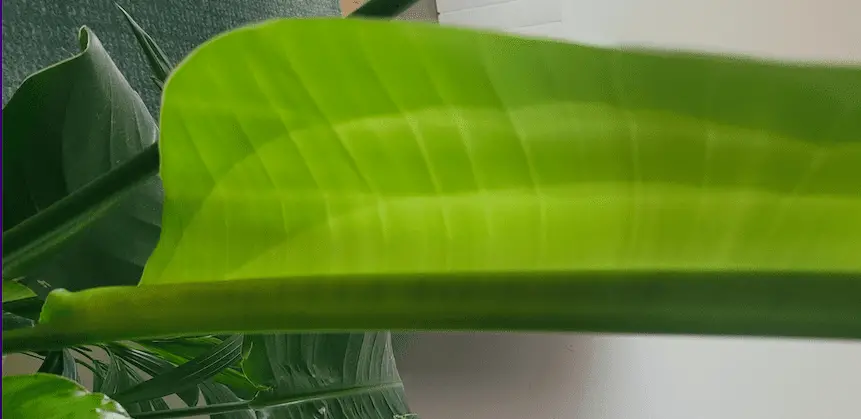
It’s a bird! It’s a plane! No, it’s a Bird of Paradise not unfurling! If you’re one of the many people who have been anxiously watching your Bird of Paradise plants (Strelitzia reginae), and wondering why they aren’t unfurling, you’re not alone.
In this blog post, we will explore some of the reasons why your Bird of Paradise plant may not be unfurling, as well as some solutions to try.
Why Is My Bird of Paradise Not Unfurling?
There are several reasons why your Bird of Paradise plant may not be unfurling, including poor plant health, pest infestation, plant secretions, and low humidity. The good news is that there are solutions for each of these problems!
I will now explore each of these reasons in more depth so that you can determine which one is causing your plant not to unfurl.
1. Poor Plant Health
One of the reasons why your Bird of Paradise plant may not be unfurling is poor plant health. This includes giving your plant the correct amount of water, light, and fertilizer.
If you’re not sure how much water your plant needs, the best way to find out is to stick your finger in the soil. If it’s dry, give your plant a good watering. Be sure to drain any excess water from the saucer after each watering.
As for light, your Bird of Paradise plant needs bright, indirect sunlight. If it’s not getting enough light, it will become leggy and its leaves will turn yellow. Plus, your plant needs the energy to unfurl its leaves, and it can’t do that if it’s not getting enough light.
Finally, fertilize your plant every two weeks during the growing season (spring and summer) with a balanced fertilizer. This will help your plant to stay healthy and strong, and give it the nutrients it needs to unfurl its leaves.
2. Infestation
Another reason why your Bird of Paradise plant may not be unfurling is an infestation of pests, such as mealybugs, spider mites, or aphids. These pests suck the sap out of your plant, causing it to become weak and stunted. Plus, they produce a sticky substance called honeydew that can attract ants and other pests.
To get rid of these pests, you can use a pesticide or an insecticidal soap. Be sure to follow the directions on the label carefully so that you don’t damage your plant. Neem oil is also a natural pesticide that is effective against many different types of pests.
3. Plant Secretions
A final reason why your Bird of Paradise plant may not be unfurling is that it is secreting a sticky substance, which is then not allowing the leaves to unfurl. This sticky substance is called sap, and it is produced by the plant in order to protect itself from pests and diseases. Although this is a rare occasion, it can happen.
If your plant leaves are stuck from secretions, you will need to clean them off with a soft cloth. Once the sap has been removed, your plant should be able to unfurl its leaves.
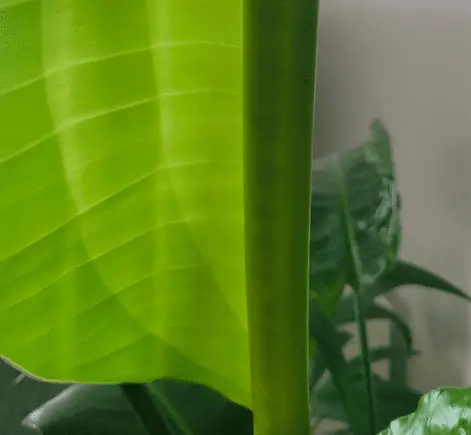
My Bird of Paradise unfurling
4. Low Humidity
Another common reason why your Bird of Paradise plant may not be unfurling is low humidity. This is because the leaves of the plant need moisture in order to unfurl. As tropical plants, they are used to high humidity levels.
One way to increase the humidity around your plant is to mist it with water every day. You can also try placing a humidifier in the room or setting your plant on a tray of pebbles and water. Just be sure that the bottom of the pot is not sitting in water, as this can cause the roots to rot.
These are just a few of the ways you can increase humidity, but a humidifier is by far the best option as it will raise the humidity levels around your plant evenly. Plus, modern-day humidifiers are very quiet, so you won’t even know it’s there!
How to Open Bird of Paradise Leaf?
It’s generally not recommended to force open a Bird of Paradise leaf as this can damage the plant. However, there is a way to gently encourage the leaf to unfurl.
To do this, you will need a spray bottle filled with lukewarm water. Then, simply mist the leaf with water until it is damp. Be sure not to saturate the leaf, as this can cause further damage.
Once the leaf is damp, you can try gently opening it with your fingers. If it doesn’t open, mist it with a little more water and try again. Once the leaf is open, be sure to remove any water that is inside of it so that it doesn’t rot.
How Long Does It Take for Bird of Paradise Leaves to Unfurl?
It typically takes a few weeks for Bird of Paradise leaves to unfurl. However, this can vary depending on the plant and the conditions it is in. If your plant is healthy and in the right environment, it should unfurl within a few weeks.
If your plant has been in a pot for a long time, it may take longer for the leaves to unfurl. This is because the roots of the plant are constricted, which can prevent the leaves from unfurling.
If you have recently repotted your plant, it may also take a little longer for the leaves to unfurl. This is because the plant is adjusting to its new environment and needs time to acclimate.
Has My Bird of Paradise Unfurled Too Early?
Your plant will usually know the best time to unfurl its leaves. However, maybe you accidentally tried to open the leaves too early or you moved your plant to a new location and it started to unfurl its leaves.
If this happens, don’t worry! Your plant will likely be fine. The leaf will just be more vulnerable and thinner than if it had unfurled at the usual time. You can try to protect the leaf by misting it with water and keeping it out of direct sunlight.
Conclusion
In conclusion, there are several reasons why your Bird of Paradise plant may not be unfurling. These include pests, secretions, low humidity, and poor plant health. However, there is no need to worry as most plants will eventually unfurl their leaves. Just be sure to provide the right environment and care for your plant!
I hope this article was helpful in troubleshooting why your Bird of Paradise plant is not unfurling. If you have any further questions, please feel free to leave a comment below.
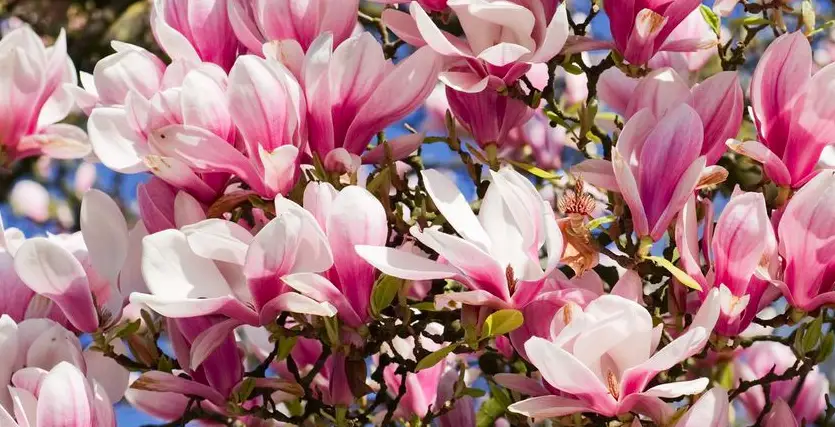
Is your magnolia tree blooming in September? If so, you’re not alone! Many homeowners are noticing their magnolias blooming earlier than usual this year. While it’s a beautiful sight, it can also be puzzling.
Why is my magnolia tree blooming in September? What can I do to make it stop? In this blog post, we will explore the reasons why magnolias bloom in September and offer solutions to keep them from flowering again.
Why Is My Magnolia Tree Blooming In September?
Your magnolia tree may be blooming in September because the plant is immature, it has been injured, the variety of magnolia does this, or if it’s blooming twice that year. These are all reasons why your magnolia tree may be blooming earlier than usual.
If your magnolia tree is blooming in September, it’s important to understand the reason why. This will help you determine if there’s anything you can do to stop it from happening again. I will now go into more detail about each of the reasons your magnolia tree may be blooming.
1. Immaturity
Juvenile magnolia trees are prone to blooming in September. This is because they have not reached maturity yet and are still growing. If your magnolia tree is blooming in September, it’s likely because it’s a young tree. There’s no need to worry, as this is normal behavior for immature magnolias.
In fact, it can take 10 to 30 years for a magnolia tree to reach maturity. So if your magnolia is only a few years old, it’s likely that it will bloom in September as it took longer to reach maturity.
2. Injury from Winter
If your magnolia tree was injured during the winter, it may bloom in September. This is because the plant took longer to heal from the injury. Magnolia trees are particularly susceptible to winter injury, as they are native to warmer climates.
In fact, low temperatures can damage the flowers and leaves of magnolia trees. The plant will use all its energy just trying to survive, rather than bloom when it usually would.
Winter can also effect the environment and life cycle of all plants, not just magnolia trees. There’s a chance the temperature was never correct until now for the plant to bloom.
3. Variety of Magnolia
The type of magnolia tree you have can also affect when it blooms. Some varieties of magnolia are known to bloom in September, even if they are not injured or immature.
For example, the Grandiflora Magnolia is known to bloom later on in the year. So if you have this type of magnolia, it’s normal for it to bloom in September.
4. Blooming Twice That Year
Magnolia trees typically bloom once a year, in the spring. However, it’s not uncommon for them to bloom twice a year. If your magnolia tree is blooming in September, it may be because it already bloomed earlier in the year and is now blooming again.
Only you know your magnolia tree and its blooming patterns. If it has already bloomed once this year and is now blooming again in September, it’s likely because it’s blooming twice.
What Should You Do If Your Magnolia Tree Bloomed In September?
There’s no need to do anything if your magnolia tree bloomed in September. This is normal behavior for immature, injured, or certain types of magnolia trees. Just be patient and wait for the tree to bloom again next year.
Keep giving your tree the same care as you always have. Water it regularly and fertilize it as needed. If you think the winter may have injured your tree, be sure to protect it next year with a layer of mulch.
Should I Prune Magnolia Tree In September?
Generally, there is no need to prune your magnolia tree if it blooms in September. The one time I would recommend pruning is if the plant is damaged, diseased, or is simply too big. It’s also a bit late in the year to prune, so you may want to wait until early spring when the plant has time to recover before winter.
If you decide to prune your magnolia tree, be sure to use sharp, clean shears. Make sure you sterilize them before use to prevent the spread of disease. Also, make sure you only remove dead or diseased branches. Don’t go overboard and remove too much, as this can weaken the plant
Conclusion
If your magnolia tree blooms in September, don’t panic! There are a few reasons why this may happen and it’s usually not anything to worry about. Enjoy the beautiful flowers that have blessed your yard a bit early this year and be sure to take pictures!
I hope this article was helpful in understanding why your magnolia tree may have bloomed in September. If you have any further questions, please feel free to reach out to us. We would be happy to help!
Do you have a green thumb? If so, you may be looking for houseplants with waxy leaves. These plants are easy to care for and look beautiful in any home. In this blog post, we will discuss the best plants to choose if you want a low-maintenance houseplant that has stunning foliage.
Houseplants with Waxy Leaves
Here are some of my beautiful houseplants with waxy leaves:
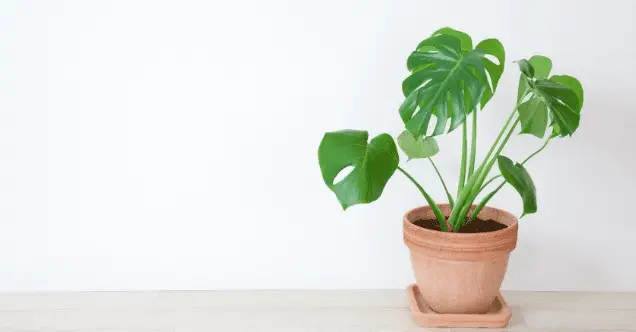
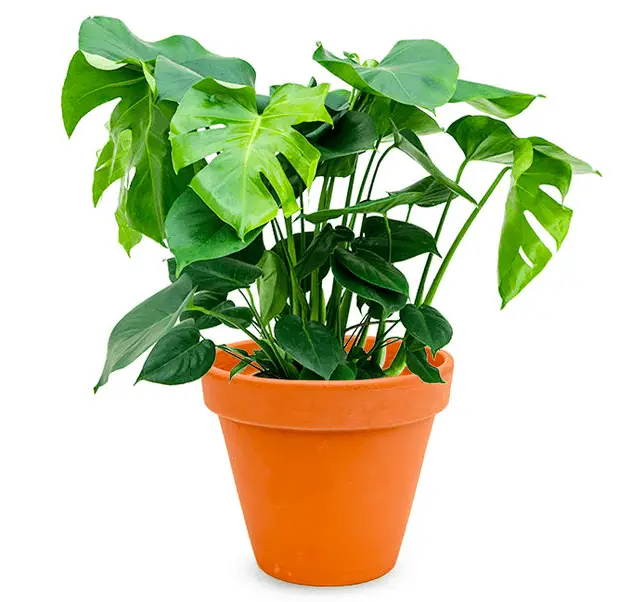
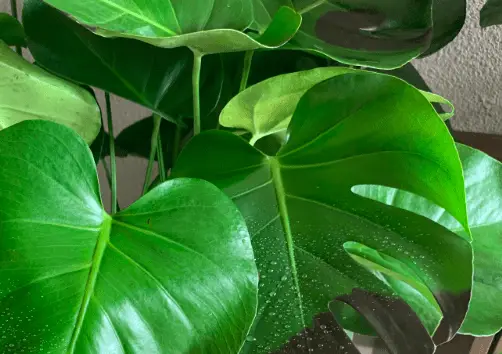
1. Swiss Cheese Plant (Monstera Deliciosa)
Monstera Deliciosa, more commonly known as the Swiss Cheese Plant, is a tropical plant native to Central America. The most notable feature of this plant is its large leaves, which are often cut into round or heart-shaped holes.
Swiss Cheese Plants are not difficult to care for, but there are a few things to keep in mind. These plants prefer warm and humid conditions and need bright, indirect light. They are fast-growing plants and can quickly outgrow their pots, so be sure to repot them every year or two.
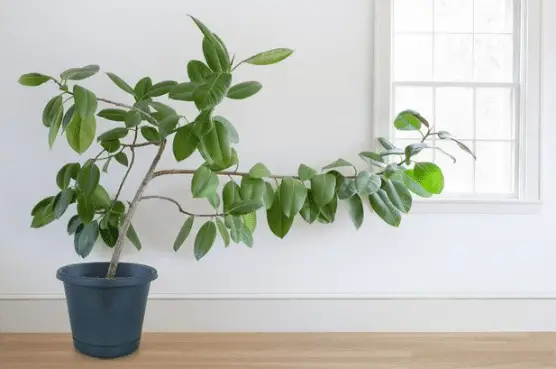
2. Rubber Fig (Ficus Elastica)
The Rubber Fig is a popular houseplant that originates from India and Malaysia. It gets its name from the thick, rubbery texture of its leaves. This plant is known for being low-maintenance and easy to care for. Rubber Figs prefer bright, indirect light but can also tolerate low light conditions. They should be watered when the soil is dry to the touch and allowed to drain completely.
Rubber Figs are a great choice for beginner plant parents or anyone looking for a low-maintenance houseplant. If you are looking for a plant that will grow quickly, however, Rubber Fig may not be the best choice as it can take several years to reach its full size.
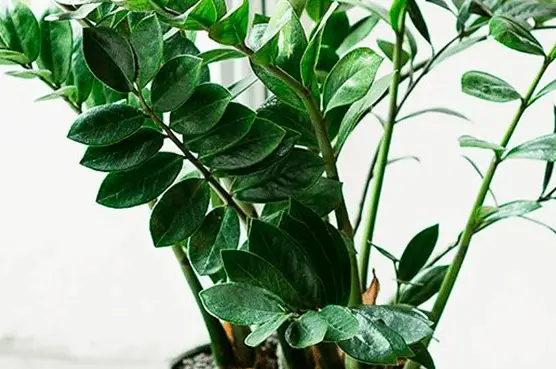
3. Zanzibar Gem (Zamioculcas Plant)
The Zanzibar Gem, or Zamioculcas plant, is a succulent houseplant that is native to Africa. It has dark green, waxy leaves and produces small white flowers. The Zanzibar Gem is an easy-to-care-for plant and is popular for its low maintenance requirements. It can be grown in both indoor and outdoor settings and does well in both sunny and shady areas.
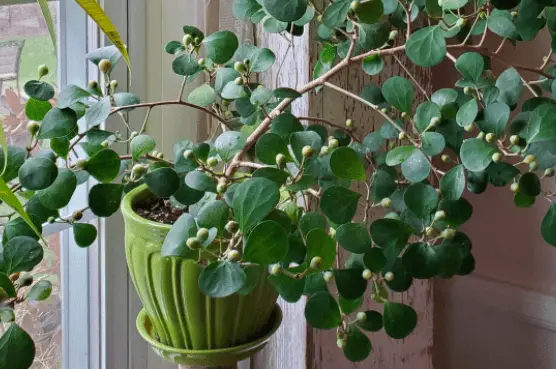
4. Mistletoe Fig (Ficus Deltoidea)
With waxy, triangular leaves, the Mistletoe Fig is a unique-looking houseplant that originates from Southeast Asia. It is an easy plant to care for and does well in both bright and low light conditions. Water Mistletoe Figs when the soil is dry to the touch and be sure to allow the plant to drain completely.
It grows to a few meters tall in the wild, but it’s unlikely for it to reach these heights indoors. Mistletoe Fig is a slow-growing plant, so don’t be alarmed if it doesn’t seem to be growing much in its first few years.
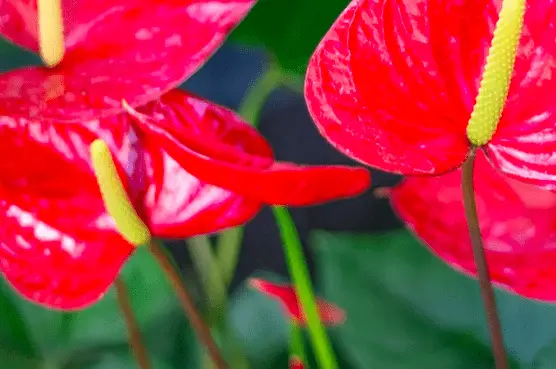
5. Anthurium
Anthurium is a genus of about 1,000 species of flowering plants in the family Araceae, native to tropical regions of the Americas and Asia. It is a popular ornamental plant because of its colorful spathe and spadix flowers.
The generic name Anthurium is derived from the Greek anthos (flower) and oura (tail), referring to the spadix flower’s characteristic tail-like extension. This makes Anthurium a great choice for anyone looking for a low-maintenance houseplant with beautiful flowers.
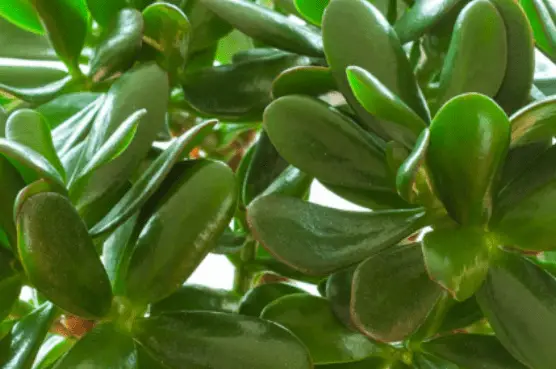
6. Jade Plant (Crassula Spp.)
The Jade Plant is a succulent plant that is native to South Africa. It has thick, fleshy leaves and grows in large clusters. The Jade Plant is popular as a houseplant because it is easy to care for and drought tolerant.
The Jade Plant is also known as the Money Tree or Good Luck Plant. It is said to bring good luck and fortune to those who own it. Some people believe that the leaves of the Jade Plant can be used in feng shui remedies to attract wealth and prosperity into your home.
7. Bromeliad
Bromeliad is a member of the plant family Bromeliaceae, which includes about 3,000 species of tropical flowering plants. Many bromeliads are epiphytes, which means they grow on other plants or trees rather than in soil. These attractive and often brightly colored plants are native to South America, Central America, and the West Indies.
The waxy leaves are sharp to the touch and arranged in a rosette pattern. Bromeliads can be grown both indoors and outdoors, but they require special care to thrive. They should be watered regularly, but the soil should be allowed to dry out completely between watering.
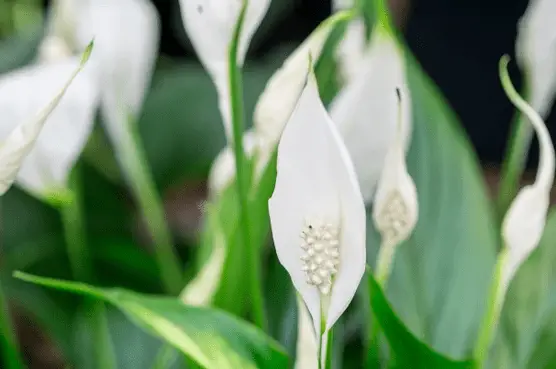
8. Peace Lily
Peace lilies (Spathiphyllum) are a genus of flowering plants in the family Araceae. They are native to tropical regions of the Americas and Asia.
Peace lilies are easy to grow and care for, making them a popular houseplant. They are known for their long-lasting white blooms, which often last up to two months. The leaves of peace lilies are also known for their ability to clean the air by absorbing toxins such as benzene and formaldehyde.
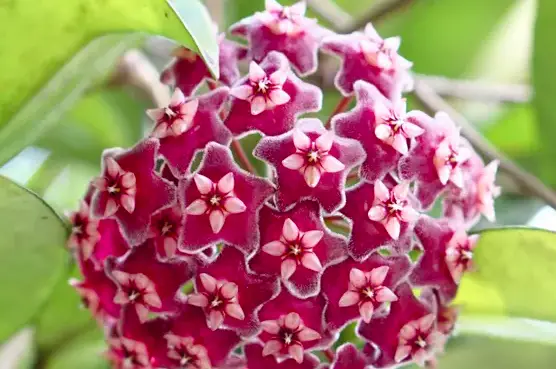
9. Hoya Carnosa
Known as the Wax Plant or Porcelain Flower, Hoya Carnosa is a vine-like plant that is native to Southeast Asia. It has glossy, dark green leaves and small white/pink flowers. The Hoya Carnosa is an easy-to-care-for plant that works well in bright and low light conditions.
The Hoya Carnosa is a fast-growing plant, so it is important to prune it regularly to keep it under control. It is also a climbing plant, so be sure to provide it with something to climb on if you want it to stay healthy and happy.
The Heartleaf Ice Plant is a succulent plant that is native to South Africa. It has thick, fleshy leaves and grows in large clusters. The Heartleaf Ice Plant is popular as a houseplant because it is easy to care for and drought tolerant. The Heartleaf Ice Plant gets its name from the shape of its leaves, which are heart-shaped.
The Heartleaf Ice Plant produces bright pink/red flowers that bloom in the summer. This makes it a great plant to add color to your home during the warmer months.
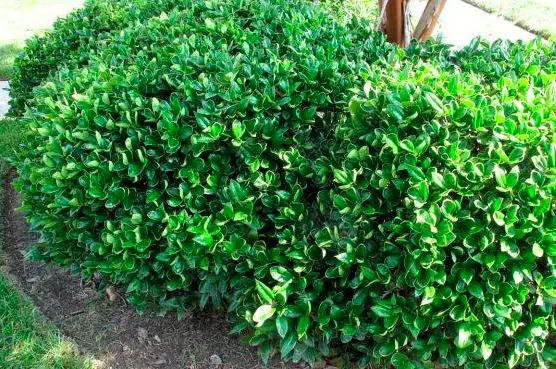
11. Carissa Holly
The Carissa Holly is a shrub that is native to Africa. It has dark green, glossy leaves, and small white flowers. The Carissa Holly is an easy-to-care-for plant that works well in bright and low light conditions.
Many gardeners grow it as a hedge plant because of its dense growth habit. It is slow growing, so it does not require much maintenance or pruning. The Carissa Holly is also known to be fairly deer resistant, making it a good choice for those who live in areas where deer are a problem.
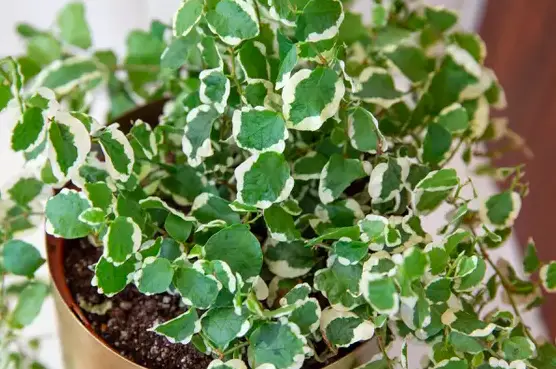
12. Swedish Ivy
Swedish ivy (Plectranthus australis) is a fast-growing, evergreen vine that hails from the tropics. This popular houseplant is prized for its easy care and bright foliage, which features attractive variegated leaves.
While Swedish ivy is typically grown as a trailing or cascading plant, it can also be trained to climb vertical surfaces. Whether you’re looking to add a splash of green to your indoor space or create an outdoor living wall, Swedish ivy is a great choice!
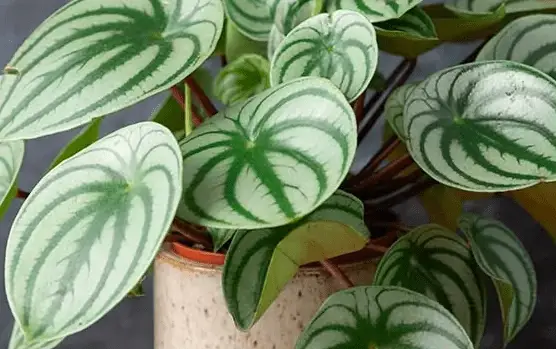
13. Radiator Plant (Peperomias)
The radiator plant, also known as a peperomia, is a popular indoor plant that’s often used in decorating because of its interesting leaves. The plant is easy to care for and doesn’t require much light, making it a good choice for people who don’t have a lot of experience with plants.
One thing to keep in mind if you’re thinking about purchasing a radiator plant is that they can be quite toxic to cats and dogs. So if you have pets, it’s important to make sure they don’t have access to the plant.
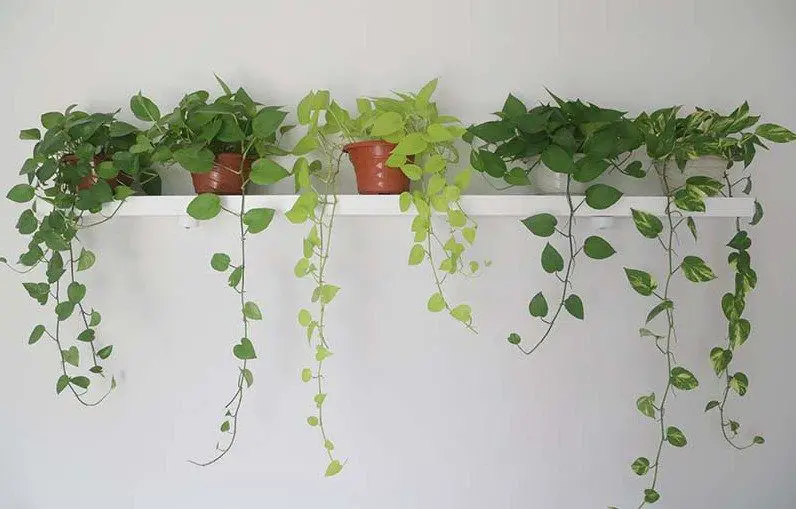
14. Pothos
Answer: Pothos plants (Epipremnum aureum) are easy-to-care-for houseplants that can brighten any indoor space. These vining plants are native to the tropical forests of Southeast Asia and thrive in warm, humid conditions. While pothos can tolerate lower light levels, they will grow best in bright, indirect sunlight.
Pothos plants are very versatile and can be grown as either trailing or climbing vines. To encourage your pothos to climb, simply provide them with support such as a trellis or piece of string.
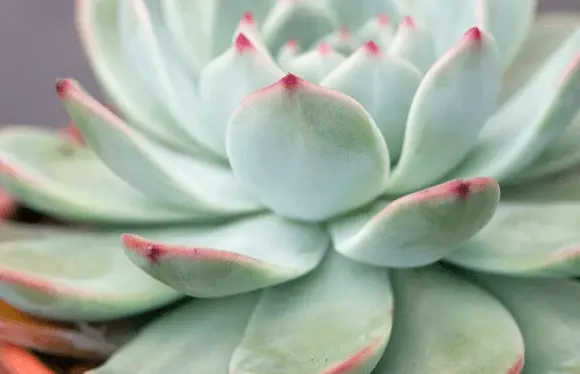
15. Echeveria Succulent
Echeveria is a large genus of succulent plants native to the mountains of Central America. The genus comprises over 120 species, which are commonly known as hen and chicks plants. Echeveria is characterized by its fleshy leaves, which grow in rosettes. The leaves are often brightly colored, and the flowers are borne on stalks.
Echeveria succulents are popular houseplants, due to their ease of care and striking appearance. Many species of Echeveria can be easily propagated from leaf cuttings, making them even more popular with gardeners and plant enthusiasts.
Where to Buy Plants with Waxy Leaves?
If you’re looking for a place to buy houseplants with waxy leaves, we recommend starting your search at your local nursery or garden center. You can also find these plants online from many different retailers. When shopping for plants online, be sure to read the plant descriptions carefully so that you choose a plant that will thrive in your home.
Etsy can be a great place to find rare and unique plants, especially if you’re looking for a collector’s item. However, be aware that the prices on Etsy can be higher than what you would find at a nursery or garden center.
What to Look for When Buying Plants with Waxy Leaves?
When shopping for houseplants with waxy leaves, there are a few
How to Care for Plants with Waxy Leaves?
The specific care required will depend on the plant species. However, many waxy plants are able to store water in their leaves, which means they don’t need to be watered as often as other plants.
When watering your waxy plant, check the soil before adding water. Allow the top few inches of soil to dry out before watering again. In general, it’s best to err on the side of underwatering rather than overwatering.
In addition to watering, you will also need to provide your plant with the appropriate amount of light. Again, this will vary depending on the plant species. Most waxy plants prefer bright, indirect light. However, some species can tolerate low-light conditions, like the pothos.
Conclusion
In conclusion, houseplants with waxy leaves are a great choice for people who are looking for an easy-to-care-for plant. These plants are available from many different retailers, and the care requirements will vary depending on the plant species.
Be sure to read the plant descriptions carefully before purchasing, so that you choose a plant that will thrive in your home. Do you have a houseplant with waxy leaves? We’d love to hear about it in the comments below!
Apple trees are a beautiful addition to any garden, and they can be a great source of fresh fruit. However, one common problem with apple trees is the appearance of yellow spots on the leaves. In this blog post, we will explore the causes of these spots and suggest some solutions.
Why Are There Yellow Spots on My Apple Tree Leaves?
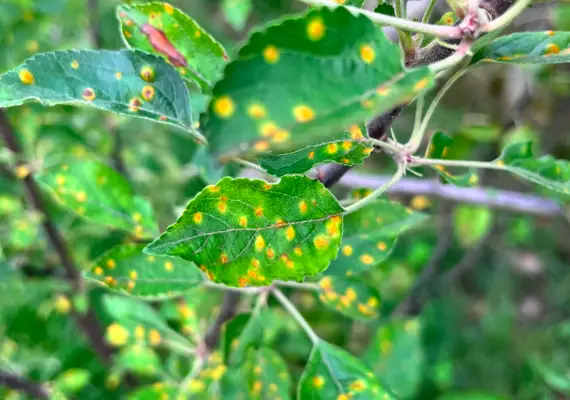
Your apple tree is likely dealing with a fungal infection known as rust. This disease is caused by a fungus that survives on plant debris and produces spores. These spores are then spread to other plants by wind, rain, or insects. Rust can affect both the leaves and fruit of your apple tree, and it is most commonly seen in late summer or early fall.
While rust is not usually fatal to apple trees, it can cause the leaves to fall off prematurely. This can weaken the tree and make it more susceptible to other diseases. Rust can also affect the quality of the fruit, making it less attractive and less valuable.
The most common type of rust on apple trees is called cedar apple rust. It’s common to find this rust on apple trees that are near cedar trees. This is because the fungus that causes cedar apple rust needs two host plants to complete its life cycle. The first host plant is a cedar tree, and the second is an apple tree.
Cedar apple rust starts as small, orange-yellow spots on the leaves of your apple tree. These spots will eventually turn brown and raise up from the surface of the leaf. In some cases, the spots will also be visible on the fruit of your tree.
How to Treat an Apple Tree With Cedar Apple Rust?
The key is to stop the spread of the fungus. This can be done by removing all infected leaves and fruit from your tree. These should be disposed of far away from your tree to prevent the fungus from spreading.
Simply take a bag and collect any leaves or fruit that have rust spots. It’s important to be vigilant about this, as the fungus can spread quickly. Be sure to check your tree regularly for new spots, and remove them as soon as possible.
You should also prune any branches that are touching cedar trees. This will help to stop the spread of the fungus from the cedar tree to your apple tree.
I usually recommend using a fungicide, like neem oil, to remove fungal infections. However, once rust has taken hold, it’s usually too late to get rid of it completely. However, Copper treatment can be used to control the rust while you take other measures to get rid of the infection.
If you have cedar trees on your property, you should also consider removing them. This is the only way to completely stop the spread of cedar apple rust. However, I understand that this may not be possible for everyone. In that case, you can try to plant your apple tree as far away from the cedar trees as possible.
Rust on apple tree
How Can I Prevent Yellow Spots on My Apple Tree?
Prevention is always the best solution when it comes to dealing with plant diseases. There are a few things you can do to prevent yellow spots on your apple tree leaves:
Sanitation
One of the most important things you can do is to practice good sanitation. This means removing all fallen leaves, fruit, and debris from around your tree. This will help to prevent the spread of fungal spores and other pests.
Monitoring
You should also regularly monitor your apple tree for signs of disease. This means checking the leaves for spots or other abnormalities. If you see anything suspicious, it’s important to act quickly to prevent the spread of disease.
Fungicide Application
If rust is a common problem in your area, you may want to apply a fungicide to your apple tree. This is best done in the spring before the rust fungus becomes active. You can also apply a fungicide after rain or irrigation to help prevent the spread of spores.
Scab is caused by a fungus called Venturia inaequalis, which overwinters in fallen leaves and infected buds. The fungus infects new growth in the spring, causing small, round lesions to form on the leaves. These lesions eventually turn yellow or brown and can be covered with black spots. Scab can also cause the fruit of your tree to become discolored and deformed.
Pests
A number of pests can cause yellow spots on your apple tree leaves. These include aphids, mites, and scale insects. Aphids are small, soft-bodied insects that feed on the sap of plants.
They are typically green or black in color and can be found in large groups on the undersides of leaves. Mites are tiny, spider-like creatures that feed on the chlorophyll in leaves. This can cause the leaves to turn yellow or brown.
Scale insects are small, hard-bodied creatures that attach themselves to plant stems and leaves. They suck the sap out of plants, which can cause the leaves to turn yellow or brown and eventually drop off.
Environmental issues
Environmental stressors such as drought, frost, or excessive heat can cause the leaves of your apple tree to turn yellow. This is usually a temporary condition and is no cause for alarm. It’s just important that you follow all of the usual care guidelines for your apple tree to help it recover.
Conclusion
In conclusion, yellow spots on your apple tree leaves can be caused by a number of different things. However, the most common cause is cedar apple rust. This fungal disease is spread by cedar trees and can infect your apple tree if it’s not properly treated.
There are a few things you can do to prevent the disease, including practicing good sanitation, monitoring your tree for signs of disease, and applying a fungicide.
If you do find yourself with yellow spots on your apple tree leaves, don’t despair! There are a number of solutions that can help to solve the problem.
You’ve left your Monstera in the car and you’re wondering what to do. Should you water it? Should you give it some sun? It can be hard to know what to do when you’re not sure of the plant’s needs. In this blog post, we’ll give you some tips on what to do if you’ve left your monstera in the car.
What Should I Do If My Monstera Was Left in My Car?
The exact steps to follow depend on how long your monstera was in the car, and what the conditions were like. Monstera plants are vulnerable, and they can’t tolerate being in hot or cold conditions for too long.
If it was only in the car for a short period of time, say less than an hour, and the conditions weren’t too hot or cold, then you likely don’t need to do anything. Just bring it inside and water it as usual.
However, if your monstera was in the car for a longer period of time, or if the conditions were extreme (very hot or cold), then you’ll need to take some extra steps to save your plant.
I will now dive into each scenario so that you know exactly what to do next time this happens to you, or if this has already happened and you are unsure of what to do.
Monstera Left In a Hot Car
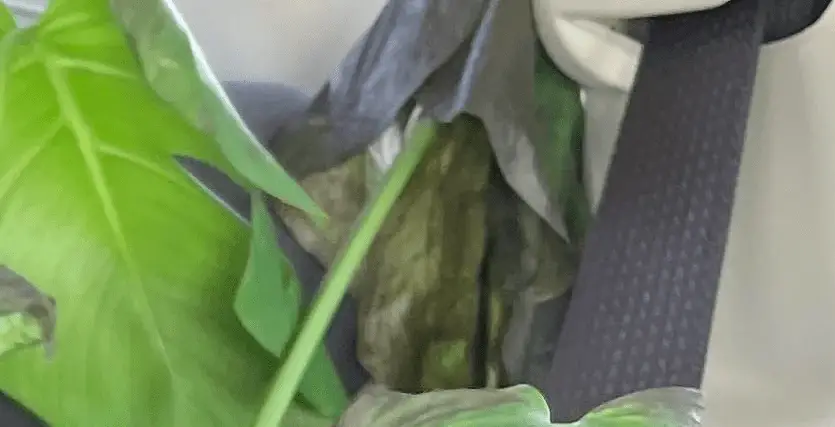
If your monstera was left in a hot car, there’s a chance the leaves that were in direct sunlight may have been damaged. The leaves will likely be black or brown in spots, and may even be crinkled. Don’t worry, though – your plant can likely recover from this type of damage.
To help your plant recover, start by trimming off any leaves that are severely damaged. You can also remove any leaves that are black or brown in spots. Use a pair of sharp scissors or pruning shears to make clean cuts.
Burnt leaves from being left in a hot car
Now your monstera if left with only healthy leaves, it will be able to focus its energy on growing new leaves rather than trying to repair damaged ones.
Give your monstera plenty of water so that the soil is evenly moist, but not soggy. You may need to water more often than usual for the next few weeks to help your plant recover. There’s a good chance the soil is dry since the plant lost water through its leaves while it was in the car.
Monitor your plant closely over the next few weeks and provide additional water as needed. If new growth appears to be stunted or if leaves continue to fall off, consider repotting your monstera into a fresh potting mix.
If you have a humidifier, running it in the room with your monstera will also help to improve the air quality and prevent the leaves from drying out.
Monstera Left In a Cold Car
If your monstera was left in a cold car, the leaves may be suffering from frost damage. The leaves may be wilted, discolored, or even fall off.
Get the monstera into the warmth as soon as possible. Your plant will be stressed from the cold temperatures, so it’s important to provide a warm and humid environment that it receives in its natural habitat.
Place your plant in a spot that gets indirect sunlight and keep an eye on the soil moisture. The leaves of your plant will likely be drooping, so you’ll need to water more often than usual. Allow the top inch or two of soil to dry out before watering again.
To help your plant recover, start by trimming off any leaves that are severely damaged. You can also remove any leaves that are wilted, discolored, or blackened in spots. Use a pair of sharp scissors or pruning shears to make clean cuts.
Should I Prune Sun-Scorched Leaves Extreme Car Heat?
It can be a good idea to prune sun-scorched leaves to help your monstera plant recover from the heat damage. However, only remove the leaves that are severely damaged – leave any that only have a few brown spots.
Pruning will help your monstera focus its energy on growing new, healthy leaves rather than trying to repair the damaged ones. Plus, it makes the plant look a lot better!
To prune sun-scorched leaves, use a pair of sharp scissors that have been sanitized with rubbing alcohol. Make sure to make clean cuts so that the plant can heal quickly. Dispose of the damaged leaves away from your plant to prevent the spread of any disease.
After pruning, give your monstera plenty of water so that the soil is evenly moist. Your monstera may need more energy than usual to recover from the heat damage, so consider using a fertilizer with high nitrogen content. Apply the fertilizer according to the manufacturer’s instructions.
How to Keep Monstera Alive in a Hot Car?
There are a few rules to follow if you want to keep your monstera alive in a hot car:
1. Park in the shade
When you can, try to park your car in the shade. If you’re going to be in the sun for more than a few minutes, use a sunshade or put up a tarp to provide some protection from the harsh rays.
Remember, the sun moves throughout the day, so even if your car is in the shade when you park it, it may not be later on. Parking as close to a building as you can helps to provide some additional shade.
2. Use the footwell
If you’re going to be in the car for a while, try to put your monstera in the footwell. This is usually the coolest part of the car, so it will help to keep your plant from getting too hot. This area tends to be harder for the sun to reach, so it will be a little bit cooler.
If you can’t put your plant in the footwell, try to at least keep it away from any direct sunlight. The sun coming in through the windows can heat up the car quickly, so it’s best to avoid it if possible.
3. Open windows
Another way to keep your car from getting too hot is to open the windows. This will help to circulate the air and keep the temperature down. Just be sure to not leave your plant in direct sunlight when you do this.
4. Water the plants in advance
If you know you’re going to be in the car for a while, water your plants beforehand. This will allow the monstera to have plenty of moisture to help it survive the heat. Just be sure not to water it too much – the soil should be moist, but not soggy.
You can also mist your plants with a spray bottle if they start to look wilted. Carry a small container of water with you to use as needed.
5. Drive slowly
It’s important to drive slowly when you have plants in the car. Sudden stops and starts can jostle the plant, which can damage the leaves. The key is to take it easy and not make any sudden movements.
If you follow these tips, your monstera should be able to survive the heat of a hot car. Just be sure to check on it regularly to make sure it’s not getting too stressed out. And if you’re ever in doubt, err on the side of caution and bring your plant inside. Better safe than sorry!
Conclusion
In conclusion, if you have left your monstera in a hot or cold car, don’t worry – there’s a good chance it will be able to recover. The key is to get your monstera back into an environment that closely resembles its natural habitat.
Have you had any experience with leaving your monstera in a hot or cold car? Share your story in the comments below!