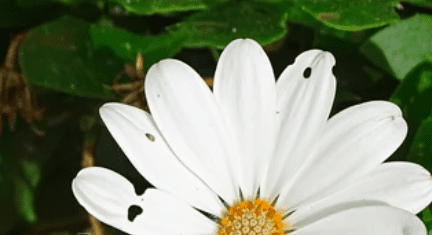
Do you have a daisy plant in your garden? If so, you may have noticed that the petals have holes in them. This is a common problem with this type of plant, and there are several reasons why it may happen. In this blog post, we will discuss the causes of holes in the petals of daisy plants, as well as solutions to fix the problem.
Why Are There Holes in My Daisy Petals?
The most likely reason for holes in your daisy petals is that the plant is being attacked by pests. Common culprits include aphids, caterpillars, and earwigs. These pests can cause serious damage to the plant, and even kill it if left unchecked.
If you suspect that your plant is being attacked by pests, the first thing you should do is inspect the plant carefully. Look for any signs of insects or larvae on the leaves or stems. If you see any, you will need to take action to remove them from the plant.
White earwigs tend to just eat the petals, snails and slugs will go after the entire plant, and caterpillars will often strip the leaves completely.
How to Treat Daisy Petals with Holes?
To treat your plant, you will need to remove the pests from it. This can be done by hand, or with the help of a pesticide.
My favorite method of pest control for all plants is the use of neem oil (Amazon link), which is a natural pesticide that is effective at killing a wide variety of pests.
Simply mix the neem oil with water according to the instructions on the bottle, and then spray it on your plant. Be sure to cover the entire plant, including the undersides of the leaves.
You will need to repeat this treatment every few days until all of the pests are gone. Once they are gone, your plant should start to recover and any pests move away.
However, there’s a chance that it’s too late and the plant is already too damaged. In this case, you may need to start over with a new plant.
Holes in daisy petals
How to Keep Pests Away From Daisy Petals?
To prevent pests from attacking your plant, you will need to take some preventive measures.
The first thing you should do is inspect your plant regularly. Look for any signs of pests, and if you see any, remove them immediately.
You can also try spraying your plant with a natural insecticide such as neem oil. This will help to keep pests away from your plant.
In addition, you can try to attract natural predators of the pests that are attacking your plant. For example, if you have a problem with aphids, you can try attracting ladybugs to your garden.
Finally, keeping your garden clean and free of debris will also help to deter pests. This is because they love hiding in places where they can’t be seen, like in tall grass or under leaves.
What Else Causes Holes in Daisy Petals?
It’s not just pests that can cause holes in your daisy petals:
Disease
Most plants are susceptible to diseases, and daisies are no exception. If your plant is infected with a disease, you may notice holes in the leaves or petals.
The most common diseases that affect daisies are powdery mildew and rust. These diseases can be treated with the use of fungicides, like neem oil.
Weather
Harsh weather conditions can also cause damage to your plant. If the temperature drops suddenly, or if there is a hailstorm, your plant may be damaged. This can cause the leaves and petals to turn brown and die.
Should I Prune Daisy Petals with Holes?
If you notice that your plant has holes in the leaves or petals, you may be tempted to prune it. However, this is not always necessary.
In most cases, your plant will recover from the damage on its own. Pruning should only be done if the plant is severely damaged, or if it is preventing the plant from growing.
If you do decide to prune your plant, be sure to only remove the damaged parts. Do not cut off more than is necessary, as this can cause further damage to the plant.
Conclusion
In conclusion, holes in daisy petals are usually caused by pests that are feeding on the plant. However, they can also be caused by disease or weather damage.
If you notice holes in your daisy petals, be sure to treat them as fast as possible by removing spraying the plant with neem oil. You should also take preventive measures to keep pests away from your plant. Finally, only prune the plant if it is absolutely necessary.
I hope this article was helpful in solving the mystery of the holes in your daisy petals! If you have any questions, please feel free to leave a comment below.
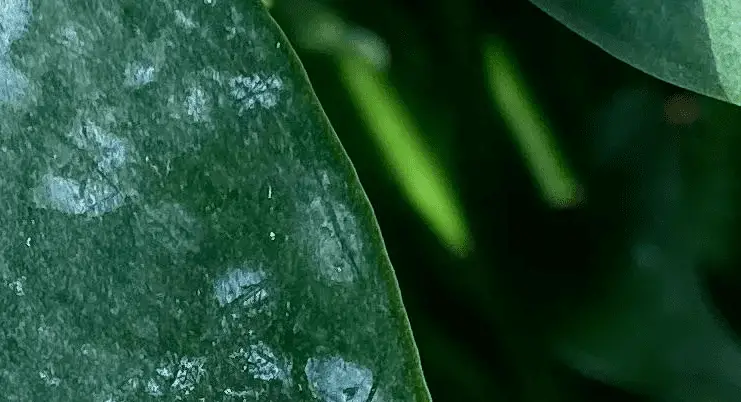
If your monstera has started to white spots, this is most likely powdery mildew. Powdery mildew is a type of fungi that can affect almost any type of plant, and it’s one of the most common problems that gardeners have to deal with.
The fungus thrives in warm, dry conditions and produces a white, powdery growth on the plant’s leaves and stems. But why is it there and what can you do to get rid of it?
Why Has My Monstera Got Powdery Mildew?
Your monstera has powdery mildew because fungal spores landed on your plant and the conditions are right for the fungus to grow. The main reasons for this are:
1. The plant is under stress
Monstera plants need certain conditions to grow well, and if they’re not met, the plant will become stressed. When a plant is stressed, it’s more susceptible to diseases like powdery mildew.
Some of the most common causes of stress in monstera plants are:
Too much or too little water
Not enough light
Poor drainage
Poor air circulation
Poor soil quality
Temperature changes
If you think your plant is stressed, try to identify the problem and correct it. This will help to prevent powdery mildew and other diseases.
2. The environment is conducive to fungal growth
Powdery mildew thrives in warm, humid conditions with little air circulation. While monstera plants enjoy humidity levels of around 60%, they also need good air circulation to prevent the fungus from developing.
If your home is particularly warm and humid, or if you have your monstera plants in an enclosed space, this could be the cause of the powdery mildew.
You can try to improve the air circulation around your plants by opening windows or using a fan. You should also try to reduce the humidity levels by using a dehumidifier or moving your plants to a drier location.
3. You didn’t clean your plant
Monstera plants are susceptible to pests and diseases if they’re not kept clean. The best way to clean your plant is to gently remove the affected leaves with a soft cloth or brush. You should also disinfect your pruning tools after each use.
4. Fungal spores landed on the leaves
The wind can blow powdery mildew spores onto your plant, or the spores can be carried by insects. Once the spores land on the leaves, they’ll start to grow if the conditions are right.
So, now you know why your monstera has powdery mildew and how it got there. But what can you do to get rid of it? Let’s find out.
How to Fix Powdery Mildew on Monstera Plant?
The first step is to get rid of any powdery mildew currently present on your plant. You can do this by wiping the affected areas with a damp cloth or spraying them with water.
Now you’ve removed what you can see, it’s time to kill all fungus spores still on your monstera. The easiest way to do this is to use a fungicide. There are many different products available, so make sure you choose one that’s suitable for your plant.
I recommend using a natural neem oil fungicide (Amazon link) as it’s safe for both you and your plant. Neem oil is made from the seeds of the neem tree and it’s a very effective way to get rid of powdery mildew. Plus, it’s better than using harsh chemicals on your plant.
Simply mix the neem oil with water according to the instructions on the bottle and spray it onto your plant. Make sure you cover all affected areas, as well as any healthy leaves nearby. This will help to prevent the fungus from spreading.
You should see a noticeable difference within a few days, but continue spraying for at least two weeks to make sure all the spores are gone.
Once you’ve treated your plant, it’s important to take measures to prevent powdery mildew from returning. The best way to do this is to create a more favorable environment for your monstera.
Here are some tips to help you do this:
Increase air circulation around your plant by opening windows or using a fan
Water your plant in the morning so that the leaves have time to dry before nightfall
Avoid overhead watering, as this can cause water droplets to stay on the leaves for too long
Improve the drainage of your potting mix so that excess water can drain away quickly
Make sure your plant is getting enough light. A monstera needs bright, indirect sunlight to thrive
By following these tips, you should be able to fix powdery mildew on your monstera and prevent it from returning in the future.
Conclusion
In conclusion, powdery mildew is a common problem for monstera plants. The fungus can cause the leaves to turn white and eventually die. However, there are several things you can do to fix the problem and prevent it from returning.
Preventative measures are always the best way to deal with powdery mildew. Make sure you water your plant in the morning so that the leaves have time to dry before nightfall. Avoid overhead watering and improve the drainage of your potting mix.
If powdery mildew does appear, the first step is to remove any affected leaves. You can then treat the plant with a fungicide, such as neem oil. By following these steps, you should be able to fix powdery mildew on your monstera and keep it healthy for years to come.
Do you have any tips for dealing with powdery mildew? Let us know in the comments below!
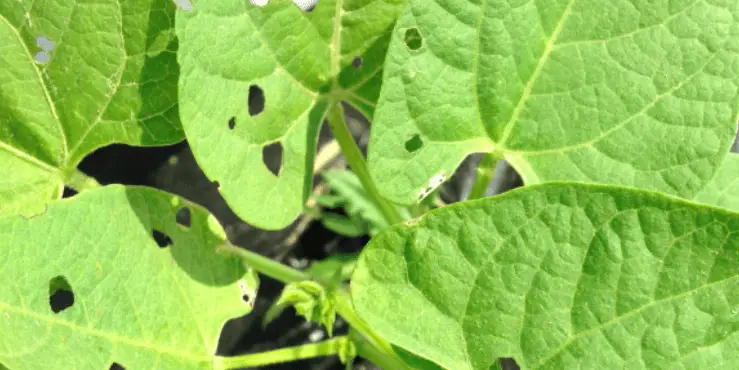
Green beans are a delicious and nutritious vegetable that can be enjoyed all year round. However, sometimes you might notice small holes in the leaves of your green beans. This can be alarming, but don’t worry – we’re here to help! In this blog post, we will discuss the possible causes of these holes and how to fix them.
Why Are There Holes in My Green Bean Leaves?
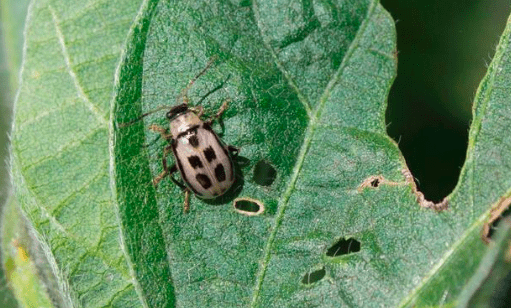
Pests are the most common cause of holes in green bean leaves. The most common pest is the bean leaf beetle, which is notorious for causing extensive damage to green bean leaves. Other pests that can cause damage include thrips, aphids, mites, caterpillars, and slugs.
All of these pests feed on the leaves of green beans, which can result in small holes. In severe cases, the entire leaf may be consumed, leaving only the veins behind.
If you notice holes in your green bean leaves, it’s important to inspect them carefully to determine if pests are to blame. Look for any insects or larvae on the leaves and look for any signs of damage. You can also try to collect a sample of the pests and take them to your local extension office for identification.
You may need to check first thing in the morning or just after sunset when the pests are most active and feeding.
How to Treat Green Bean Leaves with Holes?
To put an end to the holes in your green bean leaves, you will need to remove the pests responsible for the munching. The most effective way to do this is to use a pesticide that is specifically designed to kill the pests causing the damage.
My favorite way to tackle pests is via the use of neem oil (Amazon link), which is a natural and organic pesticide that works well against a wide variety of pests.
You can also use other pesticides, such as pyrethrin or permethrin, but be sure to follow the directions carefully and always wear gloves and a mask when applying any chemicals to your plants.
To use neem oil, simply mix it with water according to the instructions on the bottle and then spray it onto the affected leaves. Be sure to cover the entire leaf, including the underside where pests like to hide. You will need to reapply every few days until the holes stop appearing in the leaves.
Bean leaf beetle
How to Keep Pests Away From Green Bean Leaves?
To prevent pests from damaging your green bean leaves, it’s important to take some preventive measures. One of the best things you can do is to keep your garden clean and free of debris. This will make it harder for pests to hide and will also remove any potential food sources that they might be attracted to.
You can also use row covers to keep pests away from your green beans. Row covers are simply pieces of fabric that you lay over your plants. They allow sunlight and water to reach the plants, but they keep pests out.
What Else Causes Holes in Green Bean Leaves?
If pests have been ruled out as the cause of holes in your green bean leaves, there are a few other possible causes to consider:
Disease
In some cases, holes in green bean leaves can be caused by diseases. The most common disease that affects green beans is called rust, which causes orange or brown spots on the leaves. Rust can eventually kill the plant if it is not treated.
If you suspect that your green bean leaves have been affected by a disease, it’s important to take action immediately. The best way to treat diseases is to use a fungicide, like neem oil.
Animals
Another potential cause of holes in green bean leaves is animals. Birds, deer, rabbits, and other animals can all cause damage to green beans. The best way to prevent this type of damage is to use fencing or netting around your plants.
This will keep animals out and allow your green beans to grow undisturbed.
Weather
Finally, weather can also cause holes in green bean leaves. Strong winds can break the leaves and hail can cause small holes. There is not much you can do to prevent this type of damage, but you can try to grow your green beans in a sheltered area.
Pruning green bean leaves can be done by hand or with a pair of sharp shears. Be sure to disinfect your tools before and after use to prevent the spread of disease.
When pruning, always remove the entire leaf, including the stem. This will help to prevent further damage and will also make it easier for the plant to recover.
Conclusion
In conclusion, holes in green bean leaves can have a variety of causes. The most common cause is pests, but holes can also be caused by diseases, animals, and weather.
I hope this article was helpful in identifying the cause of holes in your green bean leaves. If you have any further questions, please feel free to leave a comment below.