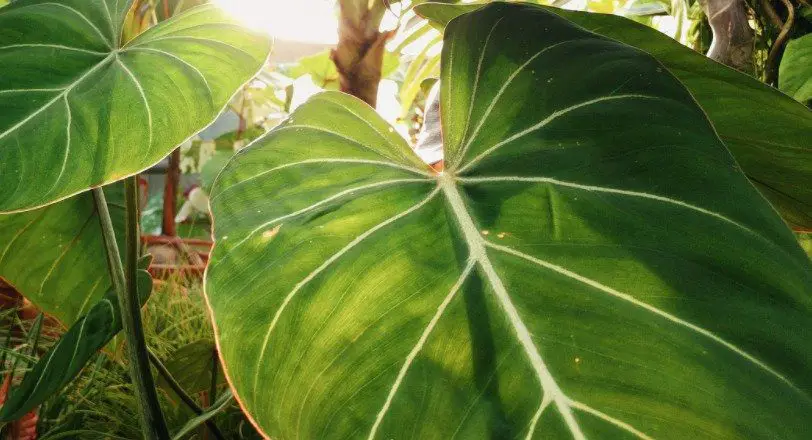
It can be frustrating when you notice that your plant is curling and it’s not the same shape as it was before. But don’t worry, there are a few reasons why this might happen! In this blog post, we will discuss some of the most common causes of curled elephant ear plants and how to fix them.
Why Is My Elephant Ear Plant Curling?
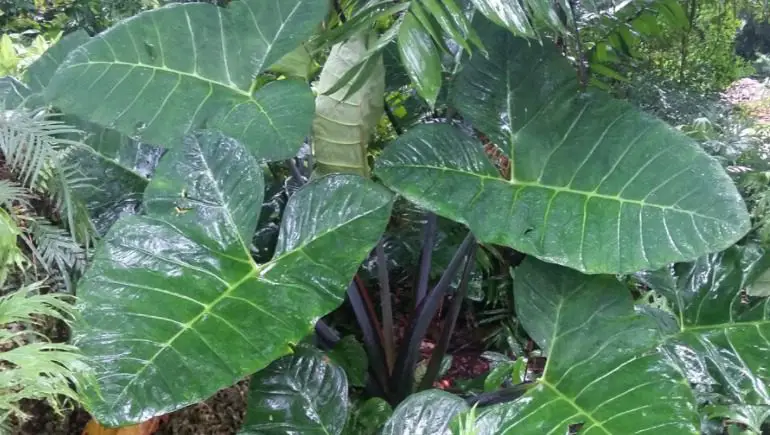
Your elephant ear plant leaves are beginning to curl because it’s experiencing a lack of water, sudden temperature changes (such as from dry air), or the pH level in its soil is too high.
Elephant ears can curl for a number of reasons, so you need to find the specific cause before you can uncurl the leaves. I will now cover the four most common reasons why your elephant ear leaves are curling.
1) Too Much Water
Overwatering is one of the most common reasons why your elephant ear leaves are curling, especially if they are curling downwards. This is because the peace lily is wilting due to too much water, so the elephant’s ear is curling downwards as if it’s trying to drain water.
When you begin seeing your plant curl its leaves downwards and flip them over, this is a sign that there might be overwatering occurring. As they are tropical plants, peace lilies appreciate being watered regularly but their soil should be allowed to dry between waterings.
If you notice your elephant ear leaves curling downwards, this is a sign that the plant needs less water. When watering your elephant’s ears, make sure the excess water drains out of the bottom of the pot.
2) Not Enough Water
When the plant doesn’t have enough water, it will curl up its leaves to protect itself. It does this to retain as much water as possible until it can find another source.
This normally happens during the summer when the plant owner doesn’t change the watering frequency. I’ve done this with my own plants many times. Basically, a heatwave arrives, and I fail to take action by giving more watering than the plant would usually need.
This results in the plant drying out and not having enough water to grow properly. This is why the leaves curl up into themselves, in order to protect their cells from dying.
You can fix this by watering more often or adding a humidifier or pebble tray to the room so it’s more humid. It should reverse after a week of giving it enough water and having proper humidity levels in your home.
3) Sudden Temperature Changes
When the temperature around your plant changes abruptly, it can cause stress. This is usually a sudden change in humidity or when you move the plant from one location to another and there’s a big jump in temperatures.
If this happens, don’t worry! Just give your elephant ear some time to adjust and slowly introduce it back into its normal environment.
This can also happen if your elephant ear was exposed to dry air from a heater or if the pot is in a sunny spot. The most common time for this to happen is during winter when lots of heaters are being used, as well as during hot summer days.
In this case, you should move your plant to a new location that has a consistent temperature level that doesn’t fluctuate. If it’s winter, make sure the plant isn’t in direct sunlight or by a heater.
4) Soil with a High pH Level
The fourth and final reason your elephant ear might be curling is if the soil has a high pH level. This means that the soil is too alkaline and can be fixed by adding some acidic material to it, such as peat moss or coffee grounds.
If you think this is the problem, test the pH level of your soil by using a testing kit or getting it tested at a nursery. Once you know the pH level, add some acidic material to lower it and help your plant get back to normal.
Curled Elephant Ear Plant Leaves FAQ
Elephant ear plants are some of the coolest-looking indoor plants you can find, but unfortunately, they do suffer from several leaf problems that are hard to deal with. I will now focus on those problems and their solutions in more detail.
Will underwatering cause elephant ear leaves to curl inwards?
Yes, if the leaves are not receiving enough water, they will start to curl inwards as a way of trying to conserve moisture. I’ve noticed this of my leaves during hot summer days when the plant dries out quickly.
Should I prune my elephant ear if the leaves are curling?
No, you should not prune your elephant ear plant if the leaves are curling. The curled leaves may be a sign that the plant is not getting enough water, so by pruning it, you will only make the situation worse. Wait until you’ve solved the watering problem before taking any corrective action.
Conclusion
In conclusion, if your elephant ear plant is curling, it could be because of a lack of water, sudden temperature changes, soil with a high pH level, or if the leaves are exposed to dry air. I hope this article has helped you figure out what’s going on and that you will now have no problem correcting the issue.
I’ve outlined the four most common reasons your elephant ear might be curling, but there could be other factors that are causing this as well. So if you’re not sure what’s going on with your plant, it’s best to take a picture of the leaves and email or post it in one of our gardening forums so that somebody can help you out!
In the article, we will discuss elephant ear plant care and why your plant may be turning yellow. We’ll also provide some tips for how to help it turn green again and thrive!
Why Is My Elephant Ear Turning Yellow?
Overwatering, not receiving enough light, fungal disease, or an atmosphere that is stressful are the reasons your elephant ear plant has yellowed.
Let’s now take a closer look at the most common reasons for yellowing leaves on this plant, as well as how to treat them.
1. Overwatering
If you notice that your elephant ear plant is turning yellow and dropping leaves, it may be because of overwatering. The roots of this plant need to be able to breathe and the soil should never stay wet.
You can help prevent overwatering by allowing your elephant ear plant’s soil to dry out before watering it again. In fact, the only time to add more water is when the top of the soil is dry to the touch. Using a moisture meter is also helpful for keeping track of your plant’s moisture level.
It’s important that the pot used has drainage holes so that the plant’s roots can breathe. When water is left to pool at the bottom of the pot, the roots can become waterlogged and rot.
This causes the plant to stop taking in nutrients, wilt and turn yellow, or even die if not corrected quickly enough. If you suspect that your elephant ear plant is suffering from root rot, take action by repotting the plant.
Start by inspecting the roots and pruning any that are black or slimy. Replace the soil with fresh potting mix and place it in a new container that has drainage holes for better aeration around the roots.
2. Fungal Infections
Fungal infections on elephant ear plants may also be the reason they’re turning yellow. The most common type of fungus is called leaf spot and it can cause leaves to turn yellow, curl up, or even wilt completely.
The best way to prevent fungal disease is by providing your elephant ear plant with proper care. To begin, make sure it receives plenty of light and water the soil at room temperature.
It’s also important to clean up any dead leaves or other debris before they have a chance to spread pathogens to healthy parts of the plant. If you notice that your elephant ear is turning yellow due to fungus, the best treatment is to prune any dead or affected parts of the plant.
Neem oil is also great for preventing or treating fungal infections, so you may wish to consider spraying your plant with this organic fungicide.
Note that if the infection is severe, all parts of the elephant ear plant will need to be removed in order to save it. However, if only a few leaves are affected and there’s still healthy growth on the plant, pruning off the affected leaves may be enough to allow it time to heal and recover.
3. Lack of Sunlight
Elephant ear plants need a lot of light to thrive, so if yours is turning yellow it may be because the plant isn’t getting enough sunlight.
If your plant is located in a dark area, move it to an area that receives at least six hours of sunlight each day. You can also try increasing the wattage of the light bulbs you use if moving the plant isn’t an option and/or doesn’t help with its growth.
By giving your elephant ear plant more exposure to light, you should see new leaves and stems grow. Note that it will take some time for the plant to adjust to its brighter environment – be patient!
If your elephant ear is turning yellow due to lack of light but you cannot move the plant, try supplementing with a full-spectrum fluorescent light bulb. This will ensure that the plant gets all of the light it needs.
4. Environmental Stressors
Environmental stress, such as unpredictable weather or fluctuating temperatures, can cause an elephant ear plant to turn yellow.
If you’ve recently moved your plant indoors in the autumn and it’s still not getting enough light (or is too hot), this may be why it’s turning yellow. Another possibility is that the potting soil used was contaminated with chemicals or pathogens that are making the plant sick.
Cold drafts and dry heat are also harmful to elephant ear plants, so make sure your plant is situated in an area free from these.
Yellowing Elephant Ear Plant Leaves FAQs
I’ll go through some of the most common questions regarding yellowing leaves on elephant ear plants, starting with some of the most frequently asked ones.
Should I cut yellow leaves off my elephant ear plant?
Yes, pruning yellow leaves will help to rejuvenate your plant and make it grow new leaves. However, the yellowing is often a sign that there’s something wrong with the roots or soil, so you should check those before pruning off any leaves.
Will too little light cause my elephant ear plant to turn yellow?
Yes, if your elephant ear plant isn’t getting enough light it will turn yellow. Try moving the plant to a sunnier spot or using grow lights to add more light.
Will too much water cause my elephant ear plant to turn yellow?
Yes, if you’re watering your elephant ear plant too often or with water that’s too cold, it can cause the leaves to turn yellow. Make sure to water at room temperature and only when the soil is dry.
Will yellow elephant ear plant leaves turn green again?
No, it is very unlikely for the yellowing leaves to turn green again. However, if you prune off the leaves, new ones will grow in their place. So, there’s no need to worry as the plant will continue to grow despite the yellow leaves.
Conclusion
In conclusion, there are many reasons why an elephant ear plant may turn yellow. The most common ones are due to lack of light, fungus, or environmental stressors. However, there can be other causes as well.
If your plant is turning yellow, the best thing to do is identify the cause and take corrective action. This may involve increasing light exposure, changing the potting soil, or spraying with a fungicide. By taking these steps, you should see your elephant ear plant return to its healthy green state.
If you have any other questions about yellowing leaves on elephant ear plants, please drop me an email and I’ll do my best to answer them. Thanks for reading!
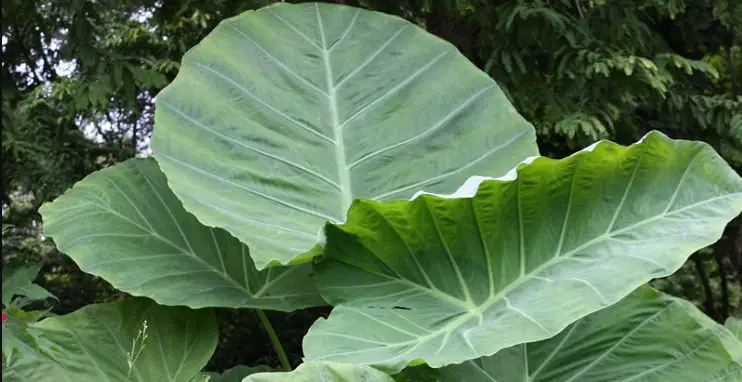
Elephant ear plants are one of the most popular houseplants in the world. They come in a wide range of colors and shapes, but they all have one thing in common: they’re big! Read on to learn about these fascinating plants…
The 4 Species of Elephant Ear Plant
The four species of elephant ear plants are:
Colocasia
Caladium
Alocasia
Xanthosoma
I will now give an overview of each type of elephant ear and why they are popular. I start with my favorite and then go through the others in a particular order.
1. Colocasia
The first species of elephant ear plant is the Colocasia. It has large, dark green leaves that form a clump at ground level. The colors range from light to dark green with purple veins and stem on top of pinkish petioles (the part of the leaf stem).
The plant is thought to originate from Southeast Asia and is also called taro. However, it can be grown in almost any climate zone if you provide care for the plant. Just make sure to keep it in warm conditions, so move the plant inside during winter if it gets cold in your climate.
It was first grown for its edible tubers but now is mostly grown as an ornamental plant. The taro root can be boiled or fried and tastes similar to potatoes.
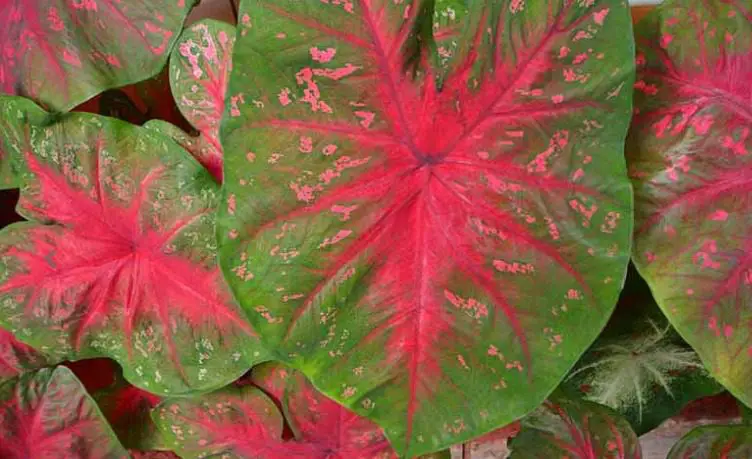
2. Caladium
The second species of elephant ear plant is the Caladium. It has large, arrow-shaped leaves that come in a range of colors, including white, pink, red, and green. They typically have a dark vein running down the center of each leaf.
Originating from South America, this plant is also called the Angel Wings. It grows well in areas of sunlight but should be kept out of the direct sun because the leaves are delicate.
The leaves of the Caladium are often used for floral arrangements and make a beautiful addition to any garden.
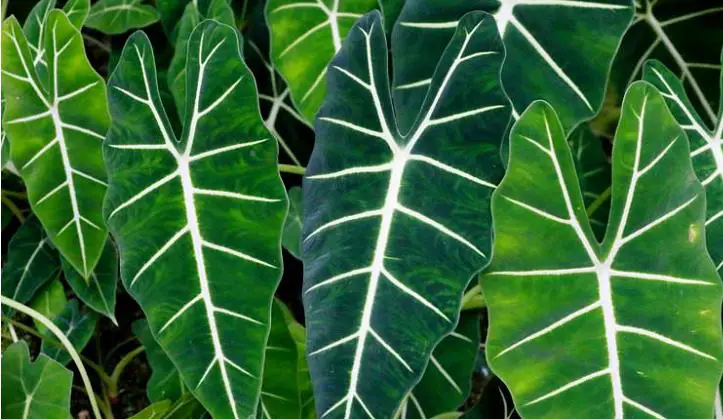
3. Alocasia
The third species of elephant ear plant is the Alocasia. It has large, dark green leaves with a pointy tip and a deep furrow running down the center. The colors range from light to dark green with purple veins and stem on top of pinkish petioles (the part of the leaf stem).
Native to Australia and Asia, this plant loves warm, humid conditions. It grows well in sunny areas but should be kept away from direct sunlight to prevent scorching of its leaves.
The Alocasia is popular because it can grow into a large plant that adds texture to any garden or indoor space. Since this type of elephant ear plant has very dark green foliage, you can place it near other plants with light green or variegated leaves to create a beautiful contrast.
4. Xanthosoma
The fourth species of elephant ear plant is the Xanthosoma. It has large, arrow-shaped leaves that are green on top and purple underneath. They range in color from light to dark green with veins running down the center like an Alocasia leaf, but they’re much thicker than those of their cousin (Alocasia).
This plant originates from America and is also called the Cocoyam or Tannia. It requires tropical conditions to grow, which means it can’t handle cold weather.
The Xanthosoma plant has edible roots that are cooked like potatoes and taste very similar in texture but sweeter in flavor than a yam. They’re often boiled, roasted, fried, or mashed.
My Favorite Type of Elephant Ear Plant
Out of all the types of elephant ear plants, my favorite is the Colocasia. I love the dark green leaves with their purple veins and stems on top of pinkish petioles (the part of the leaf stem). They’re so big and beautiful!
Do you have a favorite type of elephant ear plant? Let me know in the comments below.
Growing All Elephant Ear Plant Types
Now that I’ve given you a general overview of each type of elephant ear plant, it’s time to talk about how they grow and what conditions are best suited for them.
All types of elephant ear plants do well in full sun or partial shade. They prefer moist, but not wet, soil and grow best in USDA zones of 10 and 11. They can be grown outside in warm climates, but they should be brought inside in colder climates.
The plants grow so well that many consider them to be pests! In fact, it can be hard to stop elephant plants from spreading throughout the whole area. That’s why I often recommend for people plant elephant ears in containers that can be moved around as needed.
So, if you’re looking for a big, beautiful, and easy-to-grow houseplant, an elephant ear is a great option! Just make sure to give it plenty of sun or shade and moist soil, and enjoy the show.
Care For the Different Types of Elephant Ear Plants
Most types of elephant ears require the same care. They do best in full sun or partial shade, prefer moist but not wet soil, as well as grow best in USDA zones of 10-11.
I personally recommend watering the soil around the elephant ear plant, not the leaves, which will help prevent any diseases that may occur on the leaves.
All types of elephant ears should be fertilized twice a year with a high-phosphorus fertilizer. Be sure to follow the instructions on the package, as too much phosphorus can be harmful to plants.
Also, be sure to check for any signs of pests or diseases and take action if necessary.
Pests that may attack elephant ear plants include aphids, mealybugs, scale insects, whiteflies, and nematodes. Diseases that may occur include bacterial blight, anthracnose, stem rot, and wilts.
So, as long as you’re vigilant about checking for pests and diseases, your elephant ear plants should thrive!
Conclusion
In summary, there are four types of elephant ear plants: Colocasia, Caladium, Alocasia, and Xanthosoma. Each type has a different look with leaves ranging in color from light to dark green. My favorite type is the Colocasia for its large, dark green leaves with purple veins and stems on top of pinkish petioles (the part of the leaf stem).
I have written many articles about these unique plants, so please do a search on my blog to find any specific information you want you to know about.
Have you ever seen a drooping elephant ear plant? They are often called that because the leaves of the plants hang down from their stems. The sad drooping leaves can make the plant appear unhappy or unhealthy.
In fact, elephant ear plants usually have large leaves that stand tall, so what’s going on? In this blog post, we will talk about why your elephant ear plant may seem to be drooping and what you can do to help it!
Why Is My Elephant Ear Plant Drooping?
The most likely reason why your elephant ear plant is drooping is that it hasn’t received enough water. No matter what type of elephant ear plant you have, it will droop if the roots aren’t able to get enough water.
Another typical cause of the elephant ear plant drooping is a lack of light. To flourish and grow, this plant requires well-lit, indirect sunshine. If they don’t get enough sunshine, the leaves will droop and appear glum.
How to Stop Elephant Ear Plant Drooping?
You need to take action by making sure the soil is moist and the plant is getting enough sunlight. This will revive the leaves and get them standing upright again.
1) More water
The first step is to water the elephant ear plant more often. The soil should be moist but never soggy or too dry. If it isn’t receiving enough water, the leaves will droop and then eventually wilt over time.
A great way to tell if your plant needs a little extra drink is by sticking your finger in the soil. If it is dry, then you need to water! Alternatively, a moisture meter is an excellent way to tell if your soil requires water.
Elephant ear plants that are suffering from a lack of water should be treated immediately. This means fully saturating the soil with water until it starts to overflow from the plant pot.
I like to do this in the bathtub, where I can really soak the plant and allow the water to fully drain out. I do this for about 30 minutes and then allow the plant pot to sit in the bathtub overnight so that it can properly absorb all of that moisture.
2) More sunlight
The second potential cause of elephant ear drooping is that the plant isn’t receiving enough light. This is often the case with plants that are indoors and aren’t getting any natural sunlight.
In order to get better results, place the plant in an area that receives bright light from the sun for most of the day. If you don’t have a spot like this indoors, then consider moving your elephant ear outdoors during warmer months when it is warm enough for them to thrive outside.
Alternatively, you can use grow lights (Amazon link to my favorite) to illuminate your elephant ear plant. These lights are a great way to make sure the leaves receive enough light even if they can’t get it from natural sunlight.
I use them on my house plants during the winter months when the sun rarely makes an appearance in London. They give my plants the light they need and keep them healthy.
Droopy Elephant Ear Plant FAQs
You’re undoubtedly wondering a lot of things about the leaves of this plant. If that’s the case, I’ll go ahead and answer some of the most frequently asked questions I get asked.
How do I get my elephant ears to stand up?
Use a stake pole to prop up elephant ear plant leaves that are drooping. This involves placing a stake next to the plant and tying it up with string. It will keep those leaves from hanging down once they’ve been upright for a few days.
This may appear strange at first, but this is a technique that has been used for many, many years. You can actually buy these stakes at your local gardening store or online.
Should I prune droopy elephant ear leaves?
Prune any leaves that are already dead as these can lead to further problems with the plant. If they are drooping, you can trim those leaves off as well if it makes them look better and more aesthetically pleasing in your home or garden.
Will droopy elephant ear plant leaves kill my plant?
No, it won’t direct kill your plant. However, it’s important to find out what is causing the leaves to droop so that you can treat your plant appropriately. Lack of water can be fatal for your plant if the leaves become too wilted.
Do I need to re-pot a drooping elephant ear plant?
No, you shouldn’t need to re-pot a drooping elephant ear plant. In fact, this can cause more stress and worsen the issue. I only re-pot my plants when I suspect root rot or if the plant has grown too big for the current pot.
Will my droopy elephant ear plant recover?
Yes, your droopy elephant ear plant will recover as long as you take appropriate steps to revive it. You just need to water and provide more sunlight for the leaves to stand upright again. The tips in this guide are likely to help you fix the problem quickly.
Conclusion
In conclusion, there are a few things that can cause an elephant ear plant to become droopy. The two most common reasons for this are because the leaves aren’t receiving enough water or sunlight and you need to take action by either increasing how much it’s watered or providing more light.
Hopefully, reading about why your elephant ear plant is drooping was helpful! If you have any other questions, please feel free to leave me a message
You may have received a pilea as a gift or bought one for your garden, but noticed that it is not doing well. Don’t worry! We’re here to help. Pileas are hardy plants and can survive in many conditions, but they need water and light to grow properly.
If you notice the leaves on your plant are becoming leggy, don’t fret! There are steps you can take to save it before it’s too late.
How to Fix a Leggy Pilea Plant?
Pilea plants become leggy when they are not getting enough sunlight. To save your plant, simply move it to a new location where it will receive more light. Also, rotate the plant every other day to ensure that all leaves get adequate sunshine.
I’ll now go through in detail what you can do to keep your leggy pilea plant alive…
1) Provide more sunlight to your pilea
The first step is to provide more sunlight to your plant as mentioned above. Pileas become leggy when they are not getting enough sunlight. This means that you’ll need to move your plant to a new location where the sun shines more brightly for most of the day.
But that’s not all – make sure to rotate your plant every other day! This will ensure that all leaves on the plant get an equal amount of sunlight.
If you can’t provide more sunlight, then you can try using grow lights. These are special lights that help plants grow in low-light conditions. I prefer using full-spectrum grow lights that mimic the sunlight as closely as possible.
Just be sure not to position the grow light too closely to the plant, as this can cause the leaves to burn and turn brown.
2) Prune the leggy leaves from your pilea
Once you’ve provided more sunlight to your plant, the next step is to prune the leggy leaves. This will help encourage new growth and make your plant look nicer.
To do this, simply cut off any leaves that are significantly longer than the others. You can also trim back any stems that have become too long.
Use sterialized pruning shears or a sharp knife to avoid damaging the plant. Make angled cuts just above a node (the place where leaves and stems branch off).
After pruning, your plant may look a bit sad, but don’t worry – it will soon start to grow new leaves that are healthier and more compact.
Be sure to dispose of the leggy leaves and stems properly. I place them in compost far away from my house so that they don’t attract pests. Doing this also stops any disease from spreading to other plants.
Other Potential Reasons for Leggy Pilea
While a lack of sunlight is the most common reason for leggy pilea, there are a few other potential causes. Let’s take a look at these now…
1) Lack of nutrients
If your plant is not getting enough nutrients, it will become leggy as it stretches out to try and find them. The solution here is to fertilize your plant regularly using a high-quality fertilizer.
I like to use organic liquid fertilizers that are easy to apply and don’t contain any harmful chemicals. Just be sure not to over-fertilize, as this can burn the roots of your plant.
2) Pot is too small
Another potential reason for leggy pilea is that the pot is too small. When the roots of a plant are confined, it can cause the plant to become leggy as it stretches out in search of more space.
If you think this might be the case, then repot your plant into a larger pot. Be sure to use fresh potting mix and water the plant well after repotting. This will give the roots a chance to spread out and establish themselves in the new pot.
Pilea plants are generally pretty easy to care for, but they need water and light to grow properly.
If you notice the leaves on your plant are becoming leggy, don’t fret! There are steps you can take to save it before it’s too late.
Leggy Pilea FAQ
Here are some of the most frequently asked questions I get regarding leggy pilea plant problems:
Should I repot a leggy pilea?
There’s no need to repot your plant unless the pot is too small. A leggy plant can be fixed by simply providing more sunlight and pruning off the long leaves and stems.
Where should I keep my pilea?
If your plant is leggy, then it’s not getting enough sunlight. Move it to a brighter location and make sure to rotate it every other day. You can also try using grow lights if you can’t provide more sunlight.
Should I cut back my leggy pilea?
Yes, it’s a good idea to cut back leggy leaves and stems. This will help encourage new growth and make your plant look nicer. Just be sure to use sterilized pruning shears or a sharp knife so your pilea doesn’t get damaged.
Will a leggy pilea plant recover?
Yes, a leggy plant can recover if you provide it with more sunlight and water. Be sure to prune off the long leaves and stems as well. With some care, your plant will soon be healthy and thriving!
It will take a few months for your plant to completely recover. In the meantime, you can use grow lights to provide extra light if needed.
Conclusion
In conclusion, leggy pilea plants are a common problem that can be fixed by simply providing more sunlight and pruning =off the long leaves and stems. Be sure to rotate your plant every other day and use grow lights if needed. With some care, your leggy pilea will soon be healthy and thriving!
I hope this article was helpful in solving your leggy pilea problem! If you have any further questions, feel free to leave a comment below. Thanks for reading!