Moldy potting soil is a common issue for gardeners. It can be difficult to know whether or not you should throw it away and start fresh, or if there’s a way to salvage it. In this blog post, we will explore the possible causes of mold in potting soil and offer some solutions on what to do about it.
Can You Use Moldy Potting Soil?
Yes, it is possible to use moldy potting soil, but it depends on the severity of the mold issue. If the mold is only on the surface of the potting soil, you can simply remove it with a shovel or trowel. If the mold has infiltrated the entire potting mix, it’s probably best to discard it and start fresh.
Despite what you may think, it’s not the end of the world if there’s mold on the potting soil. I regularly have to deal with moldy potting soil, and I’ve found that it’s usually not a big deal. In most cases, you can simply remove the moldy top layer of soil and use the rest of the potting mix without any problems.
Why Is My Potting Soil Moldy?
Despite what you may think, moldy potting soil is not necessarily a sign of poor gardening practices. There are a number of factors that can contribute to mold growth, including:
Excess moisture
If your potting mix is too wet, it can create the perfect conditions for mold to proliferate. In fact, mold loves moisture and will often form on the surface of damp potting soil.
I tend to get mold on the surface of my potting soil during the winter months when it’s easy to overwater. I live in a cold climate, so my plants are not growing much during the winter. As a result, the potting soil stays wet for long periods of time, which creates the perfect environment for mold to grow.
Poor air circulation
If your potting mix is not getting enough airflow, mold can start to form. Be sure to store your potting mix in a well-ventilated area and avoid stacking pots on top of each other.
Not enough light
Just like plants and almost everything else in your garden, mold needs light to grow. If you notice mold forming in a pot that’s not getting enough light, try moving it to a brighter spot.
How to Remove Surface Mold from Potting Soil?
If the mold is only on the surface of your potting soil, you can simply remove it with a shovel or trowel. Simply scrape away the moldy top layer of soil and discard it.
It’s a good idea to discard the moldy soil in a place where it won’t spread, such as in a sealed garbage bag.
How to Prevent Mold in Potting Soil?
There are a number of things you can do to prevent mold from growing in your potting soil, including:
Choose a well-draining potting mix
One of the best ways to prevent mold is to choose a potting mix that drains well. If you’re not sure whether or not your potting mix is well-draining, try this simple test:
Fill a pot with potting mix and water it well
After a few hours, stick your finger about an inch into the soil. If the soil is still moist, it’s well-draining. If not, it may be time to switch to a different potting mix
Don’t over-water
It’s important to water your plants regularly, but you don’t want to overdo it. Be sure to check the moisture level of your potting mix before watering and only water when the soil is dry.
Allow for adequate air circulation
As we mentioned before, mold loves moisture and thrives in damp, dark environments. To prevent mold from growing in your potting soil, be sure to store it in a well-ventilated area and avoid stacking pots on top of each other.
Use a fungicide
If you’re still having trouble with mold, you can try using a fungicide. Be sure to read the label carefully and follow the instructions closely. Neem oil is a great natural fungicide that can be used to prevent mold.
If you prefer household solutions, cinnamon and baking soda are both effective mold inhibitors. Simply sprinkle the cinnamon or baking soda on the surface of the potting mix and water it well.
Conclusion
In conclusion, moldy potting soil is a common issue for gardeners. While it is possible to use moldy potting soil, it’s important to take the necessary precautions to prevent mold from growing in the first place.
Remember, mold loves moisture, so be sure to choose a well-draining potting mix and water your plants regularly. Allow for adequate air circulation and avoid stacking pots on top of each other. If you’re still having trouble with mold, try using a fungicide. Neem oil is a great natural fungicide that can be used to prevent mold.
With a little bit of care, you can prevent mold from taking over your potting soil and ruining your plants. Happy gardening!
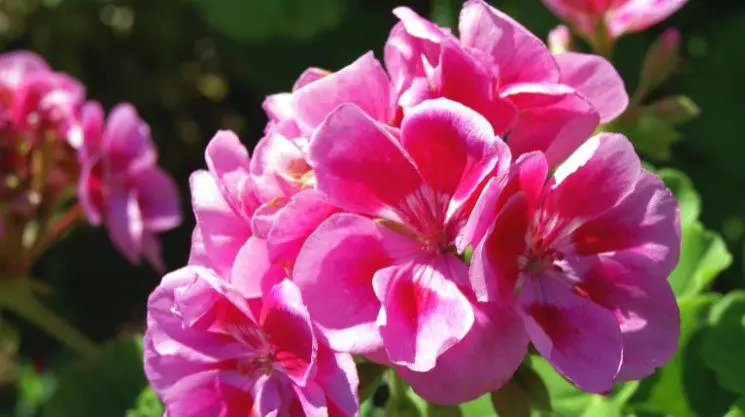
Geranium leaves are beautiful, but what happens when they start to develop holes in them? This is a problem that many people experience. Luckily, there are solutions for this! In this blog post, we will talk about the reasons why your geranium might be getting holes in its leaves and ways that you can fix it.
Why Are There Holes In My Geranium Leaves?
The most likely reason for holes in your geranium leaves is pests. There’s a leaf-tunneling pest called Liriomyza melanogaster that loves to chow down on plant tissue, which can ruin both appearances and health if left unchecked!
These pests spread quickly, so spotting one is a sign that there are more to come. If you find holes in your geranium leaves, make sure to look closely for any signs of bug life! They will often hide under the leaves and only become active during the hours of darkness.
The other potential cause of geranium holes is a disease, especially fungal infections. If your geranium leaves are covered in black spots, this might be a sign of disease and you should take care to get rid of it before the infection spreads!
How To Stop Holes in Geranium Leaves?
The best way to stop holes in your geranium leaves is to take care of the problem before it becomes too big. If you have pests, get rid of them by using an appropriate pesticide. Follow the instructions on the label carefully!
My favorite method of getting rid of bugs is with the use ofneem oil (Amazon link). This is a natural pesticide that comes from the neem tree. It is effective against a wide variety of pests and can be used on both indoor and outdoor plants.
If you think your geranium might have a fungal infection, try spraying it with a fungicide. This will help to get rid of the disease and stop it from spreading. Fungicides are available at most garden stores and come in both liquid and powder form. Again, neem oil is a great option because it is both a pesticide and a fungicide.
How To Keep a Geranium Healthy?
To prevent any holes from appearing in the future, it’s important that you provide your geranium with the right care.
Location: Make sure your geranium is in a location that gets plenty of sunlight and has good airflow around it to prevent the disease from developing
Watering: Water your geranium only when the soil is dry. If you overwater it, this can cause root rot and lead to problems with the leaves
Temperature and humidity: Make sure that your geranium is in a location where the temperature doesn’t drop below 50 degrees and keep it away from any vents or fans
Soil: Use good quality potting soil that is well-draining. You can also add some compost to the soil to help it retain moisture
Conclusion
To conclude, geraniums are beautiful plants that can be used indoors or outdoors. However, holes in geranium leaves are a problem that many people struggle with because of pests and disease!
Fortunately, there are ways to stop the damage from spreading by using pesticides and fungicides. The best way to keep your geranium healthy is simply by providing it with good care. Follow the tips in this blog post and your geranium will be beautiful and healthy all season long.
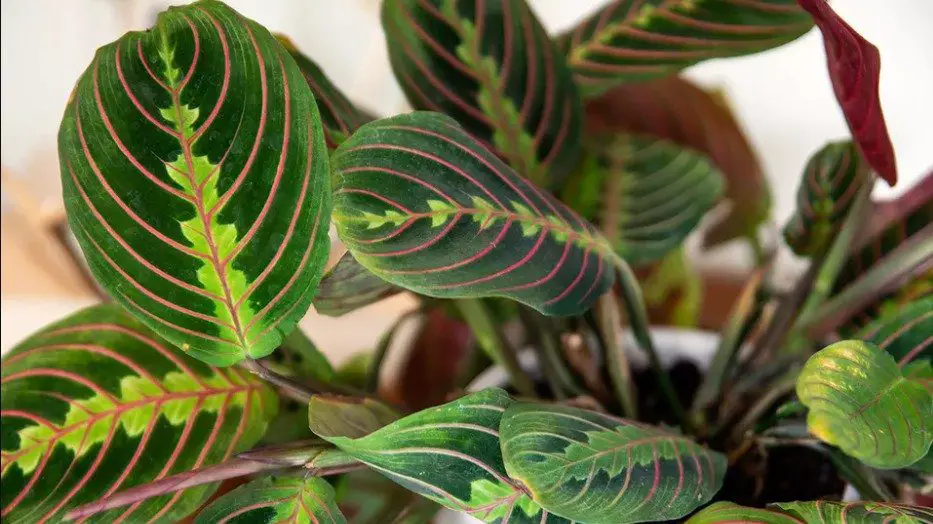
Prayer plants are popular houseplant because it is easy to care for and doesn’t need much sunlight. Prayer plants have been known as air purifiers, but what about those little holes in the leaves? Read on to find out why prayer plant leaves get holes and how you can solve this problem!
Why Are There Holes In My Prayer Plant Leaves?
You can blame pests for the holes in your prayer plant leaves. There are many leaf-tunneling pests that can cause damage to your prayer plant leaves, such as aphids, whiteflies, and spider mites. These pests insert their mouthparts into the leaf tissue to suck out the sap, leaving behind telltale holes in the leaves.
These pests are most active during the dark hours, which means it is important to check your prayer plant during the day for signs of damage.
The other potential cause of leaf holes is leaf disease, which is most commonly caused by a fungus. The fungal spores can be carried in on the wind or rain and infect the leaves when they are wet.
How To Stop Holes in Prayer Plant Leaves?
My favorite way to prevent prayer plant holes in leaves is to use neem oil. Neem oil (Amazon link) is a safe, organic alternative to chemical pesticides. I use it on all of my houseplants and have never had an issue with the plants being damaged or having any negative reactions.
If disease if the cause of holes, then you should use a fungicide. Guess what? Neem oil is an effective fungicide too! Simply spray the leaves of the prayer plant until they are completely covered.
Insects might be more difficult to get rid of, but you can try introducing beneficial insects, such as ladybugs, into your home. These bugs eat other insects so if there is an infestation in your houseplant, they can help to get rid of it.
Lastly, you can try hand-picking the pests from the leaves. This is a tedious process, but it will work if there are only a few pests on the plant. Just be sure to dispose of them properly so they don’t come back!
How To Keep your Prayer Plant Healthy?
Location: Prayer plants like bright, indirect sunlight. They can survive in low light but will grow faster and produce more leaves if they are near a window with plenty of sun exposure
Watering: Prayer plant like to be moist, not soggy. Water the soil when it is dry and does not allow prayer plants to sit in water
Fertilizing: Fertilize your prayer plant with a balanced houseplant fertilizer once a month during the warmer months
Temperature and humidity: Prayer plants do not like cold temperatures. Keep the plant away from drafty areas
Soil: Prayer plants prefer a light, well-draining soil. You can add some organic matter to the potting mix to help improve drainage.
Conclusion
To conclude, there are many reasons why prayer plant leaves get holes. The most common cause is pests, but leaf disease and environmental factors can also be to blame. There are several ways to stop the holes from appearing, but the best way to prevent them is by using a safe, organic pesticide like neem oil.
Prayer plants love sunny locations with moist soil and should be fertilized once a month with a balanced houseplant fertilizer. Keep them away from cold temperatures and drafts, and they will flourish.
I hope you have found this information helpful! If you have any questions, please don’t hesitate to drop me a message. Thanks for reading!
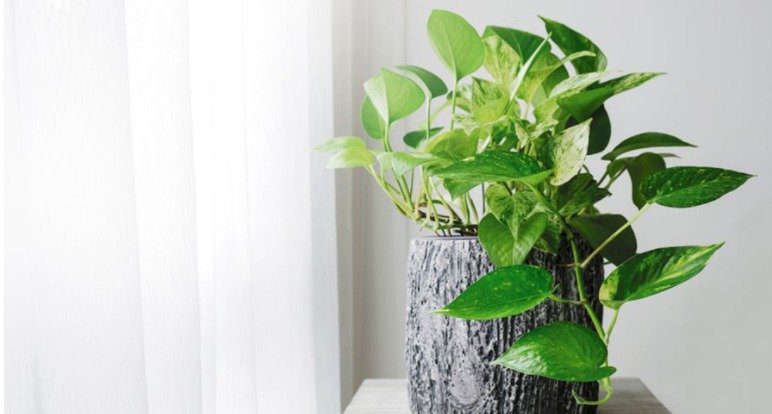
When it comes to plants, many people are often confused about what the difference is between pothos and epipremnum. Both of these plants can be classified as houseplants, but is there any difference?
Pothos vs Epipremnum
Pothos and epipremnum are both the same plant. In fact, epipremnum is just a more common name for pothos. This is news to many people, as epipremnum sounds like a more exotic name.
Why are Epipremnum Called Pothos?
The reason why epipremnum is more commonly known as pothos is that it was named the Pothos aureus when it was discovered in 1880. This is why it is now known by many as a pothos plant.
As such, the two plants are actually one and the same, despite many people thinking that there is a difference between pothos vs epipremnum. You can look back at old pictures from the 1800s and see that the plant is actually labeled as Pothos aureus.
What is an Epipremnum?
Epipremnum is a genus of flowering plants in the family Araceae. This is why it can be considered as both pothos and epipremnum, because they are classified under this same name.
They are found natively in the tropical regions of the world, such as Southeast Asia and Australia. This is why they are often used as houseplants, as they can thrive in warm environments.
They have trailing stems that can grow up to three meters long, making them a popular choice for hanging baskets. They also produce small white flowers that appear on spadices near the top of the plant. However, these flowers are rare unless the plant is given a chemical treatment.
Can I Call My Epipremnum a Pothos?
Yes, you can call your epipremnum a pothos if you want. In fact, this is the more common name for the plant. However, it is important to note that they are both the same plant.
Many people prefer to say “Pothos” as it is easier to say, but you can refer to your plant as either of the two names. It’s ultimately up to you! Some people even give their plants human names so that they can better remember them.
Is Epipremnum an Indoor Plant?
Yes, epipremnum is an indoor plant. It can also be grown outdoors in warmer climates, but it thrives best indoors where the temperature and humidity are under control. This makes them perfect for people who live in colder climates.
Epipremnum is easy to care for and can be a great plant for beginner gardeners. They only require moderate watering and fertilizing, making them a low-maintenance option.
In fact, you can keep them in areas of shade, which is why they are often used as office plants around the world. I keep a small epipremnum on my work desk. The vines trail down and make me feel more at home.
Conclusion
In conclusion, both pothos and epipremnum are the same plants, just with different names. Many people will refer to both of them as either one or the other based on what they know.
So, now you know that pothos and epipremnum are the same plants. Have fun with your new knowledge! I hope this article has helped clear up any confusion you had about the two names of this plant.
Be sure to check out our other blog posts for more information on houseplants and gardening. And as always, feel free to reach out to me if you have any questions!
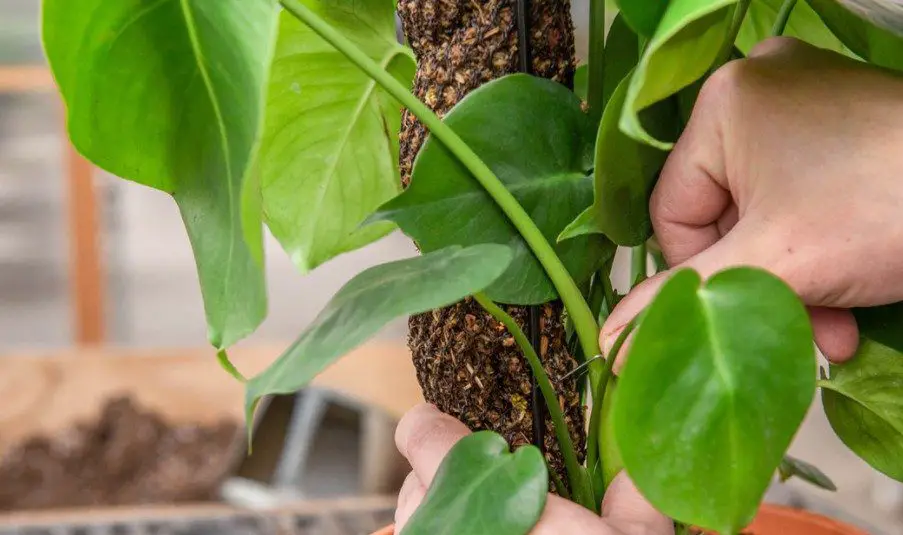
Moss poles are seen in houses around the world. They are designed to hold up large plants that otherwise would not be able to stand on their own. They can also hold up plants that are too short for pots and vases, or more than one plant at a time.
A moss pole is different from other types of stands because they come in various designs and styles, allowing them to fit into any home’s decorating style while holding the plants
While it may seem like an obvious decision to use one, there are situations where you may not want to use one. In this article, we will discuss the pros and cons of using a moss pole.
The Pros of Using a Moss Pole
Aesthetic – They come in various designs and styles, allowing them to fit into any home’s decorating style while holding the plants. I like using natural-looking poles that make my home look like a mini jungle.
Easy solution – Moss poles are easy to use and can hold up large plants that otherwise would not be able to stand on their own. Simply push the pole into the soil, and then attach the aerial roots and stems to the moss. There are many guides online that will talk you through the process.
Keeps plants tidy – The plants are kept in a designated area and do not take up space on the floor or table. The plant will simply grow upwards and become taller, rather than sprawling outwards.
Promotes growth – The plants are held in an upright position, which allows the water and nutrients to travel to the stem and leaves. It nicely spaces out the leaves, which allows the sun to reach them all.
Easier to inspect – It’s hard to inspect all leaves of your plant when they are clumped together and sprawling over the floor. Moss poles provide a simple solution by allowing you to easily see all plants. This minimizes the change of fungal infection and pest infestation.
Variety of plants – Moss poles work with a variety of plants. Whether you have a monstera or pothos, you can use a moss pole to proudly display it and add a touch of green to your home.
The Cons of Using a Moss Pole
No gardening tool is perfect, so there are a few disadvantages to using moss poles.
Difficult to clean – The plants may be out of your reach when cleaning the pole, and it can sometimes take longer than expected or desired to get all of the dirt off of them.
Not all plants fit well – There are some that will not work with the moss pole, so you would need to find another way to display them.
Expensive – Moss poles can be expensive if you are not sure which type to buy. In fact, you may go through a number of poles until you find the one you need. This is why prior research is so important.
Hard to manage – If you have a large plant, it may not work well in a moss pole and could fall over or topple out of the stand if it is too top-heavy. Using a pot with a large base is important when growing tall plants with moss poles.
Moss Pole FAQ
This isn’t the most simple topic to talk about, so I will now answer some of the most frequently asked questions when it comes to moss poles.
How tall should my moss pole be?
This depends on the size of your plant. You want to make sure that the moss pole is taller than the plant when it’s in the plant pot. I like to make sure that the pole is at least six inches higher than the highest point of the plant.
Can a moss pole damage roots?
Yes, it is possible that a moss pole can damage roots if the stand has too much weight on it. However, the damage will be minimal and will not cause the plant to die. Thousands of people around the world use moss poles on their plants and have no issues at all.
Do you need to keep moss poles wet?
Yes, if you are going to keep it outdoors, then moss poles need to be kept moist. There are many ways to do this, like watering the pole directly and spraying the plant with mist. I talk more about keeping moss poles wet in this article.
Conclusion
In conclusion, using a moss pole is an excellent way to keep your plants healthy and beautiful. They provide easy access for you, which minimizes the chance of fungal infections or pest infestations.
There are some disadvantages that need to be considered before buying one of these stands. However, these disadvantages aren’t serious and can be avoided if you do enough research before making your purchase. If you don’t want to use one, perhaps you will like one of these alternative poles.
Moss poles are a great way to show off your plants and can be used with a variety of different types of plants. So, if you’re looking for an easy gardening solution, then I highly recommend using moss poles. Thanks for reading!