by Gardener Tim | Dec 1, 2021 | Plant Care
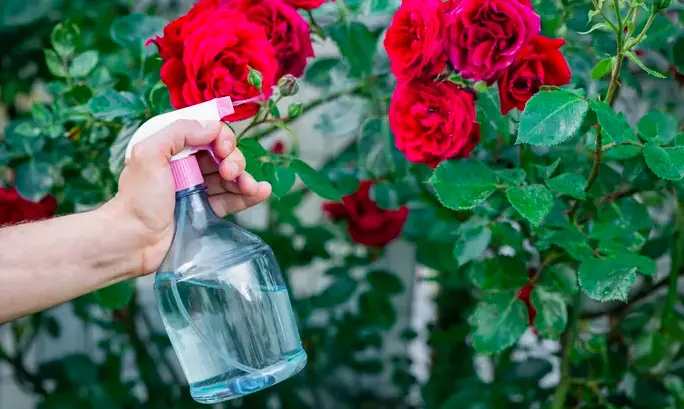
Roses are one of the most popular flowers in the world. They are often given as a sign of love or appreciation. Roses can last for a long time if they are taken care of properly. In this blog post, we will discuss how long roses can last without water and some tips on how to extend their life span!
How Long Can Roses Last without Water?
A rose bush can last a week or so without water before it starts to wilt. Depending on the type of rose, it may be able to last longer. For example, desert roses can go without water for a few weeks.
It’s a good idea to water your roses regularly, especially during hot weather. You should also regularly check the soil to make sure it’s not too dry. If the soil is dry, water the roses deeply so that the roots can absorb as much moisture as possible.
How to Stop Rose Bush from Wilting?
If you have a rose bush that is wilting, you can try giving it a deep watering. This means that you should water the rose bush until the water runs out of the bottom of the pot or make the soil completely saturated.
Another way to stop a rose bush from wilting is to put it in a cool place. The cooler temperature will help to preserve the moisture in the plant. You can also put a plastic bag over the plant to create a mini greenhouse.
With outside roses, it’s important to watch the weather and water them accordingly. If you know that a heatwave is coming, water the rose bush a few days before so that it can withstand the dry conditions.
Similarly, if it’s been raining a lot recently, then you won’t need to water the roses as often. Just keep an eye on the soil and make sure it’s not too wet or too dry.
By following these tips, you can extend the lifespan of your roses and enjoy their beauty for longer! Thanks for reading!
How Long Can Cut Roses Last without Water?
Cut roses will only last for a few hours without water. In fact, your bouquets of roses are likely to wilt within 4 hours! This is because the stems of cut roses are cut off from their water source.
This is why it’s important to keep your bouquet of roses in a vase filled with water. You should also add a floral food packet to the water. This will help to extend the life of your cut roses.
How to Make Cut Roses Survive Longer?
If you want your cut roses to last even longer, you can try these tips:
1) Remove the packaging and make fresh cuts on the stems
Use a pair of sharp shears to make fresh cuts on the stems of your roses. This will help them to absorb water more easily. You should also remove any packaging, such as a plastic wrap, from the bouquet.
Making angled cuts increases the surface area, which allows for more water uptake. It’s also important to use clean shears or a knife. If they’re dirty, then bacteria can be transferred to the stem, which will cause the rose to rot.
2) Clean the vessel
It’s important to use a clean vessel for your roses. If the vase is dirty, then bacteria can build up and shorten the lifespan of your flowers. Fill the vase with warm water and add a drop of bleach. Swish it around and rinse it out thoroughly.
3) Keep them out of direct sunlight
Roses need sunlight to grow, but too much sun can cause them to wilt. Cut flowers will last longer if you keep them in a cool, dark place.
This means that you should avoid putting them in direct sunlight or near any sources of heat. The window sill is not a good place for your bouquet!
4) Provide freshwater that is free from fluoride
You should use fresh, clean water for your roses. This means that you should avoid using water that has been sitting in a vase for days. You should also avoid using water that contains fluoride, as this can damage the flowers.
If you live in an area with hard water, then you can try using distilled water or rainwater.
5) Give flower food to encourage growth
Cut roses come with a sachet of flower food, which you should add to the water. This will help to encourage growth and extend the lifespan of your flowers.
You can also make your own homemade flower food by mixing one tablespoon of sugar, two tablespoons of white vinegar, and four cups of water.
6) Change the water often
You should change the water every few days to keep your roses fresh. This will also help to prevent bacteria from build-up. Just remember to rinse the vase out thoroughly before adding fresh water.
Conclusion
Roses are beautiful flowers that can brighten up any room or garden. They are also a popular gift for special occasions. While cut roses can last for a long time, they will eventually start to wilt and die.
However, there are steps you can take to make your roses last for a longer time. Water them regularly and keep them in a cool place. If you have cut roses, make sure to put them in water with flower food.
If you love roses, consider growing your own rose bush. This way, you can enjoy their beauty for years to come!
I hope this blog post has helped you to understand how long roses can last without water. If you have any questions, please leave a comment below and I will be happy to answer them! Thanks for reading!

by Gardener Tim | Dec 1, 2021 | House Plants, Outdoor And Patio Plants, Plant Care
Winter is a great time to enjoy the outdoors and get some fresh air. But it can also be a frustrating time for gardeners because winter brings cold weather, snow, icy conditions, and dry soil. This guide will teach you how to take care of portulaca in the winter so that they will grow healthy and strong when spring arrives!
How Do You Take Care of a Portulaca in the Winter?
The best way to take care of a portulaca in winter is by protecting it from cold temperatures, providing enough sunlight, and adjusting how much water you give to the plant.
This means keeping your portulaca inside, where it will be warmer. However, keep it away from places in your home that have cold drafts, the windows.
Additionally, don’t repot your portulaca in the winter months because they dislike being disturbed at this time of year (they are usually more stressed in the winter).
I’ll go through the most important things to remember about caring for a portulaca during the winter. Nothing can go wrong with your plant if you follow these procedures…
Watering Portulaca in Winter
When it comes to watering portulaca plants in winter, always water them deeply and allow the soil to dry out before watering again.
If you live in a place where winter is mild (around freezing) then continue giving your plant average amounts of water throughout winter. But if you can’t keep an eye on it constantly, reduce how much you give your plant by about half.
Many plant owners make the mistake of giving the same amount of water to their portulaca all year round. But this often results in the soil becoming waterlogged and the roots rotting.
Portulaca Light Requirements in Winter
Just like in the summer, make sure your portulaca gets plenty of indirect sunlight. If you’re keeping your plant indoors, place it near a south-facing window. The problem is that there are fewer hours of sunlight during the winter.
As such, you may need to supplement natural sunlight with artificial light. It can be a good idea to get a grow light (Amazon link to my favorite) and place it near your plant.
Portulaca Humidity Requirements in Winter
While portulaca plants are tolerant of low humidity levels, it’s best to keep the air around your plant humid during winter. You can do this by using a room humidifier or placing pebbles in the water and leaving them near your potted plant (be careful not to get any moisture on the leaves).
Where To Keep Portulaca Inside During Winter?
The best place to keep your plant inside during winter is near a window where it can get plenty of natural light. However, make sure the plant is not exposed to any cold drafts from windows or doors.
I like to keep my portulaca plants on my kitchen windowsill. This way, I can keep an eye on them and check their soil moisture. And if the plant is in a sunny place, you can put it outside during fine days where there’s no risk of frost or snowfall.
If you don’t have a sunny spot in your home where you can keep your portulaca, then consider using a grow light to supplement artificial sunlight.
Portulaca Winter Care FAQ
Caring for portulacas in winter is a complicated subject. As such, I shall now answer some of the most frequently asked questions.
Can portulaca survive winter?
Yes, portulaca can survive winter. However, they will need to be taken inside and given the appropriate care. Portulaca plants kept outside are unlikely to survive a frost or snowfall. In fact, they will suffer if the temperature drops below 40 degrees F.
Should I fertilize my portulaca in the winter?
No, you should not fertilize your portulaca in the winter. Fertilizing them at this time can actually do more harm than good. This is because the plant is not actively growing and doesn’t need as much fertilizer.
What temperature is too cold for portulaca?
Any temperature below 40 degrees Fahrenheit (15 Celsius) is too cold for portulaca. As such, bring the portulaca inside when the temperature falls below this threshold. I like to be proactive by bringing my portulaca inside during late autumn when the temperature starts to drop.
Should I move my portulaca away from the heater in winter?
Yes, you should move your portulaca away from the heater in winter. Heaters can actually be very harmful to plants and will cook them if they are too close! I recommend placing the pot in a room that is heated, but not anywhere too close to the heater.
Conclusion
In conclusion, there are a few things you need to do in order to care for your portulaca plant during winter. These include:
- Watering them deeply and allowing the soil to dry out before watering again
- Reducing the amount of water you give your plant by about half if you live in a place where winter is cold
- Making sure there is plenty of indirect sunlight in your home
- Keeping the air around your plant humid with a room or house humidifier
- Moving away from heaters to minimize any risk of burning.
If you follow these steps, then caring for portulaca plants during winter should be easy.
Thank you for reading! If you enjoyed this article, please feel free to leave a comment below and let me know what other types of plants or indoor plant care guides you would like to see on the site. Happy planting!
by Gardener Tim | Nov 30, 2021 | House Plants
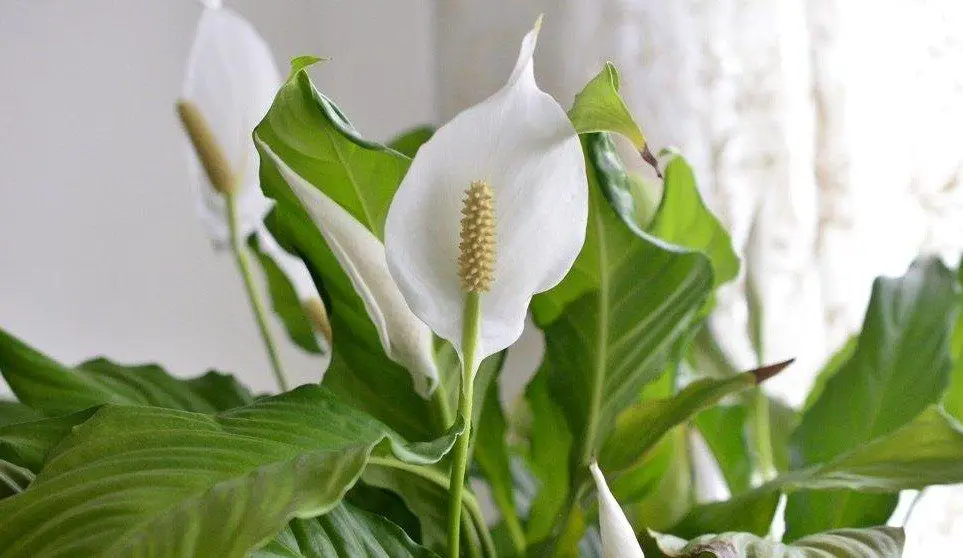
The peace lily is an extremely popular house plant, but can it get sunburn? This post explores whether or not the leaves of a peace lily will turn brown if they are exposed to too much direct sunlight. Let’s find out…
Can Peace Lilies Get Sunburn?
Yes, peace lilies can get a sunburn, but only if they are exposed to direct sunlight for extended amounts of time.
Leaving your peace lily in indirect sun for a few hours is actually good for the plant’s health, so it’s a balancing act when it comes to how much sunlight to allow.
Peace lilies that have been left in the sun for too long will usually turn brown at the tips of the leaves and along the margins. This scorching is caused by the sun’s UV rays and is called marginal burn.
As such, keep an eye on your peace lilies by checking them throughout the day. If you notice strong rays hitting your plants, then move them to a shadier location.
How to Prevent Peace Lily Sunburn?
You can prevent peace lily sunburn by keeping the plant in indirect sunlight for most of the day. This will give the peace lily enough light to photosynthesize, but not enough to scorch the leaves.
You can use curtains and blinds to protect your peace lilies from the sun. Simply pull them over when you are leaving the house, and then let them sit in indirect sunlight for at least three hours per day.
This way, you won’t have to worry if too much direct sunlight is hitting your plant because it will be protected while also getting enough light!
If you have a peace lily in a spot that gets lots of sunlight, then make sure to rotate it every two hours or so to stop one area of the plant from getting too much light.
In addition, keep an eye on the tips and margins of your peace lilies – if they start browning up, then move your plant to a shadier spot.
When Is Peace Lily Sunburn Likely To Occur?
Peace lily sunburn is common when the plant is placed in direct sunlight for long periods of time. While the leaves may not turn brown right away, it’s still important to prevent sunburns by moving your peace lilies out of the sun.
Remember that if you keep your plants in a spot with strong rays, then they’re more likely to get burned even though the damage won’t be visible until it’s too late.
Peace lily scorch can also occur when grow lights are positioned too close to the plant. This is especially true if your houseplant has recently been repotted or pruned, as it may be more sensitive to the heat from grow lights.
What Are The Signs Of Peace Lily Sunburn?
A sunburned peace lily is easy to spot because the tips of its leaves will turn brown. However, brown leaves can also be caused by other factors, so it’s important to look for additional signs of sunburn, like dry edges.
Brown leaves from fungus tend to make the leaves moist, whereas sunburn will cause brown edges that are dry to the touch.
If you are still unsure, then it’s best not to take any chances and move your plant out of direct sunlight immediately.
Can Peace Lily Plants Recover From Sunburn?
Yes, peace lilies can recover from sunburn, but it will take some time. To help your peace lily heal faster and prevent further damage in the meantime, you should increase humidity around its leaves.
In addition to increasing humidity levels, you should stop exposing the plant to sunlight for at least a week after its leaves have recovered. You can keep your plant in full shade for a few days, and then slowly return the plant to partial light after it has recovered.
Will Burnt Peace Lily Leaves Turn Green Again?
No, it is unlikely for peace lily leaves to return back to their original green color. Instead, the brown edges will remain burned for good even after you move your plant out of direct sunlight and increase humidity around it.
However, if the tips only turned partially brown (or were scorched by grow lights), then they may turn green again over time once the damage has been repaired.
Will Sunburn Kill My Peace Lilies?
No, sunburn does not kill peace lilies. However, it is important to prevent the leaves of your plant from turning brown by reducing direct sunlight exposure and increasing humidity around its foliage.
While some new growth may be discolored if you place your houseplant in an area with strong rays for several weeks or more, most plants can recover within a few months.
Conclusion
In conclusion, peace lilies are sensitive to changes in sunlight. Make sure that your peace lilies are not placed in direct sunlight for more than a few hours per day and rotate them every two or so hours so all sides get equal access to the sun.
If you see brown tips, then move them out of direct rays immediately. This can help prevent further damage to the plant and will kickstart the recovery process.
by Gardener Tim | Nov 30, 2021 | House Plants
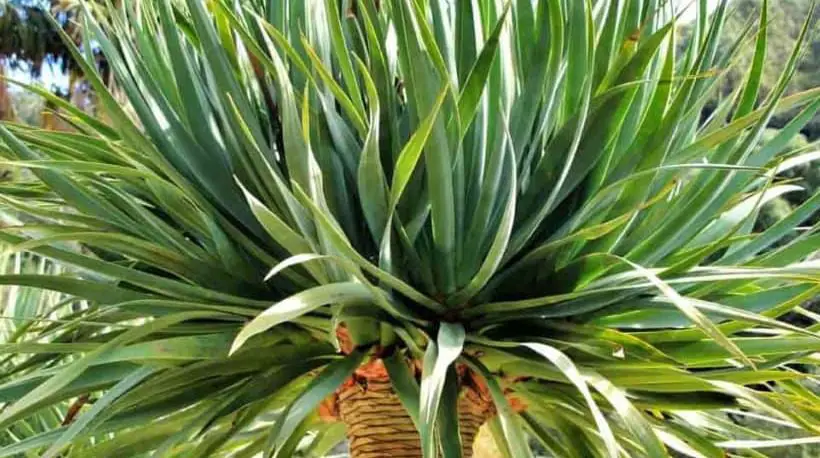
Dracaena plants are common houseplants, but do they get sunburn? This is the question that many people ask themselves when they notice their dracaena leaves turning brown. Well, let’s find out…
Can Dracaena Get Sunburn?
Yes, dracaena plants can get a sunburn, but only if they are exposed to direct sunlight for a long period of time. This doesn’t mean that dracaena plants dislike the sun, but it means they should only be given indirect sunlight.
This means that you need to be careful of where your dracaena plant is placed. If it gets direct sunlight for too long, the leaves will begin to turn brown and eventually burn up.
Placing the plant in natural lighting will maintain the green color on your leaves. If possible, you can do this by placing the dracaena plant in a well-lit room that doesn’t have direct sunlight.
How to Prevent Dracaena Sunburn?
You can prevent monstera sunburn by placing the plant in a shaded area that is protected from direct sun rays. Here are some other ways to prevent dracaena sunburn:
– Placing the pot near a window with sheer drapes or blinds that filter out direct sunlight. Planting a dracaena outside could be a bad idea if you live in a hot climate
– If you have several plants, make sure they are placed far enough apart from each other to allow for proper sunlight
– Place any grow lights further away from the plant to prevent sunburn
– Rotate the dracaena on a frequent basis to ensure all sides receive equal exposure to sunlight. This stops one side from being burnt and the other side from receiving no light
When Is Dracaena Sunburn Likely To Occur?
Dracaena sunburn is most likely to occur in the middle of summer when it’s hot. This is because direct sunlight will be present for a long period of time, causing damage and sunburn.
However, if you have a shaded area where your dracaena gets indirect light from the sun then there shouldn’t be any issues. If you notice the leaves turning browner than normal, then it may mean that your dracaena is getting too much sunlight. In this case, move the plant to a shaded area and rotate it regularly.
What Are The Signs Of Dracaena Sunburn?
A sunburned dracaena plant shows signs in its leaves. It may look like the plant’s leaves are browning at the tips and edges. Sometimes, you will notice that only one side of the leaf is burnt or discolored compared to other areas on your dracaena plant – it all depends on where the sunburn occurs.
It can be difficult for some people to identify a dracaena sunburn, which is why it’s best to be cautious. This means giving your plant indirect sunlight and rotating it regularly so all sides get equal exposure.
Can Dracaena Plants Recover From Sunburn?
Yes, the good news is that dracaena plants can recover from sunburn. All you need to do is move your plant into a shaded area and make sure it gets indirect sunlight for the rest of the summer. Regularly rotate your dracaena so all sides receive equal exposure, which prevents further damage or stress on the leaves.
Will Burnt Dracaena Leaves Turn Green Again?
No, it is unlikely that the sunburnt leaves on your dracaena plant will turn green again, so be sure to prevent it from happening in the future. This means giving your dracaena indirect sunlight and rotating it regularly.
The good news is that the tips in this guide will stop the other leaves and houseplants from being burnt. Furthermore, sunlight won’t kill your dracaena, so there’s no need to worry too much. Sunburn is mainly an aesthetic issue that can be prevented with the right care.
Conclusion
In conclusion, your dracaena plants can get sunburnt if they receive direct sunlight for too long. It is unlikely that the burnt leaves will turn green again, so be sure to prevent this from happening in the future by providing your plant with indirect sunlight and rotating it regularly.
This article has answered some of the questions you may have about how to care for your dracaena plant. I hope you have found this article helpful, and it has taught you everything there is to know about dracaena sunburn.
by Gardener Tim | Nov 30, 2021 | Plant Care
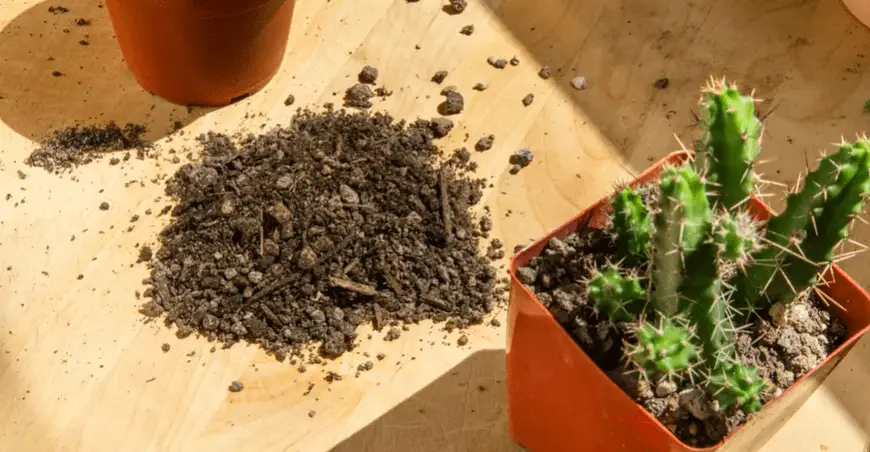
There are many different types of soil that you can use for your plants, but sometimes it can be tricky to figure out which one is the best for them. In this blog post, we will explore the question of whether or not cactus soil can be used for peace lilies. Keep reading to find out!
Can I Use Cactus Soil for My Peace Lily?
Yes, you can use cactus soil for your peace lily! In fact, cactus soil is often recommended as a good option for peace lilies. Cactus soil is well-draining, which is important for peace lilies since they are susceptible to root rot.
Cactus soil is also relatively low in nutrients, which is fine for peace lilies since they are not heavy feeders. Overall, cactus soil is a great option for peace lilies and should help them to thrive!
Let’s go into more depth about some of the benefits of using cactus soil for peace lilies.
1) Aeration
All plants need good aeration in their soil, and peace lilies are no exception. Cactus soil is very porous, which means that it has a lot of tiny holes throughout. This allows for good aeration in the soil, and peace lilies will be able to breathe easily.
You can create even more aeration by using a chopstick to poke holes in the cactus soil when you plant your peace lily. This will help to ensure that the roots have plenty of oxygen and can grow properly.
It’s a good idea to do this on a frequent basis to make sure the soil isn’t becoming compacted and preventing the roots from getting the oxygen they need.
2) Drainage
As we mentioned before, cactus soil has great drainage. This is important for peace lilies because they are susceptible to root rot when the roots are sitting in water.
Not only that, but too much water can also lead to fungal growth, brown spots, wilting, and yellowing of the leaves. Cactus soil will help to ensure that the roots of your peace lily are not sitting in water, and this will help to prevent root rot.
This is great because it’s easy to overwater peace lilies, and using cactus soil can help to make sure that this doesn’t happen.
3) Acidity
A pH of 5.8 to 6.5 is ideal for peace lilies, and cactus soil is typically in this range. This means that cactus soil is a great option for peace lilies because it won’t be too acidic or too alkaline for them.
It’s important to get the pH level right because if it’s off, it can lead to problems such as nutrient deficiencies, poor drainage, and stunted growth.
The good news is that you can test the pH of your soil with a soil test kit. They are super affordable and will immediately tell you what the pH of your soil is. This way, you can make sure that it’s in the right range for peace lilies before you plant them.
Tips for Using Cactus Soil for Peace Lilies
Here are a few tips that you should keep in mind when using cactus soil for peace lilies:
Fertilizer sparingly
Peace lilies don’t need a lot of fertilizer, so you don’t need to worry about adding a lot of it to the soil. In fact, too much fertilizer can actually be harmful to peace lilies. A little goes a long way, so just add a small amount of fertilizer to the cactus soil when you plant your peace lily.
Add other ingredients
To create the perfect environment for peace lilies, you can add other ingredients to the cactus soil such as perlite, vermiculite, or sand. These ingredients will help to improve drainage and aeration in the soil.
You can also add compost to the soil to give your peace lily a boost of nutrients. This is especially helpful if you are planting in a pot since the roots won’t have access to other sources of nutrients.
Mix it up
When you are adding cactus soil to your peace lily pot, be sure to mix it up with the existing soil. This will help to ensure that the roots have access to all of the nutrients and benefits that the cactus soil has to offer.
Why Soil Matters for Peace Lilies
Using the wrong soil means trouble for peace lilies. The wrong type of soil can cause all sorts of problems, such as poor drainage, nutrient deficiencies, and stunted growth. This is why it’s so important to choose the right soil for your peace lily.
Lack of flowers
One of the most common problems that peace lilies have is a lack of flowers. This can be caused by several factors, but is usually due to too much nitrogen in the soil, especially compared to potassium and phosphorus.
Weak stems
When the soil is too dense, it’s impossible for enough moisture to reach the roots of the plant. This will cause weak stems because the plant isn’t able to get enough water and nutrients.
The good news is that cactus soil is light and airy, so you won’t have to worry about this problem if you use it for your peace lily.
Black spots
Soil that is too rich in nutrients and other minerals can cause black spots on the leaves of peace lilies. This is because the plant isn’t able to process all of the nutrients, and they end up being deposited on the leaves.
Conclusion
In conclusion, cactus soil is a great option for peace lilies. It’s light and airy, which helps to improve drainage and aeration. It also has a pH that is in the ideal range for peace lilies.
When using cactus soil, be sure to mix it up with the existing soil and add other ingredients such as perlite, vermiculite, or sand. You can also add compost to the soil to give your peace lily a boost of nutrients.
Keep in mind that cactus soil is very light and doesn’t have a lot of nutrients, so you will need to fertilize sparingly. A little goes a long way when it comes to fertilizer for peace lilies.
By following these tips, you can use cactus soil to grow healthy and beautiful peace lilies. Thanks for reading!


