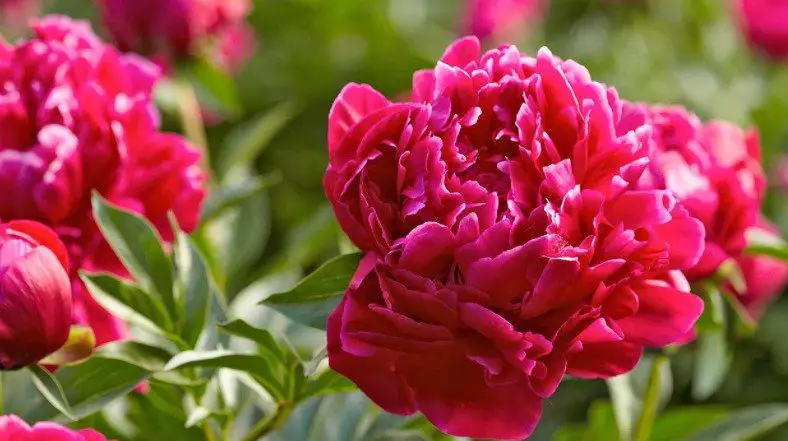
Peonies are a type of flower that is often planted in gardens and yards. They can be pink, white, or purple. One of the most common problems with peony plants is curling leaves. This article will tell you everything you need to know about why peony leaves curl and what to do about it!
Why Are My Peony Leaves Curling?
Your peony leaves are curling because they have been given the wrong amount of water or exposed to extreme temperatures. Ensuring that your peonies have proper amounts of water and temperature is the best way to avoid curling peony leaves.
Peony plants enjoy moist soil, but they should never be soaking wet. If the bottom of your peony’s leaves are always damp or even sitting in a puddle of water this could cause them to curl up and die.
I will now go into more depth about what you can do to prevent the leaves on your peony from curling and dying.
How Do I Uncurl My Peony Leaves?
To avoid your peony leaves from curling, you must first identify and address the source of the problem. Here’s how to go about it:
1. Peony leaves curling from overwatering
Overwatering is the number one cause of problems for a peony plant. If you are overwatering your plant, this means that the soil is completely soaked and water may even be pooling at the bottom of your plant pot.
To fix this, the first step is to increase drainage around your plant so that it doesn’t pool at the bottom of the pot. This means that the pool should have plenty of drainage holes.
With future watering, you should only add more water when the top inch of soil is dry to the touch. You can test this by sticking your finger into the soil. It can also be a good idea to use a moisture meter, which is the most accurate and cleanest way to tell if your peony needs more water.
2. Peony leaves curling from underwatering
If you are underwatering your plant, this means that the roots are not absorbing the water and nutrients they need. This could be because it has dried out completely or because you haven’t given enough.
To fix this problem, all you need to do is ensure that the soil remains moist and does not dry out completely. To do this, you should water your peony once every two weeks at the very least and even more often if it is hot outside or gets plenty of sunlight.
3. Peony leaves curling from temperature change
The final reason why peony leaves curl is from heat stress or cold drafts. This happens when the temperature in your peony’s environment changes too rapidly.
For example, if you place a plant that has been outside all winter near an air conditioner or heater vent, this will cause the leaves of the peonies to curl up.
It’s important to maintain a consistent temperature for peony plants. If you are bringing them inside from the cold, they should be acclimated over a few days and not placed near an air conditioner or heater right away.
If your leaves curl up during spring or summer it could also be because of too much heat exposure, such as direct sunlight on the plant all day.
Peony Leaf Curling FAQ
Peony plants aren’t common and it is often hard to find information about them. We’ve gathered some of the most frequently asked questions on peony leaf curling and answered them here.
Should curled peony leaves be pruned?
No, there’s usually no need to prune peony leaves that are curling as a result of a problem. If you do this, you could stress your plant even more. I recommend only pruning leaves if they are brown and dying.
Will curled peony leaves uncurl?
Yes, you just need to apply the right amount of water and the correct temperature. For example, if your peony leaves are curling from being underwatered, you must give them enough moisture so that they uncurl back into a normal shape.
Are curling peony leaves a sign of disease?
Curling peony leaves aren’t a sign of any diseases. They are usually the result of an issue with water, temperature, or sunlight exposure. This means the condition won’t suddenly appear on other plants. It’s important to look for signs of disease, like yellow peony leaves or a white powdery fungus covering the plant.
Is a curling peony something to worry about?
Curling peony leaves can be a cause for concern, but not always. If you’ve been using the right amount of water and temperature then it’s likely that your plant is just going through a normal stage in its life cycle. However, if this continues for longer periods, then it is worth considering getting your plant checked out by a professional.
Do I need to repot my curled peony?
No, there is usually no need to repot a peony that is curling. Repotting it could cause more damage and stress to the plant if you don’t know what you’re doing. I recommend only repotting peony plants that are very root bound or are suffering from root rot.
Conclusion
In conclusion, peony leaves curl because they are given the wrong amount of water or exposed to extreme temperatures. Ensure that your peonies have proper amounts of water and temperature, then they should uncurl themselves back into a normal shape.
If you’ve been using the right amount of water and temperature then it’s likely that your plant is just going through a normal stage in its life cycle. However, if this continues for longer periods, then it is worth inspecting your plant closer.
I hope that this article has helped you understand why peony leaves curl and what to do about it!
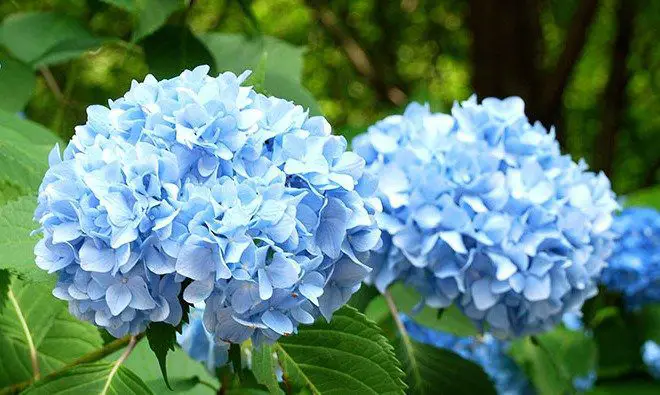
Hydrangeas are low-maintenance plants, but sometimes problems can arise. For example, the leaves of your hydrangea might be turning black and falling off! If you notice this happening, don’t worry – we have some tips for restoring those beautiful flowers to their former glory.
Why Are My Hydrangea Leaves Turning Black?
Your hydrangea leaves are turning black because of overwatering, sooty mold, nutrient deficiency, or pests. These are the most common reasons for leaves to turn black. The exact cause will need to be identified to save your hydrangea.
I will now cover each of these potential causes in more depth. By the end, you’ll know what the problem is and how to save your plant.
1. Overwatering
Overwatering is the number one reason for leaves turning black and falling off a hydrangea plant. If you have been giving your plants too much water, stop doing that immediately! Too much water will lead to root rot, which is fatal for hydrangeas.
It is recommended to only add water when the soil feels dry. You can test this by using a moisture meter, stick, or even the old-fashioned method of sticking your finger in the soil.
If root rot is already present, then it’s advisable to prune the affected roots and dispose of them away from all other plants. Next, repot the hydrangea in fresh soil that drains easily.
The type of water is also important when it comes to watering hydrangea plants. It’s best to use rainwater, distilled water, or filtered water. This is because the chemicals standard tap water can severely damage hydrangeas over time.
2. Fungal Infection – Sooty Mold
If you see black dust on the leaves of your plant, this might be sooty mold. Sooty mold can often grow in response to excess sap that has built upon the surface of the leaf – thanks to mealybugs!
If there is too much sap, the airborne fungal spores will take hold. These spores are present everywhere – even in your home. But you can reduce the number of spores by regularly cleaning and monitoring the moisture levels.
Mealybugs can be difficult to get rid of, but you will have to deal with them before the sooty mold spreads throughout the plant. If you see white cotton-like substances on the stems or leaves, then it’s likely there is an infestation of mealybugs.
This sooty mold also blocks the light from reaching the leaves, which can result in the plant not getting enough sunlight to produce energy from photosynthesis.
In order to treat this problem of fungal growth, remove any infected leaves and spray a fungicide on the remaining foliage.
You can prevent it from happening again by monitoring the amount of humidity in the room, as mold thrives in humid environments that are lacking in air circulation. You should also regularly inspect the plant for signs of pests that are leaving sap on the leaves.
3. Nutrient Deficiency
Hydrangeas are large plants that need plenty of nutrients to thrive, but if they don’t get enough nutrients, this can lead to nutrient deficiency and blackened leaves.
You should fertilize your hydrangea every two weeks with a 20-20-20 NPK fertilizer during late spring through the summer months.
If this doesn’t seem to be working, you can up the frequency of fertilization to once a week. However, it is important not to overdo it as too much fertilizer will damage your hydrangea!
4. Pests
Finally, if no other problems have been identified and there are many blackened leaves, you might have a pest that is causing the damage. These pests could be aphids, scale insects, or mealybugs.
You can treat this problem by pruning away any dead leaves and then spraying your plant with an insecticide solution in order to kill off any remaining pests on the hydrangea’s branches.
Black Hydrangea Leaves FAQ
I will now cover some frequently asked questions about why the leaves of your hydrangea might be turning black.
Why do my hydrangea leaves look burnt?
This happens when your hydrangea has been exposed to too much sun or if they haven’t been given enough nutrients.
Should I cut off black hydrangea leaves?
Yes, prune away any dead leaves so the plant can focus its energy on growing new ones. This will improve the health of your hydrangea and make it look more visually appealing.
How do I get rid of hydrangea fungus?
Fungus can be treated with a fungicide and it might need to be applied preventively as well. You should also remove any infected leaves before the fungus has time to spread. My favorite fungicide is neem oil (Amazon link) as it is organic and works well for a variety of different plant types.
Will black hydrangea leaves turn green again?
No, the hydrangea leaves will remain black for the rest of their life cycle. They will eventually fall off and be replaced with new green ones. Well, if you give the correct care and attention to your hydrangea.
Conclusion
I hope this article has helped you identify why your hydrangea is suffering from blackened leaves, and what you can do about it!
If I could leave one tip for readers wanting to save their hydrangeas, it would be that hydrangeas are heavy feeders and need a lot of nutrients to thrive. So if you want your hydrangeas to stay beautiful, provide them with plenty of food!
Remember: the most common causes for blackened leaves on this plant are overwatering, sooty mold, nutrient deficiency or pests! By identifying which one is affecting your plant’s health you can take the appropriate steps to heal your plant. If you have any questions feel free to leave a comment!
It’s no secret that Monstera Albo and Thai Constellation plants look remarkably similar. But what is the difference between these two houseplants? That’s what we want to find out in this article!
Monstera Albo vs. Thai Constellation
The quickest way to tell the difference between these two plants is to look at the size of leaves and the variegation.
The leaves of the Thai Constellation are bigger, with more coverage. These larger leaves also come with a bundle of cream-colored speckles. On the other hand, the Monstera Albo has variegated parts that are brighter and more white. The plant also doesn’t look as full, with tall stems and leaves that are smaller in size.
Most of the cuttings you see for sale online are from Albo plants. However, many small plants sold are Thai Constellations.
When deciding which one to get, it’s important to consider whether you prefer a fuller look or more speckling. It’s also important to think about pricing, how much room you have, and how easy/hard the plant is to care for.
By the end of this blog post, you should have a good idea of the difference between Monstera Albo and Thai Constellation plants.
The Main Differences Between Thai Constellations and Albos
I will now provide a comparison of the two to help you see how they differ. Images can be found below.
Monstera Thai Constellation
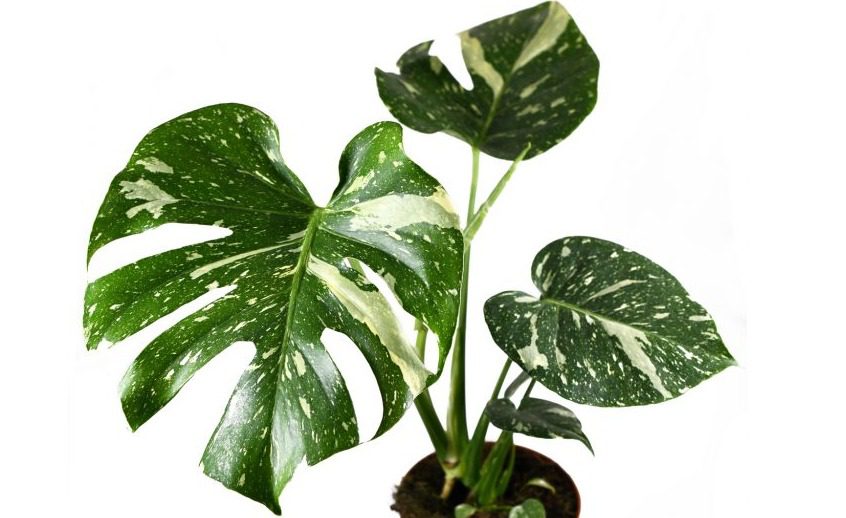
The variegation on a Thai Constellation looks like someone has just dropped a bucket of creamy paint on your plant! It has a scattered variegation appearance.
Thai Constellations grow quickly and large. In fact, it is not uncommon for the leaves on a Thai Constellation to grow three feet in size. Along with these large leaves, the plant also has more of them, with nodes found everywhere!
This plant is perfect if you have lots of space in the home for a statement piece that commands attention. It may be slightly too large for small bedrooms.
Monstera Albo Borsigiana
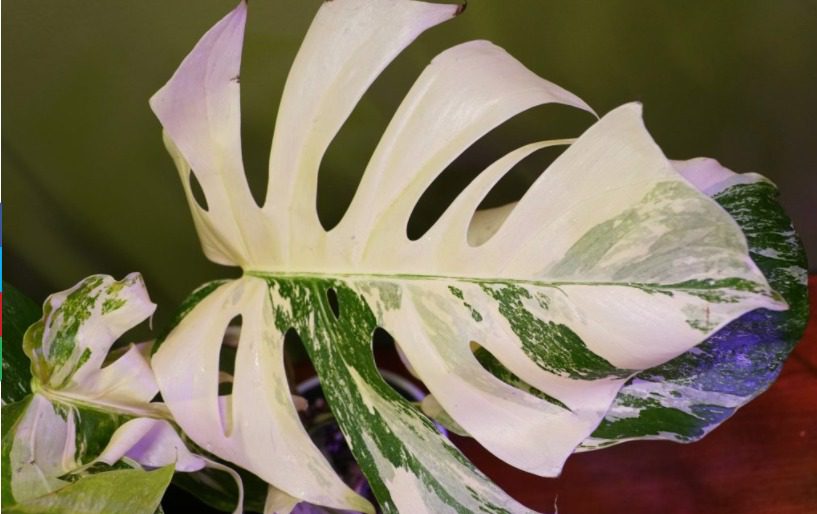
Albo plants have white variegation that contains no creamy hues (like a blank piece of paper).
Unlike the scattered variegation on the Constellation, the Albo has solid chunks of white coloring. Some leaves may even be completely white!
The leaves on a Monstera Albo are small, which makes the plant perfect for small rooms. There are also fewer nodes on the Albo.
The Albo is a narrow plant that grows tall. As such, it can be a good idea to use a moss pole to help the plant climb.
Type of Variegation
There are two types of variegation found in plants: stable and unstable. All types of variegated plants have muted cells that make the leaves white instead of green.
Thai Constellation – Stable
This plant has stable variegation that was genetically created in labs. They do this by changing the tissue culture and cells. These stable variegated plants have mutated cells throughout the whole plant, which means they naturally grow variegated leaves.
The amount and type of variegation are completely random, which means each plant’s variegation isn’t the same.
Monstera Albo Borsigiana – Unstable
This type of Monstera has unstable variegation that is created by an accident in nature (meaning, there was no lab). This happens when a mutation occurs and new cells are produced with stable colors.
As a genetic mutation, you should trim off any green leaves that recently grew and don’t have the variegated white you desire.
This also means that the variegation isn’t always the best. As such, when you’re buying a Monstera Albo, you should look closely at the specific cutting you’ll be receiving. Buying the wrong cutting will result in a plant that doesn’t look like what you expected (lots of white variegation).
However, more white isn’t also better… Too much variegation will mean you get laves that are 100% white. This sounds cool, but the plant won’t be able to grow! If a leaf doesn’t have any green on it, the plant won’t be able to photosynthesize and will eventually die.
Which is More Expensive – the Monstera Albo or Thai Constellation?
Generally, a Monstera Albo is more expensive than a Thai Constellation.
The Thai Constellation is easier to propagate and has consistent variegation. As such, there are more sellers of Thai Constellation on the market. More supply means cheaper prices for the consumer.
Albo plants are harder to propagate, which means those plant sellers have a harder time producing cuttings. This means they want more money for their hard work.
The exact price depends on other factors, like where you live and the seller you’re buying from.
Where to Buy Monstera Albo?
The most reliable way to find a reputable seller is by looking for shops with several reviews online.
I’ve had good success on Etsy. Just make sure to buy from a seller with a good reputation.
Are There Differences in Care for the Monstera Albo vs. Thai Constellation?
The same care and growing conditions apply to both of these multicolored Monsteras.
They need lots of light, so place them near your windows. However, make sure they don’t receive direct sunlight for too long as variegated plants have delicate leaves that burn easier than other plants.
Both plants have a similar level of hardiness, although I feel like the Thai Constellation is slightly less vulnerable. It won’t react as badly if the humidity level isn’t perfect. With that said, there isn’t too much difference between the two plants.
Which One Should You Choose?
This is a personal choice that depends on your preferences. Both plants are stunning and will add some color to your space!
It’s important to consider the amount of available space you have for a new plant.
The Thai Constellation grows quite full and bushy. The Monstera Albo grows smaller, but will need the support of something else if it doesn’t have anything available nearby… like a moss pole!
I would personally recommend the Thai Constellation for most people. It’s easier than an Albo to propagate, is cheaper, and grows fuller.
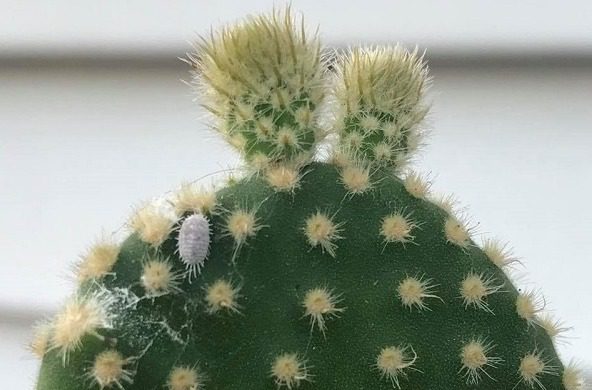
Cacti are an excellent addition to any garden. They are easy to care for, and they come in a wide variety of colors. But there is one problem- mealybugs!
These little bugs love cacti plants, and can quickly destroy them with their constant feeding. Luckily, you don’t have to give up your cactus if it has mealybugs on it! There are many ways that you can get rid of these pests without harming the plant itself.
How to Get Rid of Mealybugs on My Cactus?
If your cactus has just a few mealybugs, then you can simply scrape them off with a Q-tip that has been dipped in rubbing alcohol.
If your cactus is infested with mealybugs, then you need to try and remove as many in one go. The best way to do this is with neem oil and a spray bottle. Fill the spray bottle with neem oil and simply give your plant a thorough spritzing!
You should notice results within 24 hours, as the neem oil is very effective at killing mealybugs on contact. Be sure to repeat this process once every week for two months – that will ensure that you have gotten rid of all of the mealybugs.
If you don’t own any neem oil (amazon link), then you can make your own solution with dish soap. This is also effective – you just need to be careful not to harm the cactus plant.
Spray the solution over your cactus, making sure to get in all the cracks as this is where mealybugs like to hide. The solution will suffocate the mealybugs and get rid of them within a week or so.
What are Mealybugs?
Mealybugs are small bugs that live on the leaves, stems, and roots of plants. They are usually found in greenhouses and nurseries, but they can sometimes be brought into the home.
They feed by piercing plants with their straw-like mouthparts and sucking out their sap. This weakens the plant, which then becomes susceptible to pathogens like fungus or bacteria that cause leaf spots or rots. They also excrete a sticky substance called honeydew, which can lead to sooty mold.
These pests are most common in warm, dry conditions with poor air circulation. They thrive indoors during the winter when heaters and furnaces run constantly.
Signs of Mealybugs on Your Cactus
Mealybugs are tiny, but they can be seen with the naked eye. They come in a variety of colors – white, black, gray, or pink – and have soft bodies that look waxy or fuzzy at first glance.
If you notice these little bugs on your cactus plant leaves then it is time to do something about it! They are very difficult to get rid of once they have infested an entire plant.
Where Do the Mealybugs on My Cactus Come From?
Mealybugs are usually brought into the home on new plants. They can also fly or crawl in through open doors and windows if they live nearby.
They thrive indoors during the winter when it is warm and dry all of the time with poor air circulation – this makes your house a perfect breeding ground! Keep an eye out for them in January and February.
How to Stop Mealybugs From Returning to My Cactus?
To prevent mealybugs from returning to your cactus, you should always inspect plants before bringing them inside. Check the soil and leaves for any signs of bugs or eggs – if you spot any then do not move the plant!
To really be sure that there are no mealybugs, you can spray your cactus with neem oil before bringing it inside. Then hold the plant in quarantine for a week before putting it in its long-term position.
Will Ladybugs Help Get Rid of Mealybugs From My Cactus?
Yes, ladybugs are one of the best ways to get rid of mealybugs on your cactus. You can release ladybugs onto infected plants – they will eat all of the bugs in sight!
Using beneficial bugs is the most natural way to get rid of mealybugs on your cactus. There are alternatives to using ladybugs, but they are not as effective or safe for your plant.
Ladybugs can take anywhere from one week up to two months – it all depends on how bad the infestation is.
You can check on them by lifting up the leaves and looking underneath. When you see no sign of mealybug-life, then you can be sure that the ladybugs have done their job.
Conclusion
In conclusion, there are many methods that you can use to get rid of mealybugs on your cactus plants. You should start by taking a Q-tip and dipping it in rubbing alcohol, then wiping off as many bugs as possible.
If the plant is badly infested, then try using neem oil or a homemade dish soap solution. Make sure to spray in all of the small gaps, as the mealybugs like to hide in places where they can’t be seen.
I hope this article will help you to get rid of those mealybugs on your cactus. Please feel free to leave any comments or questions in my inbox.
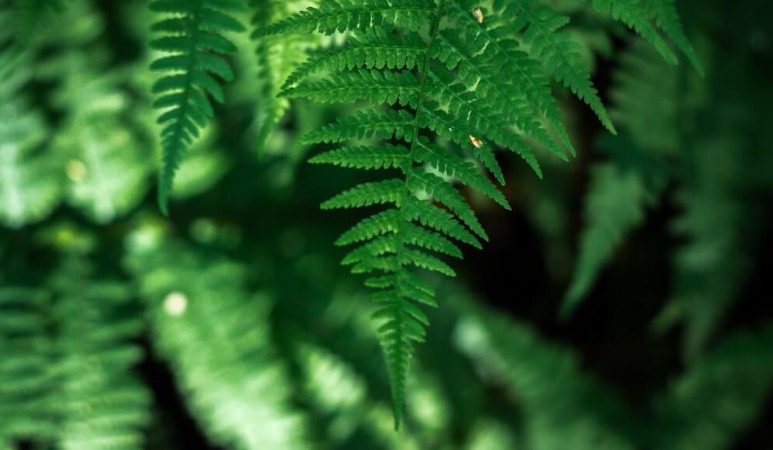
Is it time to water your ferns? Ferns are often grown in pots and can be tricky to keep alive. It is important that they stay moist, but there is a fine line between giving them too much or not enough water.
In this article, I will discuss how often the different types of ferns need to be watered, what the best type of water is, and what to do if things go wrong. Let’s get started…
How Often To Water Ferns?
Generally, it’s best to water a fern every week to keep the soil moist. These plants enjoy being watered slightly more often when compared to other plants. This is because they are native to tropical and subtropical regions.
They also need to be watered very well so that the water reaches the entire root system of the plant.
You should only water when the soil is dry. If you are not sure, stick your finger into the potting mix to test it out. There should be some moisture, but never leave them sitting in water for too long or they may end up rotting from the roots up!
What Type of Water Should I Give My Fern?
Filtered water is generally the best type of water for ferns. This type of water doesn’t contain chlorine or fluoride, which can be harmful to your plants. It also contains minerals that may help nourish them as well as make sure they stay hydrated.
Can I Give Tap Water to My Fern?
No, you should never use tap water for ferns. It contains chlorine and fluoride, which are harmful to them. In addition, it may come from a municipal source that added chemicals, such as arsenic or copper, which both can be bad for your plant too!
Can I Use Cold Water on My Fern?
No, you should never use cold water on your ferns. A lot of people believe that it is okay to give them a quick rinse in the sink, but this can end up harming your plant! The shock of cold water can damage the roots of your fern, which may cause it to die.
Can I Use Warm Water on My Fern?
Yes, you can use warm water on your ferns. However, you need to be careful because water that is too hot will cause shock and damage to your plant. This is why room temperature water is best.
Can I Use Distilled Water on My Fern?
Yes, you can use distilled water on ferns. This is because it doesn’t contain chemicals that may be bad for your plant. However, it does lack some minerals that can be useful for your fern.
Personally, I prefer to use filtered water instead of distilled water when it comes to ferns. It has the right amount of minerals that may be useful for them, but it doesn’t contain chemicals or other substances that can harm them.
What Happens if I Overwater My Fern?
Overwatering a fern is a bad idea as it can cause root rot or other diseases to develop. If your ferns are in a pot, the soil may become soggy and it will be very hard for air to reach their roots.
This is why you should only water when the soil becomes dry! Otherwise, they may end up rotting from the top down if too much time passes. Plants like the bird’s nest fern can turn brown if given too much water.
If your fern does develop root rot, then you should take action by removing it from the pot. You can carefully remove as much of the rotted roots as possible before placing them in a new pot with fresh soil that drains well.
Signs That Your Fern Is Overwatered
Droopy leaves
Mold on top of your soil
Rotten roots that are black and smell
Water standing in the bottom of the saucer
Brown or yellow leaves
What Happens if I Underwater My Fern?
Ferns enjoy soil that is moist. If you don’t give them enough water, they can suffer from dehydration. This may cause their roots to die, which will eventually lead them to brown and wither.
Leaves are usually the first sign that you are underwatering your fern because it is difficult for plants to photosynthesize if there isn’t enough water in the soil. If you see leaves wilting or drooping, then it is time to give them more water!
An underwatered fern should be soaked with water until the soil is completely saturated. You should then allow any excess water to drain before returning your fern back to its home.
Signs That Your Fern Is Underwatered
Dry leaves
Leaf drop
Leaf color change at the edges
Wilting
Should I Water My Fern Less in the Winter?
Yes, you should water ferns less in the winter. However, you still need to be careful because they can get too much or too little water during any season.
When it comes to watering your plants in general, a good rule is “less but more often.” This means that you never want to overwater your plant and give them lots of water all at once. If their soil is saturated, then you should allow it to dry out before watering again! This is a good way to avoid yellow fern leaves.
How Long Can A Fern Go Without Water?
There is no exact time frame when it comes to how long a fern can go without water. It all depends on the type of plant, its location in your home, and whether or not you overwater them!
If you have an underwatered fern that hasn’t been given enough water for at least two weeks, then they will be in trouble. The best solution is to monitor the soil as often as possible.
Conclusion
In conclusion, ferns are pretty easy to care for. However, you need to be careful when it comes to watering them because they can get too much or too little water!
Generally, you should water when the top inch of soil is dry, which usually ends up being once per week. Remember, it is better to give them less water but more often!