As the season changes, we start to see a variety of tree colors. Some trees will turn red or orange while others may change brown and yellow. But what causes this color change? And why do some trees turn different colors than others?
In this blog post, we will discuss why an umbrella pine turns brown and what you can do to prevent this from happening. Let’s get started…
Why Is My Umbrella Pine Turning Brown?
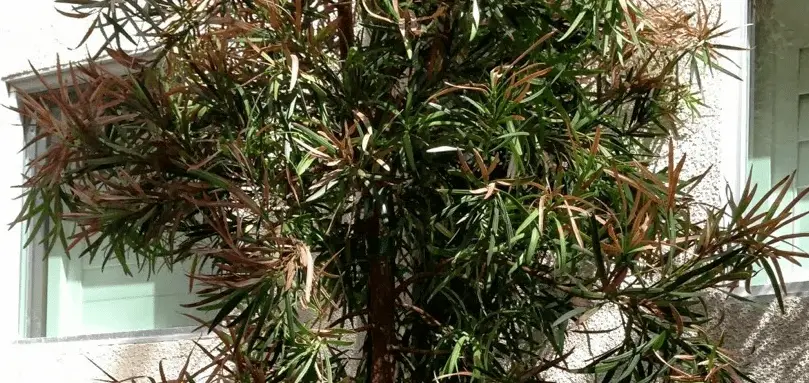
Browning of an umbrella pine is generally caused by overwatering or leaf burning. Overwatering leaves are damp, but burnt leaves are dry and crispy. Another cause of discolored leaves might be pests, which may be attacking the plant and causing shock.
I’ll go through why these things happen and how to stop them. By the end of this article, you’ll know how to keep your pine healthy and green.
1. Browning Leaves from Overwatering
When you overwater your umbrella pine, the leaves will start to brown and eventually drop off. This is because the roots are not getting enough oxygen and the plant is suffocating.
The best way to prevent this from happening is to water your pine tree deeply but less frequently. Allow the top few inches of soil to dry out before watering again. You can test this by sticking your finger in the soil. If it’s dry, it’s time to water.
If you think your umbrella pine is overwatered, stop watering it and let the soil dry out completely. Once the soil is dry, start watering again following the tips above.
You may also need to adjust your watering schedule based on the weather. For example, if it’s been raining a lot, you won’t need to water as often. Plants grown in containers must have drainage holes to prevent a buildup of water.
Finally, make sure the roots aren’t already rotting. If they are, you need to act quickly by pruning the roots and replanting the pine tree in fresh, well-draining soil. Left alone the tree will die.
2. Browning Leaves from Leaf Burn
Has your plant been exposed to a lot of direct sunlight? If so, the leaves may be burnt. This is because the leaves are getting too much sun and they’re starting to dry out and turn brown.
To prevent this from happening, move your umbrella pine to a spot that gets indirect sunlight. A good rule of thumb is to provide at least four hours of indirect sunlight each day.
If the leaves are already burnt, you can trim them off so the plant can focus its energy on new growth. This will also help the plant look nicer. Simply use a sharp pair of scissors or pruning shears to cut off the burnt leaves.
You may also need to adjust the amount of fertilizer you’re giving your umbrella pine. Too much fertilizer can burn the leaves. If you think this is the problem, stop fertilizing and see if the leaves start to green up.
3. Brown Leaves from Pests (Aphids, Mealybugs, and Scale)
Pests can also cause the browning of leaves. The most common pests are aphids, mealybugs, and scale. These pests suck the sap from the leaves, causing them to turn brown and eventually die.
To get rid of these pests, you can use a variety of methods such as horticultural oil, neem oil, or insecticidal soap. You can also try planting companion plants that will deter pests from attacking your umbrella pine.
My favorite pesticide is neem oil because it’s all-natural and it works great. It’s made from the seeds of the neem tree and it’s completely safe for humans and animals.
Conclusion
In conclusion, browning leaves on an umbrella pine can be caused by overwatering, leaf burn, or pests. To prevent this from happening, water deeply but less frequently, move to a spot with indirect sunlight, and use pest control methods.
Do you have any questions or tips on how to keep an umbrella pine healthy? Let us know in the comments below!
Tim is an avid gardener from the UK. He was the founder of PlantCarer.com from 2021 to Sep 2023. He sold PlantCarer.com to Aaron. He has since started his own business called Seed To Supper, which provides new gardeners all the materials you need in a box (pots, seeds, compost and instructions) to grow your own delicious and nutritious vegetables and herbs from start to finish – no garden required.



0 Comments