Do you have a pear tree in your backyard with black leaves? If so, you may be wondering what is wrong with it. This is a common occurrence with pear trees, and there are a few possible explanations for why your tree may be exhibiting black leaves.
Fortunately, I’ve dealt with this problem before and I can help you figure out what might be causing your tree’s leaves to turn black. Let’s take a closer look…
Why are Pear Tree Leaves Turning black?
Fire blight, Fabraea leaf spot, and pear scab are three possible causes of black leaves on pear trees. Each of these conditions is caused by different types of fungi or bacteria, so the best way to determine which one is affecting your tree is to have it examined by a trusted expert.
Once you have an accurate diagnosis, you can take steps to treat and prevent these conditions from recurring in the future. This may involve using certain fungicides or pesticides on your tree, or simply taking a few basic measures to keep your pear tree healthy and strong.
I will now talk about each of these causes in more detail so that you can better understand the root of your tree’s black leaves problem.
1. Fire Blight
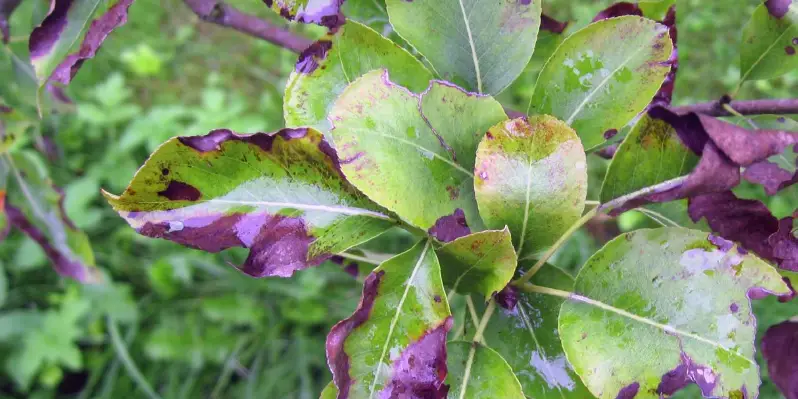
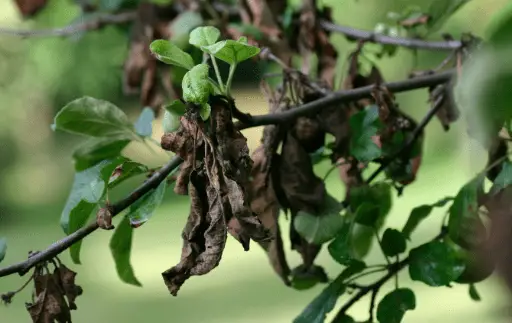
Fire blight (Erwinia amylovora) is a bacterial disease that is known to affect pears, apples, hawthorn, and other trees in the rose family. It is characterized by wilted, blackened leaves and dark cankers on branches.
It thrives in moist and humid conditions, which usually occur during the spring and early summer. The disease is dormant during the winter, so it is important to take precautions during this time by applying fungicides and other preventative measures to your pear tree.
Unfortunately, there is no cure for fire blight, so preventing the spread of the disease is your best bet. The good news is that fire blight can be kept under control with proper treatment with fungicides and other preventative measures.
Fire Blight
2. Pear Scab
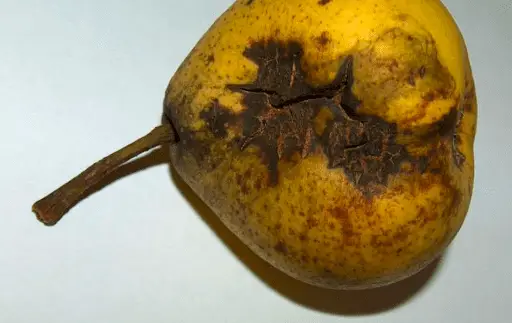
Pear scab (Venturia pirina) is another common cause of black leaves on pear trees. You may have heard of apple scab, well pear scab is very similar. It tends to cause circular, black spots on the leaves, fruit, and even the trunk of the tree.
Like fire blight, pear scab thrives in moist and humid conditions. This makes it more likely to occur during the spring and early summer when rainfall is at its peak. To prevent this condition from affecting your tree, you may need to apply certain fungicides or pesticides on a regular basis.
Some people have had great success with companion planting, which involves planting certain flowers or herbs around the base of your tree to help keep it healthy. Planting chives around pear trees have been sometimes known to help with pear scab and other diseases.
Pear Scab
3. Fabraea Leaf Spot
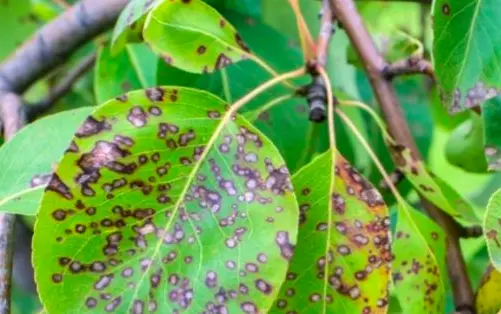
Fabraea leaf spot (Fabraea maculata) is another common cause of black leaves on pear trees. This is a type of fungal disease that causes lots of tiny, black spots on the leaves of your tree. Not taking action can lead to shrinking fruit, yellow leaves, and leaf drop.
Late May and early June is the time when this condition is most likely to occur. Like the other two conditions mentioned above, it thrives in moist and humid conditions, so taking measures to keep your pear tree dry may help prevent or slow down the progression of this disease.
It’s also a good idea to prune your tree when it’s dormant to remove any dead or damaged leaves and branches. This will help prevent the spread of this condition, as well as many other diseases that affect pear trees.
Fabraea Maculata
How to Treat Black Leaves on Pear Trees?
Prevention, fungicide sprays, and pruning are the top methods for treating black leaves on pear trees. Each of these methods will help to keep your tree healthy and strong, thereby reducing the risk of black leaves or other symptoms associated with various diseases.
1. Prevention
Take measures to prevent your pear tree from being exposed to moisture and humidity, which are conditions that can facilitate the growth of these diseases. For example, water your tree at the base, not from above. This will help to keep moisture off of your tree’s leaves and branches, thereby reducing the risk of black leaves or other symptoms associated with these conditions.
You can also plant pear trees that are resistant to these diseases. The following types tend not to be affected by fire blight, pear scab, and other conditions that can cause black leaves:
Harrow Gold
Magness
Maxine
Moonglow
Harvest Queen
Orient
Seckel
Harrow Crisp
Starking Delicious
Warren
Kieffer
Harrow Delight
Harrow Sweet
Old Home
As you can see, there are many types of pear trees that are less likely to be affected by black leaves and other symptoms associated with these conditions. So if you want to reduce the risk of your tree getting sick, consider planting one of these varieties instead.
2. Pruning
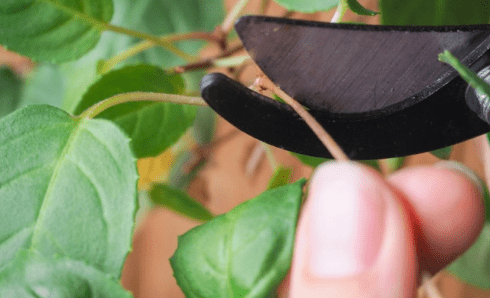
Pruning a diseased branch or leaf can also help to remove the source of infection and prevent it from spreading. Be sure to prune at the first sign of black leaves or other symptoms, before they have a chance to take hold and spread throughout your tree.
If you do decide to prune your tree, be sure to wear protective gloves, goggles, and other safety gear. This will help to prevent any harmful pathogens or spores from coming into contact with your skin.
It’s also important to disinfect your pruning equipment after you’ve used it, as this can further help to prevent the spread of disease. So be sure to clean and sanitize your tools before each use. 70% alcohol is ideal for this, as it will effectively and safely disinfect your tools.
Summer Pruning: Disease spreads quickly when the temperature is above 70ºF. This means the disease spreads quickly and violently during the warmer months. I recommend pruning 18-20 inches below where you can see any disease.
Winter Pruning: Diseases are dormant during the winter months, so it’s a good time to prune your tree. This will allow you to get rid of any infected or damaged branches, and reduce the risk of black leaves spreading throughout your tree.
The disease doesn’t spread quickly in winter, so you can prune just a few inches below where the disease starts. However, I like to err on the side of caution and prune a bit more than that, just to be sure. Remember to sanitize your tools after each use, as this will further help prevent the spread of disease.
3. Sprays
The final method for treating black leaves on pear trees is to apply sprays. These will help to kill off any pathogens or spores that may be present in your tree, thereby reducing the risk of them spreading and causing damage.
There are many different types of sprays available, from organic and natural products to chemical fungicides. So be sure to do your research, and choose the spray that is best suited for your needs.
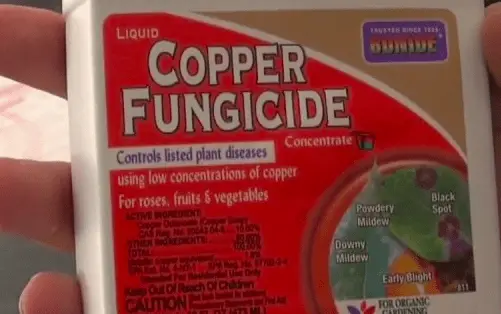
Copper Fungicide
These are my personal favorite sprays, as they are very effective at killing off pathogens and spores. Copper fungicides can be applied regularly throughout the growing season, and are a great way to prevent black leaves from taking hold of your tree.
The exact process will depend on the exact type of spray that you use, so be sure to carefully follow the instructions provided by the manufacturer. Generally, you will need to apply the spray consistently, and at regular intervals throughout the growing season.
Copper Fungicide
Organic Fungicide
There is a range of organic fungicides available as well, which can be a good option if you are looking for a more natural approach to dealing with black leaves on pear trees. Organic sprays often take longer to work than chemical ones, so be sure to give them plenty of time to work before you decide if they are effective or not.
I’ve had huge success with neem oil, which is a natural fungicide that kills off any pathogens or spores in my trees. It is made from the neem tree, which is native to India and known for its natural healing properties.
Another fungicide that is worth a try is vinegar. Vinegar is a natural disinfectant and antimicrobial agent, making it an ideal choice for treating black leaves on pear trees.
Here’s how to use vinegar to get rid of pear tree black leaves:
To make a 1-gallon vinegar mixture, mix 6 cups of water with 4 cups of white vinegar
Spray the WHOLE tree with the vinegar mixture, making sure to get all of the branches and leaves
Repeat the process every fortnight or so, until your tree is free of black leaves and pathogens
Remember to wear protective gear like gloves and goggles when using vinegar, as it can irritate the skin if not handled properly.
There’s one more natural fungicide that you can use: essential oil. Some essential oils, like mint and cinnamon, are known for their powerful antimicrobial properties and can be a great way to get rid of black leaves on pear trees.
To use essential oil to treat black leaves, simply mix together a few drops of the essential oil with some water and spray it onto your tree’s leaves. You may need to repeat this process a few times to see results, but it is an effective and natural way to deal with pear tree black leaves.
Conclusion
In conclusion, the three most common diseases to cause black leaves are fire blight, fabraea leaf spot, and pear scab.
The good news is that there are many different methods for treating black leaves on pear trees, including pruning, sprays, and natural fungicides like copper fungicide, vinegar, and essential oil. Be sure to do your research and choose the approach that is best suited to your needs.
It’s all about protecting your tree when it is most vulnerable and taking preventative measures to keep black leaves at bay. With the right care and attention, you can enjoy a beautiful, healthy pear tree that stays free of pesky black leaves all season long!
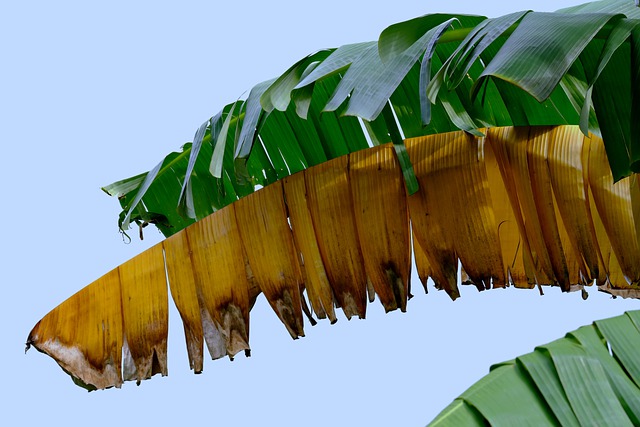
Banana plants are a popular choice for gardeners and home growers, due to their attractive foliage and easy maintenance. However, if you have noticed that the leaves of your banana plant are turning brown on the edges, there may be cause for concern.
In this post, we will explore some of the common reasons why banana leaves may be turning brown, as well as tips and strategies for preventing further damage and promoting healthy plant growth. Let’s get started!
Why Are Banana Plant Leaves Turning Brown on the Edges?
The edges of banana plant leaves turn brown when the plant doesn’t get enough water, receives too much sun, doesn’t get the correct nutrients, experiences damage from cold temperatures, has a fungal disease, is being attacked by pests, or is discarding old leaves during the aging process.
Any one of these factors can cause the browning of the banana plant leaves. The exact type of browsing your plant experiences will depend on the exact cause of browsing. For example, if your plant is sun-scorched, you may notice crispy, dry leaves, while if your plant is nutrient-deficient, it may develop yellow or pale brown areas along the edges of its leaves.
One way to prevent this from happening is to make sure that your plant always has access to plenty of water. You can do this by regularly checking the soil moisture levels, and adding water as needed.
Simply dip your finger an inch or two into the soil, and if it feels dry, then it’s time to water your plant. Additionally, you may also want to consider adding mulch around the base of your banana plant to help retain moisture in the soil.
Sun Scorch
While banana plants love receiving sunlight, too much sun exposure can actually cause them to become scorched and dry out, leading to the browning of leaf edges. It’s just like when we head to the beach on a hot, sunny day – if we get too much sun without reapplying sunscreen, our skin starts to burn.
To prevent this from happening with your banana plant, you should make sure to position it in an area of your yard that gets plenty of sunlight but is also protected from harsh rays. For example, you might consider planting it in a spot that is shaded by large trees or covered with a garden canopy.
Sun Scorched Banana Plant
Inadequate Nutrients
Banana plants require certain nutrients in order to stay healthy, including nitrogen, potassium, phosphorus, calcium, and magnesium. If your plant does not get enough of these nutrients due to poor soil quality or other factors, its leaves may start to turn brown or yellow along the edges.
One way to prevent this from happening is to make sure that your plant gets regular fertilization treatments, either by adding fertilizer directly to the soil or using a foliar spray. You should also consider testing your garden soil and amending it with any necessary nutrients as needed.
Using a testing kit will reveal what nutrients your soil is lacking, allowing you to take the necessary steps to add them in. pH testing kits also help to ensure that your soil has the proper pH level for optimal banana plant growth.
Damage from Cold Temperatures
Banana plants are tropical plants, which means that they do not tolerate cold very well. If you live in a climate where temperatures drop below freezing during winter months, it’s important to make sure that your banana plant is protected, which may meanoverwintering your banana plant.
To prevent damage from cold, you can either bring your plant indoors or cover it with a protective winter blanket. Additionally, you may also want to consider adding mulch around the base of your banana plant in order to help insulate and protect it from the cold.
Banana Plants Protected from Winter Conditions
Natural Process of Aging
As banana plants age, they naturally start to shed old leaves. While this may seem alarming, it is completely normal and does not indicate that anything is wrong with your plant. In fact, losing old leaves actually serves an important function in the growth of your banana plant – it helps make room for new leaves to emerge.
This tends to happen at the end of the growing season when most banana plants are getting ready to go dormant for the winter. We covered what to do earlier, so scroll up this page if you need a refresher!
Disease
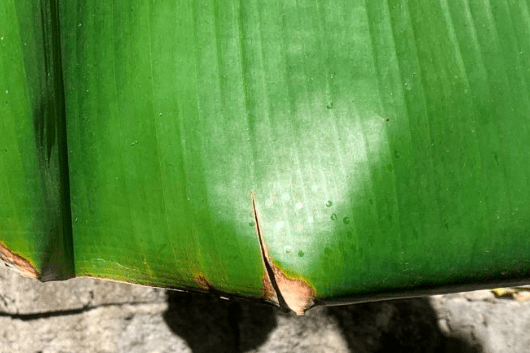
Banana plants are susceptible to a number of different diseases, including fungal diseases, bacterial diseases, viral diseases, and even nematodes. If your banana plant becomes infected with one of these diseases or pests, it may start to turn brown along its leaf edges as the disease progresses.
If your banana plant develops brown spots, then this may be a sign that it has been infected by bacteria or fungi. To prevent this from happening, you should take steps to protect your plant from insect infestations and other diseases by using appropriate pesticide treatments and keeping the area around your plant free of debris.
Additionally, regular pruning can also help keep disease at bay by removing dead leaves and branches, which reduces the risk of disease spreading to other areas. Fungus thrives in moist and humid conditions, so making sure to maintain good air circulation around your plant is also important.
Transport Shock
When you bring a banana plant home from the nursery or garden center, it may experience some shock during the process of transport. This is especially likely if your plant has been exposed to extremes in temperature or humidity levels, like being outside on a hot day and then being brought indoors where it’s much cooler.
To prevent this from happening, make sure to give your plant plenty of time to acclimate and adjust to its new environment before you subject it to any extreme conditions. Additionally, you should always make sure that your banana plant is properly watered and has enough shade or cover from direct sunlight in order to prevent heat stress.
This can happen when people bring their banana plants inside for winter. You see, people think that the more warmth you give a banana plant, the better. But in reality, dry heat from indoor heating systems can actually be really harmful to banana plants.
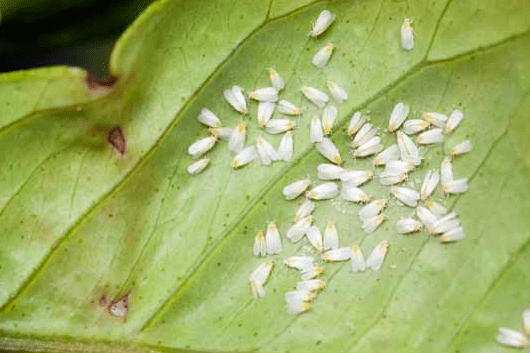
Pests (Whitefly)
Finally, one of the most common causes of browning along the edges of banana plant leaves is an infestation from pests such as whiteflies. These tiny insects feed on the juices from your banana plant leaves, causing them to turn brown/yellow and eventually dry up and die.
Whiteflies are tiny, white, moth-like insects that are commonly found in indoor houseplants. They move in groups and tend to stick together in clusters on the undersides of leaves.
Whiteflies can be difficult to get rid of, especially if they have already established themselves in your banana plant. However, there are a number of different treatments that you can try, such as using insecticidal soaps or neem oil.
I’ve found great success when spraying neem oil directly onto the leaves of my banana plant to kill off any pesky whiteflies. Be sure to do this at least once a week, and you will soon see your banana plant’s leaves returning to their healthy green state!
Whiteflies Causing Brown Spots
Should I Prune Brown Banana Plant Leaves?
It can be a good idea to prune brown banana plant leaves if they are showing signs of disease or serious damage. This will help prevent the infection or damage from spreading, as well as improve air circulation and reduce moisture levels around your plant.
However, if you think that your banana plant may simply be aging and shedding old leaves, then it is probably best to leave these leaves alone. As long as your banana plant is healthy, it should not need any additional pruning or treatment. Ultimately, the decision to prune brown banana leaves will depend on the specific condition of your plant and its needs.
If you do decide to prune your banana plant, then it is important to make sure that you are using clean and sharp pruning tools. This will help prevent the spread of disease or infection to other parts of your plant. Additionally, be sure to disinfect any tools between use in order to further reduce the risk of spreading any bacteria or fungi.
Conclusion
In conclusion, if your banana plant’s leaves are turning brown along the edges, it can be a sign of underwatering, cold temperatures, nutrient deficiency, natural aging, disease, or even damage from pests and other environmental factors.
To prevent browning leaves, follow basic plant care practices such as proper watering, protecting your plant from cold temperatures, and using pest control measures to reduce the risk of disease.
Do you have any tips or advice for dealing with brown banana plant leaves? Let us know in the comments!
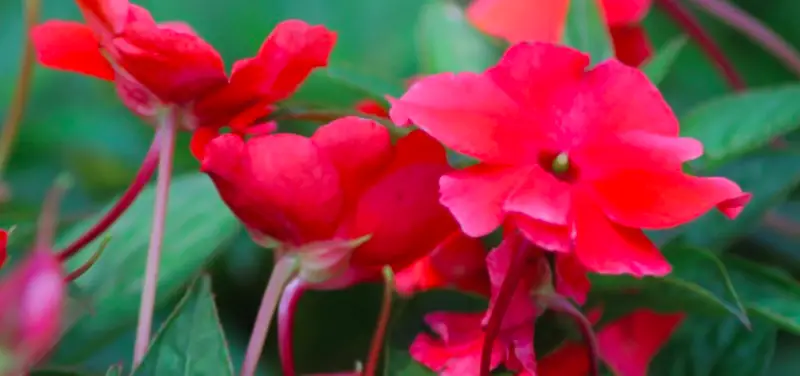
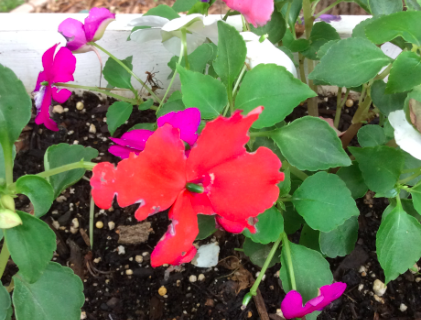
Impatiens are some of the most beautiful flowers. They come in a wide variety of colors and their blooms are large and showy. Unfortunately, impatiens are also susceptible to a number of problems. One of the most common problems is holes in the flowers.
There are several potential causes of holes in impatiens flowers. Luckily, I’ve dealt with most of them and have some tips to share. Let’s jump in!
Why Are There Holes in My Impatiens?
Pests are usually to blame for holes in impatiens flowers. There are a number of different pests that can cause this problem, including mites, aphids, thrips, and caterpillars. Pests may either chew on the leaves or suck out the sap from the flowers themselves, leaving behind ugly holes.
These pests can appear suddenly, so it is important to be vigilant and watch out for any signs of damage. If you notice holes in your impatiens flowers, try taking a closer look to see if there are any pests present.
The pests may be hiding in the soil, underneath the leaves, or on the stems of your flowers. Once you have located them, take action right away to get rid of these pests and protect your impatiens from further damage.
How to Remove Pests from Impatiens?
If your plant has large pests, like caterpillars, you may be able to remove them by hand. Simply pluck them off and dispose of them far away from your plants.
If you are dealing with smaller pests, like aphids or mites, try using an organic insecticidal soap to get rid of them. You can also use a strong blast of water from the hose to dislodge and wash away these pests.
Neem oil is a good option that I’ve had a lot of success with in the past. This natural oil can be applied directly to your plants and it works by suffocating pests and blocking their ability to reproduce.
The neem oil can be applied weekly to protect your impatiens from further damage. With some time and dedication, you can keep your impatiens looking beautiful and healthy all season long!
Impatiens Petal Holes
How to Keep Pests Away From Impatiens?
Preventative measures need to be taken to keep pests away from your impatiens plants. One of the best ways to do this is by regularly inspecting your plants and removing any eggs or larvae that you may find.
Keeping your garden clean and free of debris will also help prevent pests from taking up residence in your plants. You can do this by removing old plant matter or fallen leaves on a regular basis.
Another important step is to avoid using pesticides or other harsh chemicals in your garden. These toxic substances can not only harm your plants, but they can also kill off beneficial insects that help control pest populations naturally.
In fact, beneficial insects can be a great way to naturally control pests in your garden. Encourage these insects by planting plenty of flowering plants and herbs, which will attract ladybugs, lacewings, and other beneficial critters that can keep the pests at bay.
What Else Causes Holes in Impatiens?
While pests are the main cause of holes in impatiens flowers, there are other factors that can also lead to this problem. For example, environmental stress may be a culprit.
Environmental Stress
Environmental stress can come from many sources, such as improper watering or nutrient deficiencies caused by over-fertilizing. If you notice your plants looking unhealthy or wilted for no apparent reason, it may be time to take a closer look and see if there are any underlying problems that need to be addressed.
Large Animals
In addition to pests and environmental stress, impatiens may also be vulnerable to damage caused by larger animals. Deer, rabbits, and other large mammals may eat the flowers or chew on the leaves of your plants.
To prevent this kind of damage from happening, you may need to place physical barriers around your gardens such as fencing or netting. You can also use deterrents, such as predator urine or other scents that will keep these animals away from your plants.
Weather Storms
Finally, holes in impatiens flowers may also be caused by inclement weather or extreme fluctuations in temperature. If you live in an area that is prone to heavy rainstorms, strong winds, or other harsh conditions, your plants may suffer damage from these events.
To protect against this type of damage, make sure your plants are properly staked or tied to stakes, and that they have adequate shelter from the elements. You should also keep an eye on your plants during severe weather events and take action if you notice any damage starting to occur.
Should I Prune Impatiens with Holes?
It is not a requirement to prune your impatiens if they have holes in them. However, pruning is a good way to remove any damaged or dead tissue from the plant and allow new growth to emerge.
Fungal disease is a good reason to prune your impatiens, as it can often cause holes or other damage that you are seeing. By pruning out any infected tissue, you can stop the spread of the disease and give your plants a better chance of recovery.
If you do decide to prune your plants, make sure that you are using clean and sharp tools so as not to spread disease or infection. Additionally, you should be careful not to damage any healthy tissue when pruning your impatiens.
Conclusion
Overall, if you want to keep your impatiens plants healthy and beautiful, it is important to take proactive steps in preventing pests and other issues from taking hold in your garden. Pests can be a problem for many different types of plants, so it is important to be vigilant in monitoring your garden and taking action as soon as you notice any issues.
I recommend using neem oil, keeping your garden clean and free of debris, and using natural pest control methods like beneficial insects to keep pests under control. With these strategies in place, you can enjoy beautiful impatiens flowers for years to come!​
Do you have any tips for preventing holes in impatiens flowers? Share your thoughts in the comments below!​
Vinca is one of the most popular flowers for gardens and landscapes, due to its easy maintenance and beautiful blooms. However, one of the most common questions gardeners have about these plants is how to water them properly.
There are a few key things to keep in mind when watering vinca flowers, so I’ve put together a few tips that will help you get the most out of your vinca plants.
How Often to Water Vinca Flowers?
Watering frequency will depend on a number of different factors, including the size and type of plant, the weather conditions, and how much sun your vinca flowers are getting. Generally speaking, you should aim to water your vinca plants every other week during the growing season.
In hot weather or in drought conditions, you may need to water more frequently – perhaps even once a week. The key is to monitor your plants and adjust your watering schedule accordingly.
Personally, I only add more water to my vinca plants if I can see that the soil is starting to dry out. It’s simply a case of sticking your finger into the soil and seeing how damp it is – if your finger comes out dry, then that’s a good indication that you need to add more water.
When is the Best Time to Water Vinca Flowers?
Water vinca flowers early in the day, as this sets them up for the best performance throughout the day. Plus, if you wait until later in the day excess water will not be able to drain from the soil, which can lead to waterlogged roots and cause your vinca plants to rot.
The earlier in the day you water your plants, the better. Ideally, try to water them as soon as the sun comes up, or just before it rises. This prepares your vinca plants for the day ahead, ensuring that they have access to enough moisture and nutrients to flourish.
How Much Water Do Potted Vinca Flowers Need?
Vinca flowers are drought-tolerant and can survive in dry soil for long periods of time, so I recommend watering potted vinca flowers thoroughly once every other week.
For potted vinca flowers, it is important to be mindful of how much water you are giving them. Remember that these plants do not require a lot of water and can easily get overwatered if you aren’t careful.
Manually checking the soil can help you gauge how much water your potted vinca flowers need. Simply stick a finger into the soil and see if it is damp or dry – if the top two inches of soil are dry, then it is time to add more water.
How Deep to Water Vinca Flowers?
To give the roots of your vinca flowers the best chance at soaking up all of that precious moisture, you should aim to water them to a depth of six inches. This developed a deep root system that will help your plants thrive and flourish.
Deep roots will also keep the roots safe from harsh weather conditions, like cold snaps, heat waves, and drought. So it is important to water your vinca flowers deeply in order to ensure that they are getting the full range of benefits from their watering schedule.
Avoid watering overhead, as this can lead to fungal diseases and other issues. Instead, I recommend using a soaker hose or drip irrigation system to water your vinca flowers – these methods will help you water deeply without wasting any excess moisture.
What Happens if I Overwater Vinca Flowers?
Overwatering drought-loving plants like vinca flowers can seriously damage their health and even kill them. So it is important to keep an eye on your vinca plants and make sure that you are not giving them too much water.
Symptoms of overwatering include wilted or brown leaves, stunted growth, fungal growth and even plant death. If you see any of these signs in your vinca plants, then it is time to adjust your watering schedule accordingly and give them less water until their roots have had a chance to recover.
What Happens if I Underwater Vinca Flowers?
Underwatering vinca plants can also have serious consequences for their health and growth. If your vinca flowers are not getting enough water, they may wilt or droop, become discolored or lose their leaves.
This can also leave your plants vulnerable to disease and pests, as well as cause stunted growth and even death. So it is crucial that you are watering your vinca flowers regularly in order to keep them healthy and thriving.
Can I Give Tap Water to Vinca Flowers?
While you can give your vinca flowers tap water in a pinch, it is always best to use filtered, distilled, or rainwater when watering your plants. This ensures that your plants are getting the purest and healthiest source of moisture possible.
Tap water can contain chemicals like chlorine that can be harmful to your vinca plants. So if you want to give your plants the best chance at success, it is best to use filtered or rainwater for watering them.
Conclusion
In conclusion, it’s best to water your vinca flowers every other week, making sure to give them a deep watering that reaches down to six inches. You should also be mindful of how much water you are giving your plants, and keep an eye out for signs of overwatering or under-watering. With the right care and attention, your vinca flowers will grow tall, healthy, and vibrant!
I hope this post has helped you learn how to care for your vinca flowers and keep them healthy and thriving. So go out there, get yourself some beautiful vinca plants, and start enjoying their gorgeous blooms today!
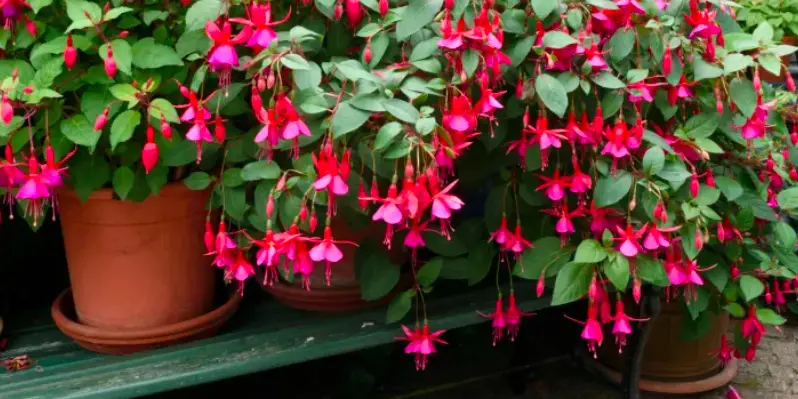
Do you have a fuchsia plant that you love, but don’t know how to keep it alive during the winter? Fuchsias can be overwintered indoors or outdoors, depending on where you live. In this blog post, we will discuss the best ways to overwinter your fuchsia plant so that it stays healthy and blooms all winter long!
Can Potted Fuchsias Be Overwintered?
Yes, fuchsia can be overwintered! This process involves putting fuchsias into a dormancy stage so that they can rest and recuperate during the winter months. When done correctly, overwintering fuchsias can help them live for years to come! Tender fuchsias will usually need to be overwintered indoors, depending on your location and climate.
The goal of overwintering is to put the fuchsia into dormancy, so it’s important to allow the plant to go through its natural process. Your fuchsia will not bloom during this process, but that’s okay! The plant is resting and preparing for the next blooming season.
Potted Fuchsia Ready to Be Overwintered
How to Overwinter Potted Fuchsias?
There are two main types of fuchsias- hardy and tender. Hardy fuchsias can withstand cold temperatures and do not need to be brought indoors for the winter. Tender fuchsias, on the other hand, cannot withstand cold temperatures and must be brought indoors for the winter.
As your fuchsia is in a pot, you likely own a tender fuchsia. This means that you will need to bring your fuchsia plant indoors for the winter so that it does not die in the cold weather. The inside temperature shouldn’t be warm, but it should be at least 40-45°F and free of drafts. A garage is ideal as it also provides low-light conditions, which is perfect for fuchsias during their dormancy period.
Here’s my five-step process for overwintering potted fuchsias:
Step One: Start decreasing the amount of water you give your fuchsia plant about a month before you plan on overwintering it. This will be done in the latter autumn months when the days are getting shorter and the temperature is gradually decreasing.
Step Two: Once the weather has cooled down and there is a risk of frost, bring your fuchsia inside into a frost-free area, like a garage, shed, or greenhouse.
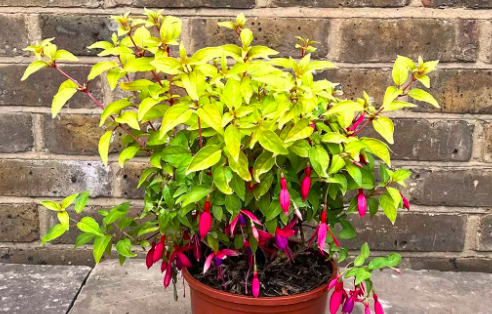
Step Three: Cut back the fuchsia plant so that no leaves remain on the plant. This will help the plant to conserve its energy during the winter months.
Trimming Fuchsia
Step Four: Once your fuchsia is inside, add water sparingly. You should only water your fuchsia plant when the soil is completely dry, which will be roughly once per month.
Step Five: When spring arrives, repot your fuchsia plant into fresh potting soil and start increasing the amount of water you give it. Once the risk of frost has passed, you can also put your fuchsia plant back outside.
Watch Out For…
When bringing fuchsias inside, watch out for pests that may have hitched a ride on the plant. These include whiteflies, aphids, and mealybugs. If you see any of these pests, be sure to remove them from your plant immediately so that they don’t spread to other plants in your home.
Neem oil is a great natural solution for getting rid of pests on plants. Simply mix neem oil with water according to the directions on the bottle, and then spray your fuchsia plant with the mixture. Be sure to do this in a well-ventilated area as neem oil can be quite pungent!
Fungus should also be kept an eye out for as it can spread quickly in humid conditions. If you see any signs of fungus, such as powdery mildew or black spots on the leaves, be sure to remove the affected leaves and increase the amount of airflow around your plant.
Again, neem oil can be used to treat fungus in plants. It is a natural fungicide that will help to get rid of the fungus without harming your plant. To stop fungus from coming back, make sure to keep the area around your fuchsia plant clean and free of debris.
Bringing Fuchsias Out of Hibernation
When spring arrives, it’s time to start bringing your fuchsia plant out of hibernation. Start by repotting your fuchsia plant into fresh potting soil and increasing the amount of water you give it.
Find a sunny spot in your garden or home and slowly start acclimating your fuchsia plant to warmer temperatures and more light. Once the risk of frost has passed, you can put your fuchsia plant outside in its permanent location.
This is also the perfect time to trim branches halfway to encourage bushier growth. Fertilize your fuchsia plant once per month with a balanced fertilizer to help it recover from its time in dormancy and encourage healthy growth.
Conclusion
In conclusion, overwintering your fuchsia plant is a great way to keep it healthy and blooming all winter long! Be sure to follow the steps outlined in this blog post so that you can successfully overwinter your own potted fuchsia plant.
Remember, bringing your fuchsia plant inside for the winter is essential if you want it to survive the cold weather. Once spring arrives, you can repot your fuchsia plant into fresh potting soil and start increasing the amount of water you give it. With a little bit of care, your fuchsia plant will be blooming all summer long!
I hope this blog post was helpful in teaching you how to overwinter your fuchsia plant! If you have any questions, feel free to leave a comment below and I’ll be happy to help. Thanks for reading!


