House plants are a great way to add life and color to any home. And when you have house plants that have reds or greens in their leaves, it can really brighten up an otherwise drab room.
The problem is that many people don’t know which house plant varieties have red or green leaves so they end up with ones without these colors. But fear not! This blog post will tell you all about five types of house plants with red and green leaves, so you can choose one for your home.
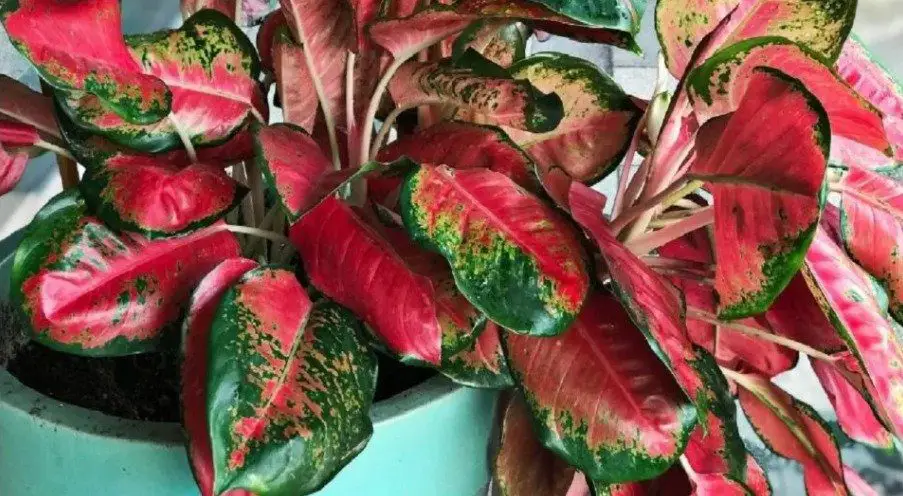
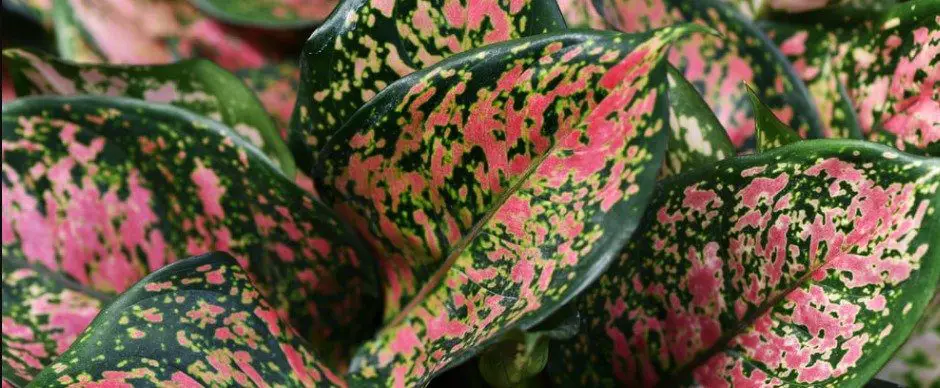
Aglaonema is a genus of about 60 species in the family Araceae. Most of these plants have red and green leaves, but some may be all-green or all-red. These are not very high-maintenance plants that will grow relatively quickly into impressive specimens with good care from you!
They like to be kept moist and can handle average home conditions. Sunlight is good for them, but not direct sunlight. Aglaonema will bloom with little yellow flowers on tall stems above the leaves if you treat it well!
2. Begonia Rex
Begonia is a genus of about 1000 species in the family Begoniaceae. Most varieties have green leaves and red stems, but there are some with all-green or all-red coloration as well.
It will grow quickly if you keep it warm, out of direct sunlight, moist but not wet soil, and feed it regularly. Water the begonia rex whenever the top inch or two of its pot’s soil becomes dry.
These plants are also good at removing indoor air pollutants!
3. Caladium
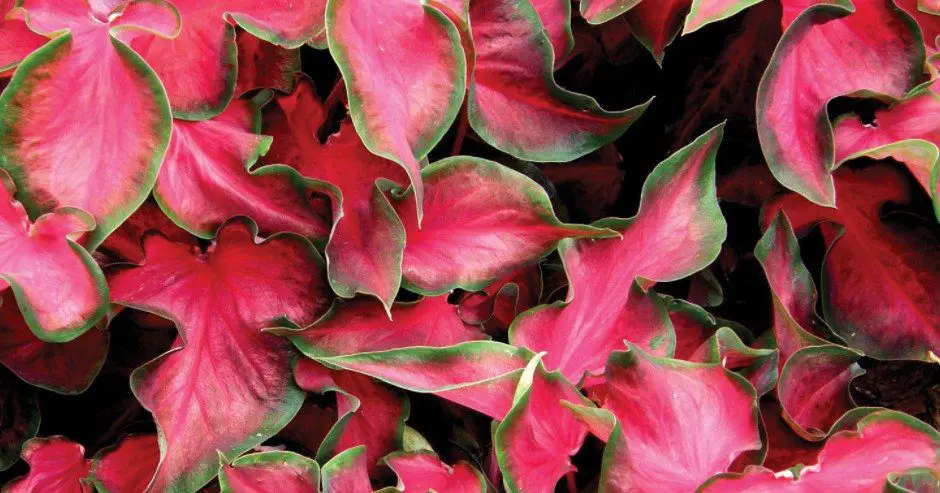
Caladium is a genus of about 60 species in the family Araceae. All varieties have green leaves and red veins, but some may be all-green or all-red with no venation. These plants are incredibly easy to grow if you treat them well!
Caladiums are beautiful plants with soft, leathery leaves. They prefer warm moist conditions and bright indirect light to support their growth properly!
4. Coleus
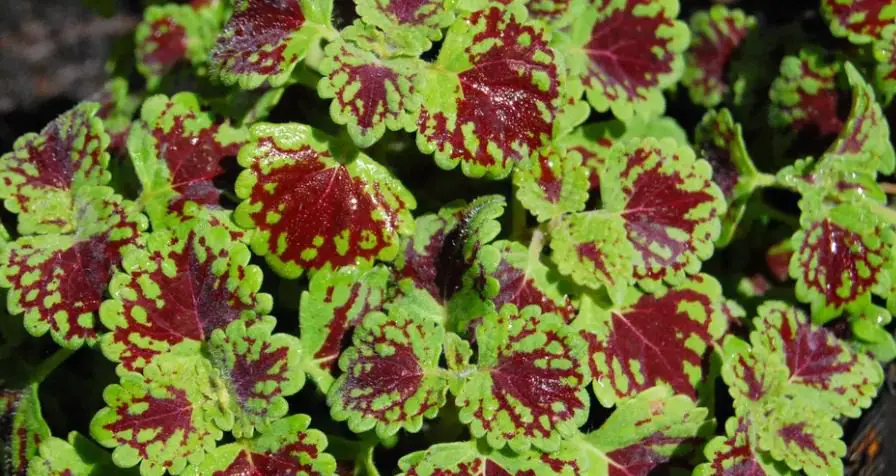
Coleus is a genus of about 350 species in the family Lamiaceae. The leaves may be green, yellow, white, maroon, or purple and have either red veins or no venation at all.
These plants are incredibly versatile, able to grow in almost any condition! They are beautiful plants that will brighten up your home with brilliant color.
5. Croton
Croton is a genus of about 80 species in the Euphorbiaceae family. The leaves may be green, yellow, orange, or red and have either no venation or veins that are separated by white running through them.
These plants can grow very quickly if you treat them well! They like to stay moist but not wet and should be kept out of direct sunlight to avoid burning their soft leaves!
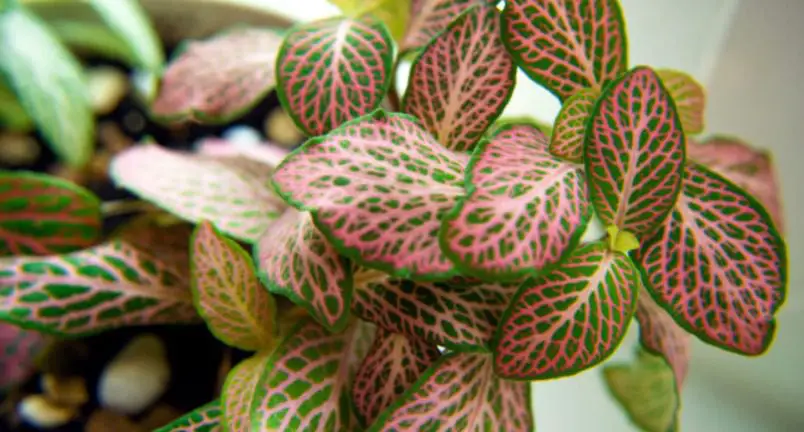
6. Fittonia (Nerve Plant)
Fittonia is a genus of about 45 species in the family Acanthaceae. The leaves are green with red or pink veins running through them, making it look like they have nerves!
These plants do well if kept moist and out of direct sunlight. They will often grow very quickly into beautiful specimens that need only basic care to thrive!
7. Poinsettia
Poinsettia is a genus of about 25 species in the family Euphorbiaceae. The leaves can be green, red, or yellow and have no veins at all!
These plants are great if you want something beautiful to decorate your home for holidays like Christmas. They don’t need much care besides misting once per week and keeping them out of direct sunlight to help maintain their coloration well!
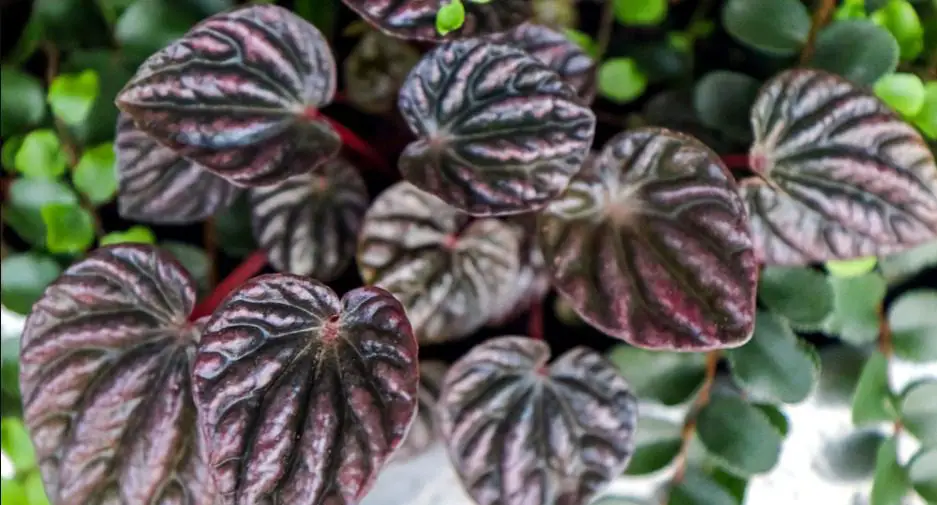
8. Peperomia Caperata
Peperomia is a genus of about 1000 species in the family Piperaceae. The leaves are green with red markings that may be spots, lines, or speckles!
These plants can grow very quickly into beautiful specimens if you treat them well! They like to stay out of direct sunlight and need moist soil but not wetness. Peperomias also help remove indoor air pollutants from your home!
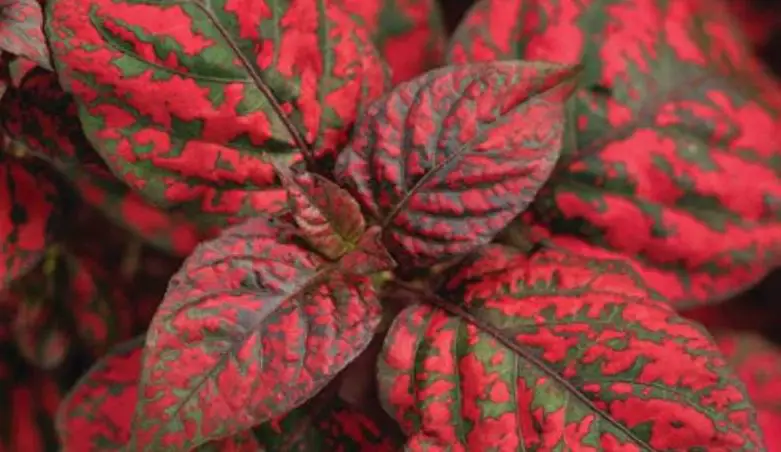
9. Red Hypoestes
Red Hypoestes is a genus of about 200 species in the family Acanthaceae. The leaves are green with red veins running through them!
Red Maple Bonsai Tree is a genus of about 500 species in the family Aceraceae. The leaves may be green, red, yellow, or orange and have no veins at all!
These plants are great for indoor bonsais if you want to add some greenery to your house without taking up too much space with an actual plant! They need plenty of water but not wetness and should never dry out completely. Red maples also help remove air pollutants from inside your home!
Conclusion
So now that you know everything there is to know about house plants with red and green leaves, which one will you get?! I hope this blog post was helpful so that you’ll choose one worthy of adding life and beauty into your own home!
I hope this post was helpful! I hope you choose one of the beautiful plants with red and green leaves to add life and beauty to your home.
Pothos plants, also known as Devil’s Ivy or Golden Pothos, are among the most popular houseplants. They’re easy to care for and adaptable to many different conditions. But can they survive outside? In this blog post, we answer that question!
Can Pothos Live Outside?
Gardeners often wonder if it is possible to grow Pothos plants outside. The answer, as with most houseplants, is that they can’t live outdoors year-round because their needs are not met by the outdoor environment.
However, there are ways to keep them alive while enjoying a little bit of summer in your yard!
The best way for those who want some green during the winter months and springtime without needing to go through any major work or expense is bringing potted vines indoors before frost hits and again when temperatures start rising back up after frosts have receded.
If you’re looking for more permanent solutions, take into account where you live (geographically) and what type of climate zone you live in.
Look at how big these pothos managed to grow outside!
How To Grow Pothos Outside?
There are many factors to consider when you want to grow a pothos outside. Keep the following information in mind:
Temperature
Pothos plants can’t survive when temperatures drop below 50°F. You’ll need to protect them from harsh weather if you want to plant them outdoors.
Lighting
You need at least six hours of bright light every day for your plant to grow well outside.
Make sure that you put it in an area where it will get this much natural illumination on all sides, if possible.
Watering
The most important thing is not letting the soil dry out while making sure they don’t have wet feet either! This means watering them often and about once or twice each week, depending on how hot their location is.
When planting your pothos outside, you need to consider much more than if the plant was inside. Has it rained recently? Is the weather hot?
Fertilization
Fertilize your pothos plants monthly in spring and summer.
It will depend on the type you need, but you’ll generally use a half teaspoon of fertilizer for every one gallon of water you use to help replenish the nutrients it needs to grow well!
Pruning
Pothos plants should be pruned right after they bloom so that the new, tender growth can grow up and fill out.
Pests
You need to watch out for pests if you are going to plant your pothos outside. Make sure you add this to your considerations when deciding where you want to place it.
If you do notice pests, then you should take care of them as soon as possible. Neem oil is great for this!
Soil
Pothos plants need soil that is rich in nutrients, but not too heavy. I like using 2 parts Miracle Grow Indoor Potting Mix with 1 part perlite.
The potting mix gives your pothos all the nutrients it needs to thrive, while the perlite allows for improved drainage and aeration.
FAQs
What are the benefits of growing pothos outdoors?
The benefits of growing pothos outdoors are that they’ll get more sunlight, a change in temperature from the house or greenhouse, it will be able to grow at full speed, and it make your garden look amazing.
What are the drawbacks of growing pothos outdoors?
The drawbacks of growing pothos outside are that it usually needs more water than when they’re inside, the plant can die from shock if there’s an unexpected drop in temperature or a sudden snowstorm, and the plant can also be damaged by pests, such as slugs and snails.
Should pothos come inside during winter?
Pothos plants usually can’t survive when temps drop below 50°F, so they should be brought inside long before the first frost hits. They should also be protected from sunburn. The exact time of this will depend on where you live, how cold the winters are, and whether or not it’s a mild winter.
Should pothos come outside during summer?
You can keep your pothos outside during the summer months if you live in a warm area that doesn’t have frost.
How to get more light for outdoor pothos?
Pothos plants need at least six hours of bright sunlight every day, so make sure you put it in an area where it will receive plenty! You can also supplement any natural light with artificial lighting.
How to water outside pothos?
The most important thing is not letting the soil dry out while making sure they don’t have wet feet either!
This means watering them often and about once or twice each week, depending on how hot their location is and whether or not there’s enough rain around during the summer months (be careful with runoff!).
Conclusion
In conclusion, pothos plants thrive best indoors. They need a lot of warmth and good drainage, which means they can’t live outside year-round because it’s not possible to provide them with these conditions 24/7.
However, you can keep your vines alive by bringing them inside before the frost hits, and when temperatures start rising back up again, simply put the pothos plant back into your garden.
If you’re looking for more permanent solutions, take into account where you live (geographically) and what type of climate zone you are located within. For example, if you live in a place with temperatures below freezing all year long, the pothos plant will need to be inside at least six months out of the year.
As a gardener, you may now be trying to revive a corn plant that’s dying. It is important to understand that the cause of death will vary from plant to plant.
There are many different factors that could be causing the problem and some plants have more than one issue at a time. This article will provide a range of potential solutions to help fix these problems so as not to let them go unnoticed!
How to Save a Dying Corn Plant?
You can save dying corn plants with the right care, which includes:
Corn plants need around 70 degrees Fahrenheit in order to thrive
In order to help the corn plant survive, you must maintain a humidity level of over 50%
Using a potting mix that drains well to avoid root rot
Water when the top inch of soil is dry with chemical-free water
Provide sufficient amounts of sunlight that is indirect
Reasons Why Your Corn Plant Is Dying
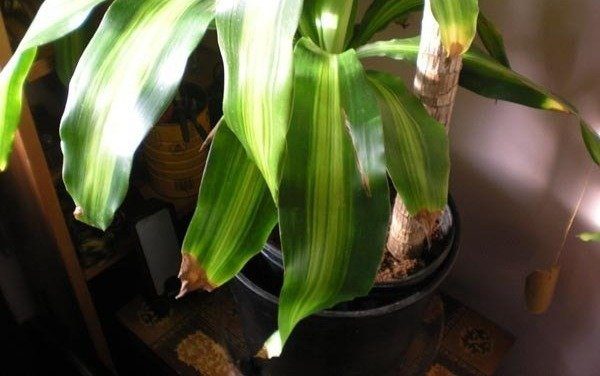
Yellow leaves
Yellow drooping leave can be the result of not having enough water, overwatering, not giving enough sunlight, or not using a suitable fertilizer.
If you want your corn plant to thrive to its potential, the best thing that you can do is make sure it has a pot that comes with lots of drainages and a good soil mixture.
Sunburn
Sunburn is a common problem for corn plants that are not getting enough shade. After a long summer day, the sun may be too hot for your corn plant. They will protect themselves by curling their leaves in to avoid getting scorched or burnt.
Your plant needs to be shaded from the sun in order to stay alive, which can easily be done by using something like a patio umbrella or screen house. To prevent sunburned plants in the future, move the plant to a shadier part of your house or garden.
Fungus
If your corn plant has spots of white or black, it is most likely a fungus. To save the plant from this problem, it needs to be treated immediately! You should look for a fungicide that is labeled to kill fungus and follow the instructions. I like using neem oil because it’s an organic fungicide that handles fungal infections and controls pests.
Holes in leaves
If your plant has holes in leaves, it may be because of an insect or pest problem. This is a common problem for many plant owners. To save the plant, try using neem oil to help control pests like aphids or mealybugs.
Brown leaves
Brown leaves on your corn plant could be caused by too much sun, not enough water, or a disease. To save the corn plants from this problem you need to do some leaf pruning and add more organic material like compost for nutrients.
For late-season browning, it is recommended that you wait until next spring before taking any action because they will start growing again when warmer weather comes around!
Lack of nutrients
If your corn plant is not getting enough nutrients, it will start to wither and die. This can be caused by an improper soil mixture or a lack of fertilizer.
To save the dying plants from this problem, you need to fertilize with manure or compost every two weeks until the browning starts to go away!
I hope some of these suggestions for saving a dying corn plant helps!
Soil and potting
Keeping the potting mix in a container with good drainage will help to reduce root rot. It is also important that you use a mixture of perlite, vermiculite, and/or peat moss as this helps aerate the soil for better growth.
The best type of plant potting mix should have lots of organic material like compost or manure because it provides nutrients for your plants. You can buy fertilizer from local nurseries too!
Conclusion
In conclusion, there are many factors that could be causing the death of your corn plant. These solutions should help you save a dying corn plant in no time!
We hope this article has helped answer any questions about saving a dying corn plant or what could be causing the issue. Plant problems are very common but there’s always something we can do about them! If you have other issues with your garden, contact us for assistance anytime!
It’s important to remember that the plant’s death is relative to what caused it. If you’re not sure how your corn plant died, try the solutions listed above in order and find out which one fixes the issue!
The Haworthia flowering stem bloom is a beautiful event, but many gardeners are left wondering what’s happening during the process. In this post, we will cover everything you need to know about the haworthia flowering stem bloom and how it can affect your plants.
Does Haworthia Bloom?
Haworthia does indeed bloom. The most common type of flowering stem that haworthias produce is a single flowering spike in the center of its rosette leaves.
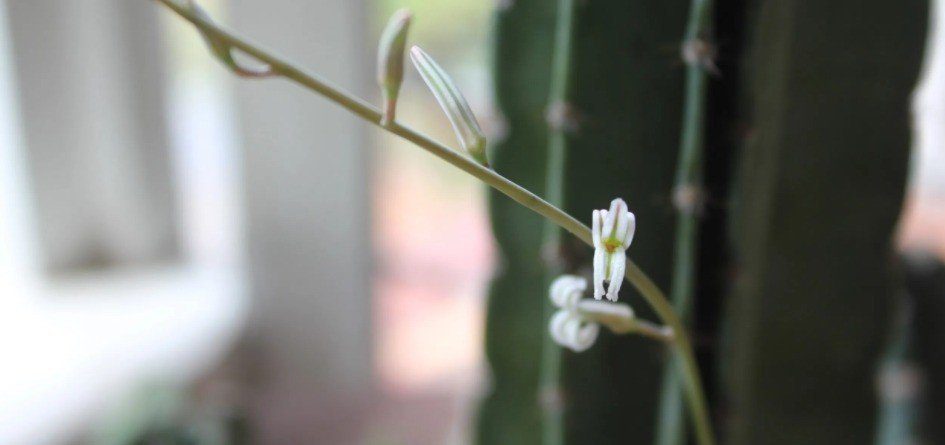
These spikes grow taller and wider until they are fully grown (about 18 inches). Once this happens, white flowers will begin to form on these stems at intervals along their length.
This can take anywhere from two weeks up to six months for them to reach full size and then flower as needed.
Does Haworthia Die After Flowering?
Haworthia does not die after flowering. Many gardeners are left wondering what to do during the process of haworthia flowering stem bloom. They will continue life as usual, and if you’re lucky enough (or they were propagated from a division), new rosettes may form at the base of them.
How Long Do Flowers Last On The Stem?
The flowers on these stems can last anywhere between two weeks up to six months before wilting away or being eaten by birds that enjoy their nectar. This means that you have plenty of time to take care of your plants without fear that immediate attention is required! If beetles get into blooms early, then it’s possible for many more buds to start forming on the stem.
How To Care For Flowering Stems?
Some gardeners are left wondering what to do during haworthia flowering stem bloom, such as how best to care for them and whether or not they should be divided after this event has ended.
Fortunately, caring for plants in their post-bloom form is easy! All that you need to do is water your plant well (with some fertilizer) every few weeks, and it will continue living on its own until new rosettes start forming at the base of flowers (or old leaves) again.
When Do Haworthia Bloom?
Haworthia bloom at various times of the year, depending on their variety. While blooming can occur throughout the year in many climates within USDA zones nine or higher, it is most commonly seen from November through February when rainfall and temperatures are lower than usual.
There’s no need to worry about your Haworthia plants during flowering! They will stop growing new leaves while they produce flowers atop tall stems that were previously hidden below ground level.
The Haworthia Flowering Stem Explained
The plant’s flowers grow on an inflorescence, which is a long stem that ends with the bloom. Despite being small succulents, haworthias are known for their long flowering stems. This stem grows periodically throughout the year to produce flowers along its length.
The flowering stem may look out of place, but it actually belongs to the haworthia plant. As flower stems grow longer and fuller with time, more buds will appear as well!
Should You Cut The Haworthia Stem?
It is not necessary to cut a flowering stem, but some gardeners may find it preferable. If you want the rosette at the base of your plant to produce more leaves and this is their only blooming stalk, then cutting them off might be worth considering.
Should You Divide Your Plant?
Some people wonder what they should do with their plants during haworthia flowering stem bloom: whether or not they need to divide them after all these flowers have wilted away.
Unfortunately for many gardeners, dividing when this occurs will usually confuse the plants and can even kill them if done incorrectly. It’s best to wait until new foliage starts growing again from anywhere in its rosettes before separating any sections just yet!
How Do You Get Haworthia To Bloom?
Many gardeners are curious as to how to get Haworthia plants to bloom. This is a fairly easy process that starts with providing the plant with indirect sunlight, high humidity, and warm temperatures (60-80 degrees Fahrenheit). With these conditions met, your plant will begin producing flowers in less than three months!
Basic Care Guide
Watering: Haworthia plants should be watered when the surface of their soil is completely dry – usually no less than every two weeks. You can tell if they need water by pressing your finger into the top inch; if it’s wet, then you don’t have to worry about watering! When planting them in a pot or garden bed, make sure that there are drainage holes at its bottom for excess moisture to escape.
Light: This plant prefers indirect sunlight and will start wilting in light because it does not tolerate heat well. For this reason, avoid placing these plants too close to windows during winter months as frost may damage them even more severely than being exposed all day. It would also benefit from some shade outdoors during the day so that it does not get too hot for it.
Temperature: Haworthia plants are cold-sensitive and need a warmer climate to bloom during their flowering stem phase. Provide them with 60-80 degrees Fahrenheit to trigger these blooms!
Fertilizer: Add some fertilizer or compost every few weeks into the top layer of soil in your pot (or garden bed) – but only after you’ve watered thoroughly beforehand as this can inhibit its ability to decompose efficiently. This will provide your plant with nutrients and ensure healthy growth progress without making roots feel starved all year round!
Air circulation: The air needs to be able to circulate around the leaves of this plant at all times, so avoid planting them next to large objects or plants that might hinder airflow.
Spider mites: Haworthia are susceptible to insect pests sometimes, in particular, spider mites; these can affect the plant’s health and even kill it over time if left unchecked. Make sure to inspect your Haworthia for signs of this pest (which is visible as webbing on their leaves) before letting them get too out of control!
Disease: Some gardeners worry about diseases affecting their Haworthias during the flowering stem phase – but there isn’t a great deal you can do other than keep an eye on things. If they become infected with anything, then bring them indoors so that they’re away from environmental factors outside which may worsen their condition.
Conclusion
In conclusion, haworthia plants are a perennial and succulent variety that bloom once per year. These flowering stem blooms typically fall at the start of summer, but can also happen during autumn months too; for this reason, it’s worth checking out your plant to see if they’re in their haworthia flower cycle!
If you want more leaves or flowers from them after this process is done, then consider cutting off the old stem so that new ones will grow instead – though be careful not to do anything until they’ve wilted away completely first (this could confuse or kill them)!
Lavender is a beautiful, fragrant plant that can brighten up any room in your home. In fact, many people enjoy growing lavender in their gardens as it is known to be a very low-maintenance plant.
However, if it’s not watered correctly, it can quickly become wilted and lifeless. This blog post will discuss how to save overwatered lavender plants and revive them back to their former glory!
How to Save Overwatered Lavender?
There are four key steps to saving your overwatered lavender plant. Let’s go through each one so you can get your plant back to good health…
1) Stop watering immediately
The first step is to immeasurably stop watering your lavender plant. This will give the roots a chance to dry out and recover from any water damage that has been done. If you continue to water an overwatered plant, it will only compound the problem and make it more difficult to save.
2) Re-pot your lavender
If the soil around your lavender plant is soggy or waterlogged, it’s important to re-pot the plant into fresh, dry soil. This will give the roots a chance to breathe and dry out. Be sure to use a well-draining potting mix and avoid any that are heavy in clay.
The pot should have adequate drainage holes at the bottom so that water can easily escape. Adding sand and perlite is also a good idea as it will help with drainage and aeration.
3) Prune any roots that are rotten
Overwatering a lavender plant can lead to root rot, which can kill the plant. If you see any roots that are black or mushy, it’s important to prune them away. This will allow the healthy roots to take over and help the plant recover.
Use a pair of sharp, sterilized scissors or pruning shears to remove any rotten roots. Be sure to dispose of them properly so that they don’t spread the rot to other plants.
4) Set up a watering schedule
Once your lavender plant has recovered from being overwatered, it’s important to set up a watering schedule. This will ensure that the plant gets the correct amount of water and doesn’t become overwatered again.
Water your lavender plant once a week, allowing the soil to dry out in between waterings. You could even use a moisture meter to help you gauge when the plant needs water.
What Does Overwatered Lavender Look Like?
Overwatered lavender plants will typically have wilted, yellow, or brown leaves. The leaves may also be drooping or falling off the plant. The stems may be soft and spongy to the touch.
If the lavender has been overwatered for too long, the roots may be black, mushy, and rotten. The plant may also be starting to produce mold or mildew.
If you see any of these signs, it’s important to take action immediately and follow the steps above. With a little care and attention, you can save your overwatered lavender plant!
How Much Water Do Lavender Plants Need?
I recommend giving water to your lavender plants every week. However, you should always check the soil before watering to make sure that it’s dry. If the soil is still moist, wait another day or two before watering.
Lavender is a drought-tolerant plant, so it doesn’t need a lot of water to survive. In fact, overwatering is one of the most common problems that people have with lavender plants.
Do you own any succulents? Then you might be familiar with the “soak and dry” method of watering. This involves giving the plant a deep watering, then allowing the soil to completely dry out before watering again.
This method is perfect for lavender plants as they don’t like to sit in moist soil. It’s also a good idea to water in the morning so that the plant has time to dry out before nightfall.
Lavender Care Tips
Temperature: Lavenders like the same temperatures that most other plants do – in the range of 60 to 85 degrees Fahrenheit.
Light: Lavender requires full sunlight or at least six hours a day of sun exposure. If planted outside, they should be placed in an area with some shade in the afternoon.
Soil preference: Succulent mix is best for lavender because it drains well and has the ability to hold a bit of moisture.
Watering: Lavenders like one inch per week, or seven inches total over time. They should never be watered too much or not at all!
Humidity: Lavenders do best in a dry climate, so if you live somewhere that is humid year-round – heavy soil or clay will only make things worse!
Fertilizing: Lavender plants prefer slow-release fertilizer mixed into the potting mix. Inorganic fertilizers should be avoided because they do not break down easily and can lead to salt build-up in the soil.
Insects and diseases: Lavenders are susceptible to insect infestations like aphids, spider mites, powdery mildew, or fungal infections! If you notice any of these problems on your plants – consult a professional on how best to combat them.
Conclusion
In conclusion, if you have an overwatered lavender plant, don’t despair! There are four steps that you can follow to save your plant.
First, stop watering immediately. Second, re-pot the lavender into fresh, dry soil. Third, prune any roots that are rotten. Fourth, set up a watering schedule.
With a little care and attention, you can revive your overwatered lavender plant. However, if the stems are soft and spongy or the roots are black and mushy, it’s possible that the plant has been overwatered for too long and may not be able to be saved.