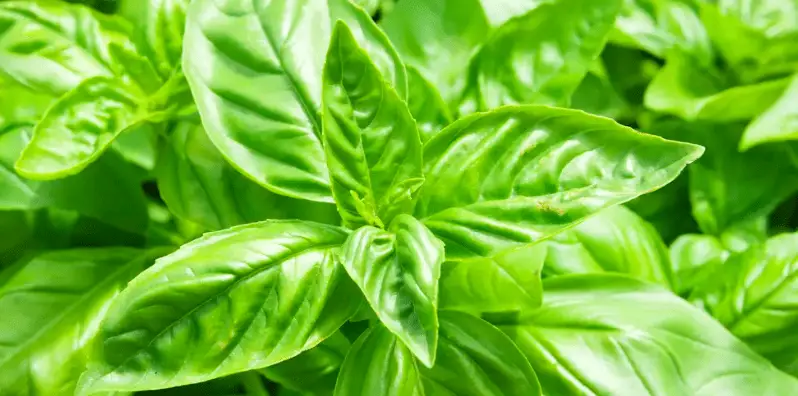
Basil plants are a popular herb used in cooking. Not only do they taste delicious, but they are easy to grow. However, they need to be protected from the cold weather if you live in a climate where it gets below freezing. In this blog post, we will discuss how to protect your basil plants from the cold so that they can continue to thrive all winter long!
Can Basil Survive Winter?
Yes, basil can survive winter, but only if you take the proper precautions. If the temperature in your area drops below freezing, you will need to take your basil plants indoors. This is because basil is a tropical plant and cannot tolerate cold weather.
However, most species of basil are annuals, which means they only live for one growing season. This means that many people simply choose to start fresh with new basil plants each spring, rather than trying to overwinter their plants.
How to Protect Basil Plants in Winter?
If you want to try and overwinter your basil plants, there are a few things you can do to help them survive the cold weather.
Next, you will need to water your basil plants regularly. This is especially important if the weather is dry, as basil plants are susceptible to drought. Be sure to also fertilize your plants every few weeks to keep them healthy.
Mulch
Mulching is a well-known gardening technique that can be used to protect plants from the cold. You can use any type of mulch, such as straw, leaves, or even fabric. Simply cover the pot with a few inches of mulch, and this will help insulate the basil plant and keep it warm.
Doing this in later summer/autumn will give the plant a few more months of growth before it needs to be brought indoors for the winter.
Protection
Finally, you will need to provide some protection from the cold for your plants. This can be done by placing them in a sunny spot inside, rather than out in the cold. You may also want to consider covering your plants with a cloth or tarp if the temperatures are expected to dip below freezing.
Artificial lights
Artificial lights are particularly useful for providing extra light during the winter months. Here in the UK, there isn’t much natural sunlight during winter, so using a grow light is essential for keeping my indoor plants alive! 12 hours of light per day is ideal for most plants, so I set my timer to turn the lights on in the morning and off at night.
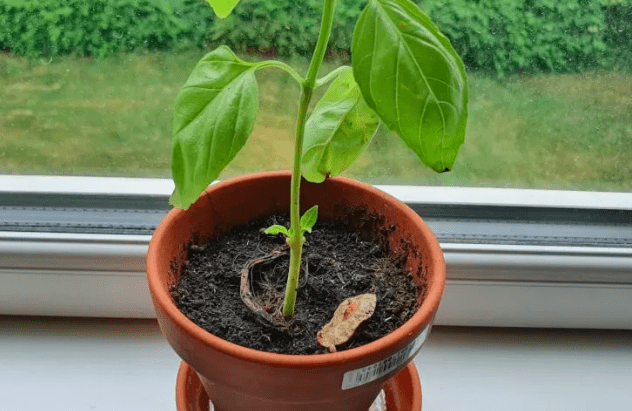
Basil brought inside for winter
How to Treat Cold Damage on Basil?
Cold damage on basil plants looks like brown or black spots on the leaves. If you notice this happening to your plants, it is important to take action immediately.
1) The first step is to move your plants indoors if they are not already. If the temperature outside is below freezing, your plants will not be able to recover from the cold damage.
2) Once you have moved your plants indoors, you will need to cut off any affected leaves. This will help prevent the spread of the damage and allow your plant to focus its energy on healing.
3) After you have removed the damaged leaves, you will need to water your plant deeply. Be sure to also fertilize it so that it has the nutrients it needs to recover.
4) Finally, you will need to provide some protection from the cold for your plant. This can be done by placing it in a sunny spot near a window or by using a grow light. Preventing further cold damage will help your plant recover more quickly.
How Cold Can Basil Tolerate?
Basil is a sensitive herb, and even a slight drop in temperature can affect its growth. In general, basil plants can tolerate temperatures as low as 50°F. However, they will not thrive in this temperature range and may start to show signs of stress, such as wilting leaves.
When temperatures drop even more, below 0°F, basil plants will start to experience cold damage. This can manifest as brown or black spots on the leaves and may eventually lead to the death of the plant.
Conclusion
In conclusion, it is important to take measures to protect your basil plants in winter. This can be done by moving them indoors, mulching them, or providing artificial lights and extra warmth. If you notice any cold damage on your plants, be sure to take action immediately by moving them indoors and removing any affected leaves.
Don’t worry too much if your basil doesn’t look manage to survive the winter as you likely own an annual variety that is only meant to last one season. You can always replant in the spring!
Perennial basil varieties do exist, however, so if you’re interested in growing basil that will come back year after year, make sure to get your hands on one of these plants.
By following these tips, you can help your basil plants survive the winter and enjoy fresh herbs all year round. Do you have any other tips for overwintering basil plants? Share them in the comments below!
Do you have a ficus plant in your home or office? If so, you may have noticed that its leaves turn a reddish color from time to time. But why is this? Is this something to be concerned about? In this post, we’ll take a closer look at the reasons behind a red leaf on a ficus plant.
Why Are There Red Leaves on My Ficus?
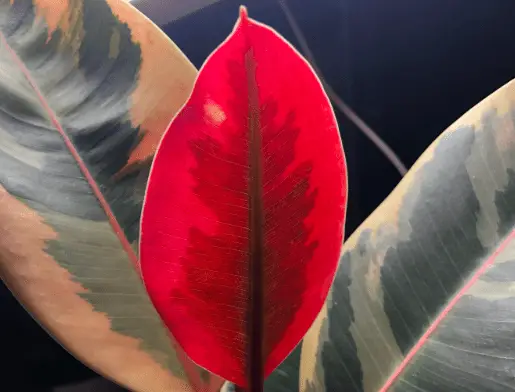
The red leaves on your ficus are occurring naturally. Ficus plants contain a pigment called anthocyanins, which is found in the leaves, stems, and fruit of the plant. The anthocyanins provide protection against a number of environmental stressors, including UV rays, pests, and diseases.
When the leaves of a ficus plant are exposed to high temperatures or direct sunlight, the anthocyanins will cause the leaves to turn red. This is perfectly normal and is nothing to be concerned about. In fact, the red leaves can actually help to protect the plant from further damage.
This happens in many types of plant life. For example, the leaves of maples and other trees will often turn red in the fall as a result of the changing temperatures and shorter days. The red leaves on your ficus are simply a response to the environment around them.
A Single Red Ficus Leaf
Anthocyanins – The Red Pigment
Anthocyanins are a type of flavonoid, which is a class of plant pigments. Flavonoids are responsible for the color of many fruits and flowers. In addition to their protective role, anthocyanins also have several other benefits.
Anthocyanins are powerful antioxidants that can help to protect cells and DNA from damage. They also have anti-inflammatory properties, which can help to reduce the risk of some chronic diseases.
So, if you see red leaves on your ficus plant, don’t be alarmed. This is perfectly normal and is nothing to be concerned about.
Red Spots on Fiscus
Red spots are another story altogether. If you notice red spots on the leaves of your ficus, this is likely due to a fungal or bacterial infection. The spots are usually most prevalent during periods of high humidity.
If you notice red spots on the leaves of your ficus, you’ll need to take action to prevent the spread of the infection. Remove any affected leaves and dispose of them immediately. You can also treat the plant with a fungicide or bactericide.
In conclusion, red leaves on a ficus plant are normal and nothing to be concerned about – It’s just the plant’s way of protecting itself from the environment.
We hope this post has helped to clear up any confusion about red leaves on ficus plants. Remember, if you see red spots on the leaves be sure to take action to prevent the spread of infection. Otherwise, enjoy the beautiful red leaves.
Do you have any questions about red leaves on a ficus plant? Leave a comment below and we’ll do our best to answer them!
Do you have a banana plant that you want to keep alive during the winter? If so, you’re in luck! In this blog post, we will discuss how to overwinter banana plants so that they stay healthy and thrive throughout the colder months.
Don’t let all of your hard work go to waste by neglecting your banana plant during the winter months! Follow these simple tips and your plant will be sure to make it through until spring.
Can Banana Plants Be Overwintered?
Yes, banana plants can be overwintered in the same spot where they are growing. If your plant is in the ground, there’s no need to dig it up – simply cover the plant with fleece and hessian to insulate it from the cold.
Not only can you overwinter banana plants, but it is recommended in order to protect them from the cold weather. While banana plants can withstand some cold temperatures, they are not frost-hardy and will not survive if the temperature drops below freezing. Even cold temperatures can turn the leaves brown.
What happens if you don’t overwinter a banana tree
How to Overwinter Banana Plants?
Overwintering banana plants is a six-step process that includes:
Pruning leaves
Wrapping the plant with fleece
Wrapping the fleece with hessian
Surrounding the plant with wiring
Filling with straw
Covering the top to secure heat
Let’s go through each of these steps one by one so that you can successfully overwinter your banana plant.
1) Prune Leaves
As soon as the first light frost hits, you should prune your banana plant’s leaves. This may seem counterintuitive, but by pruning the leaves you are actually protecting the plant from further damage.
Simply make clean cuts just above the top of the stem, being careful not to damage the stem itself. Sloping cuts will ensure moisture doesn’t run down into the stem and cause rot.
After you have pruned the leaves, your plant will look a bit bare. This is normal and nothing to worry about – the leaves will grow back come springtime.
2) Wrap the Banana Plant with Horticultural Fleece
The next step is to wrap your banana plant with horticultural fleece. This will protect the plant from the cold weather and help to insulate it.
First, measure out enough fleece to completely cover your plant. Cut the fabric so that you have one long piece that can be wrapped around the entire plant.
Next, take the fleece and drape it over the plant, tucking it in around the base. Be sure to completely cover the plant so that nothing is exposed. Once the plant is completely covered, use some garden twine to secure the fabric in place.
3) Wrap the Fleece with Hessian
Now that the plant is wrapped in fleece, it’s time to add an extra layer of protection by wrapping it in hessian. This fabric is often used in gardening as it is breathable and will help to protect the plant from cold weather.
To wrap the plant in hessian, simply take a piece of fabric that is long enough to go around the plant and drape it over the fleece. Once again, be sure to tuck it in around the base and secure it with garden twine.
Wrapped in fleece and hessian
4) Surround the Plant with Wiring
If you live in an area that is particularly cold, you may want to take extra measures to protect your plant by surrounding it with a wire cage.
To do this, simply create a wire cage that is big enough to fit around the plant. Once the cage is in place, fill it with straw or another insulating material. This will help to keep the plant warm and protect it from cold weather.
5) Fill the Cage with Straw
As we mentioned in the previous step, you will need to fill the wire cage with straw or another insulating material. This will help to keep the plant warm and protect it from cold weather.
Simply take a bale of straw and place it inside the cage. If you don’t have straw, you can also use shredded newspaper or even old clothes. Now your banana tree is ready to withstand the cold weather!
6) Cover the Top
Lastly, you will need to cover the top of the cage in order to secure the heat and stop rainwater from getting inside. Many experienced gardeners recommend using polythene sheets, so that’s what I’ve always used when overwintering banana plants.
To cover the cage, simply take a sheet of polythene and drape it over the top. Be sure to secure the edges with garden twine or something similar so that it doesn’t blow away in the wind. And that’s it – your banana plant is now ready to overwinter!
Alternatives to Overwintering
If the above steps sound like too much work, you can always bring your banana plant indoors for the winter. This is a good option for plants that are small enough to fit into your home. Simply place the plant in a sunny spot and water it as usual. You may need to mist the leaves occasionally to keep them from drying out.
Many people choose red banana plants for containers because they are smaller. This means you can simply move the plant indoors during the autumn before the first frosts, and then put it back outside when the weather warms up again in the spring.
Cold-tolerant Banana Plant Varieties
There are a number of banana plant varieties that are more tolerant to cold weather than others. If you live in an area with colder winters, it’s worth considering one of these varieties for your garden.
The most cold-tolerant variety is the Musa Basjoo, which can withstand temperatures as low as -20 degrees Celsius. This variety is also known to be resistant to wind and salt, so it’s a good option for coastal gardens.
Musa Basjoo
Another cold-tolerant variety is the Musa Acuminata, which can withstand temperatures as low as -15 degrees Celsius. This variety is also known to be resistant to disease, so it’s a good choice if you’re worried about your plant getting sick.
Lastly, the Musa Sikkimensis is a good option for gardens in colder climates. This variety can withstand temperatures as low as -10 degrees Celsius and is also known to be resistant to frost damage.
Conclusion
In conclusion, overwintering banana plants is a great way to keep them healthy and happy during the colder months. There are a number of different ways to overwinter banana plants, so be sure to choose the method that best suits your needs.
It may seem like hard work at first, but once you get the hang of it, overwintering banana plants is actually quite easy. So don’t be afraid to give it a try! Your plants will thank you for it.
You can also try one of the cold-tolerant varieties we mentioned above if you live in an area with colder winters. Whichever route you choose, we wish you the best of luck with overwintering your banana plants!
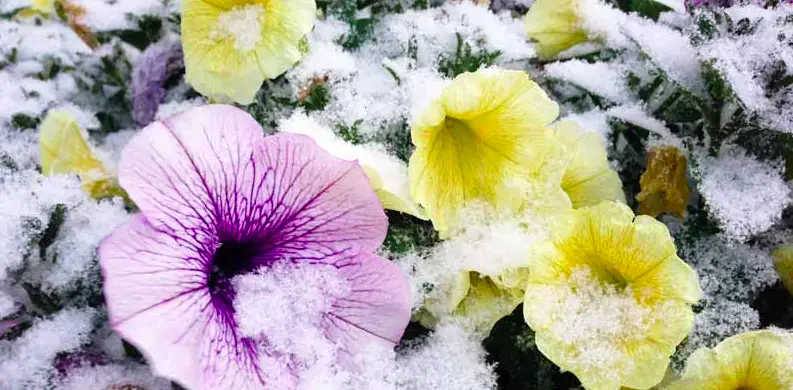
If you’re like most gardeners, you probably enjoy watching petunias (Petunia x hybrida) bloom all summer long. But what do you do when the colder weather starts to creep in? Don’t worry – we’ve got you covered! In this guide, we will teach you how to overwinter petunias so that you can enjoy their beauty well into the winter months.
Can Petunias Be Overwintered?
Yes, petunias can be overwintered! This means that you don’t need to worry about losing your petunias to the cold weather. There are several different methods you can use to overwinter petunias, depending on your particular growing conditions and preferences.
Some of the most popular ways to overwinter petunias include bringing them inside for winter, mulching around them in the garden bed, or covering their roots with a thick layer of straw or leaves.
Regardless of which method you choose, just remember to be patient and give your overwintered petunias plenty of time to adjust to their new environment. With a little bit of care and attention, you should be able to enjoy your beautiful petunias the following spring!
How to Overwinter Petunias?
Now you know that petunias can be overwintered, but how exactly do you go about doing it? Here are some tips and tricks to help you overwinter your petunias successfully:
Step one: Stop fertilizing in late summer or early fall, as this means the petunias will store energy in their bulbs for the winter.
Step two: Dig up your petunias and gently separate the bulbs. Brush off any dirt, and then inspect the bulbs for any signs of disease or pests. Discard any petunia bulbs that are damaged or diseased.
Step three: Cure your healthy petunia bulbs by leaving them to dry for two weeks. This will form a protective barrier around the bulbs, which will help them withstand colder temperatures.
Step four: Store the bulbs in a cool, dark place until spring. It’s a good idea to wrap the bulbs in newspaper to keep them protected from moisture and pests.
Step five: Once the weather begins to warm up in spring, you can replant your petunia bulbs in your garden bed or pot. Be sure to water them regularly, and enjoy watching them bloom all summer long!
Protecting Potted Petunias During Winter
If you grow your petunias in pots but don’t want to dig them up for overwintering, there are still plenty of things you can do to protect them from the cold. One option is to move your pots indoors during winter, where they will be protected from freezing temperatures and harsh weather conditions.
Another option is to bring your potted petunias inside on particularly chilly nights and wrap them in blankets or tarps. This will help insulate them from the cold, keeping them safe and healthy until spring comes around.
No matter which method you choose, remember to pay close attention to your potted petunias throughout the winter months so that you can intervene if they start showing any signs of distress or damage.
Replanting Overwintered Petunias
When spring comes, you will need to replant your overwintered petunias bulbs. Before you begin, take the bulbs out of storage and let them temper to prepare them for the growing season.
People often put their petunia bulbs in the refrigerator to simulate colder weather and trick the plants. All you have to do is leave the bulbs in the refrigerator for a couple of weeks and then plant them in small pots. After refrigerating the bulbs for an additional week, they will be ready to plant.
Once your petunia bulbs are ready to be replanted, choose a sunny spot in your garden or pot and prepare the soil by mixing in some compost or fertilizer. Then simply dig a small hole for each bulb and carefully place it inside, making sure that the top of the bulb is just below the surface of the soil.
Conclusion
In conclusion, overwintering petunias is not only possible but also quite simple. By following the basic steps outlined above, you no longer have to worry about losing your beautiful petunias to the cold winter weather. With a bit of patience and care, you can look forward to enjoying your petunias year after year! So what are you waiting for? Start overwintering your petunias today!
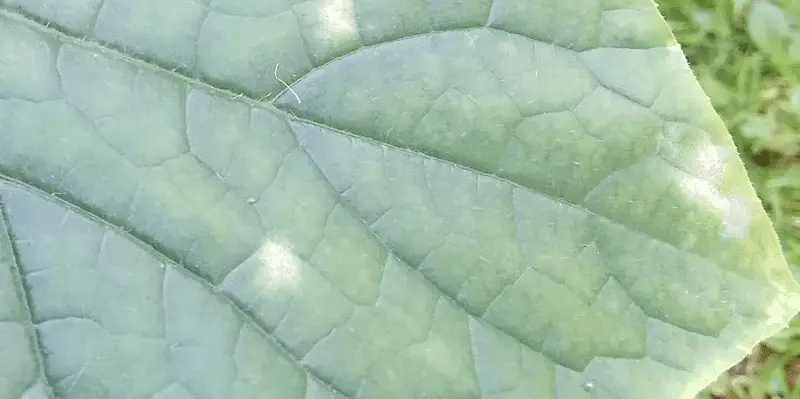
Cucumbers are a refreshing addition to any dish, but sometimes these tasty vegetables can be afflicted with white spots. These spots can negatively affect the cucumber’s appearance and taste. Luckily, there are a few things you can do to get rid of them. Keep reading to find out what causes white spots on cucumber leaves and how to treat them!
The Causes of White Spots on Cucumber Leaves
The main cause of white spots on cucumber leaves is powdery mildew. This type of fungus thrives in warm, humid conditions and can quickly spread from one plant to another. The spores of the fungus are carried by wind or water and can infect cucumbers that are already stressed or have damaged leaves.
Once the fungus has taken hold, it will start to produce white, powdery growth on the leaves of the plant, which is why it’s called powdery mildew. The leaves will eventually turn white and may drop off the plant entirely. In severe cases, the cucumber plant may die.
Treating White Spots on Cucumber Leaves
If you think your cucumber plant has powdery mildew, you must act quickly to treat it. The fungus can spread rapidly and will soon affect the entire plant if left untreated.
To start, remove any affected leaves from the plant. This is to stop the fungus from spreading and to reduce the number of spores in the air. Destroy the leaves by burning them or placing them in a plastic bag and in the trash.
Next, you’ll need to treat the plant with a fungicide. There are many different types of fungicide available, so be sure to choose one that works on powdery mildew. I like neem oil, as it’s a natural fungicide that is also effective against other types of fungus and pests.
To use neem oil to treat powdery mildew, mix 1 teaspoon of neem oil with 1 quart of water. Spray the mixture onto the leaves of the plant, making sure to coat both the top and bottom of the leaves. Apply the treatment every 7-10 days until the fungus is gone.
Baking powder is another effective treatment for powdery mildew. Again, mix baking soda with water and spray it onto the leaves of the plant. You could also create a paste with baking soda and water and apply it directly to the affected leaves, although I prefer a less concentrated mix.
It can also be a good idea to drop the baking soda around the soil of the plant, as this will destroy any spores that are in the ground.
Once you’ve treated the plant, be sure to monitor it closely for any new signs of powdery mildew. The fungus can be difficult to get rid of completely, so it’s important to be vigilant in order to keep it from coming back.
Powdery Mildew Spots
Preventing White Spots on Cucumber Leaves
The best way to deal with powdery mildew is to prevent it from happening in the first place. Here are a few tips to help you do that:
1. Provide Air Circulation
The first step is to provide good air circulation around the cucumber plants. This can be done by spacing the plants properly when you plant them and by pruning any dead or dying leaves throughout the growing season.
Fungus thrives in humid conditions, so keeping plants too close together can create the perfect environment for powdery mildew to take hold. Spacing the plants properly will help to reduce humidity and prevent the fungus from spreading.
2. Water Early
Water the cucumber plants early in the day so that the leaves have time to dry before nightfall. Wet leaves overnight provide the perfect environment for powdery mildew to grow.
If you can’t water early in the day, make sure to use a soaker hose or drip irrigation system so that the leaves don’t stay wet for too long. The drip system is a lifesaver in this instance as you can water the plants without wetting the leaves or overwatering your cucumber.
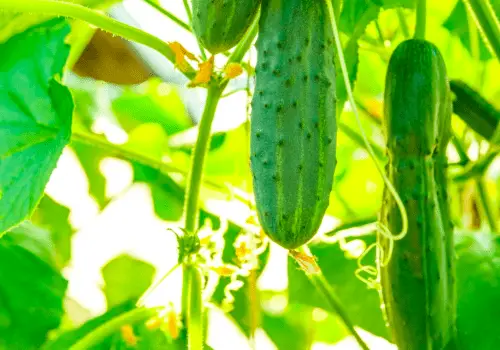
3. Provide Direct Sunlight
Cucumber plants need at least 6 hours of direct sunlight every day in order to stay healthy. Powdery mildew thrives in shady, cool conditions, so providing plenty of sunlight will help to prevent the fungus from taking hold, as well as stop cucumber leaf yellowing.
If your garden provides lots of coverage, you may need to move the cucumber plants to a sunnier spot. Alternatively, you may need to remove some of the taller plants that are shading the cucumbers.
Cucumber Plant in the Sun
4. Remove Debris
Remove any dead leaves or other debris from around the cucumber plants. This includes fallen leaves, crispy/dry cucumber leaves, dead flowers, and even rotting fruit. All of this material can harbor powdery mildew spores and should be removed as soon as possible.
Keeping the area around the plants clean will help to prevent the fungus from taking hold. You may need to do this every few days, especially during wet weather.
5. Inspect Regularly
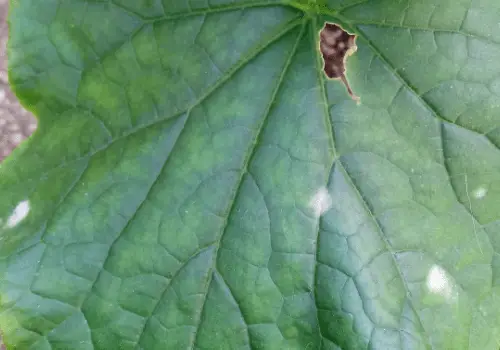
Be sure to inspect the cucumber plants regularly for any signs of powdery mildew. The earlier you catch it, the easier it will be to treat. You should also inspect any new plants before adding them to your garden. Powdery mildew can spread quickly and even cause holes, so it’s important to stop it from getting a foothold in your garden.
By following these tips, you can hopefully prevent powdery mildew from affecting your cucumber plants. However, if the fungus does take hold, be sure to act quickly to treat it before it has a chance to do too much damage.
6. Mildew-Resistant Cucumbers
There are a number of cucumber varieties that are resistant to powdery mildew. These include:
Brickyard Cucumbers
Beit Alpha Cucumbers
Carolina Pickling Cucumbers
Cucamelon Cucumbers
Diva Cucumbers
Dasher II Cucumbers
Cool Breeze Cucumbers
Cross Country Cucumbers
Planting any of these varieties will help to reduce the chances of powdery mildew taking hold in your garden.
Conclusion
White spots on cucumber leaves can be unsightly and affect the taste of these refreshing vegetables. In fact, the main cause of these spots is a fungus called powdery mildew. This fungus thrives in warm, humid conditions and spread throughout cucumber plants quickly.
If you think your cucumber plant has powdery mildew, remove any affected leaves and treat the plant with a fungicide. Be sure to monitor the plant closely for any new signs of the fungus and take steps to prevent it from spreading.
I hope this article was helpful in dealing with powdery mildew on your cucumber plants. Thanks for reading! Do you have any tips on dealing with this pesky fungus? Let me know in the comments below!