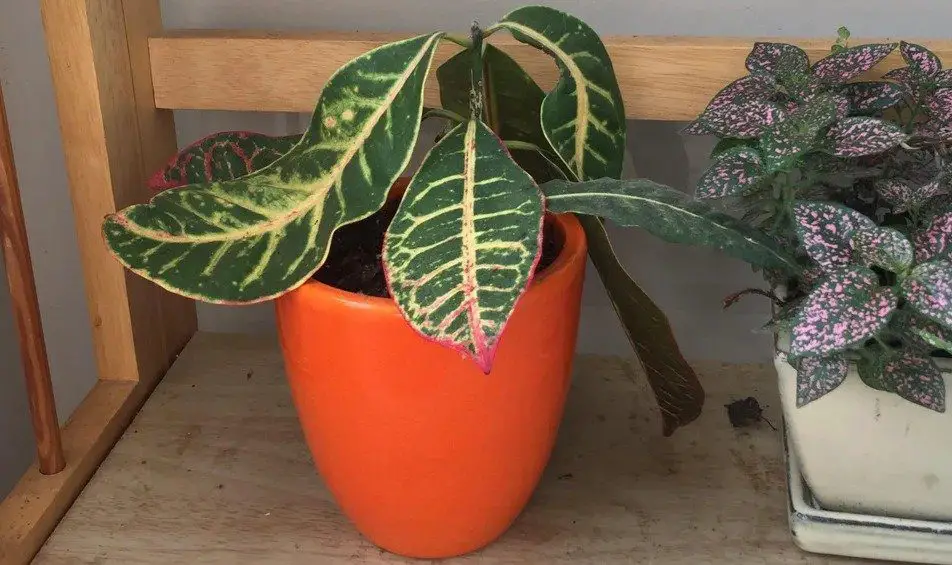
Have you ever seen your croton leaves drooping? If so, then it may be time to learn more about what is causing them to do this. Croton plants are very popular for their beautiful foliage and the fact that they are easy to care for.
However, sometimes these plants can have trouble with bugs or other pests which causes them to have some droopy leaves. In this blog post, we will discuss why your croton leaves might be looking sad and how you can help.
Why Are My Croton Leaves Drooping?
Your croton leaves are drooping because the plant hasn’t been given enough water. Croton plants are not very drought tolerant, so underwatering will cause your croton leaves to droop and wilt.
There are other potential causes, but by far the most common reason is underwatering. I have seen it time and time again, which shows just how easy it is to do.
Every plant owner has made this mistake once or twice (or thrice)!
How to Stop Croton Leaves Drooping?
You need to give your croton more water and humidity ASAP! You can do this in a number of different ways, which I will now go into in more depth.
Firstly, give a good dose of water to your croton. I recommend showering the plant with water until it drains from the bottom of the soil. Doing this will completely saturate the soil with water and ensure that all of the roots are able to drink up as much water as possible.
Next, create a humidity tent for your croton. If you’re not sure what this is, it basically involves putting a large plastic bag around your plant to trap moisture. Within a week or so, the leaves will bounce back to life!
You could leave your croton in the bathroom with the door closed. Do this every night after you take a shower, so your croton can enjoy a few nights of maximum humidity levels. Using humidity trays is another good tactic.
Failure to act will cause the droopy croton leaves to fall off! This is why you must ask now to avoid any more damage to your beloved plant.
Other Causes of Leaf Droopiness
There are a few other potential causes of droopy croton leaves:
Pests
Have you seen any bugs on your plant? If so, that could be the problem! These pests can eat up all sorts of leaves and leave them wilting away. In fact, they frequently cause holes in croton leaves.
If you have spotted any issues with bugs or pest infestations, then I recommend using neem oil to remedy the situation quickly.
Also, do not purchase new plants from unknown sources as this is one way in which pests might make their way into your home without warning.
Disease
Croton plants are slightly more prone to disease than other houseplants. If your leaves aren’t recovering, then it might be worthwhile checking if they have any signs of black or brown spots on them.
These kinds of diseases spread like wildfire in the home and cause havoc for everyone! That is why you should act quickly before things get out of hand (or control).
Not enough sunlight
Did you know that crotons need a lot of sunlight to be healthy? If they don’t get enough, then the leaves will start to droop and even fall off completely.
If this is the case, simply move your plant closer to any windows in order for it to gain some more light and energy! Also, consider investing in grow lights ( Amazon link) if there are no windows nearby (with sufficient natural light) or at all.
FAQ:
Will droopy croton leaves kill my plant?
No, your croton should bounce back from drooping leaves as long as you take action immediately. If it doesn’t after a week or so, then please do not hesitate to contact me! I would be more than happy to help out in any way possible.
What if the problem keeps coming back?
In this case, it might be worthwhile to look into preventative measures that can reduce the chances of your croton becoming droopy. You may need to invest in a humidifier.
Will underwatering cause droopy croton leaves?
yes, underwatering will cause your croton leaves to droop and wilt. Take action by giving your plant more water and moisture.
Will my croton tolerate cold temperatures?
No, croton is a tropical plant that cannot tolerate cold temperatures. I would recommend keeping it in a warm area of the home away from any windows or doors that are left open for too long.
Why are my croton leaves drooping after watering?
Although they love water, there is a chance you may have given too much water. Also, you should be careful about what type of water you give. It’s important to only use room temperature water that is free from chemicals. I would stop watering for a few days and move the plant into a place that receives lots of sunlight.
Why are my croton leaves drooping after repotting?
Your croton is most likely stressed from repotting. In this case, it is best to take a step back and give the plant some breathing room. Do not water it for a few days until you see signs of improvement.
Conclusion
In conclusion, you must act quickly if you notice your croton leaves drooping as the longer you wait, the more damage will be done to your plant. I recommend showering it with water and creating a humidity tent for one week in order to bring those leaves back.
To prevent it from happening again in the future, make sure to create a watering schedule and add more humidity to your home. A humidifier machine can be a life (plant) saver!
I hope this article was helpful and I wish you the best of luck with your croton!
This article is about aloe vera plants and why they droop. It talks about how to care for them, what causes the drooping in the first place, and how to avoid this problem from happening again.
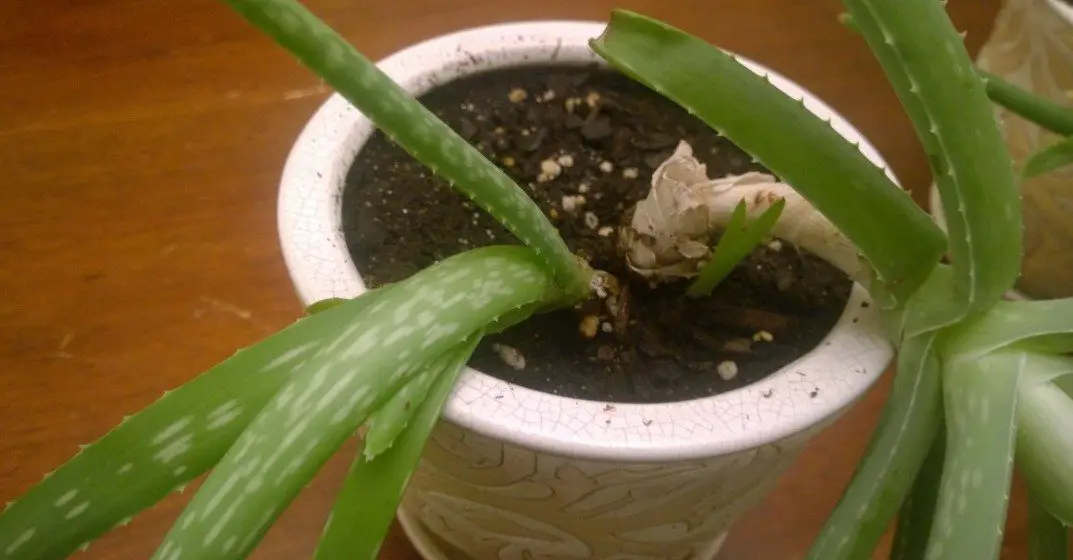
Why Is My Aloe Vera Drooping?
Your aloe vera is drooping because it has not received enough sunlight or it has been given too much water.
However, there are many other reasons for aloe vera droopiness too. I will now talk more in-depth about each of these reasons…
1) Too much water
Aloe vera plants are succulents, which means they don’t need as much water as other plants. In fact, during the winter months, aloe vera only needs water every couple of weeks or less!
However, if your plant is drooping and you have been watering it a lot recently, then this may be why. Many people make the mistake of thinking that because an aloe vera plant has a thick gel-like substance inside its leaves, that it must need more water than other types of vegetation.
This couldn’t be further from the truth… The high concentration in sap within these succulent species means they store excess nutrients when needed, so there’s no reason to keep them saturated with water.
You can fix this issue by reducing the amount of water you’re giving your aloe vera. Typically, I give my aloe vera a small amount of water once a week during summer and once every two weeks. Remember, you can’t take it out once you put it in!
2) Not enough sunlight
If your aloe vera is drooping and it has been inside for a long period of time, then this may be the cause. Aloe veras will be sad if they aren’t receiving the sun they need.
If you don’t want your aloe vera plant to droop again, then be sure it gets enough sun! During winter months, around 12 hours of sunlight per day will suffice so try keeping it by a window. If you keep the plant outside during summertime or live in an area with longer daylight periods year-round, then you can reduce this amount slightly if needed.
You may even want to give some artificial light to your aloe vera to help it out. I like using full-spectrum grow lights (Amazon link) on my succulents, especially during the colder months and when the days are dark.
3) Disease (aloe rust)
If your aloe vera has been drooping for a long time, then it could be because of the disease. Aloe rust is a common problem in plants that causes the leaves to turn brown and curl up at the ends.
Aloe rust can be caused by high humidity or excessive rainfall after a prolonged dry period (which lets the plant become moist). You will notice aloe rust when the leaves develop yellow spots.
You can fix aloe rust by applying a good fungicide, like neem oil. Spray the affected plant with the fungicide and then water normally.
You can prevent aloe rust by making sure you do not overwater your succulent plants during periods of high humidity, which often come along with a lot of rainfall. You should also make sure that conditions are very sunny before allowing access to more moisture from rain or irrigation systems.
As always, choosing an appropriate location for any type of houseplant will go a long way toward preventing problems with pests and diseases down the line!
Alternatively, you can take cuttings from your aloe vera plant to propagate new plants. This is my preferred method because it’s super easy and lots of fun!
4) Pests
Aloe vera plants can also get aphids, which will cause the leaves to become damaged and even droop. Aphid infestation is caused by feeding on sap from aloe veras and other houseplants. When this happens, it’s time to take action! You should use neem oil to get rid of all pests!
You can also use predator insects, like ladybugs, to help control pest populations. Predators are especially useful for preventing further damage to crops that have already been affected by pests, like aphids or whitefly.
5) The pot is too small
If your pot isn’t large enough, the roots of your aloe vera plant will start to wrap around the edge as they grow. If this happens, it may cause drooping because there is not enough room for the root system to develop properly.
You can fix this issue by repotting your aloe vera with fresh soil and a larger pot! You should also consider transplanting every time you remove dead leaves from the bottom of your succulent plants, which I usually do about once per year. This helps prevent nutrients from getting trapped in old leaf matter that’s been sitting at the base of its container for too long.
FAQ
How do you fix droopy aloe vera?
Give less water
Give more sunlight
Treat disease
Remove pests
Plant in a larger pot
Should drooping aloe vera plants be re-potted?
Yes, re-pot aloe vera if the plant is large and outgrowing its current pot. This will give the plant more room to breathe and spread its roots.
Will too much water cause my aloe vera to droop?
Yes, aloe vera will droop if they are given too much water. As such, you should make sure that the plant does not become moist and soggy while watering it. Moisture meters are a great tool to use as well.
Does pest damage cause my aloe vera to droop?
Yes, pest infestation can cause your plant’s leaves to become damaged and droopy. As such, you should make sure that the pests are removed by using neem oil or predator insects!
Conclusion
I hope this helps! I know it can be frustrating when your aloe vera plant starts drooping and you’re not sure why! Hopefully, now that you’ve heard my suggestions, you’ll find a solution to the problem and get back on track with taking care of your succulent!
The top evergreen shrubs for pots in shade are plants that thrive in shady spots. These plants do not need much sun, so they are perfect to be planted around the side or back of your house where there is less sunlight. Read on to find out more about these top evergreens and how you can plant them successfully!
The Top 10 Evergreen Shrubs for Pots in Shade
1) Rhododendron
The rhododendron is a type of evergreen shrub that prefers shade and can handle being in the sun for part of the day. This plant has beautiful flowers with vibrant colors such as pink, white, or purple which bloom from spring to summer.
Rhododendrons are great to be planted as hedges around your property because they grow tall very quickly. The Rhododendron grows up to six feet high and five feet wide! Another added benefit is that this shrub also produces berries that you can eat, although it might take a while before they produce enough berries for you to enjoy them.
2) Camellia sasanqua
The camellia sasanqua is a type of evergreen shrub that prefers shade to partial sun. It has beautiful white flowers in fall or winter, which are loved by many insects, like bees and butterflies. This flower produces berries too (in the summer).
Camellias sasanqua needs acidic soil with lots of organic material like compost added into it so that their roots do not get irritated easily. They also require moist soil at all times to keep themselves hydrated.
3) Laurel
The laurel is a type of evergreen shrub that prefers full shade. This plant has dark green leaves on top, and pine cone-like flowers in the summertime.
Laurels are great for planting under windows where you want to block out any sunlight from entering your home during the day. Just make sure you do not plant them too close to your window because the roots might block the air from entering.
This shrub prefers well-drained soil and can tolerate being dry for a while, but it does need lots of water when it’s hot out. This is especially important in summertime so that this evergreen stays hydrated!
4) Fragrant Sweet Box
The fragrant sweet box is an evergreen shrub that prefers shade to partial sun. This plant has small white flowers during springtime, which turn into berries after the flowering period ends.
This tiny shrub (only about three feet tall) can be planted in a container or even as ground cover near your front door because it does not require much space! You can also place these plants under windows too if you’d like some natural privacy screening from sunlight coming through during the daytime hours.
Fragrant sweet boxes need well-drained soil and should be watered regularly until they are established first before cutting back on watering to reduce water runoff at the base of this evergreen’s roots.
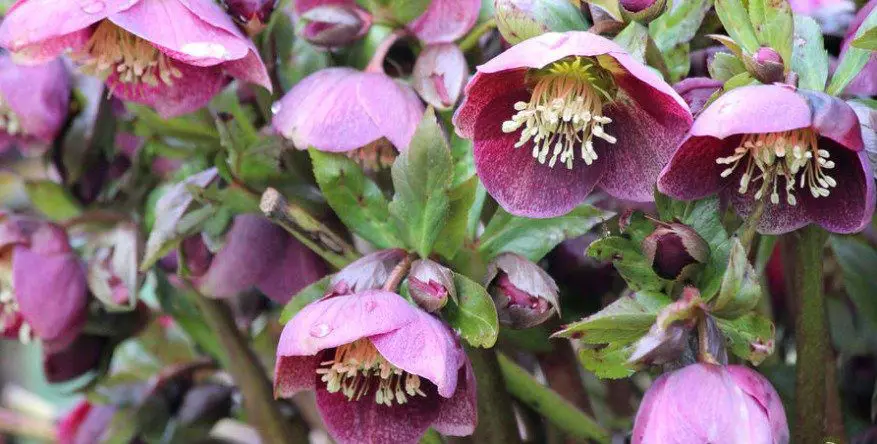
5) Lenten Rose
The lenten rose is a type of evergreen shrub that prefers shade to partial sun. This plant has beautiful flowers during wintertime, which range from pink and white in color with petals that are covered in tiny little hairs on top!
Lenten roses can be planted as ground cover or even placed into containers because they do not take up much space at all. They also prefer moist soil, so make sure you water them enough if it’s hot out during the summer months.
This evergreen does well when planting under windows too but only if there isn’t harsh sunlight shining through for most of the day – otherwise this could burn their leaves and cause damage to its health!
6) Autumn Fern
The autumn fern is a type of evergreen shrub that prefers shade to partial sun. This plant has beautiful green leaves with bronze edges during the springtime, which turn into the foliage that turns a reddish color in fall before it drops off for winter!
When planting them near your home’s foundation make sure you leave enough room between this evergreen and your house so that its roots don’t get damaged from cracking or lifting up through frost heave action.
These plants are great when used as ground cover around other bigger, taller perennials like hostas (which need more sunlight than these types of evergreens).
Autumn ferns require moist soil to stay hydrated, but they also need well-drained soil too so that their roots do not get flooded by excess water.
7) Pachysandra
The pachysandra is a type of evergreen shrub that prefers shade to partial sun. This plant has beautiful dark green leaves with purple edges during the springtime, which turns into shiny dark foliage throughout the summer months!
Pachysandras can be planted as ground cover or even placed into containers because they do not take up much space at all. They also prefer moist soil, so make sure you water them enough if it’s hot out during the summer months.
8) Mondo Grass
This low-growing grass has a dwarf size which makes it ideal for small areas and containers, but its ability to spread quickly means it will rapidly fill spaces with lush green foliage. It’s an easy-care perennial that doesn’t require trimming making this one of the best choices when looking at evergreen shrubs for pots. Just make sure that roots don’t escape from drainage holes and use a strong trellis to keep it upright.
9) Monkey Grass
One of the easiest evergreen shrubs to grow, monkey grass is hardy and can survive in both full sun or partial shade. Cold sensitive it does best in zones seven through ten but will still do well up north if you plant it on a south-facing wall where it’s protected from winter winds.
The name comes from its round leaves which are traditionally used for topiaries and other decorations throughout the holidays! It grows quickly so be sure there aren’t any drainage issues when planting this perennial as wet soil could cause root rot.
Monkey grass prefers part sun with moist soils that drain easily. In hotter climates, this means giving your plant some afternoon shade during the summer months while also letting air circulate around roots to prevent mildew growths.
10) Ivy
Ivy is one of the most popular evergreen plants. It comes in many varieties and can grow up to be quite big. The thick leaves are dark green with white variegated patterns on them. Ivy prefers moist soil, but it will do well even if the soil quality isn’t ideal for other types of plants. Ivy does not like extreme cold or heat; make sure you plant this shrub where there’s some shade during the summer months!
FAQ
Can potted evergreens survive the winter?
Yes, the plants mentioned above can survive the winter. However, if you are in a freezing climate, you will need to protect by roots by using an insulated pot. These pots are great for the winter because they help keep warmth inside when the temperatures drop below freezing.
Can potted evergreens survive being kept in shade?
Yes, all plants mentioned above can survive in shade. I like to grow these in the shaded areas of my garden during the summer, but position them in full sun during the winter months.
Conclusion
In conclusion, the top evergreen shrubs for pots in shade are great to use around your garden. They do not need much sun, meaning that they can survive without too much direct sunlight. This makes them perfect plants for planting around the side or back of your house where there is less sunlight.
They are also great during the winter when other plants need to be taken inside! These plants can be kept in full glory in the sun during this time, so nothing is sacrificed.
By following these simple steps you can enjoy beautiful top evergreen shrubs all year long!
The monstera deliciosa is a plant that has been grown in both tropical and temperate climates. It has the ability to grow anywhere from 6-12 feet tall, which makes it perfect for growing indoors or outdoors.
In fact, this is one of the most popular houseplants in the world! It’s almost the perfect plant. However, monstera plants are known to weep or sweat.
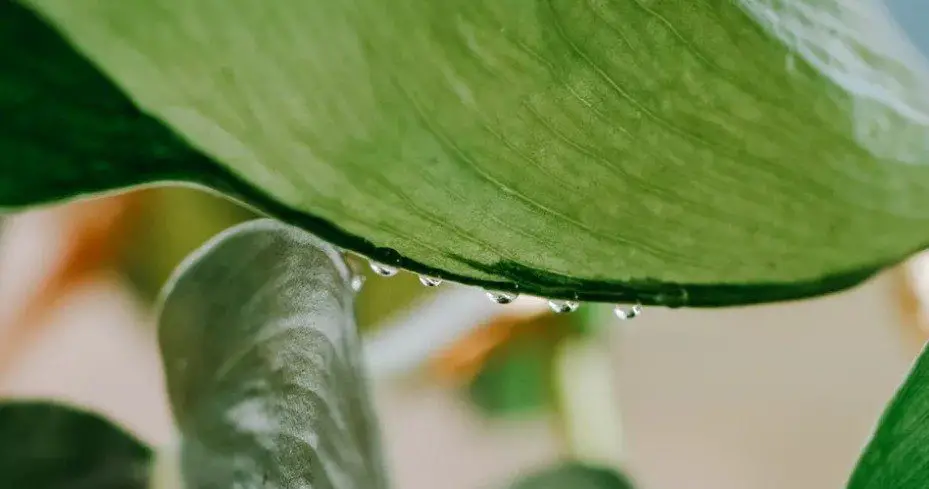
If you have noticed water droplets on its leaves, then you need to know why this is happening and what you can do to stop it. Let’s take a closer inspection…
Why is My Monstera Weeping with Water Droplets?
Your monstera is weeping because it is experiencing guttation. This is why there are water droplets on your monstera.
Guttation is when a liquid form on leaves, due to excess water accumulating inside of them. This leads to droplets that form on the monstera deliciosa’s foliage, which can damage its appearance if left untreated. You want to take care of this problem as soon as possible!
As the soil becomes more and more saturated with water, roots will absorb more than they’re able to hold onto. This causes the xylem tissue (which transports sap) to send water to the leaves.
At night, the pores on the monstera leaf close, which creates a huge build-up of water in the leaf tissue. The only way for it to escape is by leaking from the pores, which makes it look like your monstera is weeping or sweating!
This weeping is a cool phenomenon but it is not behavior you should expect and accept in your home. If your monstera has been weeping for several days, it’s important to get the water away from its leaves.
Now that you know why your monstera is sweating (like it just returned from a session at the gym) it’s time to find out how we can stop it from happening…
How Do I Stop My Monstera from Weeping?
Luckily, there are a few simple solutions to prevent your monstera from weeping with water droplets.
The first thing you need to do is allow the soil of your monstera deliciosa plant to dry out between watering sessions. This will help slow down the rate at which water accumulates in its leaves and start preventing those dreaded leaks!
You should also make sure that you’re not over-watering it because this can cause other problems like root rot, which we don’t want either! Make sure it’s getting watered about once every week or two weeks, depending on how much light it receives and where you store your houseplant.
Another great way to stop the weeping is by improving the drainage of the soil. This means you need to break up the soil and add some coarse material like gravel, small rocks, or perlite. Adding these materials allows for better drainage in your monstera deliciosa plant’s roots.
Additionally, always use pots that have drainage holes, so any excess water can fall away without being taken in b the roots.
Is It Bad for My Monstera to Weep?
Although it can be annoying to see your monstera deliciosa plant weeping with water droplets, the good news is that it’s not a huge problem. However, if there are large amounts of water on leaves, then you should take action to avoid fungal infections and root rot.
So while guttation won’t kill you monstera, it can lead to other problems that are a lot more serious. The best thing to do is take preventative action before you have to deal with the dangers of root rot.
Weeping isn’t something we want our plants doing either because they’re just going to leave ugly stains all over whatever surface it happens to be sitting in front of.
Monstera Weeping FAQs
You may have a few more questions when it comes to guttation (I don’t blame you), so I will now answer some of the most frequently asked questions.
What causes guttation in plants?
Guttation is caused by excess water within the roots and soil of a plant. This can also happen as a result of overwatering, which is why it’s important to make sure you’re not drowning your monstera!
Additionally, guttation can occur at night because stomata close up during this time, creating a vacuum that pulls more water into the leaves.
Is dew on my monstera?
No, it is not dew. This is guttation, which occurs when extra water accumulates in the leaves of your plant due to issues with drainage or overwatering.
When will my monstera stop weeping?
Your monstera will stop weeping as soon as it is placed in a dry environment or when you allow excess water to drain from the soil.
Will monstera guttation cause a fungal infection?
Yes, guttation can cause a fungal infection because it creates a moist environment for fungi to develop. This is why it is so important to reduce monstera weeping as soon as you can.
Is guttation normal in monstera deliciosa?
Yes, monstera deliciosa is prone to guttation when the stomata open at night or if its roots are over-saturated with water. But this should not be confused with dew! This will simply cause your leaves to become wet and leave ugly stains everywhere they’re sitting.
Conclusion
In conclusion, monstera guttation isn’t a terrible thing, so don’t worry about it too much. It’s natural and if your monstera is wept with water droplets, there are a few easy solutions to fix the problem!
Your monstera will stop weeping with water droplets if you give it time to dry out, improve drainage of the soil, and provide good ventilation. With these simple steps in mind, your plant should be back on track before too long!
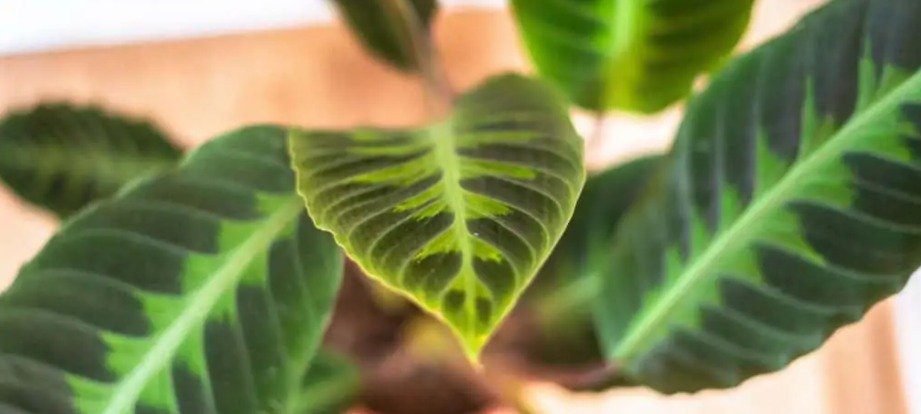
The calathea is a tropical plant that can be found in many different colors and sizes. My personal favorite is the Calathea Roseopicta, which has a bright green leaf with red veins running through it. It’s really beautiful and looks great in my living room!
One common problem I see on social media sites, like Reddit or Pinterest, is someone asking about why their calathea has crispy leaves. If you’re one of these people, I’ve created this blog post to give you the answers you’re looking for…
Why Does My Calathea Have Crispy Leaves?
Your calathea has crispy leaves because it has not been given enough water. Simply put, your calathea has dried out!
This happens to many plant owners that don’t want to give their plant too much water, or simply forget to water their plants. This is incredibly easy during the summer when the sun is hot and dries out your plant in no time at all.
How to Prevent Crispy Calathea Leaves?
You can prevent this from happening by giving your plant a bit of water at least once per week. Use room temperature or lukewarm water, and ensure that the soil is properly moistened at all times.
You should always test the soil before giving your calathea any more water. Dipping the top inch of soil should be enough to test the soil. If you want ultimate accuracy, you can use a moisture meter.
You should also be mindful of how hot the temperature is. While every fortnight may be enough in the winter, it is likely not enough water to give your calathea when the summer arrives.
One great way to add more moisture to the leaves is by using a humidifier or humidity tray. I keep my tropical plants together (which helps to raise humidity) in the same room with a humidifier that is on for a few hours a day. It keeps the humidity above 60% to keep my tropical plants happy.
If your calathea has crispy leaves because of incorrect lighting conditions, then the plant should be moved into the shade as soon as possible. Find an area that gives an adequate amount of shade or shelter from trees.
FAQ
Should I cut off crispy calathea leaves?
No, there’s no need to cut off the crispy leaves. Depending on how damaged they are, they will likely make a full recovery. If the leaves are dark brown from sunburn, then feel free to cut them off with a pair of sterilized scissors.
Will too much sunlight cause crispy calathea leaves?
Yes, too much sunlight can cause crispy calathea leaves. If the problem persists, then you will need to move your plant away from direct sunlight and ensure that it gets some shade when the sun is the hottest.
Should I mist my crispy calathea leaves?
Yes, misting will give more moisture to your calathea leaves and reduce the crispiness. Alternatively, you can a humidifier to add humidity to the whole room, so all tropical plants will benefit.
How do I grow a calathea in shade?
To grow a calathea in the shade, you should look for an area that’s shaded from direct sunlight but still gets a few hours of dappled light. You can also use live plants to create even more shade if needed!
Why does my calathea look burnt?
Your calathea looks burnt because it has not been given enough water, or because of too much direct sunlight. Ensure that you are giving your plant the right amount of water and moving it to a shadier location if necessary!
Will crispy calathea leaves turn green again?
It is hard for leaves to turn green again, but it can happen in rare cases. It depends on how badly damaged the leaves are.
Conclusion
In conclusion, your calathea has crispy leaves if it is not given enough water. This can happen because of the heat, but you should also be mindful that your plant will require more or less water depending on the time of year.
To prevent this from happening, ensure that you are giving your plant the right amount of water! Be mindful of how hot it is outside, and remember to test if the soil needs more or less water.
This blog post should help you understand why calatheas have crispy leaves and what can be done about this problem! If you ever need any other information on caring for a calathea, then feel free to check out our website today.