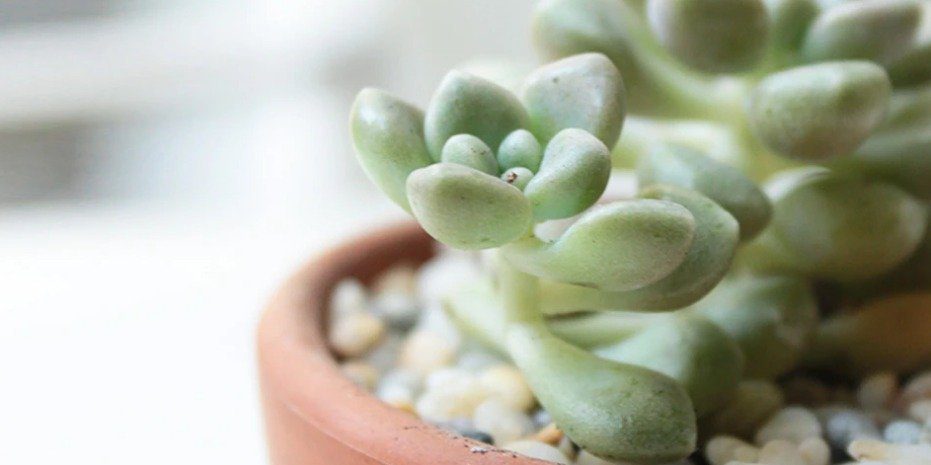
Succulents are a popular plant choice for people that want low-maintenance plants. They are also very easy to care for. However, succulents can get stretched which will cause them to lose their shape and look unappealing. If you notice your succulent getting stretched out, don’t worry! Here’s how you can fix the issue with some simple steps…
What is a Stretched Succulent?
A stretched succulent is when a succulent becomes long and skinny.It usually happens over time, but it can also happen very suddenly if the plant has sprawled out or there are animals around that may have eaten part of your succulents.
Why is my Succulent Stretched Out?
This happens because of etiolation, also known as growth without sunlight. It is when a plant or succulent grows long and spindly because it isn’t getting the light that it needs to grow properly.
This can happen in normal conditions, but if your succulents are near a window with the curtains closed all day then they will get etiolated very quickly. You should move them closer to a window or into the more direct sun for proper lighting!
Do I Need to Re-Pot a Stretched Succulent?
If your succulent is stretched out, you might think that you need to repotting right away, but this may not be necessary depending on why your plant became stretched out in the first place.
If your succulent had been in a tight container for too long, meaning that they have outgrown their pots and the roots are basically bursting through the bottom of them, you should also re-pot at this time.
How to Fix a Stretched Succulent?
If you notice that your succulent is stretching, it should be moved to a place with lots of light. Doing this stops etiolation very quickly.
I like to keep my succulents on a sunny window sill or outside during the summer months.
Unfortunately, there is no way to reverse the stretching process, so stretched-out succulents will remain that way for the foreseeable future. These succulents should be propagated to make more plants and to not waste the ones that you already had.
Using Propagation to Fix Stretched Succulents
You can propagate cuttings to save your stretched succulent.
1) To start, cut off the top of your succulent using sharp scissors. I like to cut everything but two inches of the base (with a few leaves attached).
3) The cutting should start to root within a couple of days – or a few weeks at most.
If propagating doesn’t work, then unfortunately that is just how your succulent will look from now on. If you really don’t want stretched-out plants then I would suggest making sure your succulents are getting enough light. You can do this by moving plants into a better location or using grow lights, with the latter being essential during winter.
Will Grow Lights Prevent Stretched Succulents?
Yes! One way you can prevent your succulents from stretching is by using grow lights. They mimic sunlight and will help prevent etiolation of the plant because they give them what they need to stay healthy with adequate lighting!
I like using full-spectrum grow lights because they give off a light similar to natural sunlight, compared to other types of grow lights.
Is a Stretched Succulent Bad?
A stretched succulent isn’t necessarily bad, but you should try to fix it if possible. If your plant is stretching out too much then the best thing that you can do for them would be to move it closer to a window so they get better sunlight!
The bad news is that it’s usually too late to save them if they’ve already stretched out, but you can at least save some of the leaves or the other succulents in your home!
When to Cut Back Stretched Succulents?
If you notice that leaves on your plant are not curling down anymore but rather standing tall, this means it has become very stretched out due to being in bright light without enough water or nutrients. It’s time to cut it back and propagate, but be careful as the leaves will snap off easily.
Conclusion
In conclusion, stretched succulents are common in the plant world. It doesn’t mean that there’s something wrong with your plants, it just means that they need more light to stop etiolation. If you have any other questions then feel free to leave them down below!
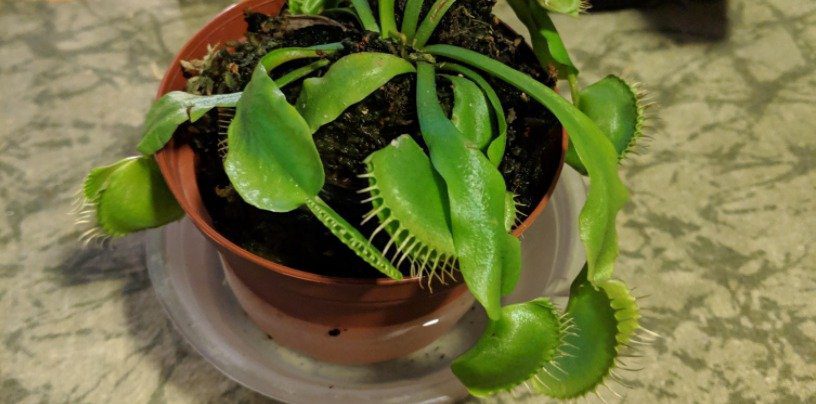
What is wrong with my venus fly trap? Many people ask this question when they see their plant drooping. It can be hard to tell what might be causing it, but there are some common reasons that may explain why your fly trap is drooping. Read on for more information about the possible causes of a fly trap drooping and how you can fix the issue…
Why Is My Venus Fly Trap Drooping?
The main reason why your venus fly trap is drooping is due to it not getting enough light. You see, fly traps are adapted to grow in a specific type of environment. If the conditions are not right, your plant will let you know by drooping over and looking generally unhappy!
If you’re keeping your fly trap indoors, make sure that it has a window where it can get as much sunlight as possible. If this doesn’t seem to be the problem and your plant is still drooping, then keep reading to find out how to prevent this issue from happening again.
Remember: The Venus Fly Trap Has a Dormant Season
There’s a chance that your venus fly trap has gone into its dormant season. In fact, this may be why your fly trap is drooping! This season starts in late October and ends sometime in February. During this time, the fly trap goes into a period of hibernation where it is basically sleeping.
Has the Venus Fly Trap Been Under Stress?
Is there a chance that it has been under stress and this is why it is drooping? If so, then the best thing to do is just let it be and wait for the plant to perk back up. You can help out by placing your fly trap in an environment that will put less stress on it, such as a room with indirect sunlight or weak light.
How To Stop Venus Fly Trap Drooping?
The solution will depend on what is causing the drooping in the first place, but I’ve had good success with using LED grow lights on my carnivorous plants, especially during the cold months.
A grow light will help your fly trap get the light that it needs to stay strong and healthy. Using a full-spectrum light is the best idea as that is closest to the sun’s rays. Also, make sure to rotate plants from time to time as they can become lopsided if they receive more light on one side over another!
To keep your fly trap looking its best, it’s important to follow the main growth tips. Here is what I recommend:
Soil: Make sure to feed your fly trap every month or so! – Keep the soil moist but not wet (similar conditions as if it were growing outside) – Don’t overfeed. Only feed one trap every month or two.
Water: You should water a venus fly trap about once a week. If you are using tap water, let it sit out for at least 24 hours so that the chemicals in the water can evaporate. You can test if your plant needs more water by poking your finger into the soil.
If it is still slightly damp, then you don’t need to water yet! You can also use a moisture meter to get the most accurate results
Temperature: Fly traps light temperature that is between 75 and 80 degrees Fahrenheit. If your fly trap is drooping, then it may be because the temperature of the room that you are growing in is too low or high.
Conclusion
In conclusion, knowing how to identify the cause of a fly trap drooping is an important skill for any plant keeper. Droopy venus fly traps do not have to be a death sentence, and there are many things that you can try in order to get them back on track! Hopefully, this blog post has been helpful.
My top tip is to use a grow light to help the fly trap get enough sunlight. Doing this will help your fly trap stay strong and healthy!
By following these steps, I have been able to keep my venus fly traps looking great for over two years now. Thanks so much for reading – please leave any comments below if you have them!
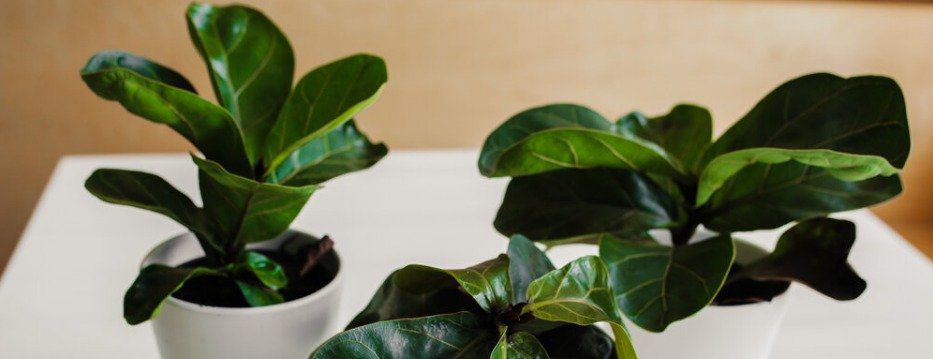
Fiddle leaf figs are a popular indoor plant. They have been used as an air purifier, and many people think they make the room look nice. There are several reasons why your fiddle leaf fig might be dropping leaves, but it is important to identify what the problem may be before you take action.
In this blog post, we will discuss common causes of leaf drop in fiddle leaf fig plants and how to correct them!
Why Is My Fiddle Leaf Fig Dropping Leaves?
Your fiddle leaf fig is dropping leaves because of shock, root rot, or dry conditions. Basically, it all depends on keeping the conditions of your house under control. I will now go into each of the main reasons and what you can do to fix the issue.
Fiddle Leaf Lig Dropping Leaves from Shock
A fiddle leaf fig can drop leaves from shock when you move it to a new house. It is important that you do not put it in a drafty or cold room. If your fiddle leaf fig is placed where the temperature drops below 50 degrees, then this can shock it and cause leaf drop!
The solution is to move your plant to a warmer and more humid room. You should also offer consistent care, as making random changes will only shock your plant even more than it already is.
Fiddle Leaf Lig Dropping Leaves from Root Rot
Another reason why your fiddle lig fig may be drooping its’ leaves is because of root rot. Fiddles are very susceptible to root rot if they have poor drainage or too much water around their roots.
The best way to avoid root rots with these plants is by making sure there isn’t any standing water in the soil. If it’s too late, then you can try to remove the root rot by repotting your plant and replacing some of its’ soil.
Fiddle Leaf Lig Dropping Leaves from Dry Conditions
Leaf drop can also occur if your house is too dry and warm with a low humidity level. If you find that it happens to be very cold outside, then make sure your fiddle leaf fig isn’t directly by an open window!
You should keep them away from drafty areas like windows so they don’t get too much wind exposure or chilly temperatures. As long as you take care of these things around your home, there shouldn’t be any major problems with dropping leaves on your plants!
You can use a humidifier to increase the moisture levels around your fiddle leaf fig if you find that it’s too dry. If there is not enough humidity in your home, then try misting their leaves with water once a week! This will make them feel more comfortable and decrease leaf drop from low humidity conditions.
Fiddle Leaf Care Guide
Offering consistent care is key if you don’t want your fiddle leaf fig to drop any leaves. As such, keep the following in mind:
The higher the humidity, the better. Make sure there is no standing water in your plant’s soil!
They like bright but indirect sunlight; avoid direct exposure to the sun or you’ll find it will burn its’ leaves
Mist their leaves with water once a week, and make sure there is always water in the soil
You should use high-quality potting soil that has good drainage
Keep the temperature between 60 and 80 degrees, but not below 50
As long as you keep these things in mind, your fiddle leaf fig should have no problems with dropping leaves!
Conclusion
In conclusion, fiddle leaf figs can drop leaves for a number of reasons but you should be able to resolve the issue by looking at your home environment and what changes need to be made. You may have a fiddle leaf fig that drops its’ leaves due to shock, root rot, or dry conditions!
The most important thing you can do is not put it in an extremely drafty or cold place and make sure you don’t leave your fiddle leaf fig sitting in a pool of water! If you keep the humidity levels up around your plant, then they should be just fine.
Cucumbers (Cucumis sativus) are among the easiest vegetables to grow. They germinate quickly, tolerate a wide range of temperatures and moisture levels, and adapt well to containers.
However, sometimes the cucumber leaves can feel crispy. In this post, we reveal why this is and what you can do about it…
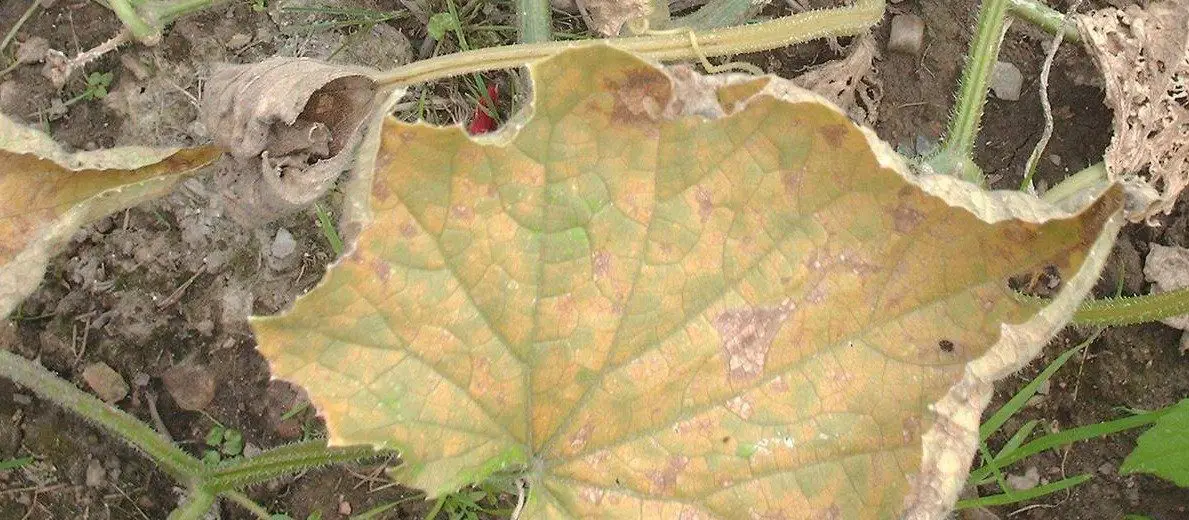
Why Do Cucumber Leaves Feel Crispy?
The most likely reason why your cucumber leaves feel crispy is because of leaf scorch! This is caused by conditions of high temperature and not enough moisture in the soil.
The leaves will start off very dry, and then slowly turn brown or yellow in patches on the tips. Leaves may turn a bronze color before dying off completely.
What Causes Cucumber Leaf Scorch?
Cucumbers are pretty heavy drinkers. During hot, sunny days they take up a lot of water through their roots and this makes the leaves expand as it passes through them. When night-time temperatures drop suddenly (particularly in dry conditions) the cucumber can become dehydrated – that is, there isn’t enough moisture in its cells to keep them plump or elastic.
This means that when morning comes and the sun hits these now wrinkled leaves again, evaporation takes place very quickly – dropping soil temperature even further! The result: leaf scorch…
Why are Scorched Leaves Bad for My Cucumber Plant?
Leaf scorch doesn’t just look bad on plants, but it can have serious consequences too. In hot, dry conditions cucumbers will be more prone to powdery mildew – a fungal infection that causes leaves to lose their vital green color and wither away completely!
To prevent leaf scorch in the future you’ll need to make sure that soil moisture levels are even throughout the day (and night). This might mean watering with soaker hoses or drip irrigation for 30 minutes every morning if sun exposure is expected.
You could also try giving your cukes some afternoon shade by planting them under taller crops (like tomatoes) or erecting a temporary shade cloth. This will bring down night-time temperatures and prevent the water from evaporating so quickly…
If you’re already dealing with leaf scorch on your cucumber plants, don’t worry! You can still save them by watering regularly throughout the day until soil moisture levels are even again. Once this happens evaporation should be reduced to normal levels meaning these crispy leaves won’t stay that way for long…
Conclusion
In conclusion, cucumber leaves feel crispy because of leaf scorch, which is bad for the plant as it affects growth and disease resistance. You can prevent this by watering regularly until soil moisture levels are even again – alternatively you could try giving your cukes some afternoon shade or a temporary shelter against the sun’s rays!
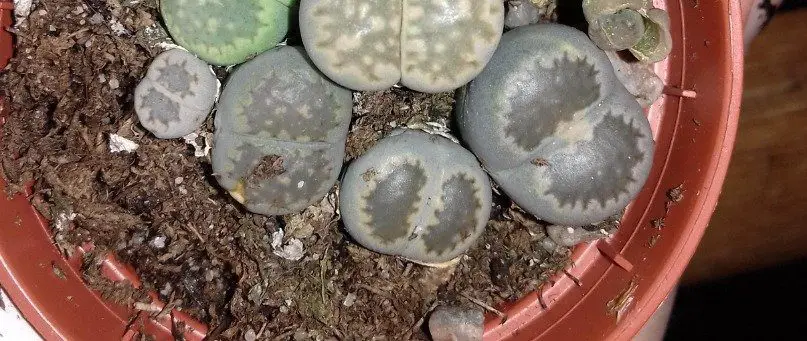
Lithops are small succulent plants with many variations. The most common is called Lithops bromfieldii, which has a diamond-shaped body and two large leaves on either side. If you have ever grown lithops before, or if you have them in your garden now, then chances are that one day they will die from overwatering!
This post will teach you how to save overwatered lithops so that they can continue living their long lives of sunshine and rainbows.
How to Save Overwatered Lithops?
Step One – Remove the plant from its container. Pick up your dying plant by holding onto both leaves firmly near their base where they join together as one stem. Shake out all loose dirt from roots into a plastic bucket or a plastic bag. Pull the plant out of its container as you gently tug on it to loosen roots from rocks and soil.
Step Two – Clean your lithops once you have removed it from its old dirt and are certain no stray dirt clumps remain on top of either leaf’s surface. Next, go ahead and place them onto paper towels which will absorb any excess moisture left behind. You can use clean cotton swabs (Q-tips) or other small, pointy objects to reach into the crevices of each leaf’s surface and clear out any dirt that remains.
Step Three – Replant your lithops after inspecting the plant for damage during this cleaning process.
Step Four – Locate a place with bright indirect sunlight where your flowerpot can rest until the soil is completely dry. Lithops do best in warm climates, so if you can place your flowerpot on a window sill to receive indirect sunlight during this time period then they will be very happy!
If not and it’s wintertime where you live, or you don’t have access to an area with bright light for long periods of time, then just let them sit wherever inside until their dirt has dried up into hard clumps before returning them back outside again once conditions are acceptable.
Step Five – Let another week pass by without giving your lithop plant any water at all (and assuming that no one watered it accidentally). Continue to monitor soil moisture daily, and as soon as you notice it is beginning to dry up, then go ahead and water your lithops by slowly pouring only a small amount of water onto the plant’s surface so that the top inch of soil is moist.
Step Six – Let us now hope beyond hope that you never have need of this post/tutorial again!
If you notice these white spots becoming larger in size at an alarming rate, then chances are your lithops have been over-watered for quite some time now!
You will also see that the lithop has become soft, instead of the firm structure it usually has. This also usually comes with a split lip on top of your lithop. This is a serious sign that it has been given far too much water.
Lithops are succulents, which means they store water in their leaves. This is why it’s very important that you only give them a small amount of water at once!
How To Tell If Your Lithop Needs Water?
If the soil has turned into hard clumps and your lithop feels light when you pick it up, then this usually indicates that its roots have dried out from lack of moisture – meaning no more watering for quite some time now.
Usually, if the plant was overwatered, chances are there will be condensation on top of both leaves after watering – especially if given too much at one time (when compared to putting just enough every other day). Always check for signs like these before giving any type of water to your lithop.
As a general rule of thumb, you should be giving small amounts of water once in every two weeks. But don’t ever let them sit in any standing puddle of water! Lithops are also very sensitive about being over-watered because they will die after getting too much moisture at one time – even from just watering twice within a week apart period.
Why is Overwatering Bad for Lithops?
Overwatering is bad for two reasons: firstly, if given too much water, then they can begin rotting and/or become infested with pests. Secondly, if watered too often in a short period of time, then they can begin to lose their stem along with the roots and eventually turn into just leaves.
Conclusion
In conclusion, take care not to water your lithops more than once every two weeks, and make sure you pour just enough for the soil to become moist. And if they start changing color and become mushy, then chances are they have been overwatered – which means no more water until conditions improve!