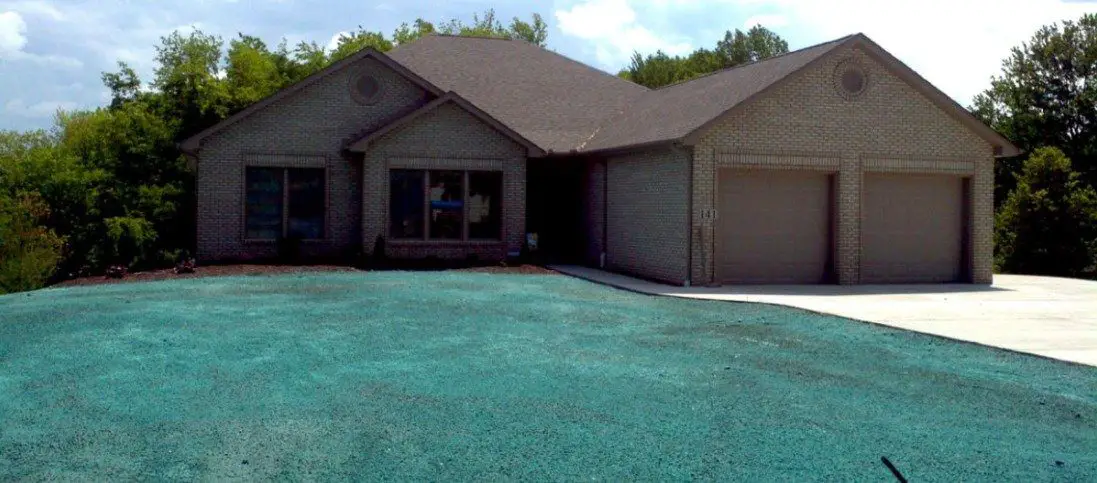
If you’re considering planting a hydroseed lawn, it’s important to know how long the soil can go without water. Hydroseeding is a process where seeds are mixed with water and then applied to an area that’s been tilled or leveled. The idea behind this technique is that the seeds will germinate quickly in moist soil and grow into thick turf.
How Long Can Hydroseed Go Without Water?
When you first lay down the hydroseed, you should keep it continuously wet for 11-14 days (or until they start sprouting up). Moving forward, you just need to keep the area moist.
Doing this will keep the seedlings healthy and allow them to grow into a lush green lawn for your enjoyment!
When thinking about how much water to give hydroseed, it depends on several factors, including quality of seed, time of year, type of soil, amount of rainfall in recent weeks/months. It’s best to test the soil with your hand to make sure that it’s never dry. With that said, I’ve found that giving the hydroseed a small amount of water 2-3 times a day works well.
Sometimes it can be difficult to determine when the right time is for watering your lawn. However, by being observant and paying attention to what Mother Nature has in store, you should have no problem knowing whether or not your soil needs a drink!
Don’t water your hydroseed if the weather predicts that rain is due, as overwatering can lead to fungus and pests. But say that the opposite is true? Well, that means that you should give your seed extra water to protect it against the burning sun.
Hydroseed Maintenance
Your freshly sewn lawn will require some extra maintenance to achieve its true potential. There are many things that you can do to keep it looking its best and green:
Watering – Watering can make or break an entire project when using this technique because proper germination relies on just how much moisture plants receive during their initial weeks after being planted into a new environment. The best way for homeowners who use this service regularly is by installing some type of automated sprinkler system around their yards where patches are evenly spaced out according to plan specifications rather than relying solely on rainfall.
Mowing – Once you have laid down the new grass seed in your lawn, it is time to start mowing! To make sure that this process goes smoothly and without too much hassle from pesky weeds or patches of dry dirt, be sure to stay on top of the blades’ growth. You should usually mow once they are 2-3 inches high, which typically takes place about 4 weeks after seeding has been completed.
Fertilizing – A green lawn is an ultimate goal for many homeowners, but it can be a challenge to grow. Your new grass will need nutrients and water in order to thrive, which you give via fertilizer following your first or second mowings of the season.
Weeds – The hydroseed on your lawn will not have weeds, but the soil does. You can still get weed growth in a short amount of time if you don’t take action. However, it’s important to avoid the use of herbicides in the first months. After some time has passed, you can spray certain areas of the yard with hydroseed herbicide spray.
Protect – If you want to make your lawn look its best, it’s important that people and pets stay off the area for around 2-3 months. This is because if someone or something starts walking on the grass before seeding has finished growing in, they’ll cause damage which can ruin all of your hard work!
Conclusion
In conclusion, it’s important to know how long hydroseed can go without water. Hydroseeding is a process where the seeds are mixed with water and then applied to an area that has been tilled or leveled, but you should keep it continuously wet for 11-14 days (or until they start sprouting up).
Moving forward, just make sure the area remains moist so your seedlings will grow into a lush green lawn!
I hope that you have enjoyed this blog post on the topic of how long hydroseed can go without water. Be sure to check out my other blog posts to learn more about your garden.
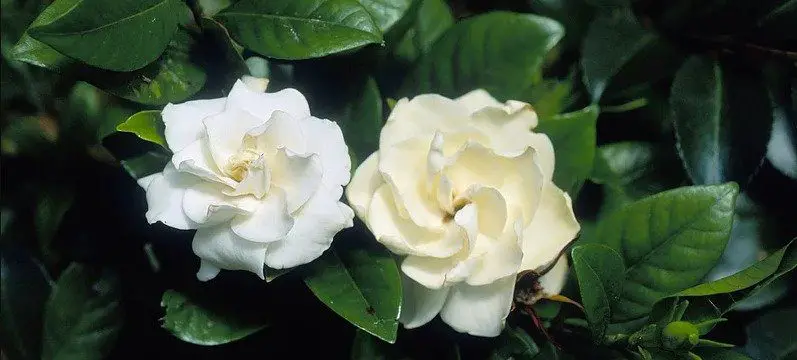
This post will clear up the following question: do gardenias like coffee grounds? There are many articles and websites that say gardenias love coffee grounds, so it might seem a bit strange to hear this article says they don’t.
But is there any scientific evidence to back up either side of the argument? We have found some other plants that thrive with added compost or organic matter, but what about gardenias? Let’s find out
Do Gardenias Like Coffee Grounds?
Yes! Gardenias like coffee grounds because the grounds act as great mulch and provide the acidic soil that gardenias need to grow.
You see, coffee grounds are great for the soil because they release nitrogen into the earth and provide extra potassium.
However, this is not true with all plants in general, so it’s important to know if your plant likes coffee or even needs acidic soil before adding any ground-based mulch.
Although I’ve said, you may be surprised to hear that I don’t add coffee grounds to my own gardenias, or any plant for that matter. This is because uses a specialist fertilizer is a better option as it provides everything the plant needs to thrive, not just nitrogen.
What Are The Benefits of Adding Coffee Grounds to Gardenias?
Adding coffee grounds to plants has many benefits. This is because they are rich in nutrients like potassium, nitrogen, and phosphorous, which helps give the plant what it needs to thrive.
They also have anti-fungal properties that will discourage diseases from forming on your plants’ leaves or roots while improving their appearance over time as well. The compost helps keep weeds at bay too!
How Much Coffee Grounds To Use?
In order to get the best results for your gardenia, it’s important to know how many coffee grounds you should use.
You can apply around two handfuls of coffee grounds to the soil and water as normal.
You can also add coffee grounds to the soil around your gardenia when you are fertilizing it, or at least once every one and a half months.
What Happens If You Add Too Many Coffee Grounds?
If you add too many coffee grounds, it can lead to a buildup of nitrogen in the soil, which is not good for your gardenia plant. In addition, this may cause other issues, such as nutrient deficiencies or root rot if there are too many nutrients contained in the ground-based mulch.
So make sure that you don’t overdo it when adding any type of organic matter to your plants’ potting mix!
Conclusion
In conclusion, gardenias love coffee grounds because they provide the acidic soil that it needs to grow.
However, it is important to know that not all plants do and they may even be damaging. It’s best practice to read up on the plant you are growing before adding any extra fertilizers or mulch.
Although I recommend using coffee grounds on your gardenias if don’t want to throw coffee grounds away, I wouldn’t buy coffee grounds JUST to use as fertilizer. Instead, you an all-purpose fertilizer, like Miracle Grow.
If unsure, consult a local garden center as they’ll have plenty of advice for your specific type of plant.
If you found this article helpful, don’t forget to share so others can find out if their favorite plants like coffee too!
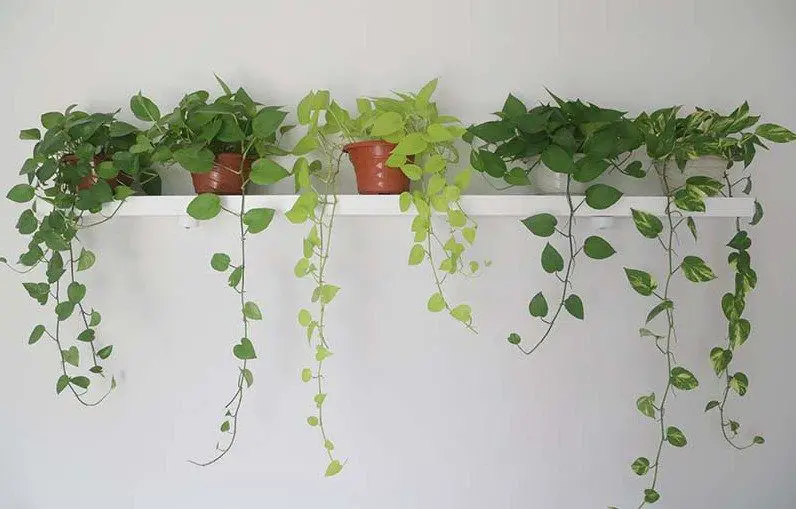
Pothos plants are one of the most popular houseplants that people buy. They are easy to care for, can be purchased in all good garden centres, and look nothing short of amazing!
However, many pothos owners want them to grow faster than they currently do! If you’re looking for ways to make your pothos plant grow faster, this blog post is just what you need. Here are 7 tips on how to make a pothos grow faster…
How to Make Pothos Grow Faster?
Provide plenty of natural, indirect light
Avoid direct sun exposure for long periods of time
Keep the plant at 70-90 degrees Fahrenheit
Use the best potting mix
Fertilize your pothos plant monthly
Water when the top layer of the soil is dry
Stop pests from attacking the plant
8 Ways to Grow Your Pothos Faster
I will now give an explanation for each of the seven tips noted above. Please note, these tips aren’t in any specific order. In fact, fertilizing your pothos plant is one of the main ways to give your plant a quick boost.
1. Give it plenty of light
Keep the plant in a room that has plenty of natural, indirect light. You should keep your pothos in a room that has a lot of windows, but also make sure to keep them away from direct sun exposure to avoid pothos sunburn. A plant won’t grow if it is not receiving enough light. I recommend using pothos grow lights if you want to maximize growth.
2. Avoid direct sun exposure
Avoid direct sun exposure for long periods of time as this can lead to leaf burn. If you can’t keep your pothos soil away from direct sun for long periods of time, try to make sure it doesn’t get too much sunlight.
3. Water it regularly
Make sure that the soil is always wet, but not waterlogged. When you first plant your indoor or outdoor pothos, water thoroughly and then wait for the top of the potting mix to dry out before watering again.
4. Provide a warm environment
Keep the temperature between 70-90 degrees Fahrenheit. The ideal temperature is 75 degrees Fahrenheit. If temperatures are below 60 and above 90 then this may cause the leaves to droop or cause them to wilt.
You may also want to keep your plant away from cold drafts. The more air movement, the dryer the leaves will be and this can cause spots to form on your pothos plants which then leads to leaf drop. When a draft is present water droplets should bead up on a pothos’s leaves
5. Use the best potting mix
Pothos plants like a potting mix that drains well. Throw in some nutrition, and you have a potting mix that’ll keep your pothos thriving. Although pothos prefers consistent soil with a pH between 6.1 and 6.5, the plant is able to thrive in a range of soil conditions.
Pothos are famed for their attractive trailing stems and large heart-shaped leaves. Plant yours in a hanging pot with drainage holes and you will see them thrive quickly.
6.Fertilize your pothos plant monthly
Use a diluted solution of fertilizer (amazon link) every other week to make your pothos grow faster. Fertilizer is important because it provides your pothos plant with the nutrients it needs to grow, such as nitrogen, potassium, and phosphorous. My favorite pothos fertilizer is Miracle Grow (Amazon link).
You can also add slow-release pellets or tablets of complete organic fertilizer around the root zone once a year (not more than 12 weeks apart). Try to limit the use of chemical pesticides, herbicides, or fungicides on your pothos plant (although this is needed if your pothos has leaf spot disease or pest issues).
The use of some inorganic fertilizers provides an instantaneous nutrient boost to the soil which spurs on Pothos growth almost immediately. Organic fertilizers, like compost and manure, may take longer to boost plant growth, but they are healthier for the plants.
7.Water your pothos correctly
plant when the top layer of potting mix feels dry to touch. When watering, water thoroughly until you see that it has been absorbed by the soil or dripping through the drainage holes in a tray below. Let excess water drip from its roots for 30 minutes before returning them to their saucer, or pot.
8.Stop pests from damaging your pothos
Create a natural insect repellant by mixing neem oil with water and spraying on stems, leaves, or soil. Consult the label for proper application rates. It’s important to spray ALL plants in your house if you notice pests on from one of your plants. This is because the pests can easily jump from one plant to another.
Why Is My Pothos Not Growing?
There are a few things that may cause your pothos plant to have stunted growth: insufficient light, improper watering habits (not watering as often as necessary), pest infestations (like spider mites), incorrect potting mix within the container of soil, over-fertilizing with chemical fertilizers which can easily burn young roots, lack of nutrients in its growing environment, as well as pothos repotting problems.
Why Pothos Plants are Amazing
Pothos plants are amazing for several reasons. They grow quickly and provide a lovely decoration to any room as they climb upwards along the wall or hang from the ceiling.
Plus, pothos plants can be used in all sorts of places: offices where you need something low-maintenance but still aesthetically pleasing; living rooms that may not have enough natural light coming through windows due to foliage blocking it out; inside your home’s entryway so people don’t see an empty table when they walk in (place one pot on each side).
Conclusion
In conclusion, you can make a pothos grow faster by ALWAYS providing everything it needs to survive. A day in which your pothos plant is not getting what it needs is a day where it won’t grow. To help your Pothos grow to their full potential, make sure to remove any restrictions that are slowing it down.
I hope these tips will help make growing pothos easier for you! If you have any additional questions please comment below and we’ll do our best to answer them.
Money trees are often used as a symbol of prosperity. Their leaves are often thought to be symbolic of the money people receive in their lives and they can also represent new life, growth, and renewal.
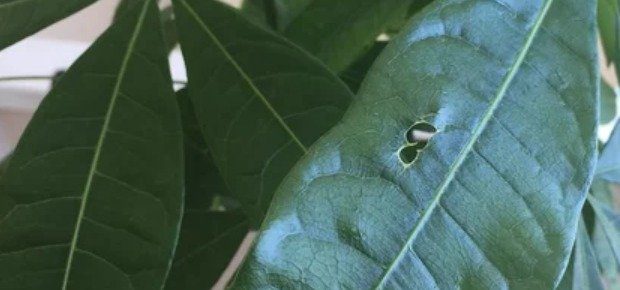
However, some plants may develop small holes or indentations on them that look suspiciously like someone has been drilling into them with a drill bit.
In this article, we look at the most probable causes for holes in the leaves of a money tree. We will also discuss the most effective ways to avoid any more holes in the future. Let’s jump straight in…
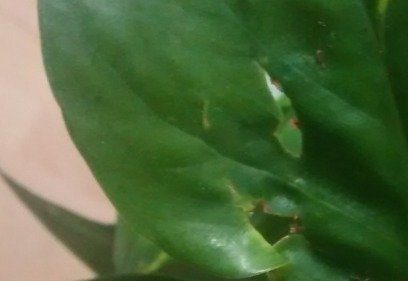
Why Are There Holes In Money Tree Leaves?
Most holes in money tree leaves are caused by a type of sucking pest, which is usually aphids or mealy bugs. Aphids feed on plants and suck their sap out, causing the leaves to dry up and die over time. The best way to stop this from happening is by spraying your plant with neem oil!
These creatures can be difficult to spot on your money tree as they are most active at night. This means the pests can turn into a huge issue if you don’t get on top of them.
If you’re sure that your plant hasn’t got a pest issue, then the holes are likely due to leaf spot disease. This is a fungus that starts as spots and then spreads quickly into larger holes.
How To Prevent Holes in Money Tree Leaves?
To prevent pests from destroying your beloved plant, you should start with applying some neem oil spray (Amazon link) to all plants in your home.
Without efficient insect control, bugs that enjoy feasting on your money tree could end up in other plants and cause damage. I use neem oil on plants to prevent and stop insect infestations.
Just as the name suggests, parasitic leaf spot disease will cause tiny brown spots to form on your money tree leaves. Start by removing any infected leaves, and then apply neem oil to prevent another infestation. You may even notice white money tree leaves if there is powdery mildew present.
How To Keep Your Money Tree Healthy?
Location: The money tree enjoys a lot of light, but not when hit directly.
Watering: Allow the top few inches of soil to dry before watering again. I tend to water my money tree once a week in summer and once every fortnight during winter.
Fertilizing: If your money tree is losing leaves, feed it with an all-purpose fertilizer twice a month in the growing season.
Temperature: Your money tree needs to be kept at a temperature between 60 and 80 degrees F.
Humidity: Try to keep your money tree in areas of over 50% humidity.
Soil: Plant your tree in well-draining peat-based potting soil.
Conclusion
So what are these holes in your money tree leaves? To conclude, most likely the cause is leaf-mining pests–though they could also be a sign of a plant disease, like leaf spot. One option for controlling insects and fungal infections is to useneem oil spray (Amazon link).
Peace lilies are beautiful house plants that can grow to be quite large. They produce lovely flowers and glossy green leaves, but sometimes the leaves can develop holes in them.
Holes in peace lily leaves aren’t a problem you should take lightly. It’s important for you to know what causes it so that you can make sure your plant is healthy!
Why Are There Holes In My Peace Lily Leaves?
Pests are the most likely reason for holes in your peace lily leaves. There is a leaf-tunneling pest, known as liriomyza melanogaster, that enjoys eating the leaf tissue.
This pest is most active at night, which means many plant owners aren’t aware that they have an issue. Well, until they spot all the holes in the peace lily leaves…
Leaf disease is the second most likely cause, and something all plant owners should be cautious of. You’ll know if your plant has a leaf disease if the holes started as small spots that were dark in color.
How To Stop Holes in Peace Lily Leaves?
My favorite way to stop holes in peace lily leaves is by using a neem oil spray (Amazon link). This will stop the pests from eating through your beloved plant.
It’s also worth noting that these pests can jump from plant to plant! So be sure to spray all plants in your house.
If you think that your peace lily may have leaf spot disease, then you should treat the disease as soon as you can. You can do this by removing dead leaves, and then using a fungicide over the plant. It even helps when peace lily leaves are turning brown.
Other gardeners and I have found that neem oil can be used as both a fungicide and an insecticide, which means the above oil can also help with diseases and peace lily root rot.
How To Keep the Peace Lily Healthy?
Location: To ensure your peace lily’s leaves are in good condition, place it in indirect light.
Watering: To avoid roots rotting, don’t allow the water to become soaked. It’s advisable to water once a week when the top inch of the soil is dry.
Fertilizing: Feed your peace lily with fertilizer during the growing season to keep it strong and healthy.
Temperature and humidity: Peace lilies like temperatures of roughly 68°F. Generally, the humidity in your home should be above 60% to keep your peace lily happy.
Soil: Peace lilies prefer soil that is properly drained and acidic, but not too acidic.
Conclusion
To conclude, you should blame pests for the holes in your peace lily leaves. But you can get the last laugh by using a pesticide, such as neem oil spray.
I hope you have enjoyed this blog post. If so, please add it to your bookmarks and share it with your green-fingered friends!