Grey lavender is a common sight in gardens across the UK. But what does it mean when your lavender turns grey? And more importantly, what can you do to prevent it? In this blog post, we will explore the causes of lavender turning grey, and offer tips on how to keep your plants healthy and looking their best!
Why Is My Lavender Turning Grey?
Frost and fungus are the two most common causes of lavender turning grey. Frost damage can occur when the temperature dips below freezing, causing the leaves and stems of the plant to wither away. Fungal diseases such as botrytis can also cause lavender to turn grey, particularly if the plants are grown in wet or humid conditions.
If your lavender is turning grey, the first step is to identify the cause. If it is due to frost damage, there is unfortunately not much you can do except wait for the plant to recover. However, if the problem is caused by a fungal disease, there are a few things you can do to try and save your plants. Let’s go through both scenarios in a little more detail.
Saving Grey Lavender from Frost Damage
As we mentioned, frost damage is one of the most common causes of lavender turning grey. This is because lavender is a Mediterranean plant, and therefore not used to the colder temperatures that we often get in the UK.
When the temperature drops below freezing, the water inside the lavender cells expands and bursts, causing the leaves and stems to wither away. This damage is usually irreversible, and the only thing you can do is wait for the plant to recover.
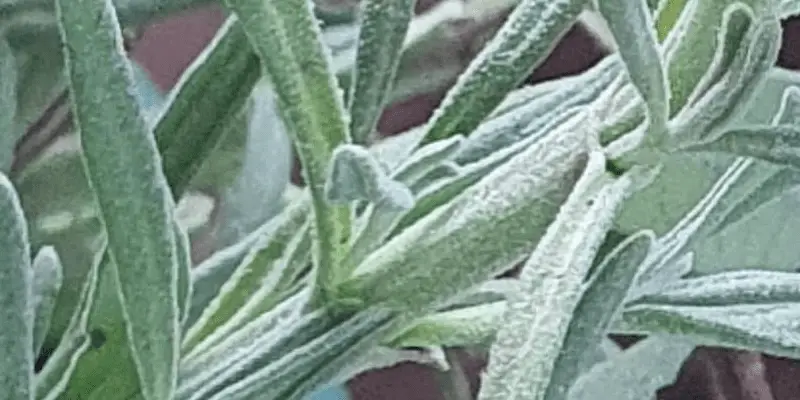
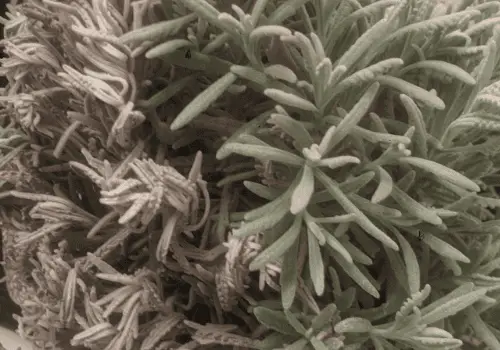
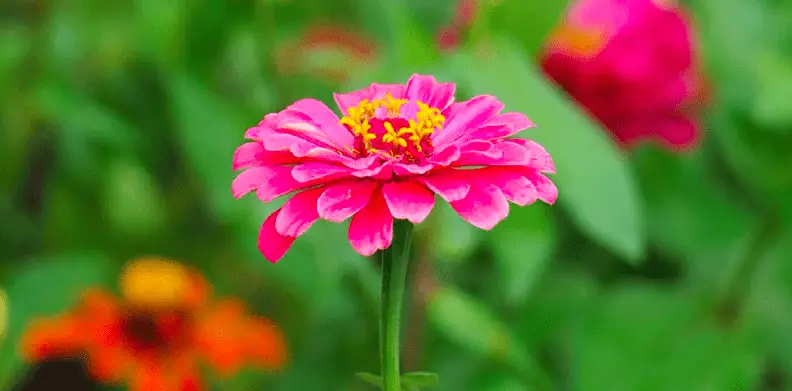
Grey Lavender
Saving Grey Lavending from Fungal Diseases
Fungal diseases such as botrytis can also cause lavender to turn grey. These diseases thrive in wet or humid conditions, and can quickly spread to other plants in the garden.
If you think your lavender might be infected with a fungal disease, it’s important to act quickly. The first step is to remove any affected parts of the plant, including any dead leaves or stems. You should then disinfect your tools and hands, to prevent the disease from spreading.
Next, you need to improve the drainage around your lavender plants. If they are grown in pots, make sure you use a well-draining potting mix and that the pots have drainage holes in the bottom. If they are planted in the ground, make sure the soil is not too compacted and that there is good drainage.
Finally, you can treat your plants with a fungicide. There are many different products available, so make sure you choose one that is suitable for use on lavender. Always follow the instructions on the packet, and be sure to apply the fungicide in the early morning or evening, when the temperature is cooler.
Preventing Lavender Turning Grey
The best way to prevent your lavender from turning grey is to take some proactive steps to protect it from the cold. If you live in an area that gets frost, consider planting your lavender in a pot so that you can easily move it indoors if the temperature drops. You can also cover plants with a frost cloth or fleece when the weather forecast predicts a cold snap.
Another way to prevent lavender from turning grey is to make sure it is not infected with a fungal disease. As we mentioned, these diseases thrive in wet or humid conditions, so it’s important to improve the drainage around your plants.
If you live in an area with high humidity, consider planting your lavender in a raised bed or on a slope, to improve the airflow around the plants. You can also treat your plants with a fungicide every few weeks, to prevent the disease from taking hold.
By following these simple tips, you can help keep your lavender plants healthy and looking their best! Grey lavender doesn’t have to be a problem in your garden – with a little care and attention, you can prevent it from happening.
Should Grey Lavender Be Pruned?
Deciding whether to prune a grey lavender plant is a tricky decision, as it depends on the cause of the problem. If the lavender is grey because of frost damage, then pruning will not help and may even make the problem worse.
However, if the lavender is grey because of a fungal disease, then pruning can help to prevent the disease from spreading. It’s important to remove any affected parts of the plant, including any dead leaves or stems. You should then disinfect your tools and hands, to prevent the disease from spreading.
Pruning can also help to improve the airflow around your lavender plants, which will help to prevent fungal disease from taking hold due to the high humidity.
Conclusion
As we have discussed, there are several reasons why lavender may turn grey. In most cases, the problem is due to frost damage or a fungal disease.
The good news is that both of these problems can be prevented with little care and attention. By taking some proactive steps, such as covering plants with a frost cloth or fleece when the temperature drops, you can help to prevent your lavender from turning grey.
If you think your lavender might be infected with a fungal disease, it’s important to act quickly to stop the disease from spreading. Remove any affected parts of the plant and disinfect your tools and hands. You should also improve the drainage around your plants, to prevent the disease from taking hold.
I hope this article has been helpful in understanding why lavender may turn grey. By following the tips above, you can help to prevent this problem from occurring in your garden. Thanks for reading!
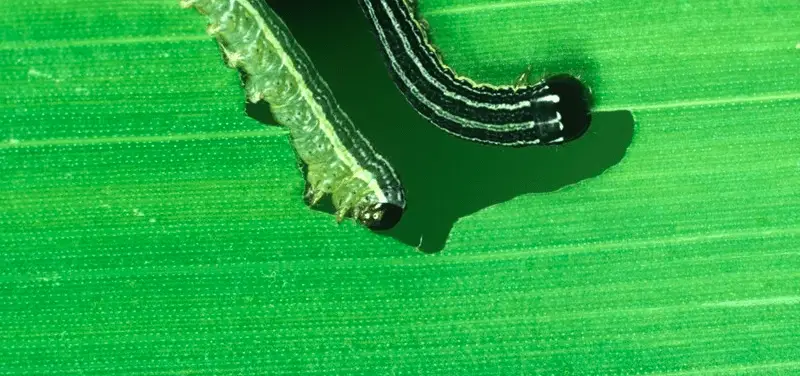
There is a battle taking place in many backyards across the country this summer. On one side are the caterpillars, munching on leaves and destroying plants. On the other side is vinegar, a natural pesticide that can kill these pesky critters. In this blog post, we will explore whether or not vinegar can be used to get rid of caterpillars.
Will Vinegar Kill Caterpillars?
Yes, vinegar can kill caterpillars. Vinegar is a natural insecticide that works well for getting rid of many pests. However, vinegar is an acidic substance and can harm plants if not used properly. Be sure to dilute the vinegar with water before using it on your plants. You should also avoid spraying it on hot days, as the sun can cause the vinegar to burn leaves.
To use vinegar to kill caterpillars, mix equal parts of vinegar and water in a spray bottle Then, simply spray the mixture on the caterpillars. The acid in the vinegar will kill them quickly. You can also use this mixture to deter caterpillars from coming back. Simply spray it around the perimeter of your garden.
I recommend using neem oil if you want to eliminate caterpillars without damaging your plants. Neem oil is a natural pesticide that is derived from the neem tree. It works by disrupting the caterpillars’ growth and reproduction. Neem oil is safe to use around children and pets, and it will not harm your plants.
If you do decide to use vinegar to kill caterpillars, be sure to take caution. Here are my top tips for using vinegar on catepillars:
Only use a diluted solution of vinegar, not straight from the bottle
Avoid using vinegar when leaves are receiving direct sunlight
Monitor the situation closely to make sure the caterpillars are gone for good
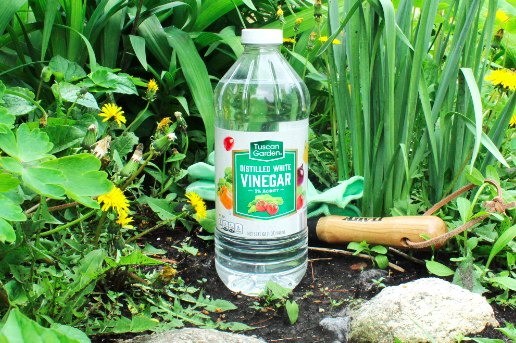
Vinegar Pest Control
What Else Can I Do To Remove Caterpillars?
Vinegar is an easy and effective way to get rid of caterpillars. However, there are a few other things you can do to deter these pests:
Bucket of Soapy Water
This method is simple but effective. Fill a bucket with water and add a few drops of dish soap. Then, pick off the caterpillars by hand and drop them into the bucket. The dish soap will kill them quickly.
Remove Their Food Source
Caterpillars love to munch on leaves, so removing their food source is a good way to deter them. You can do this by regularly trimming your plants and picking off any dead leaves. This will make it less appealing for caterpillars to come into your garden.
Set Up a Barrier
You can also deter caterpillars by setting up a physical barrier around your plants. This could be something as simple as placing a piece of cardboard around the base of your plant. The caterpillars will not be able to get past the barrier and will eventually give up and
Beneficial Insects
Another way to get rid of caterpillars is to introduce beneficial insects into your garden. Ladybugs and green lacewings are two examples of insects that will eat caterpillars. You can purchase these insects from your local nursery or online.
Release them into your garden to let them do their work. Beneficial insects are a great way to get rid of pests without using chemicals.
Bacillus Thuringiensis
Bacillus thuringiensis (BT) is a bacteria that specifically targets caterpillars. It works by paralyzing the caterpillar’s digestive system, causing them to stop eating and eventually die. BT is available in powder or liquid form and can be found at your local garden center.
Conclusion
In conclusion, vinegar can kill caterpillars. However, it is important to use caution when using this method, as vinegar can also harm plants. If you’re looking for a more natural solution, try neem oil or release beneficial insects into your garden. You can also deter caterpillars by removing their food source or setting up a physical barrier.
Do you have any tips for getting rid of caterpillars? Please do share them in the comments below! Thanks for reading!
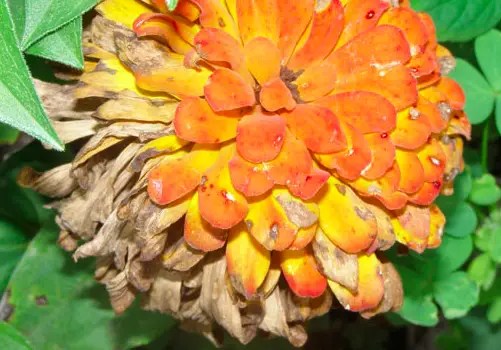
If you are seeing brown leaves on your zinnias, don’t panic! There are several possible causes, and most of them can be fixed relatively easily. In this blog post, we will discuss the most common reasons why zinnia leaves turn brown, and we will provide tips on how to correct the problem.
Why Are Zinnia Leaves Turning Brown?
Brown zinnia leaves are usually caused by fungal infections, overwatering, pests, nutritional deficiency, and leaf burn. As such, browning can be caused by both environmental and care-related factors.
If the problem is due to overwatering, you should allow the soil to dry out completely before watering again. If pests are the cause, you will need to use an insecticide or remove the pests by hand. Lastly, if the leaves are turning brown due to leaf burn, you should move the plant to a location with filtered sunlight.
I will now cover each of these causes in more detail so that you can identify the cause of the brown leaves on your zinnias and take the appropriate corrective action.
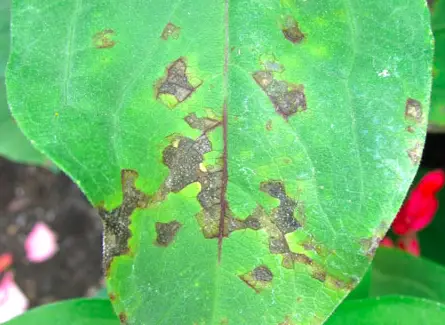
1. Fungal Infection
One of the most common reasons for brown zinnia leaves is a fungal infection. Fungi thrive in moist environments, so they are often found in poorly-drained soils. If you suspect that your zinnias have a fungal infection, look for other signs such as white powder on the leaves, black spots, discolored leaves, or stunted growth.
If you think your zinnias have a fungal infection, it is important to treat the plant as soon as possible. Fungal infections can spread quickly, so it is best to nip the problem in the bud. The best way to treat a fungal infection is with a fungicide.
There are many different types of fungicides available, so be sure to choose one that is specifically designed for the type of fungus you are dealing with. Neem oil (Amazon link) is a good all-rounder that works well against most common fungal infections.
Once you have treated the plant with a fungicide, be sure to take steps to prevent the fungus from returning. This includes improving drainage in the soil and avoiding overhead watering.
If you live in an area with high humidity, you may also need to space your plants out more so that they have good air circulation. This will help to reduce the chances of fungal infections taking hold.
If you think your zinnias have leaf burn, the best thing to do is move them to a location with filtered sunlight. This could be a spot that gets partial shade during the day or one that is only exposed to direct sunlight for a very short amount of time.
Moving forwards, be sure to avoid exposing your zinnias to too much direct sunlight. If you live in an area with very hot summers, it is best to offer some afternoon shade. This will help to prevent the leaves from getting too much sun and turning brown.
If you cannot provide afternoon shade, you may need to water your zinnias more frequently. This will help to keep the leaves cool and prevent them from drying out and turning brown.
3. Pests
Pests are another common cause of brown zinnia leaves. Aphids, whiteflies, and spider mites are all common pests that can infest zinnias. These pests feed on the sap of the plant, which can cause the leaves to turn brown. In severe cases, the plant may be stunted or even killed.
If you think your zinnias have pests, remove them as soon as possible by hand or with an insecticide. I recommend using an organic insecticide such as neem oil to avoid harming beneficial insects such as ladybugs and bees.
Once you have removed the pests, take steps to prevent them from returning. This includes keeping the area around your plants clean and free of debris. You may also need to treat the soil with an insecticide to kill any pests that are living in it.
4. Nutrient Deficiencies
Leaf burn, pests, and fungal infections are all common causes of brown zinnia leaves. However, sometimes the problem can be much simpler – a nutrient deficiency.
Zinnias need a good supply of nutrients to stay healthy and produce vibrant flowers. If they do not get enough of certain nutrients, the leaves will begin to turn brown. The most common nutrient deficiencies that cause brown leaves are nitrogen and potassium.
If you think your zinnias have a nutrient deficiency, the best thing to do is fertilize them. Use a fertilizer that is high in potassium, such as Fox Farm Big Bloom (Amazon link). Be sure to follow the instructions on the fertilizer packaging and only apply the recommended amount.
Overwatering is another common cause of brown zinnia leaves. When the plants are overwatered, the roots cannot get the oxygen they need to stay healthy. This causes the leaves to turn brown and eventually die.
If you think your zinnias are being overwatered, the best thing to do is reduce the amount of water you are giving them. Allow the soil to dry out completely between waterings and only water when the plants are wilted.
In addition, make sure that your zinnias are planted in well-draining soil. This will help to prevent the roots from sitting in water and becoming oxygen deprived. If necessary, you can add some sand to the soil to improve drainage.
Should I Prune Brown Zinnia Leaves?
It’s completely your decision whether or not you want to prune brown zinnia leaves. Some gardeners believe that it’s best to remove them so that the plant can focus its energy on producing new growth. Others believe that the brown leaves add character to the plant and should be left alone.
Personally, I only prune if the cause of browning is a fungal infection. In this case, it’s important to remove the affected leaves so that the problem doesn’t spread. However, if the browning is due to a nutrient deficiency or overwatering, I simply leave the leaves alone.
Conclusion
In conclusion, there are many different reasons why zinnia leaves may turn brown. The most common causes are leaf burn, pests, fungal infections, nutrient deficiencies, and overwatering. Once you have determined the cause of the problem, you can take steps to fix it. This may include reducing watering, adding fertilizer, or removing pests.
Do you have experience with brown zinnia leaves? Share your tips in the comments below!
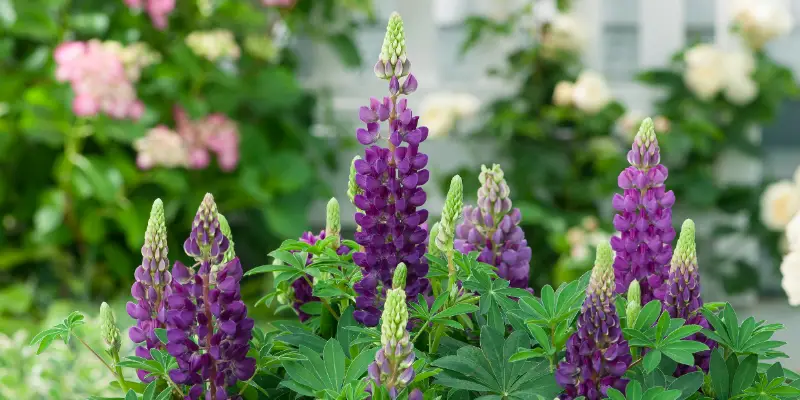
If you are looking for an interesting and unique flower to grow in your garden, you should consider lupins. They come in a variety of colors and are easy to grow. But can they be grown in pots?
In this blog post, we will take a look at whether or not lupins can be grown in pots, the best way to do it, and what you need to know before you get started. Let’s take a closer look!
Can Lupins Be Grown in Pots?
Yes, lupins can be grown in pots! They are a perfect plant for container gardens because they have shallow roots and don’t require a lot of space.
The best way to grow lupins in pots is to start them from seed. You can sow the seeds directly into the pot or start them indoors and then transplant them later. If you live in a cold climate, it is best to start the seeds indoors so that they can get a head start on the growing season.
Once the lupin roots are poking out of the bottom of the pot, it’s time to transplant them into a larger pot for the majority of their growing season. Be sure to choose a pot that is 12-16 inches deep and has drainage holes in the bottom. This is because lupins have large taproots and need plenty of room to grow.
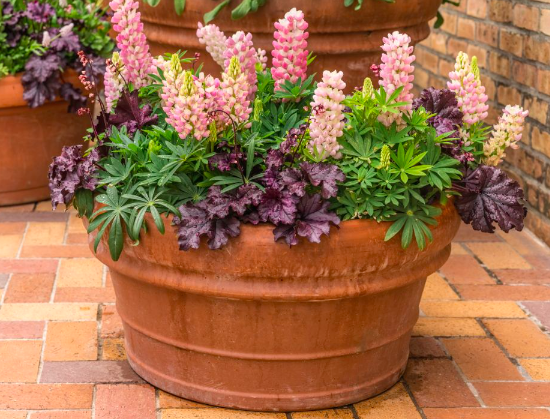
Potted Lupin on the Patio
Where to Place Potted Lupins?
Lupins love full sun, so make sure to place them in an area of your garden that gets at least six hours of sunlight per day. If you live in a hot climate, it is best to place the pots in a location where they will get some afternoon shade. This will help prevent the plant from getting too much heat and drying out.
It’s also a good idea to place potted lupins in an area that is protected from harsh winds. Lupins are delicate plants and can be easily damaged by strong winds.
Once you have found the perfect spot for your potted lupins, it’s time to sit back and enjoy the show! These beautiful flowers will add color and life to your garden all season long. Just be sure to deadhead them regularly to keep them looking their best.
What Pot for Lupins?
Any type of pot can work well for growing lupins, as long as it is the right size and has drainage holes. I prefer using plastic pots that are lightweight as they are easy to move around. You can also use ceramic or terracotta pots, but be aware that they will dry out more quickly than plastic pots.
The plastic pots (Amazon link to my favorites) are also remarkably durable and can be reused for several years. However, you can grow lupins in an old bucket if you really wanted to! As the plant matures, it may reach heights of over six feet, so make sure you choose a pot that is big enough.
It’s also important to use the fresh potting mix when you are transplanting your lupins into a larger pot. This will give them the nutrients they need to grow and thrive. Be sure to water the pots well after transplanting and keep them in a sunny spot.
Just remember, the bigger the pot, the larger your lupin plant will grow. So, choose a pot that is big enough to accommodate the size of plant you want.
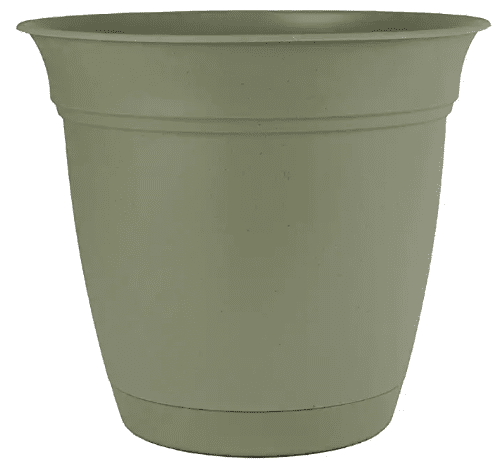
Round Plastic Planter
Overwintering Lupins in Pots
Lupins are hardy plants that generally do well in winter weather. However, potted lupins may need a little extra care to get through the winter months. This is because their roots are more exposed to the cold and can easily freeze.
To protect your potted lupins from the cold, you can move them to a garage or shed that is away from any drafts. You can also wrap the pots in burlap or bubble wrap to insulate them further.
It’s also important to protect potted lupins from excessive rainfall. The last thing you want is your lupins to sit in waterlogged soil all winter long. To avoid this, make sure the pots have drainage holes and are elevated off the ground.
If you can’t move your lupins inside for the winter, wrap the pots in bubble wrap and place them on top of a layer of mulch. This will help protect the roots from the cold and prevent them from freezing.
Removing Dead Foliage from Potted Lupins
At the end of the growing season, lupins can die back and the foliage may turn brown in places. This is normal and nothing to be overly concerned about.
To tidy up your potted lupins, simply remove the dead leaves and stems with a pair of pruning shears. You can also cut the plants back by a third to encourage new growth in the spring.
Once all the dead foliage has been removed, your lupins will be ready to overwinter. Just be sure to give them a little extra care to ensure they make it through the winter months healthy and happy.
Conclusion
Potted lupins are a great way to add color and life to your garden. They are easy to care for and only need a little extra attention in the winter months. Just be sure to choose the right pot, place them in full sun, and protect them from harsh winds. With a little love, your lupins will thrive all season long!
Do you have any tips for growing lupins in containers? Share them in the comments below! I hope this article was helpful and that you now feel confident growing lupins in this way. Thanks for reading!
Cucumber plants are great to grow in the home garden. They are easy to care for and produce a bountiful harvest. However, cucumbers can be susceptible to a number of problems if you don’t pay attention to their basic needs. One of the most common problems is overwatering.
In this blog post, we will discuss whether cucumber plants can be overwatered, what to look for if you think your cucumber plant is overwatered, and how to fix the problem.
Can Cucumber Plants be Overwatered?
Yes, cucumber plants can be overwatered. Overwatering is a common problem with cucumber plants, especially for those grown in containers. When cucumbers are overwatered, they can develop a number of problems, including yellow leaves, stunted growth, and root rot.
Not taking action to address an overwatered cucumber plant can eventually kill the plant. If you think your cucumber plant is overwatered, it’s important to take action immediately to correct the problem.
What do Overwatered Cucumber Plants Look Like?
If you think your cucumber plant is overwatered, there are a few telltale signs to look for:
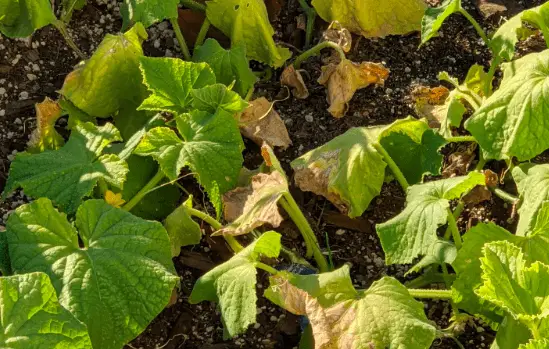
Wilting leaves – One of the most obvious signs is wilting leaves. When a cucumber plant is overwatered, the leaves will begin to droop and wilt. They may even appear wet, mushy, or develop holes.
Rotting roots – Root rot is another common problem with overwatered cucumber plants. Root rot is caused by a build-up of water in the soil around the plant roots. This can cause the roots to suffocate and die. The roots will be black, mushy, and smelly when they are affected by root rot.
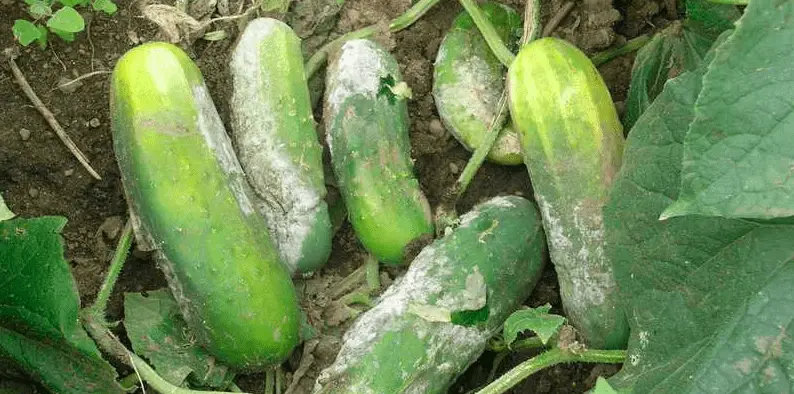
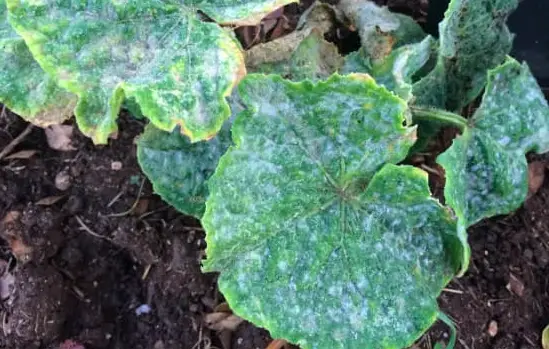
Powdery mildew – This is a type of fungus that can affect cucumber plants. It is characterized by a white or gray powdery coating on the leaves of the plant. Powdery mildew can be caused by overwatering, as well as other problems, such as high humidity levels.
Stunted growth – If your cucumber plant is overwatered, you may also notice that the plant has stunted growth. The stem and leaves of the plant will be smaller than normal, and the plant may produce fewer fruits than usual. This can also happen if a cucumber plant is too cold.
All of these symptoms can be found on overwatered cucumbers. This article contains many some pictures of overwatered cucumber plants so you can see what to look for.
Powdery Mildew on Cucumber Plants
How Much Water do Cucumber Plants Need?
In general, cucumber plants should be watered about once a week. However, the amount of water a cucumber plant needs will vary depending on the size of the plant, the type of soil it is grown in, and the weather conditions.
If you are unsure how much water your cucumber plant needs, it’s best to err on the side of caution and water less often. It’s better to underwater a cucumber plant than to overwater it.
The best way to determine how often to water your cucumber plant is to check the soil around the plant. The soil should be moist but not soggy. If the soil is dry, it’s time to water the plant.
Moisture meters are a great tool to help you determine how much water your cucumber plant needs. Simply insert the meter into the soil and it will give you a reading of how much moisture is present.
Cucumber plants also need well-drained soil. This may mean adding some sand to the soil to improve drainage. If your cucumber plant is in a pot or container, make sure that the pot has drainage holes to allow excess water to drain away.
How Do You Save Overwatered Cucumbers?
The good news is that it is possible to save an overwatered cucumber plant. If you catch the problem early, you may be able to reverse the effects of overwatering and save your plant.
First, stop watering the plant immediately. Allow the soil around the plant to dry out completely before watering again. This will give the plant a chance to dry out and recover.
Next, you need to check the roots of the plant. There’s no point trying to save an overwatered cucumber plant if the roots are already dead or dying. If the roots are starting to look black, mushy, or rotten, it’s best to prune them away.
You can prune cucumber roots by cutting away the affected roots with a sharp knife. Be sure to disinfect the knife before and after pruning to avoid spreading disease. Discard the affected roots in the trash.
Once you have pruned away any dead or dying roots, you can replant the cucumber plant in fresh, well-drained soil. If the plant is in a pot or container, make sure to choose one that has drainage holes.
Following the tips above will help you avoid overwatering your cucumber plant. I’ll now go deeper into the key tips so that you can get a better understanding of how to prevent overwatering.
Water early in the day – Watering early in the day will give the plant time to dry out before nightfall. This is important because cucumber plants are susceptible to fungal diseases if they stay wet for too long.
Check the soil before watering – Checking the soil before watering will help you to determine whether the plant actually needs water. The soil should be moist but not soggy. If it is, then the plant doesn’t need any more water.
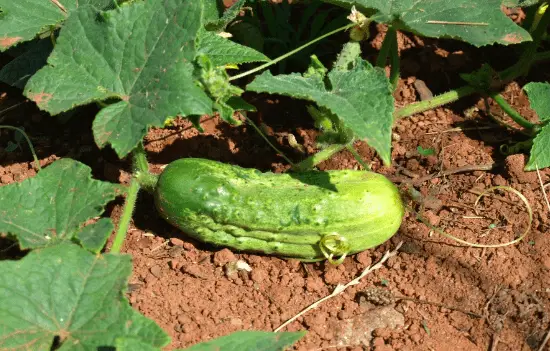
Add sand to the soil – Using well-draining soil is important to prevent overwatering. If you don’t have any appropriate soil, adding sand to the soil will help improve drainage and reduce the risk of overwatering.
Cucumber in Sandy Soil
Choose a pot or container with drainage holes – If you’re growing cucumbers in a pot or container, make sure that it has drainage holes. This will allow any excess water to drain away and help to prevent the plant from becoming overwatered.
Use a drip irrigation system – A drip irrigation system can help to prevent overwatering by delivering water directly to the roots of the plant. It means you don’t have to guess when to water the plant and you can be sure that the roots are getting the correct amount of water.
Monitor the weather forecast – If you know that rain is forecast, don’t water the plant. The rain will provide enough water for the plant and watering it yourself will just increase the risk of overwatering.
Conclusion
In conclusion, overwatering is a common problem that cucumber growers face. It can cause problems such as root rot, fungal diseases, and yellow leaves. To avoid these problems, it’s important to water early in the day, check the soil before watering, add sand to the soil to improve drainage, choose a pot or container with drainage holes, and monitor the weather forecast.
By following these tips, you can help to prevent overwatering and keep your cucumber plant healthy. Thanks for reading! I hope this article was helpful.
Do you have any cucumber growing tips? Please share them in the comments below!