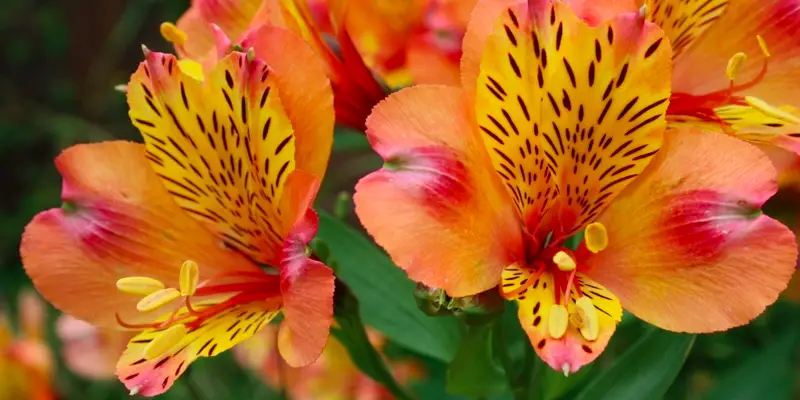
If you’re the proud owner of an alstroemeria plant, you will want to take steps to overwinter them so that they will be blooming again next year. Failure to do this may result in your plant not surviving the winter.
In this blog post, we will discuss the best way to do this. Alstroemeria are beautiful flowers and they are worth the effort it takes to overwinter them!
Can Alstroemeria Be Overwintered?
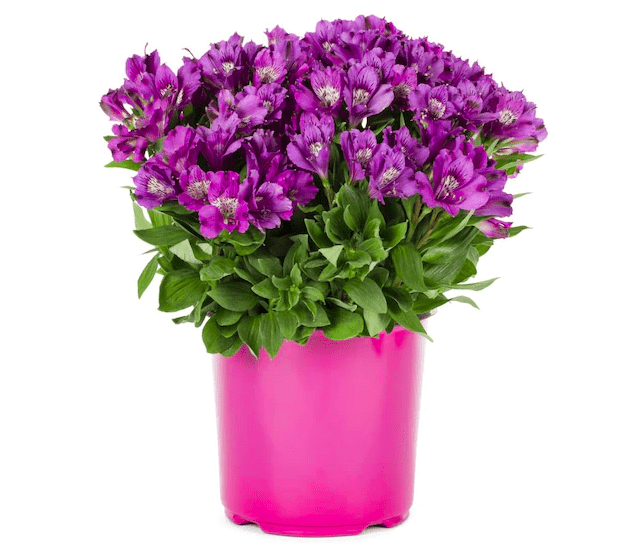
Yes, if your alstroemeria is in a pot or container, they can be moved into a greenhouse or shed that is not heated. If you have a garage, that would work as well, as long as the temperature does not dip below freezing.
While it can be tempting to provide as much warmth as possible, using heaters and such, it is actually best to keep the temperature on the cooler side. This will help to prevent your plant from going into shock and suffering from heat stress.
If your alstroemeria is in the ground, you will need to take extra steps to protect the roots from freezing. This can be done by covering the ground around the plant with a layer of mulch, straw, or leaves. You may also want to provide protection by covering the plant with a tarp or cloth.
Simply applying a foot of mulch around the base of your plant will help to protect the roots and keep them from freezing. You can also use a cover made specifically for plants, such as a frost blanket.
When Should I Overwinter My Alstroemeria?
The best time to overwinter your alstroemeria is in late fall, before the first frost. This will give the plant time to adjust to its new environment and get used to the colder temperatures. So keep an eye on the weather and be ready to take action when the time comes!
A few of my friends have successfully kept their alstroemeria plants outside during mild winters with light frosts. But this is definitely the exception and not the rule. If you are going to take this risk, make sure you have a backup plan in case your plant does not survive.
Will Alstroemeria Flower in the Winter?
Alstroemeria tends to go dormant and will not flower during the winter months. However, moving the plant indoors to a warmer environment can sometimes mean that it will continue to flower throughout the winter.
It also depends on the variety of alstroemeria. Some varieties are more likely to flower in the winter than others. If you are hoping for winter flowers, it is best to choose a variety that is known to bloom during this time.
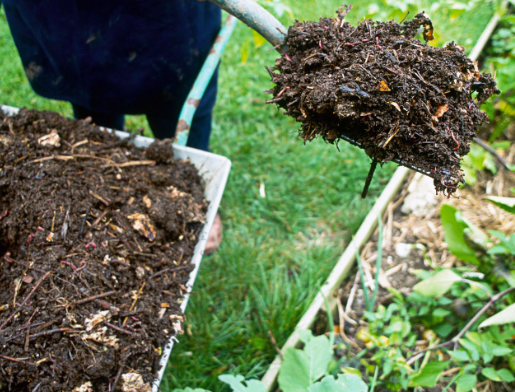
Mulching Will Keep Roots Warm
Should I Prune Overwintered Alstroemeria?
Alstroemeria plants can get leggy in the winter as they die back. This is normal and you should not worry about it. In fact, many gardeners recommend pruning back overwintered alstroemeria in early spring. This will help the plant to produce more flowers later in the season.
Conclusion
In conclusion, overwintering alstroemeria is a great way to keep your plant alive and healthy during the winter months. Just be sure to take the necessary steps to protect your plant from the cold and you should have no problem! Thanks for reading and good luck with overwintering your alstroemeria!
Do you have any tips for caring for alstroemeria during the winter? Share them in the comments below!
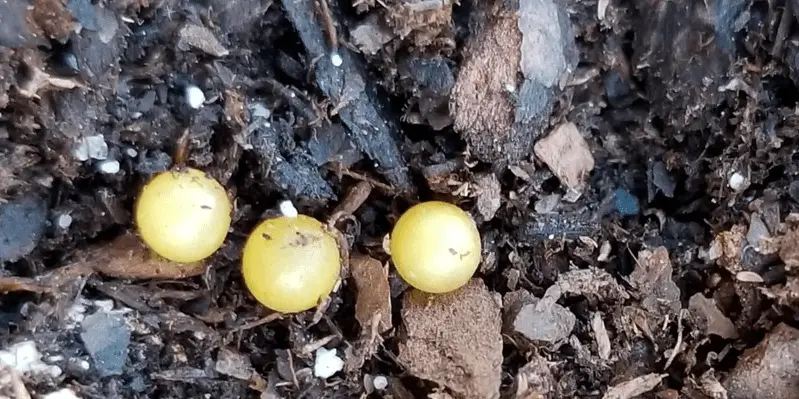
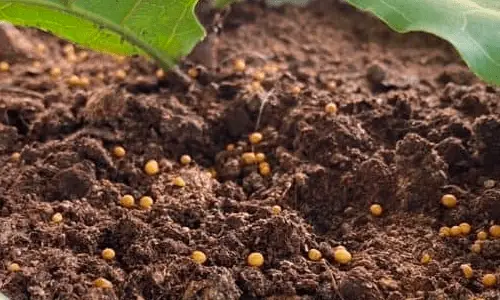
The soil in our potted plants should be a healthy, brown, well-draining, and nutrient-rich environment for our plants. However, what if we find small, yellow balls in our soil? Does this mean that something is wrong?
In this blog post, I let you know what those yellow balls might be, and whether or not they’re a cause for concern. Let’s jump right in!
What Are The Yellow Balls in Soil?
It’s likely that the yellow balls in your soil are Osmocote balls. These are small, round, yellow balls made of a slow-release fertilizer. Osmocote is a brand name, but there are other brands that make similar products.
This type of fertilizer is meant to be mixed into the soil before planting. The balls will slowly break down over time, releasing nutrients into the soil for your plants.
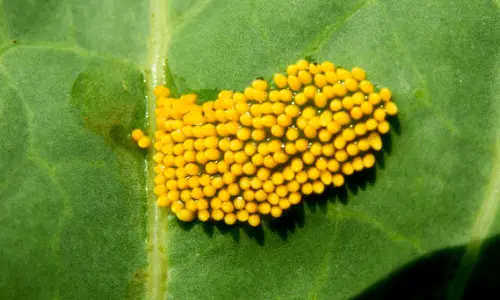
However, if the yellow balls appeared suddenly, or if you didn’t add them to the soil yourself, then they might be eggs from a pest. The most common pest that leaves yellow eggs is the beetle.
So, how do you tell the two apart? Which is an egg and which is Osmocote? Well, eggs tend to be smaller and more uniform in size. Osmocote balls, on the other hand, are larger and have a rougher texture. Plus, eggs will be grouped together in a tight cluster, while Osmocote balls will be more spread out.
Osmocote
How Did The Yellow Balls Get There?
If you didn’t add the fertilizer balls to the soil yourself, then it’s likely that they were mixed in with the potting mix when you bought your plant. This is not uncommon, and there’s no need to worry.
You see, the plants in nurseries sit on the shelf for months, so the staff needs a way to keep them healthy and nourished. They do this by adding slow-release fertilizer to the potting mix before putting the plants on display.
When you buy a potted plant, some of the fertilizer balls will come with it. This is not a problem, and you can simply leave them in the soil. They will eventually break down and release nutrients into the soil for your plant.
If you think the yellow balls might be beetle eggs, then it’s possible that a pest landed on your plant and laid its eggs there. If this is the case, you’ll need to take action to get rid of the pests before they hatch.
What is Osmocote?
Osmocote is a brand of slow-release fertilizer that comes in the form of small, round balls. These balls are meant to be mixed into the soil before planting, and they will slowly break down over time, releasing nutrients into the soil for your plants. Osmocote is a great way to ensure that your plants get the nutrients they need without having to fertilize them every week.
However, some of you may not want to use Osmocote in your soil. If this is the case, you can simply remove the fertilizer balls from the soil and dispose of them. Your plants will still be healthy without them.
I’ve removed them myself before, as I prefer to use natural fertilizers like fish emulsion. This is a fertilizer made from fish waste products, and it’s a great way to add nutrients to your soil without using chemicals.
How to Remove Yellow Eggs from Soil?
If you think the yellow balls in your soil are beetle eggs, then you’ll need to take action to get rid of the pests before they hatch. The best way to do this is to remove the eggs from the soil and dispose of them far away from your plants.
Yellow Eggs
To remove the eggs, simply use a spoon or your fingers to scoop them out of the soil. You can then dispose of them in a plastic bag or container. Make sure to wash your hands afterward, as you don’t want to spread the pests to other areas of your garden.
Once you’ve removed the eggs, it’s important to take steps to prevent the pests from returning. This might include using insecticides or traps. Neem oil is a great natural option that disrupts the lifecycle of any pests that come into contact with it.
Conclusion
So, that’s everything you need to know about yellow balls in soil. If you find them in your garden, don’t panic! They’re most likely Osmocote fertilizer balls that are there to help your plants grow.
However, if you think they might be beetle eggs, then take action to remove them from your soil before the pests hatch. It’s also important to remember that pests are inside eggs, so the way you remove them from your garden is very important. You don’t want to accidentally spread the pests to other areas of your yard. Thanks for reading! I hope this was helpful.
Do you have any questions about yellow balls in soil? Leave a comment below and I’ll do my best to answer them. Happy gardening!
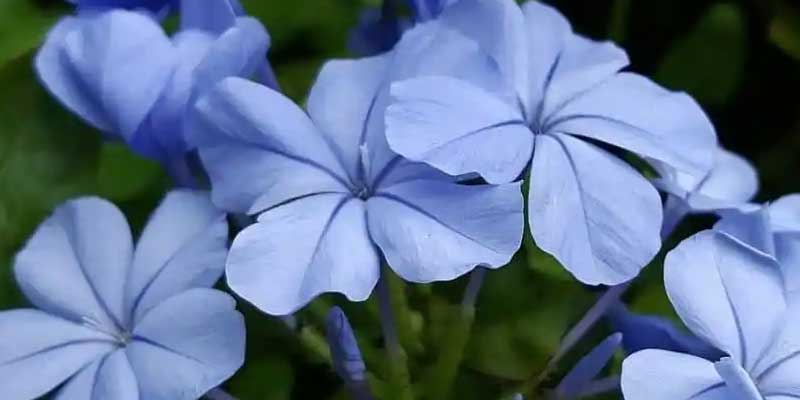
Your plumbago plant is a beautiful addition to your garden, but lately you’ve been noticing that it’s been turning brown. What could be causing this, and more importantly, how can you fix it? In this blog post, we will discuss the possible causes of browning in plumbago plants and provide solutions to help get your plant back on track!
Why Are My Plumbago Leaves Turning Brown?
Brown leaves on plumbago leaves are usually caused by pests, fungal infections, overwatering, nutritional deficiency, and leaf burn. The browning on your plumbago leaves could be caused by any one of these factors, or a combination of them.
The exact solution for your plumbago will depend on the cause of the browning leaves. If pests are to blame, you’ll need to treat your plant with an insecticide. If overwatering is the problem, be sure to let the soil dry out between waterings. And if a nutrient deficiency is causing the leaves to turn brown, fertilize your plant with a balanced fertilizer.
Whatever the cause of your plumbago’s brown leaves, there is likely a solution that can help get your plant back to its beautiful self! I will now go over each possible cause of brown leaves in more detail, as well as the solutions for each.
1. Fungal Infection
If your plumbago leaves are turning brown and mushy, it’s likely that they have a fungal infection. The most common type of fungus that affects plumbago is powdery mildew. This can be treated with a fungicide, but it’s important to catch it early. If the infection has already spread, you may need to remove and destroy infected leaves.
To prevent powdery mildew, be sure to water your plumbago at the base of the plant rather than from above. This will help keep the leaves dry, which will make it harder for the fungus to take hold. You should also avoid crowding your plants, as this can promote fungal growth.
If you do find yourself with a powdery mildew problem, don’t despair! There are plenty of fungicides on the market that can help get your plant back to health.Neem oil (Amazon link) is my personal favorite, as it’s an all-natural solution that is also effective against pests.
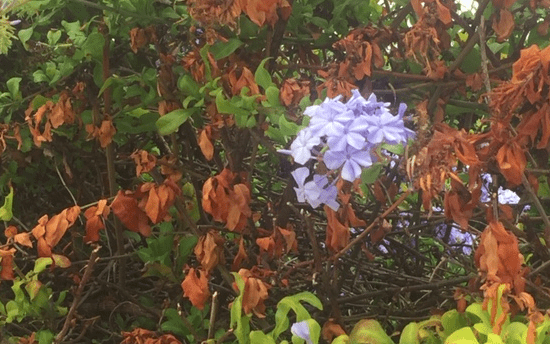
Brown Plumbago
2. Overwatering
Overwatering is one of the most common problems facing houseplants, and plumbago is no exception. If your plant is getting too much water, the leaves will start to turn brown and drop off.
The easiest way to tell if you’re overwatering your plumbago is to check the soil. If it’s constantly wet or mushy, that’s a sign that you’re giving your plant too much water.
First, stop watering it until the soil has a chance to dry out. Then, make sure you’re only watering when the soil is dry to the touch. And finally, be sure to empty any drainage trays so that your plant isn’t sitting in water.
3. Pests
Pests are another common problem that can cause plumbago leaves to turn brown. The most common pests that affect plumbago are aphids, whiteflies, and mealybugs. These pests suck the sap from the leaves, causing them to turn brown and eventually die.
To get rid of pests, you’ll need to treat your plant with an insecticide. I recommend using an all-natural solution like neem oil (Amazon link), as it’s effective and won’t harm your plants.
Once you’ve treated your plant, be sure to keep an eye out for pests and treat them immediately if they return. Prevention is better than cure, after all!
4. Leaf Burn
Leaf burn is a common problem with plumbago, and it’s usually caused by too much sun. If your plant is getting too much direct sunlight, the leaves will start to turn brown and curl up. This is a common occurrence in the spring and summer when the sun is at its strongest.
To prevent leaf burn, be sure to give your plumbago some protection from the sun. You can do this by planting it in a spot that gets partial shade or by covering it with a sheer curtain.
If your plant is already showing signs of leaf burn, it’s important to act fast! Move it to a shadier spot and give it some protection from the sun. The leaves should start to recover within a few days. However, the burnt tips won’t turn green gain.
5. Nutrient Deficiencies
If your plumbago is getting enough water but the leaves are still turning brown, it’s likely that there’s a nutrient deficiency. The most common nutrient deficiencies in plumbago are nitrogen and magnesium. These can be caused by poor soil quality or by using the wrong fertilizer.
To fix a nutrient deficiency, you’ll need to fertilize your plant with a balanced fertilizer. You can also add some compost to the soil to improve its quality. For promoting plumbago blooms, a 10-30-10 fertilizer is recommended by myself and many gardeners.
If you’re not sure what’s causing the nutrient deficiency, it’s best to take a sample of the soil to a gardening center for testing. They’ll be able to give you specific advice on how to fix the problem.
Will Brown Plumbago Leaves Turn Green Again?
No, it is unlikely. Once the leaves have turned brown, they will not turn green again. However, if you take care of the underlying problem, your plant should start to produce new growth that is green.
Should I Prune Brown Plumbago Leaves?
It depends on the cause of the brown plumbago leaves. If the problem is due to fungal diseases, then you may want to prune the affected leaves to prevent the disease from spreading. If the problem is due to pests or nutrient deficiencies, then you should not prune the leaves as this will further stress the plant.
Conclusion
In conclusion, there are several reasons why your plumbago might be turning brown. The most causes are overwatering, pests, leaf burn, and nutrient deficiencies. If you have brown plumbago, tackle the problem as soon as possible to prevent further damage. And remember, once the leaves have turned brown, they are unlikely to turn green again.
I hope this article was helpful in diagnosing the problem with your plumbago. If you have any questions or comments, please leave them below! Happy gardening!
Do you know what the holes in cornflower leaves mean? Many people are curious about this, and rightly so! The holes can be a sign of many different things, depending on the situation.
In this blog post, we will discuss the various meanings behind the holes in cornflower leaves. We will also provide tips on how to deal with any issues that may arise as a result of them. So, if you’re interested in learning more about this topic, keep reading!
Why Are There Holes in Cornflowers?
There are holes in cornflowers for a variety of reasons. The most common reason is that the plant is infested with pests. These pests can include aphids, caterpillars, or other small insects. All of these pests enjoy eating the leaves of cornflower, which causes the holes.
The holes seem to appear from nowhere as small pests are great at hiding in the crevices of the leaves. You may even have to inspect your plant with a magnifying glass to spot the culprits!
Cornflower aphids are tiny, soft-bodied insects that are typically green or yellow in color. They feed on the sap of cornflower plants, which can cause the leaves to become distorted. Aphids also produce a sticky substance called honeydew, which can attract ants and other pests.
How to Remove Pests from Cornflower?
The quicker you can remove pests from cornflower, the better. If left to their own devices, these pests will quickly destroy your plant. There are a few different ways to remove them, depending on the severity of the infestation.
If you have a small number of pests, you can try to remove them by hand. This can be time-consuming, but it is the most gentle method. Alternatively, you can use a pesticide to get rid of them.
My favorite type of pesticide for pests is Neem oil, as it is all-natural and very effective. You can find this oil at most garden stores, or online.
Mix the neem oil with water according to the package directions. Then, using a spray bottle, apply it to the affected areas of your plant. Be sure to cover all areas of the plant, as the pests can hide anywhere.
Repeat this process every few days until the pests are gone. You may also need to treat your plant preventive for a while after the initial infestation.
Cornflower Aphid
How to Keep Pests Away From Cornflower?
Once you have removed the pests from your cornflower, it is important to take preventative measures to ensure they don’t come back. One way to do this is to keep your plant healthy and strong. This will make it less susceptible to pests and diseases.
The next most important thing is to clean up any debris around your plant. This includes leaves, twigs, and anything else that may be lying around. You see, pests use these places as hiding spots. So, by removing them, you make it harder for the pests to find a home on your plant.
Finally, you should quarantine any new plants before adding them to your garden. This will help to ensure that they are not bringing any pests or diseases with them.
What Else Causes Holes in Cornflower?
It isn’t always pests that cause holes in cornflower leaves. Sometimes, the holes can be a sign of other problems…
Fungal Infections
Fungal infections are another common cause of holes in cornflower leaves. These infections often occur when the plant is too wet. The damp conditions provide the perfect environment for fungi to grow. If you suspect your plant has a fungal infection, it is important to take action immediately.
The first step is to remove any affected leaves. This will help to prevent the spread of the infection. Next, you should apply a fungicide to the plant. This will help to kill the fungi and prevent any fungus from coming back.
Physical Damage
Holes in cornflower leaves can also be caused by physical damage. This can happen if the plant is hit by a heavy object, or if it rubs up against something sharp. This usually happens during transit to or from or gardening store. This is why I recommend always inspecting your plant before you buy it!
Animals
Finally, animals can also cause holes in cornflower leaves. Whether it is birds, rabbits, or deer, these animals love to munch on leaves. If you live in an area with a lot of these animals, it is important to take precautions. This can include putting up a fence around your garden or spraying the plants with a repellent.
Should I Prune Cornflower with Holes?
The only time I recommend pruning cornflower with holes is if the plant has a fungal infection that is spreading quickly. In this case, it is important to remove the affected leaves as soon as possible. This will help to prevent the spread of the infection.
If you do decide to prune your cornflower, be sure to sterilize your pruning shears before and after use. Also, discard any leaves far away from your garden to prevent the fungi from spreading.
Conclusion
Holes in cornflower leaves can be caused by a number of different things, including pests, diseases, and physical damage. If you suspect your plant has a problem, it is important to take action immediately. This will help to prevent the problem from getting worse and will ensure that your plant stays healthy and strong.
Thanks for reading! I hope this article was helpful. Do you have any questions or comments? Please feel free to leave them below in the comments.
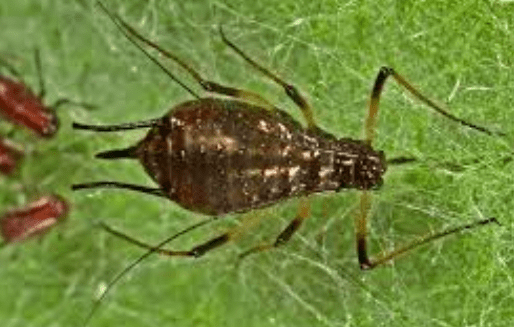
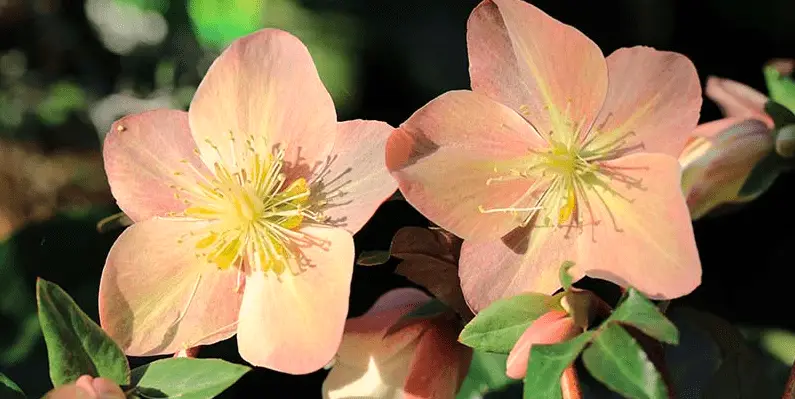
If you have been paying attention to your Hellebore plants, you may have noticed small holes in the leaves and petals. But what is the reason for this? It seems to happen randomly, but I’ve dealt with this enough times to know that there’s usually a cause.
The most common reason for holes in Hellebore leaves is due to insects. Common culprits include aphids, weevils, leaf miners, and even slugs and snails. These pests chew on the leaves, causing the holes you see.
You may not know these pests are present as they are often very small or hidden. To confirm that insects are the cause of the holes, you can check the underside of the leaves for evidence of chewing or look for any crawling pests.
These pests often only come out at night, so it can be tricky to catch them in the act. Wake up early and use a flashlight to inspect your plants – you may just see slugs or other insects crawling around.
How to Remove Pests from Hellebore?
If you do find evidence of pests, you’ll need to take action to get rid of them as soon as possible. The longer they are left, the more damage they will do to your plants.
The larger pests, such as slugs and snails, can be picked off by hand. Simply place them into a bucket of soapy water to kill them. You can also use traps, such as beer traps, to catch and kill them.
For smaller pests, such as aphids and leaf miners, you’ll need to use an insecticide. Neem oil is a natural insecticide that is safe to use around pets and children. You can also use chemical insecticides, but be sure to follow the instructions carefully.
Simply mix the insecticide with water and spray it onto the affected leaves. Be sure to get all areas of the plant, including the underside of the leaves. Repeat this process every few days until the pests are gone.
How to Prevent Pests From Returning To Hellebore?
You may have heard that prevention is the best cure. This is especially true when it comes to pests. Once you have gotten rid of them, you’ll want to take steps to prevent them from returning.
Start by ensuring your plants are healthy. Pests are attracted to weak and sickly plants, so make sure yours are well-cared for. This includes giving them the right amount of water and fertilizer, as well as placing them in an area with good drainage.
You should also regularly inspect your plants for pests. This includes checking the leaves, stems, and flowers for any signs of damage. If you see anything suspicious, take action immediately to prevent an infestation.
Clean up any fallen leaves or petals as these can attract pests. Remove them from the area and dispose of them in the trash away from your plants.
Finally, consider quarantining new plants before adding them to your garden. This is because they may be carrying pests that could infest your other plants. Inspect them carefully and treat them with an insecticide before adding them to your garden.
What Else Causes Holes in Hellebore?
If pests are not the cause of the holes in your hellebore, then it is likely due to one of these:
Fungal Infections
Fungal infections are common in hellebore plants. They often start as small spots on the leaves which can quickly spread and cause the leaves to turn brown and die. Powdery mildew is a common type of fungal infection that affects hellebores.
If you think your plant has a fungal infection, you’ll need to treat it as soon as possible. The longer it is left, the more damage it will do. Fungicides are the most effective way to treat a fungal infection. Simply mix the fungicide with water and spray it onto the affected areas. Be sure to follow the instructions on the package carefully.
You can also take preventative measures to stop your plant from getting a fungal infection in the first place. This includes ensuring the plant has good air circulation, as well as keeping the leaves dry. Avoid overwatering your hellebore as this can make it more susceptible to fungal infections.
Physical Damage
Have you ever accidentally stepped on a plant? Or perhaps your pet has taken a nibble out of one of the leaves? Physical damage can cause holes in hellebore leaves and petals.
The best way to prevent physical damage is to be careful when you’re around your plants. Make sure you don’t step on them, and keep an eye on your pets to make sure they don’t damage them.
Damage also occurs in garden shops when the plants are being shipped. If you buy a plant that has already been damaged, there’s not much you can do to fix it. However, you can prevent this by buying your plants from a reputable source.
Should I Prune Hellebore with Holes?
There’s no need to prune hellebore plants with holes in the leaves or petals. In fact, pruning can cause more damage to the plant, which will make it more susceptible to pests and diseases.
The only time I recommend pruning hellebore plants is when they have a fungal infection that is spreading fast. Removing the affected leaves can help to stop the infection from spreading. However, be sure to disinfect your pruning tools before and after use to prevent the fungus from spreading.
Conclusion
So there you have it, everything you need to know about holes in hellebore leaves and petals. I hope this article has helped you identify the cause of the holes in your plant. Remember, if you’re ever unsure, it’s always best to consult with a professional.