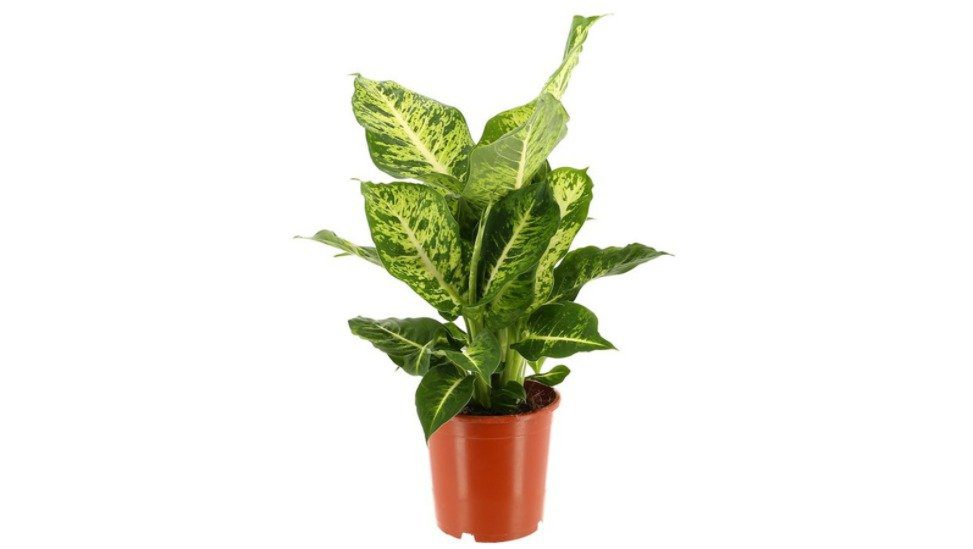
Dieffenbachia plants are one of the most popular houseplants and for good reason. They’re beautiful and easy to grow, but if you notice that your dieffenbachia leaves are curling upon themselves, then it’s time to pay attention.
In this article, you’ll learn more about what causes dieffenbachia leaves to curl and how you can care for your plant properly.
Why Are My Dieffenbachia Leaves Curling?
Your dieffenbachia leaves are curling because they have been watered incorrectly or they’re stressed from extreme temperatures.
Dieffenbachia plants enjoy indirect light, moist soil, and temperatures that are between 65-75 degrees Fahrenheit. Failure to do this will cause the plant to show signs of this stress by curling up its leaves.
You’ll know it’s the right time to water your dieffenbachia when the top inch is dry. You can test this by sticking a finger into the soil. If it’s dry, then you should water your plant until the excess runs out of its drainage holes.
2. Dieffenbachia leaves curling from overwatering
Leaves that are curling outwards are a sign that your plant is receiving too much water. This can happen if you have been underwatering for some time and then decide to give the dieffenbachia way too much water at once.
To save an overwatered dieffenbachia, wait until the soil is dry and then water your plant less frequently. I tend to water once every 10 days during the summer and once every 3 weeks during winter.
Make sure to keep it away from heat sources like radiators, fireplaces, and drying vents. You should also ensure that it gets enough light during the day so that its leaves stay straight.
Remember that your dieffenbachia will need to adjust to a new environment, so keep this in mind as you move it from one location to another.
Dieffenbachia Leaf Curling FAQ
Dieffenbachia plants aren’t common and it is often hard to find information about them. We’ve gathered some of the most frequently asked questions on dieffenbachia leaf curling and answered them here.
Should curled dieffenbachia leaves be pruned?
No, there’s usually no need to prune curled leaves as they can recover if you’ve been watering correctly and following the basic care rules. I usually only prune leaves if they are brown or to encourage new growth.
Are curling dieffenbachia leaves a sign of disease?
Curling dieffenbachia leaves aren’t a sign of disease and it’s usually down to the way that you care for your plant. However, if there is a sudden change in your dieffenbachia leaf curling patterns then this could indicate an underlying problem with the soil or root system.
Is a curling dieffenbachia something to worry about?
No, dieffenbachia leaves curling is not something to worry about and it’s usually just down to how you’re taking care of the plant. However, don’t leave the issue for too long or it may become permanent and affect the health of your plant.
Will dieffenbachia leaves uncurl if they are placed in the sun?
This will depend on why your dieffenbachia leaves are curling. If it is caused by underwatering or low humidity, then placing them in direct sunlight won’t help to straighten their appearance. Lack of sunlight is usually not what causes your dieffenbachia plant to curl its leaves.
Will misting the leaves help them uncurl?
Dieffenbachia plants love humidity, so misting the leaves may help them uncurl. I recommend using a humidifier to keep the humidity levels above 60% in your home. However, this is unlikely to fix the problem in the long term.
Do I need to repot my curled dieffenbachia?
If the leaves are curling because your plant is too small for its pot, then you should definitely repot it. However, I only recommend repotting if you think your plant has root rot or it has grown too big for its pot. Repotting too much can cause more stress to your dieffenbachia.
Conclusion
In conclusion, dieffenbachia leaves tend to curl if you water them incorrectly or expose the leaves to dry heat. If the problem continues, there’s a good chance your plant’s soil or root system is corrupt.
This highlights the importance of following a watering schedule that suits your plant and ensuring that you place it in a suitable outdoor or indoor environment.
I hope that this article has helped you to understand why your dieffenbachia leaves are curling. Follow the tips in this guide to ensure that your dieffenbachia’s leaves remain straight and green.
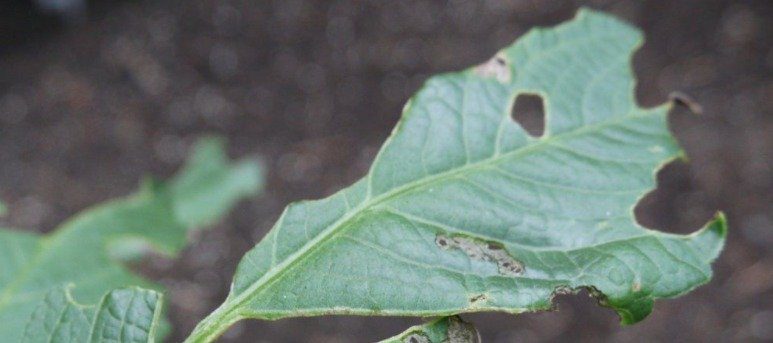
What is happening to my dahlia leaves? Why are there holes in the leaves? If you have noticed little holes in your dahlia plants, then this article will help you figure out what they are and how to treat them.
You should take a close look at your dahlia leaves to see if you can tell what is feeding on them. However, you may need to wait until nighttime…
Slugs are soft-bodied gastropods that glide along and leave slimy trails behind them wherever they go. They come out at night when it’s dark and damp because this is their favorite time to feed.
You need to stop the pests from attacking the leaves on your dahlia! This means using a combination of natural and chemical preventative treatments.
You can keep slugs away by applying a barrier of diatomaceous earth around the base of your dahlia. This powdery material is composed of tiny fossilized aquatic organisms and will dehydrate slugs as they pass over it.
If you don’t want to apply anything so harsh, then use a bed of wood chips to surround your plants. Slugs and snails do not like to cross over wood chips because it is difficult for them, so they will move on!
For capsids and other bugs, you can apply neem oil (Amazon link) to the leaves to keep them away. This oil is derived from neem tree seeds and it will kill off any bugs that come in contact with it!
It’s important that you stop pests from destroying new growth on your dahlia plants so you don’t lose flowers prematurely due to leaf loss Try one of these methods today and help control pest infestations naturally.
FAQ
Will the holes in my dahlia leaves heal themselves?
Are there any beneficial bugs/insects I should keep around?
Some insects love eating pests and will help keep them away, so they are beneficial to have around. Ladybugs are a good example of this!
What should I do if I find holes in my dahlia?
Take care of the problem immediately because left untreated it can cause irreversible damage to your plants. Start by using one or more preventative methods listed above until you see an improvement then maintain these treatments for future seasons as well.
Conclusion
In conclusion, slugs and bugs can eat holes in dahlia leaves if they are around. To prevent this problem, you should use natural barriers like diatomaceous earth or wood chips, as well as neem oil to keep the pests away from your plants.
Now that I know why there are holes in my dahlia leaves, I feel a lot better! It’s always good knowing what is happening to our plants so we can make sure it doesn’t happen again…
What do you think of when you hear the word caladium? If you’re like me, then your mind immediately goes to flowers. After all, what’s better than a lush green plant with vibrant purple and pink blooms?
But sometimes our beloved caladiums can start looking sickly or even dying off altogether. What could be causing this sudden change in appearance? The answer is actually quite simple. With some quick detective work and a little bit of love-you’ll soon have your healthy plants back!
In this blog post, we will discuss why caladium leaves turn yellow and how to fix it so that your plants stay gorgeous year-round!
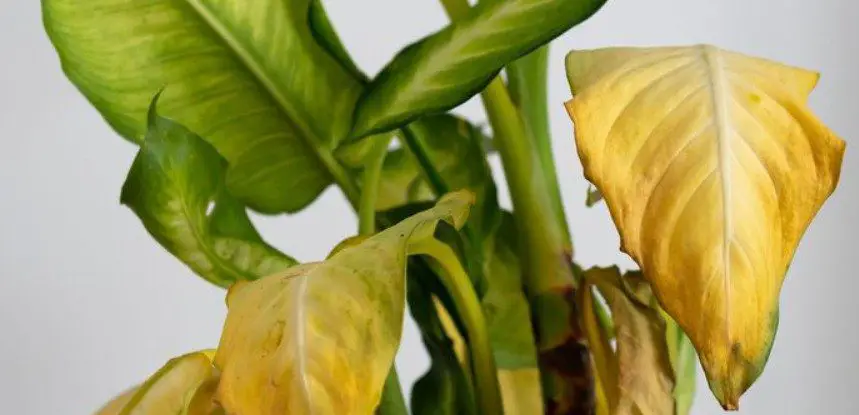
Why Are My Caladium Leaves Turning Yellow?
Caladium leaves turn yellow because of too much water or not enough nutrients. This is because caladium plants need healthy soil that contains a balanced amount of nutrients.
When you overwater your caladium plants, the excess water washes away some of these necessary elements, and the roots can become saturated. Not only is your plant unable to absorb proper nourishment from its surroundings, but the roots will start to root – both of which contribute to yellowing caladium leaves!
Caladium Leaves Turning Yellow from Overwatering
So, if your leaves are turning yellow because you’ve been overwatering the plant, then stop! You do not want to overwater caladiums.
You should water them only when the top of their soil feels dry and remove any excess water that accumulates in the saucer below it. This may be every day or every other day, depending on how hot or cold it is outside and just how thirsty your plants happen to be feeling at the moment!
You can test the soil by sticking your finger in it to see if the top inch is dry. If so, then you can water them. Once they are watered, let their soil fully drain before placing them back into their sunny indoor environment!
Personally, I like using a moisture meter, which gives the best accuracy when it comes to watering caladium plants. Hey, I need all the help I can get…
Caladium Leaves Turning Yellow from Low Nutrients in the Soil
A caladium plant that is in a healthy environment will have leaves that are green and shiny. But, when the soil lacks sufficient nutrients for growth, your plants’ leaves can start to turn yellow from malnutrition.
You see, the plants need these nutrients to grow and to produce chlorophyll, which is a pigment that turns sunlight into sugars for the plant. If there aren’t enough of these building blocks in the soil around your caladiums’ roots, then their leaves will start turning yellow from lack of nourishment!
You can keep this problem at bay by giving them consistent feedings with liquid fertilizer or compost tea once every two weeks during active growth periods (spring/summer). Just make sure you dilute it according to package directions before applying it directly onto the foliage!
Caladium Leaves Turning Yellow from Too Little Sunlight
A caladium plant that is in a dark environment will have leaves that appear pale and dull. This occurs when the plants do not receive enough sunlight for photosynthesis to occur, which means they can’t produce necessary sugars from it!
In order to prevent this type of yellowing, you should move your potted caladiums outside during spring/summer so long as there aren’t any frost warnings coming through.
Then place them in bright but indirect light so that they get some rays without getting burned by the intense afternoon sun.
You can also use LED grow lights to give some artificial light. However, be careful with how much light you are giving. It is best to start with just 1 or 2 hours to give your caladium plant enough time to adjust. This is also a great way to stop caladium drooping.
FAQ
Should I cut yellow leaves off the caladium plant?
Yes, you should cut the yellow leaves off your caladium plant if they are dead. This will allow light to get to the healthy, green foliage below it and help regenerate new growth!
Will slugs cause yellow caladium leaves?
Although slugs love to eat the leaves on your caladium plants, this will cause holes and not yellow leaves. You can use a slug bait or catch them with something like beer traps!
Does a lack of nitrogen cause yellow caladium leaves?
Yes, a lack of nitrogen will cause the leaves on your caladium plant to turn yellow. You can find a fertilizer that has more nitrogen levels or water them with compost tea!
Will too much water cause my caladium leaves to turn yellow?
Yes, too much water can cause yellow leaves on your caladium plant. You should only water enough to keep the soil moist and remove any excess that accumulates in the saucer beneath it!
Where can I buy caladium plants?
You can buy caladium plants online or at your local garden center!
Will yellow caladium leaves turn green again?
No, the yellow caladium leaves will not return to their original color. You should remove them from your plant, and then place them in a sunny location to regenerate healthy, green foliage!
Conclusion
In conclusion, yellow caladium leaves can be a sign of too much or not enough sunlight, moisture, and nutrients. But don’t worry – your yellowing plant will bounce back if you take the steps talked about above.
I hope you have enjoyed reading this blog post! Feel free to read my other articles on caladium plants, such as how to make caladiums grow faster, by using the search bar at the top of this page.
Alocasia plants are one of the most popular indoor plants for the house and office. They come in a wide variety of sizes and colors, but many people don’t know that alocasia leaves can turn yellow.
If you want to keep your plant healthy, it’s important to learn how to care for an alocasia plant with yellow leaves. We’ll go over some common causes and solutions below!
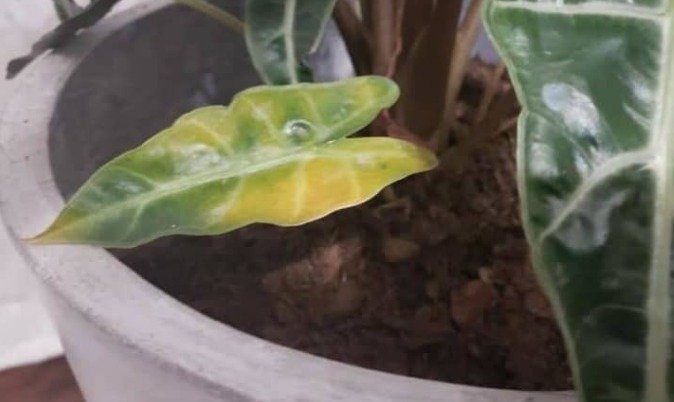
Why Are My Alocasia Polly Leaves Turning Yellow?
Your alocasia polly leaves are turning yellow because the plant has been given too much water, not enough sun, or it is experiencing environmental stress.
Let’s explore the most common causes of yellowing leaves on an alocasia polly and what you can do about them.
Alocasia Polly Turning Yellow from Overwatering
One of the most common causes of yellowing alocasia polly leaves is overwatering. Alocasia polly leaves turning yellow from overwatering is usually a sign that the plant roots have been sitting in too much water for an extended period of time. This can even cause root rot and kill your alocasia polly!
If you see signs of overwatering, such as yellowing leaves or mushy black spots on the soil surface, it’s important to correct this problem right away before it kills your plant. The best way to do this is by letting the soil dry out completely before watering again.
Moving forward, make sure to only water your alocasia polly when the soil is dry and never let it sit in a saucer full of excess water. You can test the soil by sticking your finger in the top inch of soil to see if it is dry or still moist.
Alternatively, you can use a moisture meter, which allows for the most accurate measurement possible.
Alocasia Polly Turning Yellow from Too Little Sunlight
For best results, place your potted alocasia polly near a window where it can receive at least four hours of indirect sunlight each day.
Keep in mind that while most varieties prefer bright light, some types only grow well with medium or low lighting conditions — so be sure to do your research before you buy!
You can even use grow lights to extend the amount of time your alocasia polly can bask under some light. I use them in the winter for nearly all of my plants.
Alocasia Polly Turning Yellow from Stress
If your alocasia polly is wilting or turning yellow despite the fact that you are giving it enough water and sunlight, this could be caused by environmental stress. Environmental stress can come in many forms, such as temperature changes or exposure to cold drafts.
It’s also advisable to not re-pot your alocasia polly unless absolutely necessary as this can cause a lot of stress for the plant – wait until it shows signs of needing a bigger pot!
Alocasia Polly Leaves FAQs
These plants aren’t the easiest to take care of. As such, I will now answer some of the most frequently asked questions about their leaves.
Should I cut yellow leaves off the alocasia polly?
Yes, you can cut yellow leaves off the alocasia polly, but you should only do so if they are dead or dying. If a leaf is still green and healthy-looking, then it would be best to leave it alone until it starts dying.
When cutting any part of this plant, make sure that you sterilize your scissors with alcohol before using them on another area! Otherwise, you could risk spreading fungal diseases, which will quickly take over your entire plant.
Is it normal for my alocasia polly to lose some of its lower leaves?
Will too much water cause my alocasia polly leaves to turn yellow?
Yes, overwatering is another common cause of yellowing alocasia polly leaves. If you notice that the soil has become soggy or waterlogged, then it’s likely that your plant has been sitting in an excess of moisture for too long.
Will yellow alocasia polly leaves turn green again?
No, once a leaf turns yellow, it can’t turn green again. Instead, you should focus on finding out what caused the leaves to turn yellow in the first place so that you can correct this issue as soon as possible!
Conclusion
In conclusion, alocasia polly leaves turn yellow for a variety of reasons. If your alocasia polly is suffering from overwatering, too little sunlight or environmental stress and its leaves are turning yellow, you can fix this by allowing the soil to dry out completely between waterings and giving it more light if needed.
In addition, re-potting should only be done when necessary as it may cause even more stress on the plant! In some cases, no matter how much care you give an alocasia polly with yellowing leaves there will always be parts that won’t recover.
I hope this article was helpful! If you enjoyed it, please read my other articles and stay tuned for updates from alocasia polly!
Alocasia plants are used in many gardens because of their attractive foliage and interesting shape. However, sometimes the leaves can curl for a few different reasons. This blog post will cover the top reasons for leaf curl and what you can do to help.
They can be grown indoors or outdoors depending on your climate zone, but they need plenty of sunlight and water to thrive. If you’re wondering why your alocasia leaves look curled and dry, then continue reading…
It’s important to only water when the top inch of the soil is dry, provide a consistent temperature, and minimize dry heat/cold drafts.
The causes for alocasia leaf curling are plenty, so you should always check for the top reasons before you give up on your plants. I’ll go through each of these potential reasons and what you may do about them.
How Do I Stop My Alocasia Curling?
You can stop your alocasia leaves from curling by finding the cause and correcting it. Here’s how to do that:
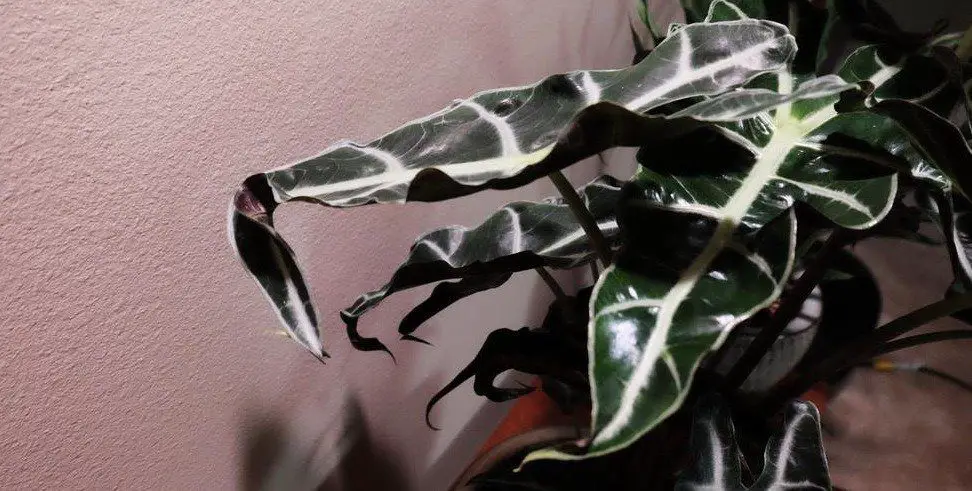
1. Alocasia leaves curling from underwatering
The most common reason for curling is underwatering. Alocasia plants do not like to dry out, so it can be a sign that the soil needs more water when you see your alocasia leaves curling.
Leaves that need more water tend to curl inwards in an attempt to retain more moisture. They don’t want any moisture to escape. This usually happens during summer when the weather is hot and dry.
Water your plant thoroughly until water drains from the bottom of the pot, and then wait for your plant to dry out before watering again. This will prevent your alocasia leaves from drying out and curling to retain water.
2. Alocasialeaves curling from overwatering
If you are overwatering your alocasia plant, it could be causing the leaves to curl. Alocasias generally prefer soil that is moist but not waterlogged.
As such, it’s likely that they’re getting too much moisture if your plants are being more than once per week.
It’s recommended to only water your alocasia when the soil has dried out. You can wait until the top half to one inch of the potting mix is dry before watering again.
While lead curling is annoying, overwatering can cause much more serious consequences to your plant. In fact, overwatering is the number one reason why alocasia plants die.
3. Alocasia leaves curling from temperature stress
Another reason alocasia leaves curl is due to temperature stress. This can be caused by cold drafts, hot temperatures, or even drastic temperature changes.
Try to keep your alocasia plant away from any drafty areas and at a consistent temperature throughout the day/night (between 70-80 degrees Fahrenheit).
Heat stress is a common cause of curling or brown leaf tips. In fact, this happens to my plants in the summer if I leave them next to an open window where they receive direct sun. Don’t worry, I have since learned my lessons and only put my alocasia plants in indirect sunlight.
You don’t want to put your alocasia outside when it’s wintertime. If you do have to, make sure you move the plant back inside before temperatures drop below 50 degrees Fahrenheit, as this is another reason for leaf curling.
Alocasia Leaf Curling FAQ
Alocasia plants can be confusing at the best of times, so I will now answer some questions about alocasia leaf curling.
Should curled alocasia leaves be pruned?
No, there’s no need to prune curled alocasia leaves. They’ll return to their normal shape on their own. I only prune leaves if they are brown and dying, as these leaves are no longer functional.
Will curled alocasia leaves uncurl?
Yes, curled alocasia leaves will uncurl if you give them the correct amount of water and prevent any temperature fluctuations. The leaves will curl up again if the conditions that caused the problem return, though.
Are curling alocasia leaves a sign of disease?
Curling alocasia leaves are not a sign of disease. The leaves will curl up naturally as the plant grows, but if they don’t uncurl after it’s done growing then you know there’s an underlying reason that needs to be addressed.
Should I repot a curling alocasia?
There’s no need to repot a curling alocasia plant. If you have been repotting your plants every spring, then it’s time to stop as this will only stress the plant out and cause more problems in the long run.
I recommend only repotting if you suspect the plant has root rot or if the plant has grown too put for the current pot.
Is a curling alocasia something to worry about?
Curling alocasia leaves are usually not something to worry about. However, you should find out what is causing the issue so that it doesn’t spread to other parts of the plant. When left untreated for too long, the underlying cause of leaf curling can cause more serious problems, like root rot.
Conclusion
In conclusion, alocasia leaves sometimes curl up because of the environment they’re in. The amount of water and sunlight your plants receive can also cause them to curl their alocasia leaves, so that is something you should take into consideration as well.
It’s important to follow all of the advice above to ensure that your alocasia leaves stay healthy. If you follow this advice, then it will be much easier for you to grow and care for your plant in the future.