Humidity trays have been marketed as an innovative way to maintain a consistent level of humidity in your home, but do they really work? In this blog post, we will examine the benefits and drawbacks of using these products.
Do Humidity Trays Really Work?
Yes, humidity trays work to provide a more consistent level of humidity in your home. Using humidity trays is a great way to keep your plants happy and healthy. However, the amount of moisture they provide is less than you may expect.
Humidity trays work by using passive evaporation which means no electricity is required. This makes it possible for these products to produce up to one cup of moisture per day depending on how dry the air is outside.
Humidity trays are a great option for people who live in areas with normal humidity levels and do not want to spend too much money maintaining their indoor plants. They can also be used as an effective humidifier in the room where they are placed, but you shouldn’t expect them to add more than one or two percent of humidity per day.
The best way to use these products is by placing them in the room where your plants are located. You should also make sure that they sit on top of a tray or dish in order to protect surfaces from water damage and spills.
The trays can be placed inside decorative planters, but you will need to refill them every few days if you want them to provide humidity for your plants.
You should note that some homeowners who live in very dry climates prefer using powerful humidifier machines because they provide better protection against low-humidity air. These machines also ensure that moisture does not collect on your furniture and walls.
FAQ
When is the best time to use a humidity tray?
Humidity trays are best used in homes with dry air. The humidity tray will provide a small amount of moisture to your plants, which can help keep them happy and healthy during the dry winter months when central heating is running constantly.
Is a humidity tray safe for my pets?
Humidity trays are perfectly safe to use with your pets in the home. They will not cause any damage or harm to you, your family, or your plants. However, if you have an aquarium that houses fish and other living creatures it is important to ensure that no water spills into their environment as this could be fatal for them.
Is there anything I should do before using my humidity tray?
It’s important that you clean out any old water from the tray before adding new water every day. This helps avoid bacteria growing inside it and making your plants sick!
Do I have to use a humidity tray if I live in a humid climate?
Humidity trays are most helpful in dry climates where central heating is used. When the air inside your home becomes too dry, using a humidity tray can help to keep your plants happy and healthy!
How often should I fill my humidity tray?
Most models recommend that you refill your tray with water daily or every other day. This amount of moisture will last for about 24 hours depending on how much heat runs throughout the house (or if there’s no heat running at all).
Can I use more than one humidity tray in my garden?
It’s best practice not to over-humidify an area because it could make certain types of mold grow faster than others. If you have different types of flower pots throughout your home, we recommend only using one tray per room to avoid problems.
Do humidity trays come in different sizes?
Yes, there are many different types of humidity trays available on the market today. Some models hold more water than others and some can be expanded to accommodate larger plants. It’s important that you choose a tray that will fit your plant pot correctly!
Do humidity trays need to be cleaned out after every use?
Yes, it’s important that you clean out any old water from the tray before adding new water every day. This helps avoid bacteria growing inside your humidity tray and making your plants sick!
What happens if I don’t use a humidity tray?
If you choose not to purchase or use a humidity tray in your home, there are many other methods you can use to maintain a consistent level of moisture in your home. You can choose from different types of humidifiers or even make homemade solutions such as water and rubbing alcohol!
What is the best way to keep my humidity tray clean?
It’s important that you clean out any old water from the tray before adding new water every day. This helps avoid bacteria growing inside it and making your plants sick! Consider using something like vinegar, lemon juice, or hydrogen peroxide mixed with baking soda to help disinfect your tray between uses.
Can humidity trays help plants grow?
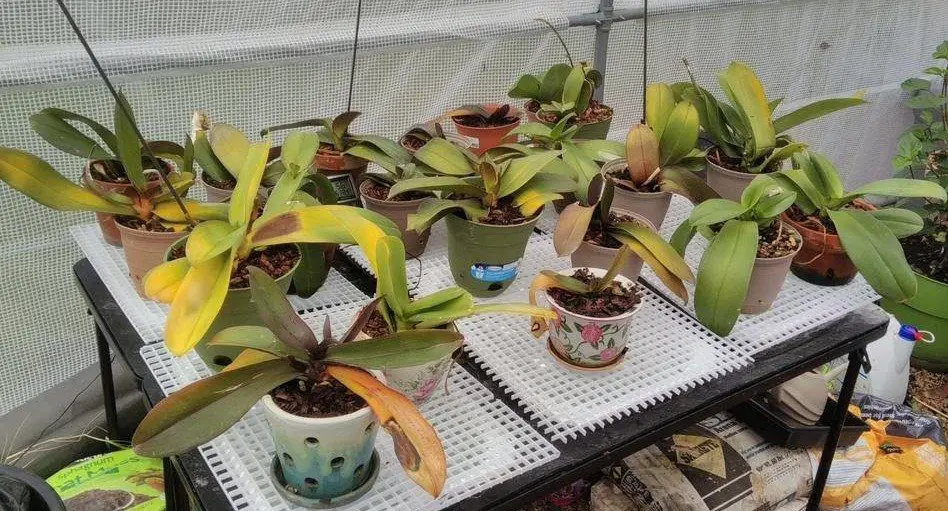
Humidity trays can help your plants grow by providing a consistent level of moisture in the air around them. It will be especially useful for moisture-loving plants, like orchids.
Are humidity trays better than humidifiers?
No, humidifiers are a better option for humid climates. They will spray mist into the air to ensure that moisture levels are maintained throughout your home. Humidifiers also have a number of functions, such as adjusting the humidity level and auto turn off.
Do humidity trays work for all houseplants?
No, not necessarily – some types of houseplants have specific needs that may require a different solution or approach to maintain their health at home. For example, cacti prefer low levels of humidity.
Conclusion
In conclusion, humidity trays are a great way to keep your plants happy and healthy. However, they will not provide the exact amount of moisture you might expect.
You can raise humidity levels by using a humidifier machine that adds moisture to your entire home. I use one during winter when the air is hot and dry inside my home.
If you are going to use a humidity tray, then it’s important to clean out the tray before adding new water every day so bacteria does not grow inside it and make your plants sick!
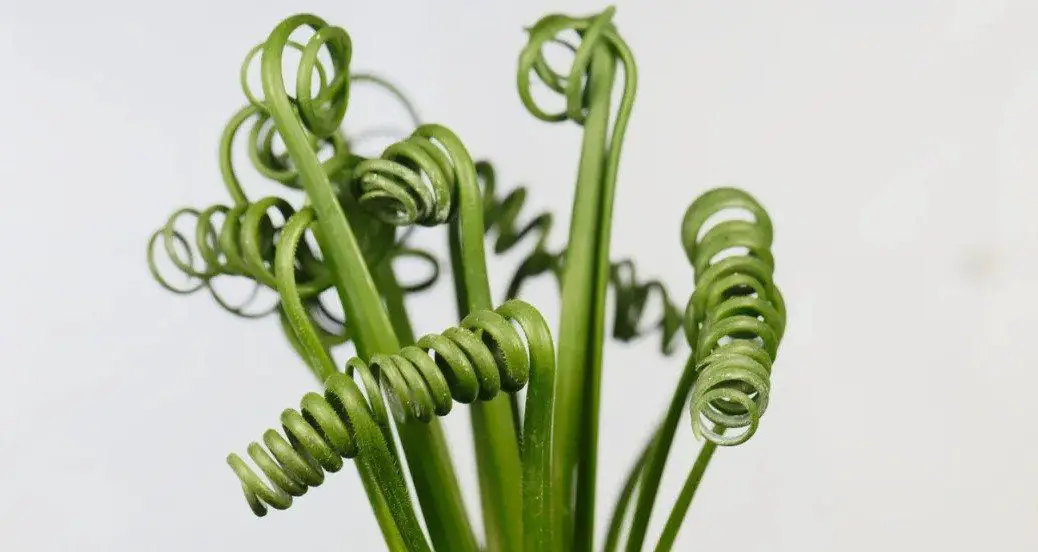
Curl up and get cozy, because the frizzy sizzle plant is not curling. Frizzle sizzle plants are known for their curly leaves, but this particular one doesn’t seem to be getting the hang of it!
The good news is that there are a few things you can do to help your frizzle sizzle plant curl…
Why Is My Frizzle Sizzle Not Curling?
Your frizzle sizzle plant is not curling because it has been allowed to flower, it has been given too much water, or it hasn’t received enough light.
Unfortunately, this is something that happens on a regular basis to nearly all frizzle sizzle plant owners. As you gain more experience, you will be able to prevent your frizzle sizzle plant from curling.
Interestingly, the flower is dormant during the summer months. The leaves will still be there, but the plant doesn’t bloom when it’s hot. Instead, the sizzle frizzle waits until the winter before growing once again.
I will now go over what you can do to stop this event from happening in the future, along with how you can help your current frizzle sizzle.
How To Stop Frizzle Sizzle from Uncurling?
First, check if your plant has been allowed to flower. If so – prune back some of those blossoms and see if that helps with leaf growth and curling.
Second, make sure you’re giving the correct amount of water (but don’t overwater). Overwatering can lead to the plant wilting and uncurling. As such, only water when the top few inches of the soil is dry to the touch.
In fact, I like to use a cactus soil mix with my sizzle frizzle plants. It’s a great way to ensure that the frizzle sizzle plants receive just enough water, and it will help with drainage too.
Finally, your plant may not be receiving enough light. If you notice this is the case – move the pot to a well-lit area of your home or office so that sunlight can fall directly on it for the most part of the day.
These three tips should help you get started when dealing with an uncurling frizzle sizzle plant. Once mastered, these steps are easy to follow even for first-time owners!
FAQ
Will the frizzles sizzle curling stop if the plant is allowed to flower?
Yes, stopping the blossoms may help with curling.
Do I need to give my frizzle sizzle plant more water?
No, but don’t overwater it either (and make sure you’re giving enough).
Does increasing humidity around my frizzle sizzle help them curl up?
It can, especially if your plant isn’t receiving enough water or humidity.
How do I make sure my frizzle sizzle plant gets enough light?
Move it closer to more light or into sunnier spots. If you can’t do this, then think about getting an LED grow light that will help your plant grow strong.
Conclusion
In conclusion, it’s important that you take the time to find out why your frizzle sizzle plant is not curling because it will help with future plants and care.
You can usually fix the issue by pruning back any flowers, making sure to water the plant regularly, and move it into a sunnier spot. If things are even worse, then you may want to read my post on why frizzle sizzle is dying.
I hope this article helped you understand a bit more about why your frizzle sizzle is not curling and how to fix it! Make sure to leave comments if you have any questions or feedback!
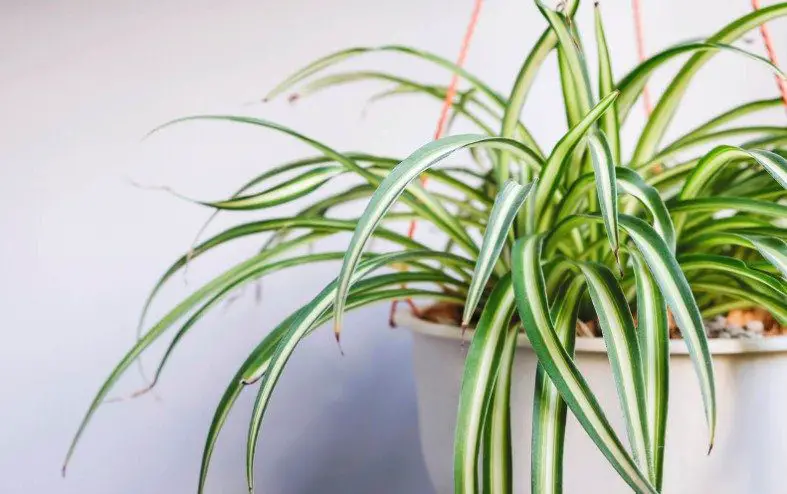
Spider plants have been popular houseplants for many years, so it’s no surprise that other plants have developed leaves that mimic the spider plant. This blog post lists some of these plants and their names so you can find where to buy them!
So, those are the top 5 plants that look the most like spider plants. All of them are make fantastic houseplants, so keep reading to find out what one suits you the best…
Carex – Japanese Sedge Plant
This plant is a perennial grass-like plant that is native to Japan. It has long, arching leaves and can grow up to 36 inches tall!
You can use this plant in the garden as it loves moist soil and has excellent water retention abilities. It also grows well around ponds or other bodies of standing freshwater, making it great for landscaping purposes!
Dracaena Plants
This is one of the most popular houseplants in the world. In fact, I have two myself! It has long, glossy leaves that almost look like blades of grass.
The Dracaena plant is great for removing toxins in the air and is a popular plant to have in hospitals or doctor’s offices! It is also easy to care for and can live in low light, making it perfect for even the most forgetful plant owners.
Pandanus Plant
This is my personal favorite, as they make beautiful hanging plants! The Pandanus is native to southeast Asia but also grows on some Pacific islands like Guam or Tahiti.
It has long left with sharp points that are often used by South Pacific cultures when weaving baskets. This makes them hard to propagate so finding one might be difficult if you do not have a greenhouse nearby…
Ophiopogon – White Lily Turf
Another perennial grass-like plant! Ophiopogon makes its home alongside ponds or river banks in Japan and China where it forms dense clumps of foliage under water growing over the river bank.
It has long, narrow leaves that look like blades of grass and is one of my favorite plants as it can be used in a number of different ways to give your garden an artistic feel. It also looks beautiful alongside water or formal gardens!
Stenotaphrum Secundatum
Last but not least we have Steno which comes from South Africa and Australia and forms clumps up to four feet tall with dark green foliage (perfect for adding height).
This plant is great for landscaping as it is very drought-resistant and thrives in poor soil. This makes it perfect to use along entryways or pot-bound plants!
Conclusion
In conclusion, there are many plants that look like spider plants, but these are some of the most popular. They make great houseplants for beginner gardeners as they require little care to grow and thrive!
I hope you have enjoyed this article. I have written many posts on spider plants, so be sure to check them out by using the search function 🙂
Calathea and prayer plants are two of the most popular houseplants in the world. But some people wonder, “are calathea and prayer plants the same?” In this blog post, we will answer that question for you as well as give you some tips on how to care for these plants.
Is a Calathea the Same as a Prayer Plant?
No, prayer plants are marantas, not calatheas. Prayer plants perform nyctinasty (leaves close at night), which calatheas do not do. This is the main way to distinguish these two plants.
They are also both members of the Marantaceae family! Although are different genus and species, they are still closely related and make great companions in the home.
If you’re having trouble distinguishing between a calathea and a prayer plant, just remember that nyctinasty (closing at night) is the key difference! Both plants are beautiful and easy to care for, so you can’t go wrong with either one.
Prayer plants are native to tropical rainforests and swamps in South America. However, you can grow them indoors with ease! Prayer plants make beautiful houseplants because of their bright green leaves and easy care requirements.
There are more than 40 different species of maranta plant, although only a few of them will be found at your local garden center. The three most common types are the red, green, and black prayer plants.
Maranta and Calathea Similarities
As they are both from the family Marantaceae, there are some similarities between calatheas and prayer plants. Both like high humidity, bright light (but not direct sun), and moist but not wet soil. They also both grow well in tropical environments, making them a perfect choice for indoor gardening.
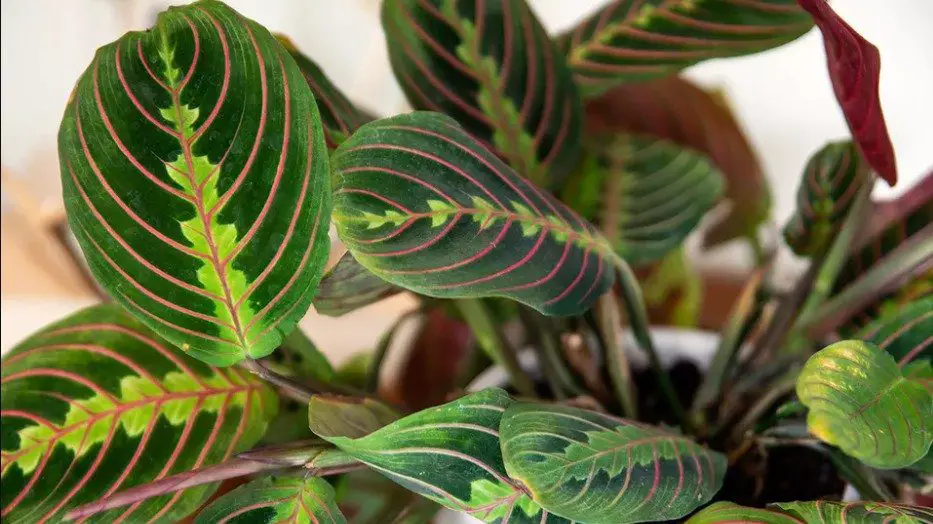
In regards to the appearance of the plants, they are also similar. Both calathea and maranta have beautiful leaves with a similar pattern. This pattern tends to look like small stripes that are dark green in color.
In fact, this is why many people think they are the same plant! They see the unique leaf pattern and automatically assume both plants are one and the same.
Maranta and Calathea Differences
Captive calatheas tend to be more colorful and diverse than Marantas. Their colors can vary from bright shades to dark hues, making them stand out in your garden or landscape even when they’re not growing alone!
In addition, calatheas tend to grow bushier and taller than prayer plants, making them a better choice for outdoor gardens. Prayer plants typically grow more slowly and stay smaller when compared to other types of indoor houseplants.
Maranta make great hanging plants because of their cascading leaves. Calatheas, on the other hand, make more compact and bushy specimens that are perfect for planting in a pot or garden bed.
Care for Calathea and Maranta
The good news is that calatheas and marantas are some of the easiest houseplants to care for. They both like high humidity, bright light (but not direct sun), and moist but not wet soil.
– Both plants prefer tropical environments, so try to keep them in a room that is consistently warm or has a humidifier running nearby
– Give your plant plenty of bright light, but make sure it’s not in direct sunlight. A sunny windowsill is perfect!
– Keep the soil moist, but don’t let it get too wet or waterlogged. You can tell if the plant needs watering by feeling the soil – if it feels dry to the touch, then it’s time for a drink
– Fertilize your plant every few months with a balanced houseplant fertilizer
– Both plants can be susceptible to mealybugs and spider mites, so keep an eye out for any signs of pests and treat them accordingly
Conclusion
In conclusion, calatheas and prayer plants are two different types of plants. However, they both come from the same family (Marantaceae) and share some common care requirements. If you are looking for an easy-to-care-for houseplant with beautiful leaves, either a calathea or prayer plant may be a good choice for you!
Which plants do you prefer? Personally, I like the calathea because there are so many varieties that you can own. In fact, I’m writing this just 1ft away from a calathea leopardina.
Thank you for reading my blog post on calatheas and prayer plants. I hope you found this information helpful! I’ve also written many posts about the wonderful calathea, so please do check them out.
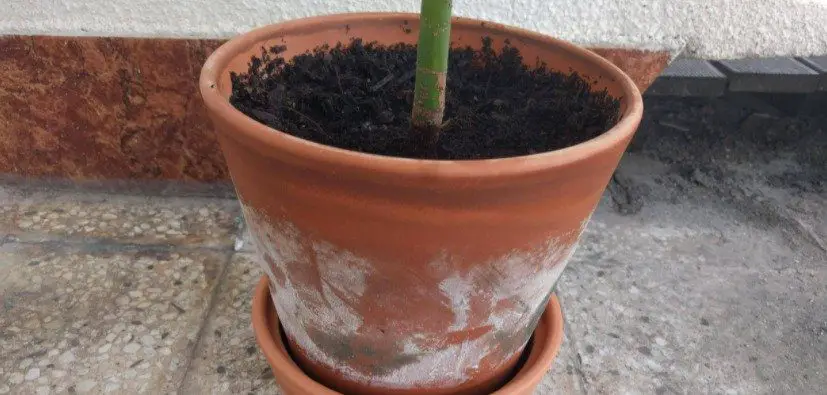
Mold can have a devastating effect on your terracotta pots. It will quickly degrade the surface and destroy the pot’s value. Mold can also lead to health problems, so it is important to remove mold from terracotta pots as soon as possible.
This blog post will teach you how to remove mold from terracotta pots with simple ingredients that are readily available in your home!
How to Remove Mold From Terracotta Pots?
You can remove mold from terracotta pots by using bleach or hydrogen peroxide. Both methods will kill the mold and remove it from your pot. I will now go through each method in more detail.
How to Remove Mold From Terracotta Pots With Bleach?
Mix two tablespoons of bleach with one gallon of water. Put the solution into a large spray bottle and thoroughly cover the moldy terracotta pot in it. Leave the mixture on for about 15 minutes to ensure that all of the molds are killed off.
It’s important to remove your plant before applying the bleach as the bleach will also damage the plant. Keep your plant in a temporary pot until the pot has been cleaned.
Scrub away any residue using an old toothbrush or scouring pad, but be gentle so you do not damage your pot further! Rinse well with clean water and allow your pot to dry completely before putting it back outside.
How to Remove Mold From Terracotta Pots With Hydrogen Peroxide?
Put three percent hydrogen peroxide (available at most stores) into a bowl filled with warm water until it covers half of your moldy terracotta pot’s surface. Leave the mixture on for about 15 minutes to ensure that all of the molds is killed off!
Then remove the pot and scrub away any residue using an old toothbrush or scouring pad. Rinse well with clean water and allow your pot to dry completely before putting it back outside!
Both methods will prevent mold from returning and will restore the look of your terracotta pots! With both methods, you should wear gloves because they can irritate your skin.
FAQ
Why do I have mold on my terracotta pots?
Mold can form on terracotta pots because they are porous. If you purchase a used pot without knowing that it has mold, you could be exposing your family to harmful chemicals.
How do I prevent mold from growing on my terracotta pots?
You should wash and dry your new or old terracotta before placing them outside! You should also avoid over-watering so the soil doesn’t stay too wet for long periods of time.
If mold does appear, use either bleach or hydrogen peroxide as described above to remove it! These methods will kill any existing molds while removing all traces of their presence from the surface of your terra cotta pots at home!
Can I leave the mold on my terracotta pots?
You can leave the mold on your terracotta pots for a little while, but it is not recommended. You should remove all traces of molds from terracotta pots to avoid health problems and discoloration.
Mold can have a devastating effect on your terracotta pots by degrading their surface value! It will also lead to health issues if left untreated in high quantities!
How long does it take for my terracotta pot to dry?
In conclusion, removing mold from terracotta pots is easy with either bleach or hydrogen peroxide. Both methods will kill the mold and remove it from your pot!
I hope that this blog post helped you understand how to clean your terra cotta pot and prevent the future growth of molds. If you have any questions, leave them in the comments below. Thanks for reading!