by Gardener Tim | Nov 22, 2021 | House Plants, How To's, Plant Care
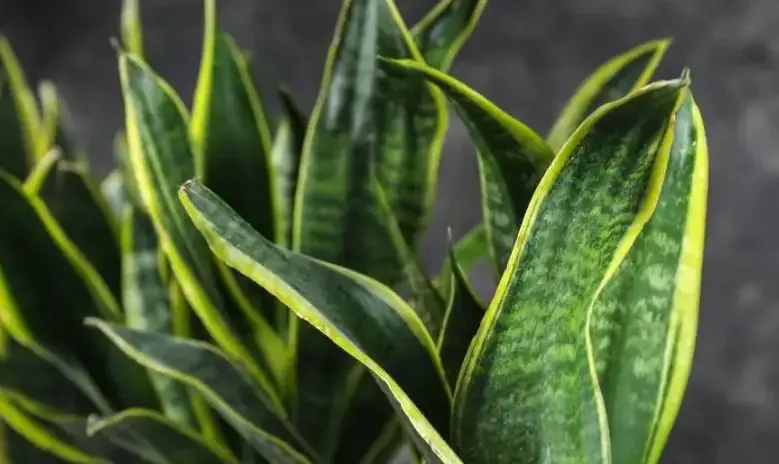
There are many reasons to divide snake plants. Perhaps you want more of them for your house, or maybe you’re looking for an easy way to share love with friends and family. Whatever the reason, it’s not too hard! Here is a simple guide on how to divide snake plants…
How to Divide a Snake Plant?
Here is a step by step process to divide snake plants:
1. Prepare your snake plant
Division can be a stressful process, so make sure your snake plant has been well looked after in the weeks leading up to the division. You should also make sure to give plenty of water to your snake plant to keep the root ball moist and easier to divide.
2. Remove the snake plant from the pot
You should be able to gently pull the plant from its pot. If your snake plant is very root bound and won’t come out of the pot, you may need to cut around the base of the root ball first before trying again.
3. Prune any brown roots or stems
It’s a good idea to prune any brown roots or stems before dividing a snake plant. These parts are rotten, so make sure to cut them off before they spread.
Root rot is a serious issue, so if you notice brown roots or stems, be sure to cut them off right away. Throw these rotten pieces away from all plants to avoid any fungal issues.
4. Separate the root ball
Once you have successfully removed the snake plant from its pot, it’s time to separate the root ball into smaller chunks. You can simply use your hands for this process, although you may need a small shovel or trowel if there are any really stubborn roots tangled together.
5. Pop the divisions into new pots
You can simply use your hands to place the divisions into new pots. Make sure you only put one division in each pot and make sure not to overcrowd them!
From there, you should water your snake plant divisions and keep them in a well-lit area until they’ve started growing again. Remember to give it plenty of water while the roots are recovering!
Snake Plant Division FAQ
It’s not always the simplest thing to split a snake plant. As a result, there are certain concerns about the procedure that individuals might have.
How often should I divide my snake plant?
Snake plants should be divided when they become too big or crowded for your house. However, be careful not to divide your snake plant too often as it can stress the plant out.
How big should snake divisions be?
The divisions of your snake plant don’t need to be huge, but they do need to have all their roots and stems intact. Only you can decide how big the divisions should be for your home.
How to know when to divide my snake plant?
The telltale signs that your snake plant needs to be divided include when it becomes crowded, the plant has lost its luster, or if the plant is wilting. If all of these signs are present in your snake plant then you should divide them immediately.
When can I split my snake plant?
The best time to divide snake plants is during the late spring or early summer. You can split them at any time, but it is best to do so while your snake plant has the most energy.
Is it easy to split a snake plant?
Yes, it is very easy to split a snake plant. There are no special tricks or tools required for this process, just your hands and some plastic pots! Follow the tips in this guide to get the best results.
How big do snake plants grow after division?
After dividing a snake plant, it will grow much larger. The new crowns are able to get more nutrients and water, allowing them to expand quickly. Divide your snake plant for this reason alone!
Where to put the new snake plants after division?
After you divide your snake plant, they can go to any sunny spot around your home. The plant will be sensitive after being divided, so be careful not to put them in direct sunlight or wind.
What are the benefits of dividing a snake plant?
The benefits of dividing a snake plant are numerous, but the biggest one is that you get more plants! These plants can be given to other loved ones or kept for yourself, but you’ll have more of them either way.
It makes it easier to manage your snake plant if it has grown to be too big for your house. Snake plant division is also a great way to help your snake plants flourish even more.
Conclusion
In conclusion, dividing snake plants is essential to the health of your plant. With this easy process, you can enjoy more snake plants around your home and give them away.
I hope that it has helped answer all of your questions about how to divide a snake plant. Please reach out to me with any other questions you may have about this process.
by Gardener Tim | Nov 22, 2021 | House Plants
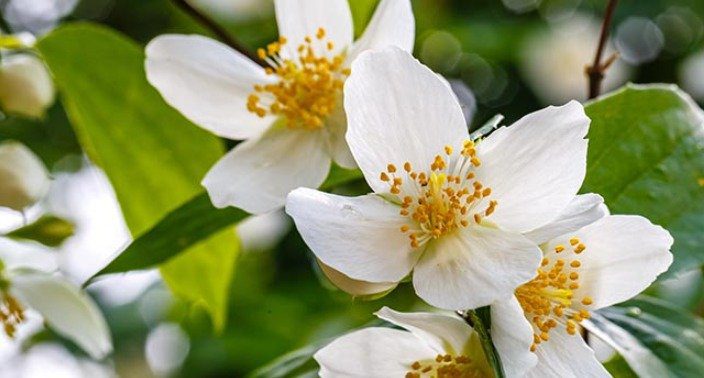
Philadelphus is a genus of about 25 species of shrubs in the family Hydrangeaceae. They are native to Europe, North America, China, Japan, and Korea. These plants are often called Mock Orange because the flowers resemble those of orange trees.
If you happen to have one of these beautiful shrubs outside your house this winter, here’s what you need to know for taking care of it!
Caring for a Philadelphus in Winter
The best way to care for a philadelphus in winter is to leave it alone and let it go dormant. This time is when the plant stores energy in order to survive until the next season.
Don’t worry if the philadelphus leaves are falling off in winter. Their leaves are deciduous, which means they will fall during the winter months and sprout again in early spring.
Does Philadelphus Lose Its Leaves in Winter?
Yes, philadelphus will lose its leaves in winter. Since these plants are deciduous, they will lose their leaves during the dormant winter season. Don’t panic when this happens! The plant is just storing energy to survive until the next season.
Philadelphus’ leaves are bright green in summer and light yellow-green during autumn months, before they fall off completely. This process will happen around December or January for most philadelphus varieties that you can find outside your house.
How Do You Winterize a Mock Orange?
There are two ways to winterize a mock orange plant:
- Put some mulch around the shrub to protect the roots from frost
- Place a sheet over your mock orange during the cold nights
These are the best ways you can help your philadelphus through winter. They are very simple to follow and you will not need to do much for your plant. In fact, mulch is great for protecting the roots of all plants during winter.
Is Mock Orange Cold Hardy?
Yes, philadelphus is cold-hardy. This means that it will survive the winter months and get ready to flourish again in early spring, once temperatures start rising! As such, you do not need to worry about the cold killing your philadelphus.
Does Philadelphus Lose Its Leaves in Winter?
Yes, philadelphus will lose its leaves in winter. Since these plants are deciduous, they will lose their leaves during the dormant winter season. Don’t panic when this happens! The plant is just storing energy to survive until the next season.
What Is the Hardiness Zone for Mock Orange?
Philadelphus is part of the hardiness zone for zones five to nine. This means that it will survive the winter season in most parts of North America and Canada. If you live in the colder areas, you might want to protect the plant by covering it with a sheet or by putting some mulch around the shrub.
Are Mock Orange Shrubs Evergreen or Deciduous?
Mock orange shrubs are deciduous, meaning that they lose their leaves during the winter. The good news is that mock orange shrubs are also cold-hardy and will survive throughout the winter months.
Conclusion
In conclusion, caring for a philadelphus in winter is simple. If you have one of these shrubs outside your house, just leave it alone and keep an eye on the weather conditions around it!
The plant will do fine during winter as long as temperatures are not extreme. Keep the soil moist but make sure to avoid overwatering too much because it will rot the roots. Click here to find out why the plant may not be flowering.
If you are living in an area with colder temperatures, it is best to cover your plant or place some mulch around it during winter nights just to be safe! When warmer weather arrives again, your philadelphus should come back strong and healthy as ever.
I hope you have enjoyed this blog post on caring for a philadelphus in winter! Please do share it with your friends so they can learn too. Thanks for reading.
by Gardener Tim | Nov 22, 2021 | Plant Care
Many people love the look of a beautiful flowering tree in their yard. When they plant one, they typically assume it will grow and bloom just like any other type of tree. But when it doesn’t produce flowers, many are left wondering why their philadelphus is not flowering? Let’s find out…
Why Is My Philadelphus Not Flowering?
The most likely reason why your philadelphus is not flowering is due to it being pruned at the incorrect time of year. You see, pruning too early often means flowering stems are accidentally removed.
There’s also a chance that your philadelphus is not getting the amount of sunlight it enjoys. You see, philadelphus enjoy full sun, so if your tree is not receiving as much as it desires, you can expect a delay in flowering.
Finally, be sure to check the soil where your philadelphus has been planted. If there is too low of an organic content or soil acidity, then this will also affect when and how flowers grow on Philadelphus.
There are a few things you can do to increase the chance of your philadelphus flowering, including pruning at the right time of year (fall), ensuring it is receiving plenty of sunlight, and testing for soil acidity.
You will have to wait until next year to see your philadelphus bloom again. If you prune during the right time of year, then flowering stems should still be present and will produce flowers for you! If done correctly, this tree can actually flower all summer long – providing a beautiful display in your yard!
How Can I Encourage My Philadelphus to Flower?
Start by pruning your philadelphus during the right time of year. Prune after the last bloom to ensure flowering stems are present for the next bloom.
Make sure your philadelphus has plenty of sunlight during the day, as this is essential for flower production! This tree needs full sun to flourish and produce beautiful flowers all season long.
Next, make sure that there is organic content within the soil where you have planted your philadelphus to help encourage flowering. You can easily check this by using a soil tester to see the acidity levels of your philadelphus’s soil. If there is too low an organic content, then flowering will be delayed.
Philadelphus will not flower without all three things – plenty of sunlight, enough organic content within the soil, and pruning at the right time! If you have been doing all three of these things correctly, then your philadelphus bloom should be right around the corner!
It’s best to wait until next year before doing any pruning. Hopefully, your philadelphus will bloom next year, and then you can prune afterward to leave young shoots for the future.
Why Is My Mock Orange Growing but Not Flowering?
Pruning your mock orange at the wrong time of year can lead to flowering stems being removed. Make sure you prune in fall after all flowers have died back! You need enough flowering stems for your mock orange to produce flowers.
As your mock orange is still growing, it’s unlikely for the reason to be due to lack of sunlight or poor soil quality. Mock oranges actually grow well in partial sunlight, which is why they are often used as landscaping plants.
Conclusion
In conclusion, there are a few reasons why your philadelphus may not be flowering. If the tree has been pruned at the incorrect time of year, if it is getting too much or too little sunlight, and finally – if there is an issue with soil acidity – this will all affect when flowers bloom on Philadelphus trees.
You can encourage them to flower by pruning during the correct time of year, ensuring it receives enough sunlight and testing for soil acidity.
Hopefully, your philadelphus will begin blooming next summer! Thanks again for reading my blog post about this wonderful plant. I hope you enjoyed learning more on this topic today.

by Gardener Tim | Nov 22, 2021 | Plant Care
As the season changes, we start to see a variety of tree colors. Some trees will turn red or orange while others may change brown and yellow. But what causes this color change? And why do some trees turn different colors than others?
In this blog post, we will discuss why an umbrella pine turns brown and what you can do to prevent this from happening. Let’s get started…
Why Is My Umbrella Pine Turning Brown?
Browning of an umbrella pine is generally caused by overwatering or leaf burning. Overwatering leaves are damp, but burnt leaves are dry and crispy. Another cause of discolored leaves might be pests, which may be attacking the plant and causing shock.
I’ll go through why these things happen and how to stop them. By the end of this article, you’ll know how to keep your pine healthy and green.
1. Browning Leaves from Overwatering
When you overwater your umbrella pine, the leaves will start to brown and eventually drop off. This is because the roots are not getting enough oxygen and the plant is suffocating.
The best way to prevent this from happening is to water your pine tree deeply but less frequently. Allow the top few inches of soil to dry out before watering again. You can test this by sticking your finger in the soil. If it’s dry, it’s time to water.
If you think your umbrella pine is overwatered, stop watering it and let the soil dry out completely. Once the soil is dry, start watering again following the tips above.
You may also need to adjust your watering schedule based on the weather. For example, if it’s been raining a lot, you won’t need to water as often. Plants grown in containers must have drainage holes to prevent a buildup of water.
Finally, make sure the roots aren’t already rotting. If they are, you need to act quickly by pruning the roots and replanting the pine tree in fresh, well-draining soil. Left alone the tree will die.
2. Browning Leaves from Leaf Burn
Has your plant been exposed to a lot of direct sunlight? If so, the leaves may be burnt. This is because the leaves are getting too much sun and they’re starting to dry out and turn brown.
To prevent this from happening, move your umbrella pine to a spot that gets indirect sunlight. A good rule of thumb is to provide at least four hours of indirect sunlight each day.
If the leaves are already burnt, you can trim them off so the plant can focus its energy on new growth. This will also help the plant look nicer. Simply use a sharp pair of scissors or pruning shears to cut off the burnt leaves.
You may also need to adjust the amount of fertilizer you’re giving your umbrella pine. Too much fertilizer can burn the leaves. If you think this is the problem, stop fertilizing and see if the leaves start to green up.
3. Brown Leaves from Pests (Aphids, Mealybugs, and Scale)
Pests can also cause the browning of leaves. The most common pests are aphids, mealybugs, and scale. These pests suck the sap from the leaves, causing them to turn brown and eventually die.
To get rid of these pests, you can use a variety of methods such as horticultural oil, neem oil, or insecticidal soap. You can also try planting companion plants that will deter pests from attacking your umbrella pine.
My favorite pesticide is neem oil because it’s all-natural and it works great. It’s made from the seeds of the neem tree and it’s completely safe for humans and animals.
Conclusion
In conclusion, browning leaves on an umbrella pine can be caused by overwatering, leaf burn, or pests. To prevent this from happening, water deeply but less frequently, move to a spot with indirect sunlight, and use pest control methods.
Do you have any questions or tips on how to keep an umbrella pine healthy? Let us know in the comments below!
by Gardener Tim | Nov 22, 2021 | House Plants, How To's, Plant Care
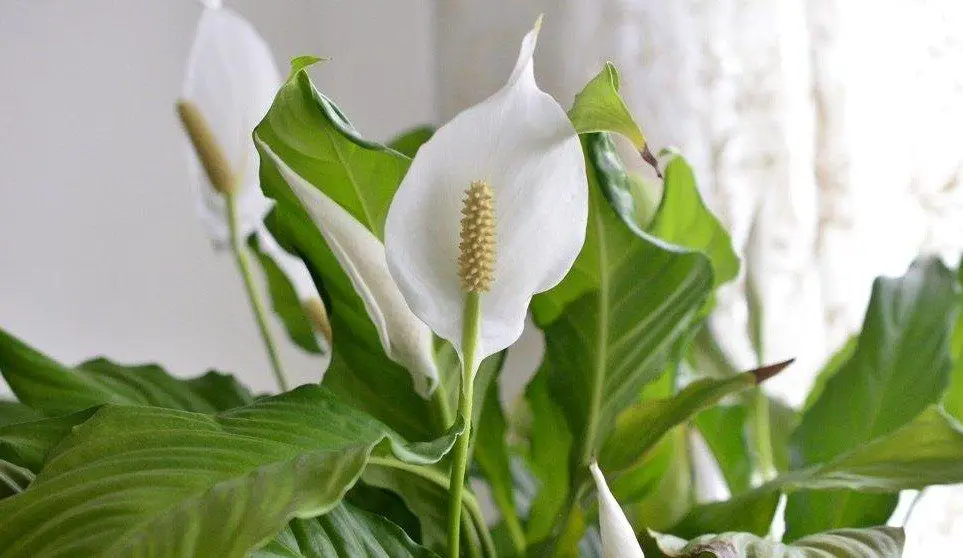
Peace lilies are beautiful plants that can be grown indoors. They are great for people who don’t have a lot of time to spend on gardening but want the beauty of green foliage in their homes.
Peace lilies do best when they are divided every year or two, which gives them more room to grow and an opportunity to produce new roots. Here is how you can divide your peace lily…
How to Divide a Peace Lily?
Here is a step by step process to divide peace lily plants:
1. Prepare your peace lilies
When you are dividing your peace lilies, you want them to be in the best condition possible. You can do this by giving the plant a good watering the day before dividing it.
2. Remove the peace lily from the pot
When you are dividing peace lily plants, it is best to remove them from their pots first. To do this you will want to gently loosen the plant on all sides of the root ball with your hands until it can be removed easily. Then slowly lift it out of its pot and set it aside.
3. Prune any brown roots or stems
You want to make sure you are pruning any brown roots or stems when you divide peace lily plants. This will encourage new root growth, which means your plant can be divided more often without damaging the health of the parent plant.
The easiest way to do this is by using sharp pruners, but it is important that they don’t damage the healthy roots.
4. Separate the crowns
Once you have removed the peace lily from its pot, gently separate the crowns with your hands until you have two or three good-sized pieces. It’s important that every crown is attached to a few leaves and roots.
You may need to trim some of the roots if they are very tangled, but try not to cut too many because this could harm the parent plant.
5. Pop the divisions into new pots
Once you have divided your peace lily plants, use a pot that is around the same size as where it was previously planted and fill it with fresh soil. Ensure the pot is big enough for the roots to grow into.
Then you just need to pop your peace lily divisions back into their new pots and water them well until the soil is thoroughly wet. These plants should be placed in an area where they receive indirect sunlight so they can establish themselves before moving them outside or into a more sunny location.
Peace Lily Division FAQ
Dividing a plant isn’t the easiest task. As such, there are a few questions that people may have about the process.
How often should I divide my peace lily?
Peace lilies can be divided every year or two, which is usually recommended for most indoor houseplants. However, if you’d like to keep your peace lily in one pot longer than this time period, simply cut
How to know when to divide peace lily?
The best way to know if you need to divide your peace lily is by looking at the roots. If they are growing out of the pot, then it’s time for division! You should also consider if multiple crowns are present, the soil is drying quicker than usual, or the peace lily has stopped flowering.
Should I repot or divide my peace lily?
Your peace lily will need more than one crown or stalk if you want to divide it. If your peace lily doesn’t meet these requirements, then you should repot it into a larger pot rather than dividing. I also repot peace lily plants if they have root rot.
When can I split my peace lily?
The best time to split a peace lily is in the springtime, which is usually between March and May. This will give the plant enough time to adjust and root itself in time for summer.
Is it easy to split a peace lily?
Yes, it is an easy process! All you’ll need are a few basic tools to get the task done. When dividing your peace lily, you should have a sharp knife, some extra soil to fill the new pots with, and scissors.
Simply follow the tips in this guide to ensure you split the peace lily without causing damage to it. You should also make sure to choose a day when the peace lily is in active growth.
Can I divide my peace lily outside?
Yes, you can split your plant wherever it makes sense for you! The process is the same, however, you can choose to split your plant outside if it’s easier for you.
How big do peace lilies grow after division?
After dividing a peace lily, each clump will be about half as large as they were original. So keep this in mind when planning where to move them or what pots to use.
Where to put the new peace lilies after division?
After you divide your peace lily, move each of the clumps into different pots and place them in their respective spaces around the home or office. Be careful of sunburn if leaving it outside. You can even choose to keep one or more at its current location if it’s large enough for multiple plants! If this is not possible, choose the best plant to keep and discard the others.
Does it matter how I divide my peace lily?
No, there is no specific right or wrong way to split a peace lily! You can use any technique you want for division as long as each clump has plenty of space and potting soil. The most important factor is simply to make sure you have enough soil and pot space for all of the new peace lilies!
What are the benefits of splitting a peace lily?
As mentioned above, there are several reasons why you would want to divide your peace lily plants. The most important benefit is that it gives them more room for growth! Additionally, dividing your peace lily plants is a great time to remove dead or dying roots.
Conclusion
In conclusion, the process of dividing a peace lily is quick and easy. Dividing your plant will give it more room for growth, allow you to remove dying roots, and encourage new root growth in the process!
I hope this guide has helped you to know when to divide your peace lily, how to do it successfully, and what tools you’ll need. Please do not hesitate to leave any questions in the comments. For example, I recently helped someone who had a peace lily with holes. Thanks for reading!


